Page is loading ...


Thank you for purchasing this car audio product.
Please read this manual carefully before operating this car audio product.
Please keep this manual for future use. It will be helpful to you if you are encounter any
operational problem.
To reduce the risk of fire or electric shock, do not use the unit in the rain or moisture
environment.
To prevent direct exposure to laser beam, do not try open the enclosure.
Visible and invisible laser radiation when open and interlocks defeated.
To protect our environment, do not dispose of electrical equipment in the domestic waste.
Please return any electrical equipment that you will no longer use to the collection points
provided for their disposal.
This helps avoid the potential effects of incorrect disposal on the environment and human
health. This will contribute to the recycling and other forms of reutilization of electrical and
electronic equipment. Information concerning where the equipment can be disposed of can
be obtained from your local authority.
Selecting fine audio equipment is only the start of your musical enjoyment.
Now it is time to consider how to maximize the enjoyment you will get from
knowing how to work your new car stereo receiver.
We hope you enjoy using this product and encourage you to always listen at
a moderate, safe sound level to avoid any possible hearing damage or loss.
If you listen to excessively loud sound over time, your hearing can adapt to
higher volumes and what sounds "normal" to you may be quite harmful and
can cause you to have permanent hearing loss. So please practice "safe sound"
and alwayslisten atmoderate sound levels only.
Start with your volume control at the lowest setting, and slowly increase the level
until you can hear it comfortably and clearly, free from distortion.
Once you have established this comfortable sound level, leave it there.
WARNING!
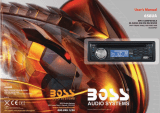
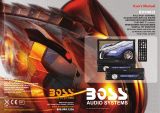
Preface
PDF created with FinePrint pdfFactory trial version http://www.pdffactory.com

LOCATION AND FUNCTION OF CONTROLS
Page 2
Press theRELbuttonto flip down the front controlpanel.
Then a disc can be inserted into the discslot or ejected by pressing the EJ but
t
A
fter flipping down the frontpanel,push it leftwards, then pullthe right side of
panel outwards toremove itfrom the unit chassis.
a)Press the SELbuttonbriefly,it is activated as selecting each mode ofE. VO
L
-> VOLUME ->BASS ->TREBLE-> BALANCE -> FADER ->
When selectinga desired audio mode,rotatethe VOLknob to adjustthe audi
effect.
In eachmode,the waiting timeis about 5seconds, and the time waiting time
is over, itreturns to the last display mode of tuner or CDPmode.
The control modeof E.VOLis operated with following numeric display.
- VOL: (MIN)00, 01,......46, 47(MAX).
- BASS/TRE: -07,-06,...,00,...+06,+07
- BAL: 0LR9,1LR9, ..., 9LR9,...,9LR1, 9LR0
- FAD: 0FR9,1FR9, ..., 9FR9,..., 9FR1, 9FR0
1. RELEASE BUTTON
2. SELB UTTON (Select)AND VOL KNOB
1920
232422
21
1
2
3
4
5
6
7
8
9
10
11
12
13
17
14
15
16
18
MODE
BND
INT RPT RDM
ST
LOUD
SCN
LOC
APS
CLK
REL
VOL
SEL
+
-
AUX
123456
PWR
MUTE
PDF created with FinePrint pdfFactory trial version http://www.pdffactory.com

Page 3
b)When pressed andhold for 2 seconds, it is activatedas cyclical mode of
following functions for user s selection.
->BEEP(ON/OFF) -> USER SET(FLAT/CLASSIC/ROCK/POP)
->SUBW(ON/OFF) -> VOL(LAST/DEFA) ->STEREO/MONO(only for FM
mode)->CLK(ON/OFF)->CLK(12/24)mode.
Afterselecting the desiredmode, rotate theVOLknobto select one setup
item of the desired mode.
BEEP ON mode:The beep isgenerated when anykey is pressed.
BEEP OFF mode: The beepsoundis disabled.
VOLLAST:The radio switches onat the actualvolume it had when itwas last
switchedoff.
VOLDEFA:After pressing SELbutton,AVOLwill bedisplayed. Then you can
pre-selecta constantswitch-on volumeby using the VOLknob.
CLK ON: Clockwill always show on the displaywhen power off.
CLK OFF: Clock will disappearon the display when poweroff.
When the unitis power off, the unit comes to ON by pressingany button onthe
front panel (exceptthe OPENkey ). It also canturn onthe unit toinsert a disc,
SD card orUSB stick intotheir slots or socket. When the unitis power on,
press and hold the power buttonformore than 0.5 seconds,theunit goes into
power off mode.
a) DuringRADIOmode:
Press the >>| or |<<button shortly to manual tune up/downfor the desired
radio stationfrequencystep by step.
Press and hold the >>| or |<< buttonfor longer 0.5seconds, to automatically
tune up/down for theradio station frequencyofstrong signal.
b) Duringdisc, SD, USB playback mode:
Press the>>| button brieflyto play next track.
Press the |<< button brieflyto play thecurrent trackfrom the beginningofit
if the playingtime is morethan 2seconds.
Press the |<<buttonbriefly to play the previous track if theplayingtime is
less than 2 seconds.
Press the>>| or |<< button and hold to skipforwards orbackwards, release
to resume normal playback.
’
BEE PON/BEEP OFF
VOL LAST/VOL DEFA
CLK O N/OFF
3. POWER ON/ OFF
4. LCD Display
5&6. TUNE, SEEK, TRACK, S KIPUP/ DOWN BUTTONS
Page 12
CONNECTOR A
1.
2.
3.
4. Memory +12V
5. Auto Antenna Output
6.
7. 12V (To Ignition Key)
8. GROUND
CONNECTOR B
1. Rear Right Speaker (+)
2. Rear Right Speaker (-)
3. Front Right Speaker (+)
4. Front Right Speaker (-)
5
7. Rear Left Speaker (+)
8. Rear Left Speaker (-)
. Front Left Speaker (+)
6. Front Left Speaker (-)
ISO SOCKET SKETCH
WIRES CONNE CTIO N
SPECIFICATION
GENERAL
Supply Voltage DC 12 V. Negative Ground
Current Consumption Max.10A
Power Output 4 X 60 watts high power
Number of channels 2 STEREO channels.
Unit Dimensions 178[W] X 165[D] X 50[H] mm.
FM SECTION
Frequency range 87.5MHz -107.9MHz
Effective sensitivity 3uV.
I.F Frequency 10.7MHz.
AM SECTION
Frequency range 530KHz - 1710KHz
Effective sensitivity 40dB.
I.F Frequency 450KHz
RCA LINE OUT
Output 1000mV @ CD MAX.
CD PLAYER
System MP3 Audio System.
Suitable CDs MP3, WMA,CD, CD-R, CD-RW Disc
Frequency characteristics 20Hz-100Hz <5dB
10KHz-20KHz <5dB.
S/N Ratio to CD 50dB [1KHz]
ISO SOCKET
ANTENNA JACK
WHITEWHITE
RED
RED
RCA LINE OUT
REAR RIGHT SPEAKER JACK
REAR LEFT SPEAKER JACK
FRONT LEFT SPEAKER JACK
FRONTRIGHTSPEAKERJACK
RCA LINE OUT
RCA LINE OUT
RCA LINE OUT
YELLOW
WOOFER LINE OUT
PDF created with FinePrint pdfFactory trial version http://www.pdffactory.com

Page 4
During radio mode, press the BND button brieflyto select the radio broadcasti
n
band you would like tohear.TheAM/FM band istoggled cyclically throughthe
tuning bands: ->FM 1-> FM2 -> FM 3 -> MW 1->MW 2->.
Press the MODE button to changeamong tuner (radio), disc (when adisc is
loaded), SD/MMC card (whenan SD /MMC card is inserted), USB (when an
USBstick is inserted) andAUX mode.
This button serves toswitchthe MUTEDstate on/off.
Press the MUTE button to suppressthe loudspeaker temporarily, and press
again to resume listening. The mutedstate willbe alsoreleased whenthe
MODE, SEL button ispressed andVOLknob on the frontpanel is used.
During radio mode:
1) when long pressing for more than 1 seconds, the radio searches from the
current frequency and checks the signalstrengthleveluntil 6 station are
found.Andthen the 6 stationsfrequency are preset tothe corresponding
presetmemorynumberedbank. The auto-storage operation is implemented
in the each selected band. When the auto-storage operation is finished,the
radio execute the Preset Scan.
2) when short pressing, the radio searches for each preset station in the curren
band and holds atthat presetnumber for5 secondswithreleasing mute, and
then search again.
7. B AND BUTTON
8. M ODE BUTTON
9. MU TE B UTTON
10. INFRARED REMOTE CONTROL SENSOR
11.A PS BUTTON ( Auto-storage /Preset scan)
In MP3 discmode, MMC/SD or USB mode, pressAPS buttonrepeatedly to
select TRACK SEARCH, DIRECTORYSEARCH orFIRSTCHARACTER
SEARCH mode.
InTRACKSEARCH mode,the LCD willdisplayTRKT 000 and flashthe
biggestdigit0that the MMC/SDcard, USB or MP3 disc contain. Rotate the k
n
to select the numberof theflashing digit from0 ~ 9.Then press SELbutton t
o
confirm the number and flash next smaller digit 0.With the same means, sele
c
the number ofthe flashing digit.After finishing selecting the numberof all
flashing digit, press SELbutton to playthe track of the selected serial numbe
In DIRECTORYSEARCH mode, the LCD willdisplay the root folder(if there i
s
not the root folder, it will find a root foldernamed ROOT).Then rotate the kno
to select your desired folder, Finally press SELbuttonto play thefirst tracko
f
the folder.
In FIRST CHARACTER SEARCH mode, the LCDwill displayA- rotate thekn
o
to select file's firstcharacter by the order ofA~Z and 0~9.Then press>>| or |
button to select onefile its first characters is theselected one. Finallypress
S
button to play the selectedfile.
Page 11
Before using the check list please make all the connections first.
If you still have questions after going through the checklist, please consult
your local customer service representative.
Common Symptoms
There is no power.
The CDs cannot
be loaded.
Cause
The fuse has blown.
Presence of CD disc inside theplayer
Inserting the disc in upside down
The surface of CD is extremely dirty
or it is damaged.
Temperature inside the car is too
high.
The volume control is set too low.
Thereisnosound.
The operation keys
do not work
The sound of the
CD player skips
The antenna cable is not connected. Insert the antenna cable firmly into the
antenna socket of the device.
No radio reception.
1.The built-in microcomputer is not
operating properly due to noise
2.Front panel is not properly fix into
its place
1. Switch the device off and on again. Or press
the RESET button to resume the program.
2. Reinstall the front panel
The device has not been correctly
connected.
The installation angle is more than
30 degrees
Wait until the road becomes smoother before
playing the CD.
Adjust the installation angle to less than 30
degrees
Turn up the volume properly.
Check the power and earth connection
according to the wiring diagram.
Cool off until the ambient temperature returns
to normal
Clean the CD or try another CD, if this works
correctly, the first CD is properly damaged.
Insert the compact disc with the label facing
upward
Remove the disc in the player then put a new
upward
Replace another fuse according to the wiring
diagram.
The car ignition is switched off.
If the power supply is properly connected to
the car accessory, switch theignition key to
ON or " ACC"" ".
Solution
The device does
not work correctly
(EJECT, LOAD,
PLAY)
In automatic search
mode the radio does
not stop at a trans-
mitting station.
Tune in to a radio station manually.
The transmission signals are too
weak.
The CDs are loaded
only halfway into
the CD tray.
The transport screws have not been
removed.
Remove the transport screws before using.
Thesurfaceoftheroadisuneven.
The surface of CD is extremely dirty
or it is damaged.
Clean the CD or try another CD, if this works
correctly, the first CD is properly damaged.
TROUBLE SHOOTING
PDF created with FinePrint pdfFactory trial version http://www.pdffactory.com

Page 5
a) Duringradio mode:
Go to anypreset station by pressing one of the 6 preset stationbuttons (1-6).
If one of these buttons is pressed for more than 2 seconds, the station currently
being listened to willbe memorizedinto the selected preset button.
b) Duringdisc, SD or USB mode:
1) Press theTOP/>|| button briefly tointerrupt the playbackof thedisc, SD/MMC
or USB. Press again toresume normal playback of the disc, SD/MMC or USB.
Press the TOP/>|| button and holdfor approximately 0.5seconds to playthe
first track of the disc,SD/MMC orUSB.
2) Press the INT button to sample the first 10 seconds part of each track, and the
INTONwill bevisible on the LCDdisplay.
In the process of INT, press INT button againto stop samplingand to continue
playing the currenttrack,and theLCD will displayINTOFF.
3) Press the RPT button onceto play thecurrent track repeatedly, and the RPT
ONE willbe visible onthe LCD display.
DuringMP3/WMAdisc, SD/MMC or USBmode,press the RPTbuttontwice
continuously toplay the current folder repeatedly, and the RPTABMwill be
visible on theLCD display.
In the process of RPT,press RPT button again to stop playing repeatedly
mode and theLCD willdisplay RPT OFF.
4) Press the RDM buttonto playall tracks on disc inrandom order, and the RDM
ON will be visible on the LCD display.
In the process of RDM,press RDMbutton again to stopplayingin random
order and the LCD willdisplay RDM OFF.
c)During the normalplaybackof MP3/WMAdisc, SD/MMC, USB:
Press the radiopreset button 6and 5 to move upand down10 tracksat a time.
In FM mode,press the STbriefly toselectstereo or mono sound mode.
When press shortly, theLOUD mode isturned on, itsto enhance the basssound
effect when thevolume levelis low. Press againto cancelthe loudness effect.
Radio station searchmode isdividedby this LOC/DXswitch, this buttoncan
be used tocontrol an attenuatorinthe tuner during search.
In radiomode, press the LOC button to changelocal reception or distance
reception. Local mode improves reception in some areas where the signal
is too strong.
Note: This button is onlyfor FMreception. InAM mode, LOC is void.
Press the CLK buttonbriefly to displaytimefor 5 secondson the display, and
then returns toits previousdisplayunless the buttonis pressed again.
Then press theCLK button andholdfor morethan 1 second until the real time
flashes on the display. Then youcan adjust HOUR or MINUTE by rotating the
VOL knob.
12. PRESET STATION MEMORYAND TOP/>||, INT, R PT, RDM BU TTON
S
13. ST/MO BUTTON
14. LOUDNESSBUTTON
15. LOC/DX BUTTON
16. CLOCK BU TTON
Page 10
CAREFORUSING CD'S:
1. To keep the disc clean:
Before playing a disc, wipe it off with a clean, dust-free cleaning cloth.
Wipe the disc outwards from the disc center.
2. When one has already been inserted. Doing so may damage the unit
Do not attach any sticker or adhesive tape on the disc.
Handle the disc by its edge to keep the disc clean and do not touch the surface.
.Insertadis
c
with labeled surface up, or it will damage the unit.
3. Do not expose the disc to direct sunlight or nearby heat sources such as heating
vents, caliduct which can cause the disc to warp.
Do not leave disc in a car if it is parked in direct sunlight as that will lead to a
considerable rise in the temperature inside the car.
4. Do not use any secondhand or rented disc, usually, there is glue on the surface of
those discs, it will stop the unit working and damage it.
5. Always store the disc in its case for protection. Scratched up discs will produce poo
sound performance and cause CD player to skip.
6. In raining day or wet area, the moisture may form on the disc or the optical parts,
the playback may not be possible. If moisture forms on the disc, wipe it off with a
soft cloth.
If moisture forms on the optical parts of the unit, allow the unit to sit for about one
hour with power on.
7. Do not use solvents such as benzine or thinners. Commercially available cleaners
or anti-static spray will damage the unit.
About CD-R/CD-R/W discs:
In addition to commercially-recorded audio CD's, this unit can playCD-R and
CD-R/W discs. In come cases, particularly when recorded onolder CD burners,
some CD-R and CD-R/W discsmay not play.Also, whenever you are recording
a CD for playback inthis receiver, it is recommendedthat you record at 24x or
slowerspeedfor CD-R and 4xor slower for CD-R/Wto achieve higher signal
quality and better playback performance.
PDF created with FinePrint pdfFactory trial version http://www.pdffactory.com

Page 6
Press theSCN button toscanthe radio frequency.If avalid signal has detect
e
the current frequency will be holdand blinking for5 seconds, then pressSCN
again to stop scanand remain the current frequency; otherwise, theradio will
go on to scan the other radio frequency 5seconds later.
Pressthe mode buttonto select auxiliary input playingmode.Then you can
connect any matched external audio device to this socket.Usethe volume
knob to adjust volume.
In the power on state, the loadeddisccan be ejectedby pressing theEJ key.
When needing to playthe file inthe USB stick,turn over the plastic cover cap
then insert theUSB stick into the USB socket. The system will change into the
USB mode automatically, andthen play the first filein the USB.
When no needingto do USBoperation,please cover the plastic cover cap.
When you need to play the file in the SD /MMCcard, insert the SD/MMC card
into thecard slot.The system willchange into the mode automatically, and
then play the first file in the SD/MMC.
When the front control panel is removed this indicatorflashes.
Before operating the unit for the first time, or after replacing thecar battery or
changingthe connections.You mustreset the unit.
Press thisbutton with a cuspidal object. This operation will erasethe clock
setting and some storedcontents.
17. SCAN BUTTON
18.AUX INPUT JACK
19. EJECTKEY
20. CD SLOT
21. USB SOCK ET
22. SD/MMC CARD SLOT
23. FLASHING LED
24. RES ET BUTTON
Page 9
INSTALLATION
To boostup the capabilityof anti-jamming,
please make sure fix tightly the support
strap into the metal jointthatconnect to the
chassis of the car.
metal
METALSUPPORT STRAP
METAL MOUNTING SLEEVE
DASHBOARD
To remove the unit out of the metal mounting sleeve,
insert the two supplied KEYS into the left and right side
slots of the chassis at the same time. Then pull the chassis
out of the metal mounting sleeve as shown in the right
illustration.
FRONT PANEL
PLASTICTRIM RING
UNIT CHASSIS
Bend thetabs on themetal mounting
sleeve against the DASHBOARD with
a screwdriver.
INSTALLATION METHOD
This is an anti-theft installation method.
The main unit wears a METAL MOUNTING SLEEVE.
Please connect the wiring, eg, the Power Supply, the Speakers and the Antenna
according to the requirements of this Instruction Manual, then install the metal
mounting sleeve into the car as per the diagram illustrated below.
NO T E
Before mounting and operating
theCDplayer, removethemetal
mounting sleeve illustratedbythe
arrows.
Remove thetwo screws that
fix the CD deck mechanismplayer
duringtransportation before
mounting theplayer.
RESETBUTTON
EJECTKEY
Pushthisresetbuttonwithacuspidal
objecttorenovatethe distortedprogram
once theprogram isdistorted.
PDF created with FinePrint pdfFactory trial version http://www.pdffactory.com

Page 8
An insulation tag was installed in your remote by the manufacturer to prevent the
battery from draining. Removing the tag from the remote before using.
Lithium Battery: CR2025 3V
Battery Life: Approximately 6 months.
1) Remove the battery holder by pressing the locking tab with your thumb
and pulling it out.
2) Replace the battery with the same type and the side facing up.
3) Gently push in the holder until securely locked into place.
WARNING
BATTERY INFORMATION:
Replacing the Battery from the Remote Controller:
:
“+
Do not recharge, disassemble or dispose of in fire.
Battery leakage may cause damage to the unit.
To avoid the risk of accident, keep batteries out of reach of children.
”
MAINTENANCEOF REMOTE CONTROL
Page7
1.PowerOn/Off
2.Mute Button
3.
4.Level/MENU UPButton
5.SEL/MENU
Loudness Button
Button
6.Level/MENU DownButton
7.MO/STButton
8.A.P Button
9.BandButton
10. Mode Button
11.Tune/Seek UpAndTrackSkipUp/FF Button
12.Tune/SeekDownAndTrackSkipDown/REW Button
13. SCAN BUTTON
14. Clock Display/Setting Button
15. LOC/DXButton
16.CDTrackTOP/>||/Radio Preset1
17.CDTrackINT/Radio Preset 2
18. CDTrackRPT/RadioPreset3
19. CDTrack RDM/RadioPreset4
20.RadioPreset 5
21.RadioPreset 6
O PERATION O F R EM OTE C ONT ROL
4
6
8
14
16
18
20
7
11
15
19
21
1
5
3
13
12
10
9
17
2
MUTE
CLOC K
SELECT
-
A.P.
ST
5
6
SCN
LOU D
LOC
BAND
MODE
1
2
3
4
TOP/
RDM
INT
RPT
PDF created with FinePrint pdfFactory trial version http://www.pdffactory.com
/