Page is loading ...

TASC
®
(Telescopic Access Solutions Corp)
Tasc-Pod User Manual

Introduction
Thank you for purchasing the Tasc-Pod.
The Tasc-Pod is manufactured in aluminum with an anodised finish. It is built to withstand the
toughest handling and working conditions. It is suitable for DIY, trade and professional applications.
Spare parts are readily available.
You may already be familiar with using similar equipment but the Tasc-Pod is unique and we
recommend you to take time and read these instructions. They are designed to familiarize you with
the features of the system and to ensure you get the very best performance from your purchase
Keep these instructions in a safe place for future reference.
For more information about the Tasc-Pod and other products, please visit the website
www.tasc-tower.com
Safety
Please ensure you read the Safety section in this manual starting on page 4 before assembling or
using the equipment. Your safety and that of others is important.
2
Tasc-Pod User Manual Issue1
All rights reserved. No part of this publication may be reproduced, transmitted, transcribed, translated or stored in a retrieval
system in any form by any means without the written permission of TASC® Limited
Technical details contained in this publication are correct for the equipment model number supplied. The Instruction and
Reference Manual will be revised as necessary for subsequent revisions to the equipment. This information will also be
published on our website. Copyright TASC® 2012.

Contents
INTRODUCTION .............................................................................................................2
SAFETY ........................................................................................................................... 2
IMPORTANT SAFETY INFORMATION ........................................................................4
Safety Considerations ................................................................................................ 4
Servicing and Spare Parts .......................................................................................... 4
MAIN FEATURES .........................................................................................................5
IN THE BOX .................................................................................................................. 5
Tasc-Pod COMPONENTS IDENTIFIED .......................................................................6
SETTING THE Tele Pod TO TROLLEY MODE ............................................................7
Erecting the Tasc-Pod ................................................................................................9
Erecting the safety cage ............................................................................................17
Collapsing the Tasc-Pod ............................................................................................ 27
SPECIFICATIONS ....................................................................................................28
WARRANTY .................................................................................................................. 29
3

4
Important Safety Information
WARNING. For your safety, please read all the safety instructions in this Manual
before using the Tasc-Pod.
Safety and quality is of paramount importance when manufacturing Tasc-Pod products. All
products meet the requirements of the Work at Height Regulations of 2005.
IMPORTANT. Read these instructions before assembling the Tasc-Pod.
IMPORTANT. Always assemble the Tasc-Pod according the instructions given in this Manual and
on the labels affixed to the Tasc-Pod.
SAFETY CONSIDERATIONS
General
•
Do not use the Tasc-Pod if it is damaged in any way
•
Never exceed the maximum load of 331lbs/150 kg
•
Never release two red buttons at the same time
•
Never release two yellow buttons at the same time.
•
Always wear a hard hat when erecting or collapsing the Tasc-Pod.
Cleaning
•
Do not use any abrasive or chemical solvents.
•
Periodically clean with a soft bristle brush and wipe with a damp cloth. We recommend
occasionally spraying with a silicon spray
•
The wheels should be cleaned using a wet sponge and dried afterwards.
How do I dispose of this productquestion
When the unit has reached the end of its life, contact your local council regarding available
recycling or disposal options.
SERVICING AND SPARE PARTS
A full set of spares are available. Please visit our website for further details for Servicing and Spare
Parts.

Main Features
The main features of the Tasc-Pod are listed below.
•
Manufactured in anodised Aluminum
•
Has three working heights: approximately 1'11"/0.6 m, 2'8"/0.8 m and 3'4"/1.0 m
•
Automatically deployed stabiliser extensions for the 2'8"/0.8 m and 3'4"/1.0 m heights.
•
Has integral safety cage with handrails, knee rails and safety gates.
•
Can be erected in less than three minutes by a single person thereby saving down time
and man hours
•
Folds down for ease of transportation and storage and can be wheeled to and from
place of use
•
Easily transportable in a small van or estate car thereby reducing fuel costs
In the Box
Carefully remove your Tasc-Pod from the box it arrived in. It is recommended that you retain this
packaging should the item need to be returned under warranty. The following items are supplied:
•
The main assembly in collapsed form, see Figures A and B.
•
The User Manual (this publication)
Out of the Box
When you remove the Tasc-Pod from its packing box, you will find it is held closed by a fabric strap
threaded around the ladder sections and one cage side as shown above. This helps to protect the
Tasc-Pod when being transported and makes it easier to transport. Do not release the strap just yet.
It is important to leave the strap fastened particularly when it is put into trolley mode (see page 7).
To undo the strap (later), push on the sides of the two-part buckle and pull apart, Figure C. The
strap can then be undone to free the cage side and ladder sections prior to erecting the Tasc-Pod.
5
A B
C

Tasc-Pod Components Identified
6
Swivel
handrail
Handrail release
mechanism
Fixed handrail
Swivel post
Rear gate
Ladder 2
release bar
Trolley
wheels
Rung 3
Safety rail (upper)
Safety rail (lower)
Front gate
Gate slide bolt
Rung 3
Rung 2
Corner handles
Cage side lock/
red release
button
Cage side
lock/release
button yellow
Spring loaded
release bolt
Rung 1
Rung 2
Stabiliser
Ladder 2 Stabiliser bar
Rung 1
Ladder 1
Stabiliser
Stabiliser bar

7
Setting the
Tasc-Pod to
Trolley Mode
For easy transportation
to the workplace
A.
Lay the Tasc-Pod on the
floor as in Fig A and then
open the cage side in the
direction of the red arrows
until the yellow buttons
arrowed in Fig B indicate
the section just opened is
now locked.
Now position the wheels
by pushing up in the
direction of the yellow
arrows in Fig A and at
the same time swivel in
the direction of the white
arrows until the wheels
are pulled into their locked
position, see Fig B.
A
B
Locked
Locked
Locked
Strap

8
C.
Carefully lift up the Tasc-Pod from
the ground into an upright position
as shown right. The strap must be
in place as shown when moving the
Tasc-Pod in trolley mode to prevent
damage to the cage locking device.
With the strap correctly fastened
the Tasc-Pod is now ready to be
transported.
D.
Hold the 'Trolley' handle and wheel
it to the place where you want to
use it.
When you get to the place of work,
undo the strap and collapse the cage
side and then retract the wheels by
rotating tem to the stowed position
as shown in Fig A on page 7.
C
D
Cage side
(trolley handle)

9
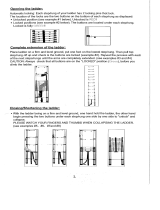
1. Erecting the Tasc-Pod
1.1.
Place the Tasc-Pod flat on
the ground.
3
1.2.
Then move it to the upright
position as shown.

10
1.3.
Press Ladder 1 Release
Bar with one hand and
raise Ladder 1 section in
the direction of the arrow
with your other hand.
Ladder 1
Ladder 1
1.4.
Until it locks as shown.
Release Bar 1

11
1.5.
Tilt the ladder forwards
towards the ground as
shown right.
Ladder 1
1.6.
Lift the opposite end using
the other ladder Release
Bar and at the same time
support the second ladder
section with the other hand.
Ladder 2
Release Bar 2

12
1.7.
Now lower Ladder 2 as
shown right until it locks
itself in position as shown
in Figure 1.8.
1.8. You now
have the
Tasc-Pod set at its lowest
height of 1'10"/0.57m.
If this is the height you
require then go to step
2.1 to assemble the safety
cage.
If you want the next
height of 2'9"/0.82m then
continue to 1.9.
Ladder 1
Ladder 2
Ladder 2

13
1.9
Now place your foot lightly
on the stabiliser bar as
shown.
Hold the ends of rung 3
on Ladder 1 and raise this
rung until the two red
locking buttons on rung 2
engage. You will hear a click
when they engage.
The stabilisers will be
automatically deployed.
Stabiliser Bar
Rung 2
Rung 3
1.10
Right shows the current
stage of erection of the
Tasc-Pod.
Ensure it is locked before
proceeding, see 1.11.
Note that the stabilisers
are now deployed on
Ladder 2.
Rung 1
Stabiliser
Lift

14
1.12.
Now place your foot lightly
on the stabiliser bar of
Ladder 2 as shown.
Hold the ends of rung 3 and
raise this rung until the two
red locking buttons on rung
2 engage. You will hear a
click when they engage.
Ensure it is locked before
proceeding, see Figure
1.15.
The stabilisers will be
automatically deployed.
Stabiliser deployed
1.11
Right shows the locking
mechanism for rung 2
engaged. This is indicated
by the red buttons being in
the locked position.
The two red buttons on
rung 3 will not be engaged
at this height. This is cor-
rect for this height setting.
Rung 2
Rung 3
Not locked
Locked
Ladder 1 Ladder 2
Raise
Locked red button

15
1.14.
To raise the Tasc-Pod to its
maximum height, put your
foot lightly on the
stabiliser bar of Ladder
1 and grip the corner
handles on the platform.
Raise until the locking
mechanisms on rung 3
engage with a click.
Now all the locking
mechanisms on this
ladder will be engaged.
1.13.
Right shows the Tasc-Pod
set at its middle height of
2'8"/0.82 m.
If this is the height that
you require then go to
step 2.1 to assemble the
safety cage, otherwise
continue.
Corner handles
All stabilisers are
now deployed
Corner handles
Stabiliser bar
Raise
Ladder 1

16
1.15.
Now open the Ladder 2 in
the same way and ensure
that the ladder sections
are also locked as indicated
right.
1.16.
The Tasc-Pod is now at
its maximum height of
approximately 3'4"/1
metre, see right.
Platform height 1
metre approx
3’4”/1 metre
Locked
Locked
Ladder 1Ladder 2
Platform

17
2. Erecting the Safety Cage
IMPORTANT. Before
erecting the safety cage,
make sure the trolley
wheels are folded inwards
as shown right.
2.1.
A Pull down against spring
B Move sideways
C Swivel round
D Closed
2.2.
To begin erecting the
safety cage pull on the
red release knob and at
the same time lift the
cage side upwards in the
direction shown.
A
B
C
D
Lift
Pull

18
2.3.
When this side is fully
upright the red knob will
engage in another location
hole and lock the cage
side upright.
2.4.
Now repeat with the
other cage side by pulling
out the yellow knob and
raising this side until it
locks in the upright
position (see Fig 2.7).

19
2.5.
When this side is fully
upright the yellow knob
will engage in another
location hole and lock
this cage side upright,
see right.
2.6.
Now grasp the handrail
and lift this to fully open
the cage side. The safety
rails will be raised at the
same time.
When the cage sides are
fully open, all yellow lock
buttons will be in the
locked position.
Repeat this on the other
cage side.

20
2.7.
When fully open and
safely locked, all yellow
buttons will be locked as
shown.
2.8.
The Tasc-Pod should now
look like this.
Locked
Locked
Locked yellow button
/