Page is loading ...

RDQCI5019 Rev. 0 Page 1 Cered 06/01/2016
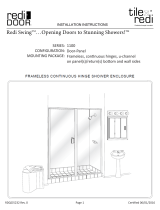
SERIES:
CONFIGURATION:
MOUNTING PACKAGE:
1000
Door-Door
Frameless, sliding door
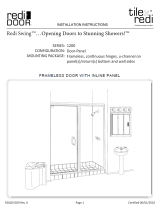
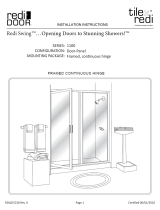
SERIES: 2000
CONFIGURATION: Door-Panel
MOUNTING PACKAGE: No header, glass-to-glass hinges,
u-channel on panel(s) and or return(s)
bottoms, wall clamps on panel(s) and or
return(s) wall sides, support bars from
walls to panels-returns
Redi Swing
TM
...Opening Doors to Stunning Showers!
TM
INSTALLATION INSTRUCTIONS
tile
redi
®
redi
DOOR
®
FRAMELESS INLINE DOOR
Redi Slide

RDQCI5019 Rev. 0 Page 2 Cered 06/01/2016
Installation Notes:
Proper blocking is required for every Heavy Glass unit prior to installation. At minimum 2x4
blocking is required at the location of any structural member of the unit including, but not lim-
ited to: hinges, clamps, and header brackets. All fasteners at these locations are required to
be installed into the blocking.
A minimum of 1 1/4” thread engagement is required of all fasteners into the blocking at these
locations. Depending on the application the customer maybe required to supply the proper
fasteners to ensure adequate engagement.
U-Channel maybe installed using wall plugs where no backing is found.
Use caution to not pierce plumbing or electric lines while installing door hardware.
Cover the drain with tape prior to installation to prevent loss of small parts.
Unpack your unit carefully and inspect for freight damage. Lay out and identify all parts using
the instruction sheet as a reference. Before discarding the carton, check to see that no small
hardware parts have fallen to the bottom of the box. If any parts are damaged or missing, refer
to the description noted in the instructions when contacting your dealer for replacements.
Maintenance:
Tools:
To install your New Shower Enclosure, you may need the following:
Pencil
Low Tack Tape
Tape Measure
4’ & 6’ Levels
#2 Phillips Screwdriver
Hack Saw
Caulk Gun
Clear Silicone Caulk
Suction Cups
Drill
1/8” & 3/16” Drill Bit
Center Punch
Files
This unit is best installed by two people.
Handle the glass panels carefully and protect the edges. Safety tempered glass is very re-
sistant to breakage, but the sharp corners of the panels can damage tile and flooring surfaces.
The glass can break if unequal pressure is applied during installation.
Please wear safety glasses whenever drilling or cutting. When drilling holes in ceramic tile or
marble, use a center punch and hammer to carefully break the glazed surface to prevent skid-
ding when drilling.
NOTE: Tempered glass cannot be cut.
Safety Notes:
Caring for Redi Clear™ Treated Glass
In order to maintain your ten year warranty, please follow these care instructions:
Once or twice a week, wipe down your shower door to remove body oils, soaps and shampoos from the surfaces.
The glass should be cleaned every few weeks using a damp microfiber cloth and a mild detergent or soap to
remove any soap scum and grime from the glass. Do not use paper towels or any abrasive tool to clean the
surface. The sealed surface is warranted with regular maintenance and without the use of any harsh chemicals or
detergents.
Caring for Non-Treated Glass
After each use, rinse with water and wipe down your enclosure with a soft cloth/towel or squeegee to maintain that
like-new look. The glass should be regularly cleaned using a damp microfiber cloth and a mild detergent or cleaner
to remove any soap scum and grime from the glass. We recommend Lysol Bathroom Cleaner as safe for shower
doors, but please test any commercial cleaning solutions on an inconspicuous area before applying to the entire
enclosure. Be sure to rinse all surfaces completely and wipe dry. Never use any abrasive material or harsh
chemicals to clean surfaces and do not allow cleaners to soak on surfaces.

RDQCI5019 Rev. 0 Page 3 Cered 06/01/2016
ITEM DESCRIPTION QT Y.
A Tub Track with Vinyl 1
B Wall Jambs 2
C Plasc Wall Anchors 6
D #8 x 1 1/2” Truss Head Screws 6
E Nylon Spacers 4
F Header 1
G Glass Panels 2
H Hanger Brackets (Pre-assembled) 4
J Towel Bar Trim Rings 2
K Acrylic Towel Bar Brackets 2
L Towel Bar Bases 2
M #10-24 x 1/2” Flat Head Screws 2
N Towel Bar 1
P Vinyl Shims 4
R Pull Handles 2
S Nylon Boom Guide 1
T #6 x 3/8” Pan Head Screws 2
U Stainless Steel Bumper Inserts 4
V Vinyl Jamb Bumpers 2
PARTS LIST
*Quanes may vary.
**Support bar only included if necessary.

RDQCI5019 Rev. 0 Page 4 Cered 06/01/2016
EXPLODED VIEW

RDQCI5019 Rev. 0 Page 5 Cered 06/01/2016
Certified 12/13/06
)
3/16”
3/16”
RDQCI5019 Rev 0 Page 4 Certified 06/21/2016

RDQCI5019 Rev. 0 Page 6 Cered 06/01/2016
RDQCI5019 Rev 0 Page 5 Certified 06/21/2016

RDQCI5019 Rev. 0 Page 7 Cered 06/01/2016
RDQCI5019 Rev 0 Page 6 Certified 06/21/2016

RDQCI5019 Rev. 0 Page 8 Cered 06/01/2016
RDQCI5019 Rev 0 Page 7 Certified 06/21/2016

RDQCI5019 Rev. 0 Page 9 Cered 06/01/2016
RDQCI5019 Rev 0 Page 8 Certified 06/21/2016
/


