Hearing
Systems
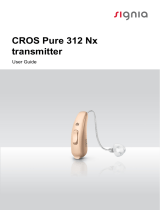
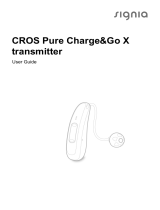
CROS Pure Charge&Go Nx
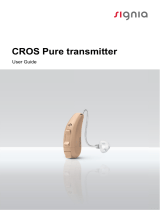
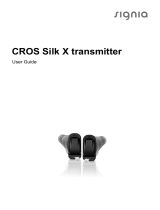
transmitter
User Guide

2
Content
Welcome 4
Your CROS transmitter 5
Components and names 7
Controls 9
Hearing programs 10
Features 10
Signal tones 10
Daily use 11
Charging 11
Turning on and o 12
Switching to andby mode 13
Inserting and removing the transmitter 14
Adjuing the volume 18
Changing the hearing program 18
Maintenance and care 19
Hearing inruments 19
Ear pieces 21
Professional maintenance 23
Important safety information 24

3
Further information 26
Safety information 26
Accessories 26
Explanation of symbols 27
Operating, transport, and orage conditions 28
Disposal information 29
Troubleshooting 30
Conformance information 31
Country-specic information 33
Important safety information 34
Personal safety 34
Product safety 37
Service and warranty 39

4
Welcome
Thank you for choosing one of our hearing inrument
accessories.
This guide, along with support from your Hearing Care
Professional, will help you underand the advantages
and greater quality of life this accessory oers.
CAUTION
It is important to read this user guide thoroughly
and completely. Follow the safety information to
avoid damage or injury.

5
Your CROS transmitter
CROS solutions are designed for people with profound
hearing loss in one ear which can not be aided with a
hearing inrument. A CROS transmitter worn on this
ear captures sound from this side and transmits it to
the hearing inrument on the other ear. This allows the
wearer of the hearing inrument to hear sounds from
both sides.
CROS transmitter hearing inrument

6
Two solutions are available:
● CROS solution:
For people with normal hearing in one ear and
profound hearing loss in the other. Sounds from the
side with hearing loss are captured and transmitted
wirelessly to the good-hearing side.
● BiCROS solution:
For people with profound hearing loss in one ear
and less severe hearing loss in the other. Sounds
from the more severe hearing loss side are captured
and transmitted wirelessly to the better-hearing side.
The hearing inrument processes and amplies the
sounds from both sides.
The CROS transmitter works with our specic wireless
hearing inruments. Your Hearing Care Professional will
advise you on the compatible models.
NOTICE
This user guide only applies to the CROS
transmitter. Your hearing inrument has a separate
user guide.

7
Components and names
➊
➊
➋
➌
➊ Ear piece
➋ Receiver
➌ Receiver cable
➍ Microphone openings
➎ Push button
(control, on/o switch)
➏ Side indicator
(red = right ear,
blue = left ear) and
receiver connection

8
You can use the following andard ear pieces:
Standard ear pieces Size
Click Sleeve
(vented or closed)
Click Dome™ single
(open or closed)
Click Dome semi-open
Click Dome double
You can easily exchange the andard ear pieces. Read
more in section "Maintenance and care".
Cuom-made ear pieces
Cuom shell
Click Mold™

9
Controls
With the push button you can, for example, switch
hearing programs. The Hearing Care Professional has
programmed your desired functions to the push button.
Push button function L R
Press briey:
Program up
Volume up
Volume down
Tinnitus therapy signal level up
Tinnitus therapy signal level down
TV ream on/o
Press for about 2 seconds:
Program up
Volume up
Volume down
Tinnitus therapy signal level up
Tinnitus therapy signal level down
TV ream on/o
Activate/deactivate airplane mode
Press for more than 3 seconds:
Turn on/o
L = Left, R = Right

10
You can also use a remote control to change
hearing programs and adju the volume of your
hearing inruments. With our smartphone app you
have even more control options.
Hearing programs
1
2
3
4
5
6
Read more in section "Changing the hearing program".
Features
The tinnitus therapy feature generates a sound to
diract you from your tinnitus.
Signal tones
Signal tones of the CROS transmitter - like a low battery
beep - are sent to the hearing inrument.
Ask your Hearing Care Professional to congure the
signal tones.

11
Daily use
Charging
Place your hearing inruments in the charger.
XFollow the inructions in
the charger's user guide.
You can also nd useful
tips for charging in the
charger's user guide.
Low power indication
You will hear an alert signal to indicate the power cell
is running low. The signal will be repeated every
20 minutes. Depending on the usage of your hearing
inruments, you have approximately 1.5 hours to charge
your hearing inruments before they op working.

12
Turning on and o
You have the following options to turn your hearing
inruments on or o.
Via charger:
XTurning on: Take the inruments out of the charger.
The artup melody is played in your hearing
inruments. The default volume and hearing program
are set.
XTurning o: Place the hearing inruments in the
charger.
Note that the charger mu be connected to the power
supply. For details refer to the charger's user guide.
Via push button:
XTurning on: Press and hold the push button until the
artup melody arts to play. Release the push button
while the melody is playing.
The default volume and hearing program are set.
XTurning o: Press and hold the push button for
several seconds.
See also the tips for charging in the charger's user guide.

13
Switching to andby mode
Via remote control or smartphone app, you can switch
your hearing inruments to andby mode. This mutes
the hearing inruments. When you leave andby mode,
the previously used volume and hearing program are
set.
Note:
● In andby mode, the hearing inruments are not
turned o completely. They draw some power.
Therefore we recommend to use andby mode only
for a short period of time.
● If you want to leave andby mode, but the remote
control or app is not at hand: Turn your hearing
inruments o and on again (via push button or
by shortly placing them in the charger until one or
more orange LEDs light up). In this case, the default
volume and hearing program are set.

14
Inserting and removing the transmitter
Colored markers indicate the side:
● red marker = right ear
● blue marker = left ear
Inserting:
XFor Click Sleeves, take care that the bend of the
Click Sleeve is in line with the bend of the receiver
cable.
Correct:
Incorrect:

15
X
Hold the receiver cable at the bend closer to the
ear piece.
XCarefully push the ear piece in
the ear canal ➊.
XTwi it slightly until it sits well.
Open and close your mouth to
avoid accumulation of air in the
ear canal.
XLift the device and slide it over
the top of your ear ➋.
CAUTION
Risk of injury!
XInsert the ear piece carefully and not too deeply
into the ear.
● It may be helpful to insert the right device with
the right hand and the left device with the left
hand.
● If you have problems inserting the ear piece,
use the other hand to gently pull your earlobe
downwards. This opens the ear canal and eases
insertion of the ear piece.

16
The optional retention rand helps to securely retain the
ear piece in your ear. To position the retention rand:
XBend the retention rand and
position it carefully into the
bottom of the bowl of your ear
(refer to the picture).

17
Removing:
XLift the device and slide it over
the top of your ear ➊.
XIf your device is equipped
with a cuom shell or a
Click Mold, remove it by
pulling the small removal cord
toward the back of your head.
XFor all other ear pieces: Grip the receiver in the
ear canal with two ngers and pull it carefully out ➋.
Do not pull the receiver cable.
CAUTION
Risk of injury!
XIn very rare cases the ear piece could remain
in your ear when removing the device. If this
happens, have the ear piece removed by a
medical professional.
Clean and dry your device after usage. Read more in
section "Maintenance and care".

18
Adjuing the volume
Your hearing inruments automatically adju the volume
to the liening situation.
XIf you prefer manual volume adjument, press the
push button.
Refer to section "Controls" for the setting of your
push button.
An optional signal can indicate the volume change. Once
the maximum or minimum volume has been reached, you
may hear an optional signal tone.
Changing the hearing program
Depending on the liening situation, your hearing
inruments automatically adju their sound.
Your hearing inruments may also have several hearing
programs which allow you to change the sound, if
needed. An optional signal tone can indicate the program
change.
XTo change the hearing program, press the push button
briey.
Refer to section "Controls" for the setting of your
controls. Refer to section "Hearing programs" for a li
of your hearing programs.
The default volume is applied.

19
Maintenance and care
To prevent damage it is important that you take care of
your hearing inruments and follow a few basic rules,
which will soon become a part of your daily routine.
Hearing inruments
Cleaning
Your hearing inruments have a protective coating.
However, if not cleaned regularly you may damage the
hearing inruments or cause personal injury.
XClean your hearing inruments daily with a soft, dry
tissue.
XNever use running water or immerse the
devices in water.
XNever apply pressure while cleaning.
XAsk your Hearing Care Professional for recommended
cleaning products, special care sets, or more
information on how to keep your hearing inruments
in good condition.
Drying
Your charger dries the hearing inruments while
charging. You can also use conventional products to
dry your hearing inruments. Ask your Hearing Care
Professional for recommended drying products and
for individual inructions on when to dry your hearing
inruments.

20
Storage
● Short-term orage (up to several days): Turn o your
hearing inruments via the push button or place them
in the powered charger.
The charger mu be connected to the power supply.
If the charger is not connected to power supply and
you place your hearing inruments in the charger, the
hearing inruments are not turned o.
Note that when you turn o the hearing inruments
via a remote control or smartphone app, the hearing
inruments are not turned o completely. They are in
andby-mode and ill draw some power.
● Long-term orage (weeks, months, ...): Fir, fully
charge your hearing inruments. Turn them o via
the push button before oring them. We recommend
using drying products while oring the hearing
inruments.
At 6 month intervals you will have to charge the
hearing inruments to avoid an unrecoverable
deep-discharge of the power cell. Deep-discharged
power cells cannot be charged anymore and they
have to be replaced. We recommend recharging more
frequently than 6 month intervals.
Observe the orage conditions in section
"Operating, transport and orage conditions".
Page is loading ...
Page is loading ...
Page is loading ...
Page is loading ...
Page is loading ...
Page is loading ...
Page is loading ...
Page is loading ...
Page is loading ...
Page is loading ...
Page is loading ...
Page is loading ...
Page is loading ...
Page is loading ...
Page is loading ...
Page is loading ...
Page is loading ...
Page is loading ...
Page is loading ...
Page is loading ...
/