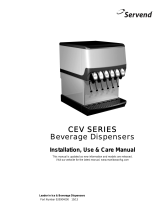
CED-400

LANCER WORLDWIDE CED-400 User manual

  • Hello! I've reviewed the Operation Manual for the Lancer Beverage Dispensers, specifically the 400 and CED-400 R-290 models. This manual covers everything from installation to detailed cleaning procedures, as well as safety warnings and troubleshooting. I'm ready to assist you with any questions you might have about the unit or its operation.
  • What is the operating temperature range for this dispenser?
    Is it ok to use an extension cord with this unit?
    Can children use this device?
    What should I do if I suspect a CO2 leak?
Model 400
Operation Manual
“Lancer” and “Lancer Worldwide” are registered trademarks of Lancer Corp.
© 2021 by Lancer, all rights reserved.
For more Information visit lancerworldwide.com or call Tech Support/Warranty: 800-729-1550
6655 Lancer Boulevard San Antonio, TX 78219 custserv@lancerworldwide.com ©2021 Lancer Worldwide Lancer PN: 28-3141 Revision 10/18/2021
CED-400 R-290
Certified by these agencies:
2
TABLE OF CONTENTS
ABOUT THIS MANUAL
This booklet is an integral and essential part of the product
and should be handed over to the operator after the
installation to preserve for any further consultation as needed.
Please read carefully the guidelines and warnings contained
herein as they are intended to provide the user with essential
information for the continued safe use and maintenance of the
product. In addition, it provides GUIDANCE ONLY to the user
on the correct services and site location of the unit.
BEFORE GETTING STARTED
Each unit is tested under operating conditions and is
thoroughly inspected before shipment. At the time of
shipment, the carrier accepts responsibility for the unit.
Upon receiving the unit, carefully inspect the carton for visible
damage. If damage exists, have the carrier note the damage
on the freight bill and file a claim with carrier. Responsibility
for damage to the dispenser lies with the carrier.
The installation or relocation of this product must be carried out by qualified personnel with
up-to-date safety and hygiene knowledge and practical experience, in accordance with current regulations.
IMPORTANT SAFETY INSTRUCTIONS ..................... 2-4
Flammable Material Warning .................................. 2-3
Intended Use .............................................................. 3
Electrical Warning ...................................................3-4
CO2 Warning............................................................... 4
Water Notice .............................................................. 4
SPECIFICATIONS AND FEATURES ........................... 5-6
CED 400 ..................................................................... 5
General Systems Overview-Remote Syrup Pumps .. 6
PRE-INSTALLATION CHECKLIST....... ..........................6
INSTALLATION ............................................................ 7-14
Unpacking the Dispenser .......................................... 7
Selecting/Preparing a Counter Location ................... 7
Dispenser Installation ........................................... 8-10
Installing Remote Syrup Pumps-Bag in Box ...........11
Installing CO2 Supply ................................................12
Dispenser Setup .......................................................13
Adjust Water Flow Rate & Syrup/Water Ratio .......... 14
CLEANING AND SANITIZING ..................................15-17
General Information ..................................................15
Cleaning and Sanitizing Solutions ............................16
Cleaning Schedule ....................................................16
Cleaning and Sanitizing Nozzles ..............................17
Cleaning and Sanitizing Syrup Lines-Bag in Box. ...17
TROUBLESHOOTING .............................................. 18-20
ILLUSTRATIONS AND PART LISTINGS ................ 21-26
Main Unit Assembly, CED 400 ........................... 21-22
Refrigeration Deck Assembly, CED 400 ............ 23-24
Wiring Diagram ........................................................25
Plumbing Diagram ................................................... 26
READ ALL SAFETY INSTRUCTIONS BEFORE USING THIS UNIT.
This manual contains important safety information and all applicable safety precautions must be observed. To reduce
the risk of fire, electric shock, damage to the equipment or personal injury when using this unit all instuctions/warnings
on the product being used must be followed:
Text following the Caution signal indicates a
hazardous situation, which if not avoided, could
result in minor or moderate injury. Be sure to read
the Caution statements before proceeding with the
installation.
Text following the Attention signal addresses a
situation that if not followed could potentially
damage the equipment. Be sure to read the Attention
statements before proceeding.
Text following the Note signal provides you with
information that may help you more effectively perform
the installation procedures within this manual.
Disregarding information will not cause damage or
injury, however it may limit the performance of the
dispenser.
! WARNING
! CAUTION
! ATTENTION
NOTE
IMPORTANT SAFETY INSTRUCTIONS
Text following the Warning signal indicates a
hazardous situation, which if not avoided, will result
in death or serious injury. Be sure to read all Warning
statements before proceeding with the installation.
When used in manual, it is to warn against possible ignition of flammable material if proper care is not taken. In order
to reduce flammability hazards, the installation and servicing of this appliance must be only carried out by a suitably
qualified person. Disposal requires transfer to authorized recycler for processing to avoid damages to the environment
or other hazards.
Flammable Material Warning Symbol
W021
3
This system uses a flammable refrigerant under pressure. Do not tamper with it. Keep clear of obstruction all ventilation openings
in the appliance enclosure. Do not use mechanical devices or other means to accelerate the defrosting process, other than those
recommended by the manufacturer. Do not damage the refrigerating circuit. Contact qualified service personnel before disposal. In
order to minimize the risk of possible ignition due to incorrect parts or improper service, only factory authorized personnel should
perform service on the appliance and its component parts. Do not store explosive substances such as aerosol cans with a flammable
propellant in this appliance. Replace component parts with like components. Only use genuine Lancer parts or parts certified by
Lancer.
H R290 Refrigerant Warning
Ce système utilise un liquide frigorigène inflammable sous pression. Ne tentez pas de le réparer. Maintenir dégagées toutes les
ouvertures de ventilation dans l’enceinte de l’appareil. Ne pas utiliser de dispositifs mécaniques ou autres moyens pour accélérer le
processus de dégivrage, autres que ceux recommandés par le fabricant. Ne pas endommager le circuit du fluide frigorigène. Contactez
un technicien d’entretien qualifié avant de mettre au rebut. Seul le personnel autorisé devrait effectuer un entretien de l’appareil et de ses
composants afin de minimiser le risque d’un allumage possible dû à des pièces incorrectes ou un entretien inapproprié. N’entreposez
aucune substance explosive comme des bombes aérosol avec un gaz propulseur inflammable dans cet appareil. Remplacez les pièces
par des pièces similaires. Utilisez uniquement des pièces Lancer dorigine ou des pièces certifiées par Lancer.
H Avertissement – Liquide frigorigène
Lorsqu'il est utilisé dans le manuel, ce symbole sert à mettre en garde contre une éventuelle inflammation d'un matériau
inflammable si les précautions nécessaires ne sont pas prises. Afin de réduire les risques d’inflammabilité, l’installation
et l’entretien de cet appareil ne doivent être effectués que par une personne qualifiée. L’élimination nécessite le
transfert à un recycleur agréé pour le traitement afin déviter des dommages à lenvironnement ou dautres dangers.
Symbole davertissement de matière inflammable
W021
Check the dispenser name plate label, located behind the splash plate, for the correct electrical requirements of unit. Do not plug
into a wall electrical outlet unless the current shown on the serial number plate agrees with local current available. Follow all local
electrical codes when making connections. Each dispenser must have a separate electrical circuit. Do not use extension cords
with this unit. Do not ‘gang’ together with other electrical devices on the same outlet. Do not locate multiple portable socket-
outlets or portable power supplies at the rear of the appliance. The key-switch does not disable the line voltage to the transformer
primary. Always disconnect electrical power to the unit to prevent personal injury before attempting any internal maintenance.
The resettable breaker switch should not be used as a substitute for unplugging the dispenser from the power source to service
the unit. Only qualified personnel should service internal components of electrical control housing. Make sure that all water lines
are tight and units are dry before making any electrical connections!
F Electrical Warning
The dispenser is for indoor use only. This unit is not a toy. Children should be supervised not to play with appliance. It should not
be used by children or infirm persons without supervision. This appliance can be used by children aged from 8 years and above
and persons with reduced physical, sensory or mental capabilities or lack of experience and knowledge if they have been given
supervision or instruction concerning use of the appliance in a safe way and understand the hazards involved. Cleaning and user
maintenance shall not be performed by children without supervision. The min/max ambient operating temperature for the dispenser
is 64°F to 100°F (18°C to 38°C) at a max altitude of 16,400 ft (5,000 m). Do not operate unit outside these conditions. Should
freezing occur, cease operation of the unit and contact authorized service technician. Service, cleaning, and sanitizing should be
accomplished only by trained personnel. During installation, old hose-sets should not be reused to connect the unit to the water
mains; new hose-sets should always be used. Applicable safety precautions must be observed. Instruction warnings on the product
being used must be followed.
! Intended Use
La distributrice doit être utilisée à l’intérieur uniquement. Cet appareil n’est pas un jouet. Ne laissez pas les enfants jouer avec l’appareil.
Cet appareil ne doit pas être utilisé par des enfants ou des personnes handicapées sans supervision. Cet appareil peut être utilisé par
des enfants âgés de 8 ans et plus et des personnes ayant des capacités physiques, sensorielles ou mentales réduites ou un manque
d’expérience et de connaissances s’ils ont reçu une supervision ou des instructions concernant lutilisation de l’appareil en toute
sécurité et comprennent les risques impliqué. Le nettoyage et l’entretien journalier ne doivent pas être effectués par des enfants sans
supervision. La température ambiante de fonctionnement de la distributrice se situe entre 65 °F et 105 °F (18 °C et 40 °C) à une altitude
maximale de 16 400 pied (5 000 mètre). Ne faites pas fonctionner lappareil en dehors de ces conditions. Si lappareil a gelé, cessez de
l’utiliser et contactez un technicien d’entretien autorisé. Le personnel assigné au nettoyage, à la désinfection et à l’entretien de lappareil
doit avoir reçu une formation à cet effet. Lors de l'installation, les ensembles de raccordement de tuyaux usagé ne doivent pas être
réutilisés pour être raccordés l'unité au réseau d'alimentation en eau; de nouveaux ensembles de tuyaux doivent toujours être utilisés.
Les mesures de sécurité en vigueur doivent être suivies. Observez toutes les étiquettes de sécurité apposées sur l’appareil.
! Utilisation pvue
4
WARNING: Carbon Dioxide (CO2) is a colorless, noncombustible gas with a light pungent odor. High percentages of CO2 may
displace oxygen in the blood.
WARNING: Prolonged exposure to CO2 can be harmful. Personnel exposed to high concentrations of CO2 gas will experience
tremors which are followed by a loss of consciousness and suffocation.
WARNING: If a CO2 gas leak is suspected, immediately ventilate the contaminated area before attempting to repair the leak.
WARNING: Strict attention must be observed in the prevention of CO2 gas leaks in the entire CO2 and soft drink system.
5 Carbon Dioxide (CO2)
Reportez-vous à l’étiquette d’identification de la distributrice située derrière la plaque antiéclaboussures pour connaître les
caractéristiques électriques de l’appareil. Ne branchez pas l’appareil dans une prise électrique murale à moins que le courant
disponible corresponde à l’intensité nominale indiquée sur l’étiquette portant le numéro de série. Les raccordements électriques
doivent être conformes au code électrique local. Chaque distributrice doit être branchée dans un circuit électrique dédié. Ne raccordez
pas cet appareil à l’aide dune rallonge électrique. Ne branchez pas cet appareil dans une prise électrique multiple partagée par
d’autres appareils. Ne placez pas plusieurs prises d’alimentation multiples portables ou alimentations électriques portables à l’arrière
de l’appareil. L’interrupteur verrouillable ne désactive pas la tension de ligne au primaire du transformateur. Débranchez toujours
l’alimentation électrique de l’appareil avant une intervention d’entretien afin de prévenir des blessures. Louverture du disjoncteur
à réarmement ne remplace pas le débranchement de la distributrice au moment de procéder à une intervention d’entretien. Seul
le personnel qualifié est autorisé à faire l’entretien et la réparation des composants électriques logés dans le boîtier du module de
commande. Veillez à ce que les conduites d’eau soient étanches et que lappareil soit sec avant de procéder à des raccordements
électriques.
F Avertissement - Électrici
AVERTISSEMENT : Le dioxyde de carbone (CO2) est un gaz incolore et non combustible qui a une odeur âcre. Un pourcentage élevé de
CO2 réduit la quantité d’oxygène dans le sang.
AVERTISSEMENT : Lexposition prolongée au CO2 est dangereuse pour la santé. Le personnel exposé à un taux élevé de CO2 souffre
de tremblements qui sont suivis par une perte de conscience et la suffocation.
AVERTISSEMENT : Si vous suspectez une fuite de CO2, aérez immédiatement la zone contaminée avant de procéder à la réparation de la
fuite.
AVERTISSEMENT : Il est impératif de prévenir toute fuite de CO2 dans le système de distribution de CO2 et de breuvage.
5 Dioxyde de carbone (CO2)
Provide an adequate potable water supply. Water pipe connections and fixtures directly connected to a potable water supply
must be sized, installed, and maintained according to federal, state, and local laws. The water supply to the carbonator must be
at least a 3/8 inches (9.525 mm) pipe with a minimum of 25 psi (0.172 MPa) line pressure, but not exceeding a maximum of 50
psi (0.345 MPa). Water pressure exceeding 50 psi (0.345 MPa) must be reduced to 50 psi (0.345 MPa) with pressure regulator.
The water supply to non-carb drinks must be a minimum of 55 psi (0.379 MPa), using a water booster if needed. Use a filter in the
water line to avoid equipment damage and beverage off-taste. Check the water filter periodically, as required by local conditions.
The water supply must be protected by means of an air gap, a backflow prevention device or another approved method to comply
with NSF standards. A leaking inlet water check valve will allow carbonated water to flow back through the pump when it is shut
off and contaminate the water supply. Ensure the backflow prevention device complies with ASSE and local standards. It is the
responsibility of the installer to ensure compliance.
! Water Notice
Assurez-vous que lalimentation en eau potable est suffisante. Les branchements et les raccords de tuyauterie deau directement reliés à
l’alimentation en eau potable doivent avoir la taille appropriée et être installés et entretenus conformément aux codes provincial et local.
La conduite d’alimentation en eau doit avoir un diamètre minimum de 3/8 po (9,525 mm) et une pression minimale de 25 psi (0,172 Mpa)
sans toutefois excéder 50 psi (0,345 Mpa). Si la pression d’eau excède 50 psi (0,345 Mpa), réglez le régulateur de pression à 50 psi
(0,345 Mpa). Lalimentation en eau des boissons sans glucides doit être d’au moins 55 psi (0,379 MPa), en utilisant un surpresseur
si nécessaire. Installez un filtre dans la conduite d’eau pour protéger l’appareil et éliminer tout arrière-goût. Inspectez le filtre à eau
régulièrement, selon les conditions du réseau local. Le circuit d’alimentation en eau doit être protégé au moyen dun clapet antiretour,
ou d’un dispositif antirefoulement ou d’une autre méthode conforme aux normes de la NSF. Dans le cas d’une fuite du clapet antiretour
de la conduite d’alimentation, l’eau gazéifiée refoule à travers la pompe (lorsqu’elle n’est pas en service) et contamine ainsi l’alimentation
en eau. Assurez-vous que le dispositif antirefoulement est conforme aux normes de l’ASSE et aux codes en vigueur localement. Cette
tâche est de la responsabilité de l’installateur.
! Remarque relative à leau
5
10.83"
(275 mm)
30.13"
(765 mm)
23.00"
(584 mm)
SPECIFICATIONS AND FEATURES
CED 400
A. Bonnet
B. Merchandiser
C. Splash Plate
D. Drip Tray
A
B
C
D
DIMENSIONS
Width: 10.83 inches (275 mm)
Depth: 23.00 inches (584 mm)
Height: 30.13 inches (765 mm)
WEIGHT
Shipping: 154 lbs (69.9 kg)
Empty: 121 lbs (54.9 kg)
Operating: 171 lbs (77.6 kg)
Ice Bath: 50 lbs (22.7 kg)
ELECTRICAL
115 VAC, 60 Hz, 12.0 Amps
220-240 VAC, 50 Hz, 6.0 Amps
220-240 VAC, 60 Hz, 6.0 Amps
WATER SUPPLY TO CARBONATOR
Min Flowing Pressure: 25 psi (0.172 MPa)
Max Flowing Pressure: 50 psi (0.345 MPa)
WATER SUPPLY TO NON-CARB DRINKS
Min Flowing Pressure: 55 psi (0.379 MPa)
Max Flowing Pressure: 120 psi (0.827 MPa)
CARBON DIOXIDE (CO2) SUPPLY
Min Pressure: 70 psi (0.483 MPa)
Max Pressure: 80 psi (0.552 MPa)
FITTINGS
Water for Carb Inlet: 3/8 inch barb
Plain Water Inlet: 3/8 inch barb
Brand Syrup Inlets: 1/4 inch barb
CO2 Inlet: 1/4 inch barb
This unit emits a sound pressure level below 70 dB
Max Altitude: 16,400 ft (5,000 m)
Climatic Class Definitions
SN (Subnormal) suitable for use under ambient temperature range of 50 °F ~ 90 °F
N (Normal) suitable for use under ambient temperature range of 61 °F ~ 90 °F
ST (Subtropical) suitable for use under ambient temperature range of 64 °F ~ 100 °F
T (Tropical) suitable for use under ambient temperature range of 64 °F ~ 109 °F
6
POST MIX ACCESSORIES:
High Pressure CO2 Regulator
Low Pressure CO2 Regulator
Manifold
CO2 Supply
Chain for CO2 Tank
Beverage Dispenser
Beverage Tubing
Oetiker Clamp Fittings
Water Booster (Lancer PN:
82-3401 or MC-163172
Water Regulator
75
110
75
General System Overview - Remote Syrup Pumps
Syrup Line
CO2 Line
Plain Water Line
Drain Line
Electrical
A. Water Source
B. Water Booster
C. Floor Drain
D. Dispenser
E. Electrical Outlet
F. Syrup Pump
G. BIB Syrup Containers
H. CO2 Regulator
I. CO2 Source
J. Water Regulator
A
B
C
F F
F F
G GG G
D
I
E
H
J
PRE-INSTALLATION CHECKLIST
CONSIDER THE FOLLOWING
BEFORE INSTALLATION:
Location of Water Supply Lines
Location of Drain
Location of Electrical Outlet
Location of Heating and Air
Conditioning Ducts
Do you have enough space to
install the dispenser?
Is countertop level?
Can the countertop support
the weight of the dispenser?
(Include the weight of an ice
machine plus weight of ice,
if necessary)
Is dispenser located away from
direct sunlight or overhead
lighting?
TOOLS REQUIRED:
Oetiker Pliers
Tubing Cutters
Wrench
Slotted Screwdriver
Phillips Screwdriver
Drill
BIB SYSTEM:
BIB Rack
BIB Syrup Boxes
BIB Regulator Set
BIB Connectors
7
INSTALLATION
Read This Manual
This manual was developed by Lancer Worldwide as a reference guide for the owner/operator and installer of
this dispenser. Please read this manual before installation and operation of this dispenser. Please see pages
18-20 for troubleshooting or service assistance. If the service cannot be corrected please call your Service
Agent or Lancer Customer Service. Always have your model and serial number available when you call.
Unpacking the Dispenser
1. Cut package banding straps and remove.
2. Open the box and remove the parts tray.
3. Close the lid, then remove using the handle cutouts.
4. Remove accessory kit and loose parts.
Inspect unit for concealed damage. If evident, notify
delivering carrier and file a claim against the same.
NOTE If unit is to be transported, it is advisable to leave the
unit secured to the plywood shipping base.
NOTE
5. Remove plywood shipping base from unit by moving unit so
that one side is off the countertop or table allowing access
to screws on the bottom of the plywood shipping base.
6. If leg kit has been provided, assemble legs by tilting unit.
DO NOT LAY UNIT ON ITS SIDE OR BACK
! ATTENTION
Never energize the machine if there is any trace of
damage. Contact Lancer Customer Service for
assistance.
! WARNING
Inspectez l’appareil pour déceler des dommages cachés.
Si l’appareil est endommagé, avisez le transporteur et
soumettez-lui une réclamation.
REMARQUE
N’alimentez jamais la machine s’il y a une trace
quelconque de dommage. Contactez le service à la
clientèle de Lancer pour obtenir de l’aide.
! AVERTISSEMENT
Si lappareil doit être transporté, il est conseillé de le
laisser fixé sur la base d’expédition en contreplaqué.
REMARQUE
NE COUCHEZ PAS LAPPAREIL SUR LE CÔTÉ OU SUR
LE DOS.
! ATTENTION
Selecting/Preparing a Counter Location
The dispenser should only be installed in a location
where it can be overseen by trained personnel.
NOTE
1. Select a location that is in close proximity to a properly
grounded electrical outlet, within five (5) feet (1.5 m) of
a drain, and a water supply that meets the requirements
shown in the Specifications section found on page 5.
When positioning the appliance, ensure the supply
cord is not trapped or damaged.
! WARNING
2. Select a location for the syrup pumps, CO2 tank, syrup
containers, and water filter (recommended).
3. Condenser air is drawn in from the top front and vents
located on the bonnet and discharged out the rear top of
the bonnet. A minimum of eight (8) inches (203 mm) of
clearance must be maintained over the top of the unit to
provide for proper air flow and circulation.
La distributrice devrait être installée uniquement dans
un endroit où elle peut être surveillée par du personnel
ayant reçu une formation à cet effet.
REMARQUE
Lors du positionnement de l’appareil, assurez-vous que
le cordon d’alimentation n’est pas coincé ni endommagé.
! AVERTISSEMENT
8
4. Cut the necessary holes in the countertop for mounting in
the designated dispenser location.
In order to facilitate proper dispenser drainage, ensure
that the dispenser is level, front to back and side to
side. Place a level on the top of the rear edge of the
dispenser. The bubble must settle between the level
lines. Repeat this procedure for the remaining three
sides. Adjust as necessary. For optimum performance
place the unit at a 0° tilt. The maximum tilt is 5°.
Leveling the Dispenser
Keep ventilation openings in the appliance enclosure
or in the built-in structure clear of obstruction.
Failure to maintain specified clearance will cause the
compressor to overheat and will result in compressor
failure.
! WARNING
Gardez les ouvertures de ventilation dans le btier
de lappareil ou la structure intégrée, libres de toute
obstruction. Le défaut de maintenir le dégagement
spécifié entraîne la surchauffe et larrêt du compresseur.
! AVERTISSEMENT
Afin de faciliter une vidange complète, assurez-vous
que l’appareil est de niveau sur les axes avant arrière et
gauche droit. Placez un niveau sur le bord arrre de la
distributrice. La bulle doit se situer entre les deux lignes.
Répétez la procédure sur les trois autres côtés. Ajustez
le niveau de l’appareil si nécessaire. Pour un résultat
maximal, réglez l’inclinaison à. L’inclinaison maximale
est de 5°.
Mise à niveau de la distributrice
Dispenser Installation
1. The dispenser is designed to be installed either
permanently to a counter or placed on a counter using the
legs (included in the Lancer kit, PN 82-1704).
2. When the dispenser is to be permanently bolted to the
countertop, the dispenser base must be sealed to the
countertop with a bead of silicone caulk or sealant which
provides a smooth and easily cleanable bond to the counter.
3. Once the dispenser is installed to the counter or placed on
the counter using legs provided, remove the cup rest and
splash plate.
4. Remove the merchandiser by removing the two (2) top
screws and two (2) bottom screws.
5. Remove the bonnet by removing the two (2) front screws.
The installation or relocation must be carried out
by qualified personnel with up-to-date knowledge
and practical experience in accordance with current
regulations.
NOTE
NSF listed units must be sealed to the counter or use
legs provided.
NOTE
L’installation ou la réinstallation après un déplacement
doit être effectuée par un technicien qualifié
conformément aux codes en vigueur.
REMARQUE
Les appareils homologués par la NSF doivent être scellés
sur le comptoir ou reposer sur les pieds fournis.
REMARQUE
A. Bonnet
B. Merchandiser
A
B
9
A
B
C
A. Oetiker Pliers
B. Fitting
C. Tubing
D. Syrup/Water/CO2
Inlet
D
10. Connect plain water tubing to water pump.
11. Route appropriate tubing from the water source to the
carbonator pump inlet at the unit. Route up the left side of
the unit to ensure space for the keyswitch.
12. Connect the tubing to the water source using Oetiker pliers
and clamps.
13. Fill a large bucket with approx. 5.4 gallons (20.4 L) of
distilled water.
Carefully read this before filling the water bath tank.
In order to optimize the maximum performance of the
dispenser, the following MUST be adhered to:
! ATTENTION - critical for performance
For proper function of the electronic ice bank control
the total dissolved solids (TDS) measurements should
be 100-500 ppm.
! ATTENTION
Veuillez lire attentivement cette directive avant de remplir
le réservoir du bain-marie. Pour optimiser le rendement
de la distributrice, assurez-vous de SUIVRE la procédure
suivante :
! ATTENTION - critique pour le rendement
Pour un fonctionnement adéquat de la commande de
bac à accumulation de glace, la mesure des matières
dissoutes totales (MDT) devrait être de 100-500 ppm.
! ATTENTION
6. Route power cord up the front of the unit for connection.
7. Connect drain tube to the drain fitting located on the bottom
of the drip tray and secure drain tube with clamp.
8. Route the drain line to designated floor drain.
9. Route appropriate tubing from the syrup pump location to
the syrup inlets located behind the splash plate. Connect
tubing to inlets using the Oetiker pliers and clamps. Repeat
for all syrup connections.
Make sure the overflow tube is not covered to allow
water from the water bath tank to escape as needed.
NOTE
Assurez-vous que lextrémité du flexible de trop-plein
n’est pas obstruée, ce qui emcherait l’eau du bain-
marie de s’échapper.
REMARQUE
15. Remove yellow cap from fill hole and insert a funnel into the
fill hole.
16. Carefully pour the distilled water mixture into the water bath
tank until water flows out of the overflow tube at the front of
the unit. Then replace yellow cap.
The water bath compartment must be filled with water
before connecting the unit, otherwise the compressor
fan may not operate properly. DO NOT use Reverse
Osmosis (RO) or purified water.
! ATTENTION
Le bain-marie doit être rempli avec de l’eau avant de
brancher l’appareil, sinon le ventilateur du compresseur
ne fonctionne pas correctement. N’UTILISEZ PAS un
appareil de filtration à osmose inversée ni de l’eau
purifiée.
! ATTENTION
14. Add 1/8 oz (4 g) of baking soda to distilled water and stir.
A
B
C
A. Bucket
B. Distilled Water
(Approx. 5.4 gal)
C. Baking Soda
(Approx. 1/8 oz)
17. Using tubing cutters, cut water supply line and install “U”
fitting, (PN 01-2128/01).
A
B
CA. Line to Water Source
B. Line To Plain Water Inlet
C. Line To Carb Water Inlet
D. “U” Fitting
D
10
18. Route appropriate tubing from the plain water inlet, located
at the front of the unit, to one side of the “U” fitting at water
supply and connect tubing to inlet.
19. Route appropriate tubing from the carbonator pump inlet
to the open “U” fitting at water supply then connect tubing
to carb water inlet using a flare seal washer (PN 05-0017).
Use a back-up wrench to prevent damage to carbonator
pump.
A
B
C
A. Plain Water Inlet
B. Plain Water Line
C. Oetiker Pliers
D. Fitting
D
A
B
C
A. Carbonator Pump
B. Carb Water Inlet
C. Carb Water Line
If the water source is above 50 psi (0.345 MPa), cut
tubing assembly and install Water Regulator Kit
(PN 18-0253/02, sold separately) as shown in kit
instruction sheet. Once installed, use a test gauge
assembly (PN 22-0138, sold separately), to set
regulator at a maximum of 50 psi (0.345 MPa).
NOTE
Si la pression d’arrivée deau est supérieure à 50 psi
(0,345 Mpa), coupez les conduites et installez un
régulateur d’eau (no de pièce 18-0253/02, vendu
séparément) comme indiqué dans la notice d’installation
accompagnant le produit. Une fois installé, utilisez
un manomètre d’essai (no de pièce 22-0138, vendu
séparément) pour régler le régulateur à un maximum de
50 psi (0,345 Mpa).
REMARQUE
C
A. CO2 Line
B. CO2 Inlet
C. Relief Valve
B
A
20. Route appropriate tubing from the CO2 supply to the CO2
inlet and connect tubing to it.
21. Feed all tubing, power cord, and drain line through the back
of the unit. If using 3/8” tubing, place reduction point behind
unit.
22. Turn on water supply and check for leaks.
23. Plug in the unit to a grounded electrical outlet to power on
and begin building an ice bank.
Never energize the machine if there is any trace of
damage. Contact Lancer Customer Service for
assistance.
! WARNING
N’alimentez jamais la machine s’il y a une trace
quelconque de dommage. Contactez le service à la
clientèle de Lancer pour obtenir de l’aide.
! AVERTISSEMENT
The dispenser must be properly electrically grounded
to avoid serious injury or fatal electrical shock. The
power cord has a three-prong grounded plug. If a
three-hole grounded electrical outlet is not available,
use an approved method to ground the unit. Follow
all local electrical codes when making connections.
Each dispenser must have a separate electrical
circuit. Do not use extension cords. Do not connect
multiple electrical devices on the same outlet.
! WARNING
Assurez-vous que la distributrice est reliée à la terre
pour éviter des blessures graves ou des décharges
électriques. Le cordon d’alimentation comporte une
fiche de terre à trois broches. Si une prise électrique à
trois trous n’est pas disponible, utilisez une méthode
approuvée pour assurer la mise à la terre de l’appareil.
Les raccordements électriques doivent être conformes
au code électrique local. Chaque distributrice doit être
branchée dans un circuit électrique dédié. N’utilisez
pas de rallonge électrique. Ne branchez pas plusieurs
appareils sur la même prise de courant.
! AVERTISSEMENT
11
Installing Remote Syrup Pumps - Bag In Box
A
B
C
A. Syrup Pump
B. CO2 Line
C. Fitting
D. Oetiker Pliers
D
1. Install BIB rack and remote pumps according to
manufacturers’ instructions.
2. Once pumps and BIB rack are installed, measure and
cut tubing to length between the pump CO2 inlets, then
connect tubing to all pumps.
3. Using tubing cutters, cut the CO2 supply line to the syrup
pumps and install tee fitting. Then, route the appropriate
tubing from the tee fitting to the syrup pumps and to the
unit.
A
B
C
A. Syrup Pump Outlet
B. Syrup Pump
C. Fitting
4. Connect tubing from dispenser syrup inlet to the syrup
pump outlet fitting. Repeat for each syrup line/pump.
A. Tee Fitting
B. CO2 Supply Line
C. Line to Unit
D. Line to Syrup Pump
A
B
C
D
Use proper connector for syrup manufacturer.
! ATTENTION
A. Syrup Pump Inlet
B. Fitting
C. BIB Connector
D. Oetiker Pliers
ABC
D
A. Syrup Pump Inlet
B. BIB Connector
C. BIB Syrup Container
AB
C
5. Install BIB (bag in box) connectors onto the syrup pump
inlet tubing.
6. Connect syrup BIBs to connectors. Repeat for each syrup
line/pump.
Utilisez le connecteur approprié spécifique au fabricant
de sirop.
! ATTENTION
12
Installing CO2 Supply
Before installing regulator, ensure that a seal (washer
or O-ring) is present in regulator attachment nut.
! ATTENTION
1. Connect high pressure CO2 regulator assembly to CO2
cylinder or bulk system.
2. Connect a 1/4” nut, 3/8” stem and seal to CO2 regulator
outlet.
3. Route appropriate tubing from the low pressure CO2
regulator manifold location to the 1/4” nut, 3/8” stem on
the high pressure CO2 regulator attached to source and
connect tubing.
4. Connect tubing routed from the CO2 inlet at the unit to one
of the low pressure CO2 regulator manifold outlets.
5. Connect tubing routed from the syrup pump location to the
second outlet of the low pressure CO2 regulator manifold.
A. CO2
Regulator
B. Wrench
C. 1/4” nut, Stem
D. CO2 Supply
A
B
C
D
- Thread regulator nut onto to tank,
then tighten nut with wrench
A. CO2 Regulator
B. Outlet
C. Wrench
D. CO2 Supply
A
B
C
D
A. CO2 Regulator
B. Fitting
C. Line to CO2 Regulator
Manifold
D. Oetiker Pliers
A
B
C
D
Avant d’installer le régulateur, assurez-vous qu’un
joint torique ou une rondelle est en place dans l’écrou
d’accouplement du régulateur.
! ATTENTION
A dedicated CO2 regulator is required to supply the
CO2 inlet at the unit as well as to all remote syrup
pumps.
! ATTENTION
Un régulateur de CO2 spécifique est obligatoire pour
alimenter larrivée de CO2 à lappareil ainsi que toutes
les pompes à sirop à distance.
! ATTENTION
A
B
C
D
A. Line to Dispenser
B. Line to Syrup Pumps
C. Line to CO2 Regulator
D. CO2 Regulator
Manifold
13
Dispenser Setup
6. Using a wrench, loosen lock nut on the regulator
adjustment screw of the high pressure CO2 regulator
connected to the source, then using a screwdriver back out
lock nut screw all the way.
DO NOT TURN ON CO2 SUPPLY AT THIS TIME.
! WARNING
A. CO2 Regulator
B. Screwdriver
C. Loosened Lock Nut
D. Regulator Adjustment Screw
A
B
CD
N’OUVREZ PAS LAPPROVISIONNEMENT EN
CO2 MAINTENANT.
! AVERTISSEMENT
7. Repeat Step 6 for both low pressure CO2 regulators on the
regulator manifold routed to the unit and the syrup pumps.
1. Purge water to fill carbonator tank by opening carbonator
relief valve. Close relief valve once water comes out.
C
2. Activate each valve until a steady flow of water is achieved.
3. Turn power off.
4. Unplug the Pump Motor Connector from the control box.
Use the wiring diagram either on the unit control box or in
the back of this manual for reference.
Pump Motor will run for a few seconds to fill
carbonator tank.
NOTE
Failure to disconnect the motor power supply will
damage the carbonator motor, the pump and void the
warranty.
! ATTENTION
5. Turn power on.
6. Turn on CO2 at the source. Using a screwdriver, adjust the
high pressure regulator at the source to 110 psi (0.758 MPa),
then tighten locknut with wrench.
7. Adjust both of the low pressure regulators on the regulator
manifold to 75 psi (0.517 MPa) then tighten locknut with
wrench.
8. Turn syrup off at back block.
9. Activate each valve until gas-out is achieved.
10. Turn power off.
11. Plug the Pump Motor Connector back into the control box.
12. Turn power on.
A. Regulator Adjustment Screw
B. Adjust to 110 psi (0.758 MPa)
C. Wrench
A
B
C
13. Activate each valve until the carbonator pump comes on.
Release the button, allow carbonator to fill and stop.
Repeat this process until a steady flow of carbonated water
is achieved.
Le fait de ne pas débrancher l’alimentation électrique
du moteur endommagera le moteur du carbonateur et la
pompe et annulera la couverture de garantie.
! ATTENTION
Le moteur de pompe s’active pendant quelques secondes
pour remplir le réservoir du carbonateur.
REMARQUE
A. CO2 Line
B. CO2 Inlet
C. Relief Valve
B
A
14
Adjust Water Flow Rate & Syrup/Water Ratio
Do not set flow rates or dispense from the unit until a
complete ice bank is established.
NOTE
Ne réglez pas les débits ou ne distribuez pas des boissons
jusqu’à l’établissement d’un banc de glace complet.
REMARQUE
1. Using a Lancer brix cup verify water flow rate (5 oz. in 4
sec.). Use a screwdriver to adjust if needed.
2. Remove nozzle by twisting counterclockwise and pulling
down, then remove diffuser by pulling down.
3. Install Lancer (yellow) syrup separator (PN 54-0031) in
place of nozzle.
A
B
CA. Syrup Separator
B. Nozzle
C. Soda Lever
AB
Increase Decrease
C
A. Flow Control, Water
B. Flow Control, Syrup
C. Nozzle (Diffuser inside)
D. Mounting Block (not
shown)
E. Soda Lever
D
E
4. Reopen syrup shut-off at mounting block.
5. Activate valve to purge syrup until steady flow is achieved.
6. Using a Lancer brix cup, activate the valve and capture a
sample. Verify that the syrup level is even with the water
level. Use a screwdriver to adjust if needed.
7. Repeat process for each valve.
8. Reinstall the merchandiser, splash plate, cup rest, and drip
tray then reattach bonnet using the top bonnet screw.
A
B
C
A. Syrup Separator
B. Brix Cup
C. Verify Soda/
Water Level
Volumetric Valve Adjustment
1. Remove the ID panel from the front of the first valve.
2. Insert the programmer’s 10-pin connector into the ID panel
plug located on the front of the circuit board.
3. When properly connected, the programmer will run a
self-diagnostic test. The display will show all 8’s” with the
decimal points lighted. After about three (3) seconds, the
display indicates the setting of the dip switches.
If the programmer does not run its diagnostic test
properly, disconnect it and try plugging it in again. If
the programmer still fails, replace the programmer.
NOTE
4. After the programmer is connected, press the “Read Mem”
button.
5. Press the “Ratio +” or the “Ratio -” key until the desired ratio
is displayed.
6. Verify the drink type by pressing “Carb Toggle” to select “C”
for carbonated or “n” for non-carbonated.
7. Press the “Enter” button to program the valve with the
setting on the display.
8. Verify ratio by pressing “Read Mem”.
9. Disconnect the programmer and repeat steps 4-9 for each
valve.
- Handheld Programmer
Volumetric Valve
Si le programmateur n’a pas exécuté son test de
diagnostic correctement, débranchez-le, puis
rebranchez-le de nouveau. Si le programmateur échoue
de nouveau, remplacez le programmateur.
REMARQUE
15
General Information
CLEANING AND SANITIZING
Lancer equipment is shipped from the factory after being cleaned and sanitized in accordance with the National
Sanitation Foundation (NSF) guidelines. The operator of the equipment must provide continuous maintenance
as required by this manual and/or state and local health department guidelines to ensure proper operation and
sanitation requirements are maintained.
The cleaning procedures provided herein pertain to the Lancer equipment identified by this manual. If other
equipment is being cleaned, follow the guidelines established by the manufacturer for that equipment.
Cleaning should be accomplished only by trained personnel. Sanitary gloves are to be used during cleaning
operations. Applicable safety precautions must be observed. Instruction warnings on the product being used must
be followed.
GENERAL INFORMATION
Use sanitary gloves when cleaning the unit and observe all applicable safety precautions.
DO NOT use a waterjet to clean or sanitize the unit.
DO NOT disconnect water lines when cleaning and sanitizing syrup lines to avoid contamination.
DO NOT use strong bleaches or detergents; these can discolor and corrode various materials.
DO NOT use metal scrapers, sharp objects, steel wool, scouring pads, abrasives, or solvents on the dispenser.
DO NOT use hot water above 140° F (60° C). This can damage the dispenser.
DO NOT spill sanitizing solution on any circuit boards. Ensure all sanitizing solution is removed from the system.
DO NOT use mechanical devices or other means to accelerate the defrosting process; other than those
recommended by the manufacturer.
! ATTENTION
Les équipements Lancer sont expédiés depuis l’usine après avoir été nettoyés et aseptisés conformément aux lignes
directrices de la National Sanitation Foundation (NSF). Pour assurer le bon fonctionnement de cet équipement et maintenir
les exigences sanitaires requises par le ministère de la santé local, l’exploitant doit effectuer l’entretien continu tel que
décrit dans ce manuel.
Les procédures de nettoyage fournies ici concernent l’équipement Lancer identifié dans ce manuel. Si vous nettoyez un
autre appareil, veuillez suivre les lignes directrices établies par le fabricant de cet équipement.
Le personnel assigné au nettoyage de lappareil doit avoir reçu une formation à cet effet. L’utilisation de gants sanitaires
est obligatoire pendant les interventions de nettoyage. Les mesures de sécurité en vigueur doivent être suivies. Observez
toutes les étiquettes de sécurité apposées sur l’appareil.
INFORMATIONS GÉNÉRALES
Portez des gants sanitaires pendant le nettoyage de l’appareil et observez toutes les précautions de sécuri
applicables.
NUTILISEZ PAS un nettoyeur à jet d’eau pour nettoyer ou désinfecter lappareil.
Afin d’éviter la contamination, NE DÉBRANCHEZ PAS les conduites d’eau pendant le nettoyage et la désinfection des
conduites de sirop.
NUTILISEZ PAS d’agents de blanchiment ou des détergents industriels, ils peuvent décolorer et corroder divers
matériaux.
NE NETTOYEZ PAS l’appareil avec un objet tranchant, un racleur métallique, de la laine d’acier, un tampon à récurer,
un produit abrasif ou du solvant.
NUTILISEZ PAS d’eau chaude à plus de 60 °C (140 °F). Cela pourrait endommager la distributrice.
NE RENVERSEZ PAS de solution désinfectante sur les circuits intégrés. Assurez-vous d’enlever toute trace de solution
désinfectante des organes de l’appareil.
N’UTILISEZ PAS de dispositifs mécaniques ou d’autres moyens pour accélérer le processus de dégivrage, autres que
ceux recommandés par le fabricant.
! ATTENTION
16
Cleaning and Sanitizing Solutions
Cleaning Solution
Mix a mild, non-abrasive detergent (e.g. Sodium Laureth
Sulfate, dish soap) with clean, potable water at a temperature
of 90°F to 110°F (32°C to 43°C). The mixture ratio is one ounce
of cleaner to two gallons of water. Prepare a minimum of five
gallons of cleaning solution. Do not use abrasive cleaners or
solvents because they can cause permanent damage to the
unit. Ensure rinsing is thorough using clean, potable water at
a temperature of 90°F to 110°F. Extended lengths of product
lines may require additional cleaning solution.
Sanitizing Solution
Prepare the sanitizing solution in accordance with the
manufacturers written recommendations and safety
guidelines. The type and concentration of sanitizing agent
recommended in the instructions by the manufacturer shall
comply with 40 CFR §180.940. The solution must provide 200
parts per million (PPM) chlorine (e.g. Sodium Hypochlorite or
bleach) and a minimum of five gallons of sanitizing solution
should be prepared.
Other Supplies Needed:
1. Clean cloth towels 2. Bucket 3. Extra nozzle 4. Sanitary gloves 5. Small brush (PN 22-0017)
Daily Cleaning
1. Using the cleaning solution, clean top cover and all
exterior stainless steel surfaces.
2. Clean exterior of dispensing valves and ice chute.
3. Remove cup rest then clean the drip tray and cup rest.
Replace cup rest and drip tray when finished.
4. Wipe clean all splash areas using a damp cloth soaked in
cleaning solution.
5. Clean beverage valves as specified by the section
“Cleaning and Sanitizing Nozzles” on page 17.
Scheduled Maintenance & Cleaning
As Needed Keep exterior surfaces of dispenser clean (include drip tray and cup rest) using a clean, damp cloth.
Daily
Remove each nozzle and diffuser and rinse well in warm water. DO NOT use soap or detergent. This
will cause foaming and off taste in finished product.
Remove cup rest and wash in warm soapy water.
Pour warm soapy water into the drip tray and wipe with a clean cloth.
With a clean cloth and warm water, wipe off all of the units exterior surfaces. DO NOT USE
ABRASIVE SOAPS OR STRONG DETERGENTS.
Reinstall the cup rest, diffusers, and valve nozzles.
Weekly
Taste each product for off tastes.
Remove the units bonnet and check the level of water in the water bath. Replenish as required and
reinstall bonnet.
Monthly
Unplug the dispenser from the power source.
Remove the bonnet and clean the dirt from the condenser air filter using a soft brush.
Reinstall the bonnet and plug in the unit.
Every Six Months Clean and sanitize the unit using the appropriate procedures outlined in the Cleaning and Sanitizing
section of this manual.
Yearly Clean the water bath interior, including evaporator coils and refrigeration components.
Clean the entire exterior of the unit.
17
Cleaning and Sanitizing Syrup Lines - Bag in Box
1. Disconnect syrup lines from BIB’s.
2. Place syrup lines, with BIB connectors and any adapters,
in a bucket of warm water.
3. Activate each valve to fill the lines with warm water and
flush out syrup remaining in the lines.
4. Prepare cleaning solution as described in the Cleaning
and Sanitizing Solutions section.
5. Place syrup lines, with BIB connectors and any adapters,
into cleaning solution.
6. Activate each valve until lines are filled with cleaning
solution then let stand for ten (10) minutes.
7. Flush out cleaning solution from the syrup lines using
clean, warm water.
8. Prepare sanitizing solution as described in the Cleaning
and Sanitizing Solutions section.
9. Place syrup lines into sanitizing solution and activate each
valve to fill lines with sanitizer. Let sit for ten (10) minutes.
10. Reconnect syrup lines to BIB’s and draw drinks to flush
solution from the dispenser.
11. Taste the drink to verify that there is no off-taste. If off-
taste is found, flush syrup system again.
Cleaning and Sanitizing Nozzles
1. Disconnect power, so as to not activate valve while
cleaning.
2. Remove nozzle by twisting counterclockwise and pulling
down.
3. Remove diffuser by pulling down.
6. Set nozzle and diffuser aside and let air dry. DO NOT rinse
with water after sanitizing.
7. Reconnect diffuser and nozzle.
8. Connect power.
9. Taste the drink to verify that there is no off-taste. If off-
taste is found, flush syrup system again.
A
B
C
A. Nozzle
B. Diffuser
C. Soda Lever
Following sanitization, rinse with end-use product
until there is no aftertaste. Do not use a fresh water
rinse. This is an NSF requirement. Residual sanitizing
solution left in the system creates a health hazard.
! CAUTION
Après avoir désinfecté la distributrice, rincez avec le
produit final jusqu’à ce qu’il ne subsiste aucun arrière-
goût. N’utilisez pas deau de rinçage. Ceci est une
exigence de la NSF. Les résidus du produit désinfectant
présentent un risque pour la santé.
! MISE ENGARDE
Following sanitization, rinse with end-use product
until there is no aftertaste. Do not use a fresh water
rinse. This is an NSF requirement. Residual sanitizing
solution left in the system creates a health hazard.
! CAUTION
Après avoir désinfecté la distributrice, rincez avec le
produit final jusqu’à ce qu’il ne subsiste aucun arrière-
goût. N’utilisez pas deau de rinçage. Ceci est une
exigence de la NSF. Les résidus du produit désinfectant
présentent un risque pour la santé.
! MISE EN GARDE
4. Rinse nozzle and diffuser with warm water.
5. Wash nozzle and diffuser with cleaning solution then
immerse in sanitizing solution and let sit for fifteen (15)
minutes.
18
TROUBLESHOOTING
TROUBLE CAUSE REMEDY
Leakage between upper
and lower bodies.
1. Gap between upper and lower valve bodies.
2. Worn or damaged paddle arm assemblies.
3. Cracked valve bodies.
1. Tighten all six (6) retaining screws.
2. Replace paddle arm assemblies.
3. Replace valve body.
Miscellaneous leakage. 1. Gap between parts.
2. Damaged or improperly installed O-rings.
1. Tighten appropriate retaining screws.
2. Replace or adjust appropriate O-rings
Insufficient water flow. 1. Insufficient incoming supply water pressure.
2. Shutoff on mounting block not fully open.
3. Foreign debris in water flow control.
4. Foreign debris in water pump strainer.
1. Verify incoming water supply pressure to plain
and carb inlet is a minimum of 25 psi (0.172
MPa) and 55 psi (0.379 MPa) respectively.
2. Open shutoff fully.
3. Remove water flow control from upper body
and clean out any foreign material to ensure
smooth-free spool movement.
4. Remove water pump strainer and clean.
Insufficient syrup flow. 1. Insufficient CO2 pressure to BIB pumps.
2. Out of CO2 .
3. Shutoff on mounting block not fully open.
4. Foreign debris in syrup flow control.
5. Bad syrup pump.
1. Adjust CO2 pressure to 75 psi (0.517 MPa)
[minimum 70 psi (0.480 MPa)] for BIB pumps.
2. Replace CO2 tank/refill.
3. Open shutoff fully.
4. Remove syrup flow control form upper body
and clean out any foreign material to ensure
smooth-free spool movement.
5. Replace BIB pump.
Erratic ratio. 1. Incoming water and/or syrup supply not at
minimum flowing pressure.
2. Foreign debris in water and/or syrup flow
controls.
1. Check pressure and adjust.
2. Remove flow controls from upper body and
clean out any foreign material to ensure
smooth-free spool movement.
No product dispensed. 1. Water and syrup shutoffs on mounting block
not fully open.
2. Cup lever arm or ID panel actuator on electric
valve is not actuating the switch.
3. Electric current not reaching valve.
4. Improper or inadequate water or syrup supply.
5. Bad valve solenoid(s).
1. Open shutoff fully.
2. Replace the lever, the ID panel actuator or the
switch as needed.
3. Check electric current supplied to valve. If
current is adequate, check solenoid coil and
switch. Replace if necessary.
4. Remove valve from mounting block and open
shutoffs slightly. Check water and syrup flow. If
no flow, check dispenser for freeze-up or other
problems.
5. Replace solenoid(s).
19
TROUBLE CAUSE REMEDY
Water only dispensed;
no syrup; or syrup only
dispensed, no water
1. Water or syrup shutoff on mounting block not
fully open.
2. Improper or inadequate water or syrup flow.
3. CO2 pressure too low.
4. Stalled or inoperative BIB pump.
5. Kinked line.
1. Open shutoff fully.
2. Remove valve from mounting block, open
shutoffs slightly and check water and syrup
flow. If no flow, check dispenser for freeze-up
or other problems. Ensure BIB connection is
engaged.
3. Check the CO2 pressure to the BIB pumps to
ensure it is between 70 and 80 psi (0.483 and
0.552 MPa).
4. Check CO2 pressure and/or replace pump.
5. Remove kink or replace line.
Valve will not shut off. 1. Cup lever may be sticking or binding.
2. Switch not actuating freely.
3. Solenoid armature not returning to bottom
position.
1. Correct or replace lever.
2. Check switch for free actuation.
3. Replace defective armature or spring.
Excessive foaming. 1. Incoming water or syrup temperature too high.
2. CO2 pressure too high.
3. Water flow rate too high.
4. Nozzle and diffuser not installed.
5. Nozzle and diffuser not clean.
6. Air in BIB lines.
7. Poor quality ice.
8. High beverage temperature.
1. Correct prior to dispenser. Consider larger
dispenser or pre-cooler.
2. Adjust CO2 pressure downward, but not less
than 70 psi.
3. Readjust and reset ratio. Refer to “Adjust
Water Flow Rate & Syrup/Water Ratio”
Section.
4. Remove and reinstall properly.
5. Remove and clean.
6. Bleed air from BIB lines.
7. Check quality of ice used in drink.
8. Check refrigeration system.
Water continually
overflows from water
bath into drip tray.
1. Loose water connection(s).
2. Flare seal washer leaks.
3. Faulty water coil.
1. Tighten water connections.
2. Replace flare seal washer.
3. Replace water coil.
Warm drinks. 1. Dispenser was recently installed.
2. Restricted airflow.
3. Dispenser connected to hot water supply.
4. Condenser fan motor not working.
5. Dirty condenser, air vents clogged.
6. Dispenser capacity exceeded.
1. It may take up to 5 hours after install to reach
the desired temperature.
2. Check clearances around sides, top, and
inlet of unit. Remove objects blocking airflow
through grill.
3. Switch to cold water supply.
4. Replace condenser fan motor.
5. Clean condenser and air vents of any
blockage.
6. Add pre-cooler or replace with larger
dispenser.
Unit will not start. 1. Compressor startup delay.
2. Motor timed out.
1. When starting unit or if current is interrupted,
there is a 5 minute delay before the
compressor/fan starts.
2. There is a 3 minute protection timer on the
carbonator level sensor. If the motor has
timed out, check water supply and reset by
momentarily disconnecting power.
20
TROUBLE CAUSE REMEDY
BIB pump does not operate
when dispensing valve is
opened.
1. Out of CO2, CO2 not turned on, or low CO2
pressure.
2. Out of syrup.
3. BIB connector not tight.
4. Kinks in syrup or gas lines.
1. Replace CO2 supply, turn on CO2 supply,
or adjust CO2 pressure to 70-80 PSI
(0.483-0.552 MPA).
2. Replace syrup supply.
3. Fasten connector tightly.
4. Straighten or replace lines.
BIB pump operating, but no
flow.
1. Leak in syrup inlet or outlet line.
2. Defective BIB pump.
1. Replace line.
2. Replace BIB pump.
BIB pump continues to
operate when bag is empty.
1. Leak in suction line.
2. Leaking O-ring on pump inlet fitting.
3. Defective syrup BIB pump.
1. Check BIB connector, if still leaking then
replace line.
2. Replace O-ring
3. Replace defective pump.
BIB pump fails to restart after
bag replacement.
1. BIB connector not on tightly.
2. BIB connector is stopped up.
3. Kinks in syrup line.
1. Tighten BIB connector.
2. Clean out or replace BIB connector.
3. Straighten or replace line.
BIB pump fails to stop when
dispensing valve is closed.
1. Leak in discharge line or fittings.
2. Empty BIB.
3. Air leak on inlet line or bag connector.
1. Repair or replace discharge line.
2. Replace BIB.
3. Repair or replace.
Low or no carbonation. 1. Low or no CO2.
2. Low water pressure.
3. Worn or defective carbonator pump.
4. Backflow preventer not allowing water to
flow.
5. Probe malfunctioning.
6. PCB malfunctioning.
1. Check CO2 supply. Adjust CO2 pressure
to 70 PSI (0.483 MPA).
2. Need water booster kit.
3. Replace carbonator pump.
4. Replace backflow preventer, noting
the flow direction arrow from pump to
coldplate.
5. Replace probe.
6. Replace PCB.
The unit’s R290 refrigerant and foam materials are combustible materials and discarded units
should be isolated from fire sources and cannot be burned. To prevent possible harm to the
environment from improper disposal, recycle the unit by locating an authorized recycler or
contact the retailer where the product was purchased. Comply with local regulations regarding
disposal of the refrigerant and insulation.
Dispenser Disposal
/