Page is loading ...

Omix-Ada, Inc. – Installation Instructions
1997-2004 Jeep Wrangler standard and Automatic. (18303.10)
2005-2006 Jeep Wrangler with 6 Speed Manual. (18303.11)
3” Body Lift Kit
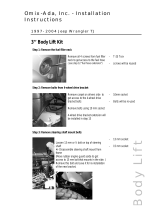
Step 1: Remove the fuel filler neck.

Step 4: Loosen Radiator

Step 5: Remove Light Bezel.

Step 8: remove Body Bolts
Picture shows position of the of the body pucks.
Body pucks 9 – 10 – and 11 are the opposite side of 4-3-and 2.

Please remove the body pucks in the following order:
Remove the factory body puck (1) from under the grille -16 mm socket
Leave body pucks 9/10/11 on opposite side of Jeep loose, but not off!
Step 9: Lift body off frame on one side

Step 10: Install body pucks
Steps 1: Steps 2:
No 4 – tighten No 5 – tighten
No 5 – start it, do not tighten No 8 – tighten
No 3 – tighten No 6 – tighten
No 2 – tighten No 7 – tighten
No 9 – tighten
No 8 – start it, do not tighten
No 10 – tighten
No 11 – tighten
No (1) will be tightened in the very last step. Do not tighten at this time.

Step 11: Install fuel extension pipe
Note: several sizes have been supplied. Use the correct one for your application. With
fuel line cut the tube should fit snug inside of rubber fuel hose.
On later model Jeeps equipped with on-board vapor recovery it is important to not
cut these lines. These lines have been supplied from the factory with extra length.
Just pull enough vapor lines loose as needed for lift. “Do Not Cut Vapor Lines”.
Fuel extension pipe.


Step 16: Install Grille bump stop.

Step 17: (5 and 6) speed manual transmission extension bracket installation
Note: Early model TJ’s equipped with AX15’s with square shifter shaft do not have a
correction bracket supplied. In a few applications there may be some shifter interference
with the console. If this happens than it will be necessary to physically bend shift lever
(lever with shift knob attached) until interference has been deleted.
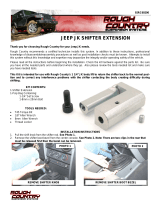
5 Speed transmissions. (Round correction bracket)
Remove shifter boot to expose shifter arm. Remove shifter arm from transmission shifter
shaft by loosing top bolt. Install correction bracket with small shaft facing instrument
panel. Apply a small amount of lock tight to Allen head screw and tighten correction
bracket to transmission shifter shaft. Reinstall shifter arm onto correction bracket and
retighten shifter arm Allen head screw and top bolt onto correction bracket. Before
installing shift boot run transmission through gears to check for clearance issues. Adjust
if needed. Reinstall shift boot.
6 Speed transmission (2005-2006 TJ ) Billet aluminum correction bracket.
Remove shifter boot to expose shifter arm. Remove shifter arm from transmission shifter
shaft by loosing top bolt. Install billet correction bracket with long section facing towards
instrument panel (see drawing).
Note: in some cases there could be a very tight fitment of the correction bracket to shifter
shaft. The use of WD40 to shaft should help with installation if tight. A rubber mallet
should be used to insure the correction bracket is seated fully into the shifter shaft. Add
threadlock to the Allen head screw and tighten. Reinstall bolt to top of correction bracket.
Insert extension shaft into correction bracket. Add threadlock to Allen head screw and
tighten securely making sure that notched side of riser is facing towards the drivers seat
(see drawing). Reinstall factory shifter arm and reinstall keeper bolt. Add threadlock to
Allen head screw and tighten securely. Before installing shift boot run transmission
through gears to check for clearance issues. Adjust if needed. Reinstall shift boot.
/


