Page is loading ...

Copyright © 2018 Omix-Ada®, Inc.
460 HORIZON DR. SUITE 100 | SUWANEE, GA 30024 | PHONE: 770-614-6101 | FAX: 770-614-6069 | [email protected]
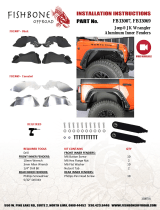
Aluminum Inner Fender Liners, Wrangler JK
Page 1/4
Part #11615.07
OMIX-ADA® TECHNICAL SUPPORT
PHONE: M-F 8am - 5pm EST 1-800-449-6649 | EMAIL: [email protected]
FOR WARRANTY INFORMATION VISIT: www.Omix-Ada.com
1. Front Right Fender Liner (1)
2. Front Left Fender Liner (1)
3. Rear Right Fender Liner (1)
4. Rear Left Fender Liner (1)
5. M5 Button Head Bolts (4)
6. M5 Lock Nuts (4)
7. Self Tapping Screw (4)
Components
Scan here or enter this
URL address to view.
https://www.youtube.com/
watch?v=ObU5gt28gQY
Watch This Install

Copyright © 2018 Omix-Ada®, Inc.
460 HORIZON DR. SUITE 100 | SUWANEE, GA 30024 | PHONE: 770-614-6101 | FAX: 770-614-6069 | [email protected]
Aluminum Inner Fender Liners, Wrangler JK
Page 2/4
2. Remove body clips that attach the inner fender
to the body. Use special removal tool to pry out.
1. To remove plastic front fender liner rst untread
hardware to underside of front inner fender well.
Use 10mm socket to remove the 5 bolts. Keep
hardware to install aluminum panel.
3. At this point the inner fender is ready to remove.
Now if your replacing OE plastic fender with
aftermarket versions you’ll pull the fender away
from the body of the Jeep. Remember to unplug
the marker light from the harness.
If you choose to retain the OE plastic fender then
you’ll need to cut and trim the inner fender from
the OE fender to keep the fender attached.

Copyright © 2018 Omix-Ada®, Inc.
460 HORIZON DR. SUITE 100 | SUWANEE, GA 30024 | PHONE: 770-614-6101 | FAX: 770-614-6069 | [email protected]
Aluminum Inner Fender Liners, Wrangler JK
Page 3/4
5. Use the OE hardware removed from step one
to attach the inner fender to the Jeep. Place
inner fender into position, thread the two bolts at
the upper center of the panel, they thread up.
Next thread the bolt near the front of the panel, it
threads from the side. This bolt threads into a spring
clip so make sure the clip is attached to the Jeep
and is positioned correctly. At this time just hand
tighten these three bolts.
4. Before installing the inner to the Jeep you must
pre install the two piece panel. There is a front and
rear panel, place the front panel on top of the rear
panel and attached with provided hardware. The
rear panel has threaded inserts that the hardware
tightens to.
6. Now tighten these three bolts starting with the
two upper bolts. Start here so it draws the panel
up into position. DO NOT use power or air tools to
avoid striping hardware or damaging panel.

Copyright © 2018 Omix-Ada®, Inc.
460 HORIZON DR. SUITE 100 | SUWANEE, GA 30024 | PHONE: 770-614-6101 | FAX: 770-614-6069 | [email protected]
Aluminum Inner Fender Liners, Wrangler JK
Page 4/4
8. Now attached the rear self tapping screw to the
Jeep body. That completes install.
7. Now use a power drill to drive the self tapping
screw into the radiator core support. If the self
tapping screw struggles to cut then drill a pilot hole
to help assist it.
/