Page is loading ...

You will immediately receive a welcome
email from [email protected] with
some helpful information. Please mark
the yosmart.com domain as safe, to
ensure you receive important messages
in the future.
Log in to the app using your new
username and password.
The app opens to the Favorite screen.
This is where your favorite devices and
scenes will be shown. You can organize
your devices by room, in the Rooms
screen, later.
Refer to the full user guide and online
support for instructions on the use of the
YoLink app.
Quick Start Guide
YS8015-UC
X3
Outdoor Temperature &
Humidity Sensor
Revision Aug. 01, 2023
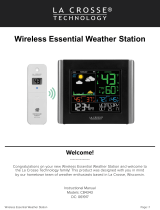
Welcome!
A
Thank you for purchasing YoLink
products! We appreciate you trusting
YoLink for your smart home &
automation needs. Your 100%
satisfaction is our goal. If you experience
any problems with your installation, with
our products or if you have any
questions that this manual does not
answer, please contact us right away.
See the Contact Us section for more info.
Thank you!
Eric Vanzo
Customer Experience Manager
Pour des instructions en
français, scannez les codes
QR dans la section suivante.
Para obtener instrucciones en
español, escanee los códigos
QR en la siguiente sección.
Fr
Es
The following icons are used in this guide to
convey specific types of information:
Very important information
(can save you time!)
Good to know info but may not apply
to you
Add Your Sensor to the
App
H
1. Tap Add Device (if shown) or tap the
scanner icon:
Scanner icon
2. Approve access to your phone’s
camera, if requested. A viewfinder will be
shown on the app.
Before You Begin
B
Installation & User
Guide
Product Support
Support produit
Soporte de producto
You can also find all guides and
additional resources, such as videos and
troubleshooting instructions, on the X3
Outdoor Temperature & Humidity Sensor
Product Support page by scanning the
QR code below or by visiting:
https://www.yosmart.com/support/
YS8015-UC
Please note: this is a quick start guide,
intended to get you started on the
installation of your X3 Outdoor
Temperature & Humidity Sensor.
Download the full Installation & User
Guide by scanning this QR code:
Your X3 Outdoor Temperature &
Humidity Sensor connects to the internet
via a YoLink hub (SpeakerHub or the
original YoLink Hub), and it does not
connect directly to your WiFi or local
network. In order for remote access to
the device from the app, and for full
functionality, a hub is required. This
guide assumes the YoLink app has been
installed on your smartphone, and a
YoLink hub is installed and online (or
your location, apartment, condo,
etcetera, is already served by a YoLink
wireless network).
You may require these items:
Medium Phillips
Screwdriver
Hammer
Required Items
D
Nail or Self
Tapping Screws
Double-sided
Mounting Tape
Get to Know X3 Outdoor
Temperature & Humidity
Sensor
E
Get to Know X3 Outdoor
Temperature & Humidity
Sensor, Continued
E
In the Box
C
X3 Outdoor
Temperature &
Humidity Sensor
Metal Plate Quick Start Guide
2 x AA Lithium
Batteries
(Pre-installed)
Battery Level
Humidity
Signal Strength
C/F (Centigrade /
Fahrenheit)
Set Button
Temperature
Status LED
Battery
compartment
cover
Battery access &
mounting cover
LED Behaviors
Blinking Red Once, then Green
Once
Device Start-Up
Blinking Red And Green
Alternately
Restoring to Factory Defaults
Blinking Green
Connecting to Cloud
or Functioning Normally
Slow Blinking Green
Updating
Blinking Red Once
Device Alerts
Fast Blinking Red Every 30
Seconds
Low Battery; Replace Batteries
Soon
Install the App, Continued
F
Power Up
G
Open the app and tap Sign up for an
account. You will be required to provide
a username and a password. Follow the
instructions, to set up a new account.
Allow notifications, when prompted.
Install the App
F
If you are new to YoLink, please install
the app on your phone or tablet, if you
have not already. Otherwise, please
proceed to the next section.
Scan the appropriate QR code below or
find the “YoLink app” on the appropriate
app store.
Apple phone/tablet
iOS 9.0 or higher
Android phone/
tablet 4.4 or higher
Press the SET
button briefly, long
enough for the LED
to illuminate,
blinking red then
green

3. Hold the phone over the QR code so
that the code appears in the viewfinder.If
successful, the Add Device screen will be
displayed.
4. Follow the instructions to add your X3
Outdoor Temperature & Humidity Sensor
to the app.
Contact Us
K
We are here for you, if you ever need any
assistance installing, setting up or using
a YoLink app or product!
Need help? For fastest service, please
email us 24/7 at [email protected]
Or call us at 831-292-4831 (US phone
support hours: Monday - Friday, 9AM to
5PM Pacific)
You can also find additional support and
ways to contact us at:
www.yosmart.com/support-and-service
Or scan the QR code:
Finally, if you have any feedback or
suggestions for us, please email us at
Thank you for trusting YoLink!
Eric Vanzo
Customer Experience Manager
Support
Home Page
15375 Barranca Parkway
Ste. J-107 | Irvine, California 92618
© 2023 YOSMART, INC IRVINE,
CALIFORNIA
Add Your Sensor to the
App, Continued
HInstallation
Considerations, Cont.
H
2. Hang the sensor from a nail, screw, or
hook, using one or all of the three
mounting holes on the rear of the sensor
(mounting hardware not included).
3. Secure the sensor to a wall or vertical
surface using the magnet feature with
the included metal plate, or by placing it
on a suitable surface (that responds to a
magnet) without the included plate
4. Secure the sensor to a wall or vertical
surface using alternative fasteners or
adhesive methods, such as double-sided
mounting tape or Velcro (not included).
The X3 Outdoor Temperature & Humidity
Sensor can be installed or mounted in at
least one of four ways:
1. Lay the sensor flat on any stable
surface, or placed within an enclosure
Location & Mounting Considerations
The X3 Outdoor Temperature & Humidity
Sensor is designed to be easy to install,
and portable, but before installing the
sensor, the following items should be
considered:
While the X3 Outdoor Temperature &
Humidity Sensor is designed for
outdoor use, do not use the sensor
outside of the environmental
temperature range, per the product
specifications (refer to the product’s
support page).
The sensor body is designed for
outdoor use, but do not allow it to be
submerged.
Do not use the sensor near sources
of extreme hot or cold, as this can
affect accurate ambient temperature
readings, and in some cases may
damage the sensor.
As with most electronic devices,
even if intended for outdoor use, the
useful life of the device can be
extended if it is protected from the
elements. Direct intense sunlight,
rain and snow over an extended
period can discolor or damage the
device. Consider placing the sensor
where it has overhead cover and/or
protection from the elements.
Place the sensor where it will be out
of reach of children.
Installation
Considerations
I
Install the Sensor
JInstall the Sensor,
Continued
J
Magnet-mounting method
1. The sensor has a built-in magnet in
the back, to allow for mounting it directly
to a suitable* metal surface, or the
included metal mounting plate can be
used for this purpose. After selecting the
sensor location, remove the plastic
backing from the metal plate, to expose
the mounting tape's adhesive side. Place
the plate at the desired location, tape
side down, and press firmly for at least
five seconds. (The surface should first
be clean and free of dirt, grease/grime, or
any substance that will impact the tape's
adhesion to the surface. It is suggested
to clean the surface accordingly, such as
with rubbing alcohol, and dry it well,
before this step).
2. Check that the sensor is secure, and
does not move easily. If the sensor does
not seem to be secure, please mount
your sensor per the wall-mounting
method steps.
*Suitable surfaces are metallic surfaces
responsive to magnets, that allow for a
good bond with the sensor's built-in
magnet. Uneven, irregular, textured,
grooved, etcetera, surfaces may not be
suitable. Surfaces subject to vibration
and movement are not likely to be
acceptable. Verify the surface is suitable
and the sensor is secure, as physical
damage to the sensor is not covered by
the warranty.
Other mounting methods
Follow the manufacturer instructions if
mounting your sensor by alternative
methods, such as with Velcro or
double-sided mounting tape. If using an
adhesive method, is it recommended to
clean and dry the surface, first. Consider
the possibilty of replacing or relocating
the sensor later, when choosing
alternative mounting methods.
Prepare to use your sensor
Allow your sensor around an hour to
stabilize and display the correct readings
on the LCD display and in the app. If you
believe your sensor readings are
inaccurate, first consult the calibration
section of the full installation and user
guide and/or app.
Refer to the full Installation & User Guide
for additional information and to
complete the set-up and settings for
your sensor.
4. Hang the sensor from this topmost
screw/nail/hook. If you will not utilize
the second and third mounting points,
ensure the sensor is secure, and proceed
to Prepare to use your sensor.
5. If not already performed in a previous
step, verify the sensor is level prior to
pre-drilling or inserting holes for the
lower mounting points. Insert one or
both screws through the lower mounting
holes, tightening them and securing the
sensor to the wall.
6. Replace the access cover by pushing
it back into place, after aligning the tab
on each end with the matching slot in
the sensor. Proceed to Prepare to use
your sensor.
3. Your mounting hardware (nails,
screws, hooks, etc.) will vary. If using
wall anchors, install the anchor(s) at this
time, per the wall anchor manufacturer's
instructions and/or per appropriate
method for your application. Insert the
topmost nail, screw, or hook, in the wall,
leaving a gap between the nail/screw
head and the surface, as shown.
2. If desired, mark or otherwise identify
the exact position of your sensor on the
wall, including one or all of the mounting
points (keyhole at top, two screw holes
at bottom). Use a level tool to ensure
your sensor will be level, if desired.
Insert the tip of a slotted screwdriver and
then gently twist it to pry off the battery
access cover
Wall-mounting method
1. The sensor has a standard "keyhole"
notch on the rear, at the top. This allows
for hanging the sensor from a nail or
screw. Additionally, there are two more
mounting holes at the bottom of the
sensor. The use of the second and third
holes will result in a much more secure
mounting method. These holes are
hidden behind the removeable access
cover. This cover affords protection
against tampering and device removal
and their use is highly recommended.
Refer to the figure below for instructions
on how to remove the cover from the
bottom of the sensor.
about 1/8th inch or 3 mm
/