M8 x 76 mm x 8
M6 x 15 mm x 8
M6 mm x 8
Φ18 x 1.5 mm x 8
6
ASSEMBLY INSTRUCTIONS
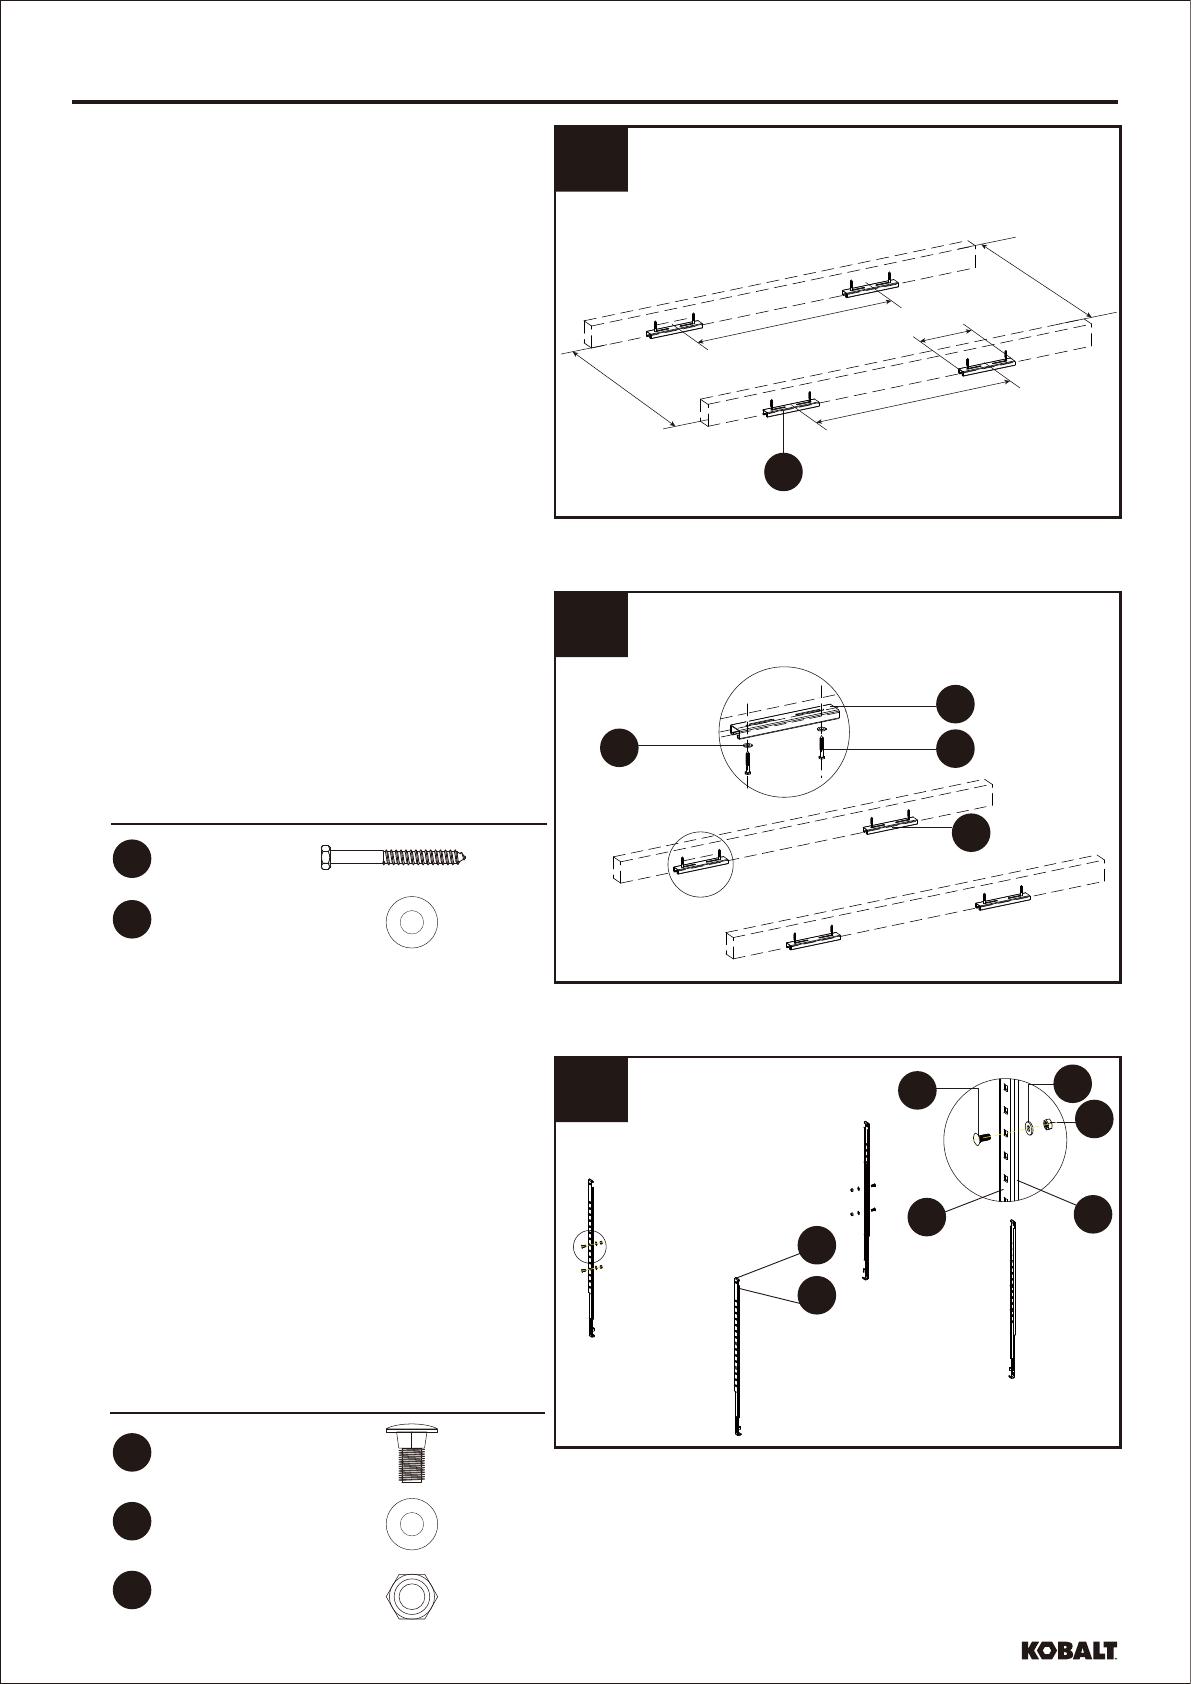
1
1. In the area where installation will
occur, locate the wood ceiling joists
(with stud finder if necessary) and
determine the direction the joints run.
Measure 32-48 in. center to center
and 48 in. and mark holes on ceiling.
Using a 3/16 in. drill bit (not inclued),
pre-drill holes for Sliding Rail (A).
2
2. Using screws (AA) and Washer (BB) ,
secure each Sliding Rail (A) to the
ceiling joints.Before tightening, ensure
the Rail faces the center. Ensure the
screw is tight and Rail is secure.
Against the ceiling. Do not overtighten
the screw to ensure optimal
performance.
3
3. Adjust the height for 4 pre-assembled
extension arms (C & D). Loosen the
bolts (CC), Nuts (EE) and washers
(DD) until pre-assembled extension
arms are apart. Determine the length
of the extension arms, attach the top
extension arms (C) to bottom
extension arms (D) using bolts (CC),
nuts (EE) and washers (DD). Ensure
the head of the bolts (CC) are on the
outside of the Beam.
NOTE: Screw space is 3 in – 9 in on
the slide rail
Hardware Used
Hardware Used
CC
AA
A
DD
EE
A
A
DD
EE
D
C
C
CC
D
AA BB
Φ18 x 1.5 mm x 8
BB
Lowes.com
48 in. 32-48 in.
48 in.
3-9 in.
32-48 in.