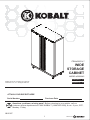
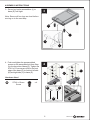
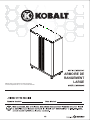
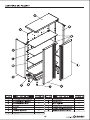
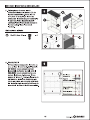
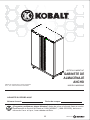
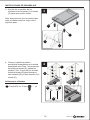
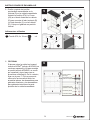
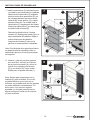
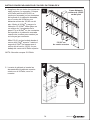
Kobalt 56645 is a wide storage cabinet that offers versatile storage solutions for your garage or workshop. With its sturdy construction and ample storage capacity, this cabinet is designed to keep your tools, equipment, and other items organized and easily accessible. The cabinet features adjustable shelves, allowing you to customize the storage space to accommodate items of various sizes and shapes. The heavy-duty steel construction ensures durability and longevity, making it suitable for demanding environments.
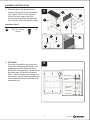
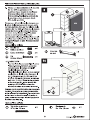
Kobalt 56645 is a wide storage cabinet that offers versatile storage solutions for your garage or workshop. With its sturdy construction and ample storage capacity, this cabinet is designed to keep your tools, equipment, and other items organized and easily accessible. The cabinet features adjustable shelves, allowing you to customize the storage space to accommodate items of various sizes and shapes. The heavy-duty steel construction ensures durability and longevity, making it suitable for demanding environments.


-
 1
1
-
 2
2
-
 3
3
-
 4
4
-
 5
5
-
 6
6
-
 7
7
-
 8
8
-
 9
9
-
 10
10
-
 11
11
-
 12
12
-
 13
13
-
 14
14
-
 15
15
-
 16
16
-
 17
17
-
 18
18
-
 19
19
-
 20
20
-
 21
21
-
 22
22
-
 23
23
-
 24
24
-
 25
25
-
 26
26
-
 27
27
-
 28
28
-
 29
29
-
 30
30
-
 31
31
-
 32
32
-
 33
33
-
 34
34
-
 35
35
-
 36
36


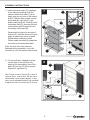
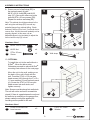
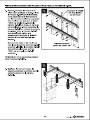
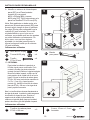
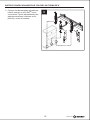
Kobalt 56645 is a wide storage cabinet that offers versatile storage solutions for your garage or workshop. With its sturdy construction and ample storage capacity, this cabinet is designed to keep your tools, equipment, and other items organized and easily accessible. The cabinet features adjustable shelves, allowing you to customize the storage space to accommodate items of various sizes and shapes. The heavy-duty steel construction ensures durability and longevity, making it suitable for demanding environments.
Ask a question and I''ll find the answer in the document
Finding information in a document is now easier with AI
in other languages
- español: Kobalt 56645 Manual de usuario
Related papers
Other documents
-
aspenhome I287-316 Assembly Instructions
-
-
-
-
-
-
-
-
aspenhome I629-297-PRW Assembly Instructions
-