Page is loading ...

Please read these instructions carefully before using this product, and save this manual for future use.
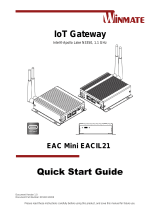
IP67 IoT Gateway
Intel® Apollo Lake N3350, 1.1 GHz
EAC Mini EACIL67
User Manual
Document Version 1.0
Document Part Number: 91521110102V

2
EAC Mini EACIL67 IoT Gateway User Manual
Contents
Preface ..................................................................................................................................... 4
About This User Manual ........................................................................................................ 8
Chapter 1: Introduction ........................................................................................................... 9
1.1 Product Overview .......................................................................................................... 10
1.2 Product Features........................................................................................................... 10
1.3 Optional Configuration .................................................................................................. 10
1.4 Hardware Specifications................................................................................................ 11
1.5 Package Contents ......................................................................................................... 12
1.6 Appearance ................................................................................................................... 13
1.7 Dimensions ................................................................................................................... 14
Chapter 2: Hardware Installation .......................................................................................... 15
2.1 Connectors.................................................................................................................... 16
2.1.1 Power Connector ................................................................................................ 16
2.1.2 USB 2.0 Type-A Connector ................................................................................. 16
2.1.3 Giga LAN Connector ........................................................................................... 16
2.1.4 USB 3.1 Type-C Connector ................................................................................ 17
2.2 Hardware Installation .................................................................................................... 18
2.2.1 mSATA Installation ............................................................................................. 18
2.2.2 External Antenna Installation .............................................................................. 18
2.3 Connecting Power ......................................................................................................... 19
Chapter 3: Mounting .............................................................................................................. 20
3.1 Wall/ Desk Mount .......................................................................................................... 21
3.2 VESA Mount ................................................................................................................. 22
Chapter 4: Insyde UEFI BIOS Setup ..................................................................................... 23
4.1 How and When to Use BIOS Setup ............................................................................... 24
4.2 BIOS Functions ............................................................................................................. 25
4.2.1 Main Menu .......................................................................................................... 25
4.2.2 Advanced Settings .............................................................................................. 26
4.2.3 Security Menu ..................................................................................................... 43
4.2.4 Power Menu ........................................................................................................ 44
4.2.5 Boot Menu .......................................................................................................... 47
4.2.6 Exit Menu ............................................................................................................ 49
4.3 Using Recovery Wizard to Restore Computer ............................................................... 50
4.4 How to Enable Watchdog .............................................................................................. 51
Chapter 5: Driver Installation ................................................................................................ 52
5.1 Chipset Driver Installation ............................................................................................. 53
5.2 Graphic Driver Installation ............................................................................................. 55

3
Preface
5.3 TXE (Trusted Execution Engine) Driver Installation ....................................................... 58
5.4 Serial IO Driver Installation ............................................................................................ 60
5.5 LAN Driver Installation .................................................................................................. 63
Chapter 6: Technical Support ............................................................................................... 66
6.1 Software Developer Support ......................................................................................... 67
6.2 Problem Report Form .................................................................................................... 67
Appendix ................................................................................................................................ 68
Appendix A: Order Information ............................................................................................ 69

4
EAC Mini EACIL67 IoT Gateway User Manual
Preface
Copyright Notice
No part of this document may be reproduced, copied, translated, or transmitted in any form or by any
means, electronic or mechanical, for any purpose, without the prior written permission of the original
manufacturer.
Trademark Acknowledgement
Brand and product names are trademarks or registered trademarks of their respective owners.
Disclaimer
We reserve the right to make changes, without notice, to any product, including circuits and/or software
described or contained in this manual in order to improve design and/or performance. We assume no
responsibility or liability for the use of the described product(s) conveys no license or title under any
patent, copyright, or masks work rights to these products, and make no representations or warranties
that these products are free from patent, copyright, or mask work right infringement, unless otherwise
specified. Applications that are described in this manual are for illustration purposes only. We make no
representation or guarantee that such application will be suitable for the specified use without further
testing or modification.
Warranty
Our warranty guarantees that each of its products will be free from material and workmanship defects
for a period of one year from the invoice date. If the customer discovers a defect, we will, at his/her
option, repair or replace the defective product at no charge to the customer, provide it is returned during
the warranty period of one year, with transportation charges prepaid. The returned product must be
properly packaged in its original packaging to obtain warranty service. If the serial number and the
product shipping data differ by over 30 days, the in-warranty service will be made according to the
shipping date. In the serial numbers the third and fourth two digits give the year of manufacture, and the
fifth digit means the month (e. g., with A for October, B for November and C for December).
For example, the serial number 1W17Axxxxxxxx means October of year 2017.
Customer Service
We provide a service guide for any problem by the following steps: First, visit the website of our
distributor to find the update information about the product. Second, contact with your distributor, sales
representative, or our customer service center for technical support if you need additional assistance.
You may need the following information ready before you call:
Product serial number
Software (OS, version, application software, etc.)
Detailed description of the problem
The exact wording of error messages
In addition, free technical support is available from our engineers every business day. We are always
ready to give advice on application requirements or specific information on the installation and
operation of any of our products.

5
Preface
Advisory Conventions
Four types of advisories are used throughout the user manual to provide helpful information or to alert you
to the potential for hardware damage or personal injury. These are Notes, Important, Cautions, and
Warnings. The following is an example of each type of advisory.
Note:
A note is used to emphasize helpful information
Important:
An important note indicates information that is important for you to know.
Caution
A Caution alert indicates potential damage to hardware and explains how to avoid the
potential problem.
Warning!
An Electrical Shock Warning indicates the potential harm from electrical hazards and how
to avoid the potential problem.
Safety Information
Warning!
Always completely disconnect the power cord from your chassis whenever you work with
the hardware. Do not make connections while the power is on. Sensitive electronic
components can be damaged by sudden power surges. Only experienced electronics
personnel should open the PC chassis.
Warning!
During heavy loading in 50°C environment, the top side of the EAC Mini may be over
70°C. Please do not touch these parts with your bare hands.
Caution
Always ground yourself to remove any static charge before touching the CPU card.
Modern electronic devices are very sensitive to static electric charges. As a safety
precaution, use a grounding wrist strap at all times. Place all electronic components in a
static-dissipative surface or static-shielded bag when they are not in the chassis.
Alternating Current
The Protective Conductor Terminal (Earth Ground) symbol indicates the potential risk of
serious electrical shock due to improper grounding.

6
EAC Mini EACIL67 IoT Gateway User Manual
Safety Precautions
For your safety carefully read all the safety instructions before using the device. All cautions and
warnings on the equipment should be noted. Keep this user manual for future reference.
Caution
Do not cover the openings!
*Let service personnel to check the equipment in case any of the following problems
appear:
o The power cord or plug is damaged.
o Liquid has penetrated into the equipment.
o The equipment has been exposed to moisture.
o The equipment does not work well or you cannot get it to work according to the
user manual.
o The equipment has been dropped and damaged.
o The equipment has obvious signs of breakage.
Do not leave this equipment in an uncontrolled environment where the storage temperature is
below -20°C (-4°F) or above 60°C (140°F). It may damage the equipment.
Caution
Use the recommended mounting apparatus to avoid risk of injury.
Warning!
Only use the connection cords that come with the product. When in doubt, please
contact the manufacturer.
Warning!
Always ground yourself against electrostatic damage to the device.

7
Preface
Important Information
Federal Communications Commission Radio Frequency Interface Statement
This device complies with part 15 FCC rules.
equipment has been tested and found to comply with the limits for a class "B" digital device, pursuant to
part 15 of the FCC rules. These limits are designed to provide reasonable protection against harmful
interference when the equipment is operated in a commercial environment. This equipment generates,
uses, and can radiate radio frequency energy and, if not installed and used in accordance with the
instruction manual, may cause harmful interference to radio communications. Operation of this equipment
in a residential area is likely to cause harmful interference in which case the user will be required to correct
the interference at him own expense.
European Union
This equipment is in conformity with the requirement of the following EU legislations and harmonized
standards. Product also complies with the Council directions.
Electromagnetic Compatibility Directive (2014/30/EU)
EN55024: 2010+A1: 2015
o IEC61000-4-2: 2009
o IEC61000-4-3: 2006+A1: 2007+A2: 2010
o IEC61000-4-4: 2012
o IEC61000-4-5: 2014
o IEC61000-4-6: 2014
o IEC61000-4-8: 2010
o IEC61000-4-11: 2004
EN 55032: 2015+AC: 2016
EN61000-3-2:2014
EN61000-3-3:2013
Low Voltage Directive (2014/35/EU)
EN 60950-1:2006/A11:2009/A1:2010/A12:2011/ A2:2013
Operation is subject to the following two conditions:
This device may not cause harmful interference.
This device must accept any interference received including
interference that may cause undesired operation.

8
EAC Mini EACIL67 IoT Gateway User Manual
About This User Manual
This User Manual provides information about using the Winmate® EAC Mini EACIL67 IoT Gateway.
The documentation set for the Winmate® EAC Mini EACIL67 IoT Gateway provides information for specific
user needs, and includes:
EAC Mini EACIL67 Quick Start Guide - describes how to get the box computer up and running.
EAC Mini EACIL67 User Manual – contains detailed description on how to use the display, its
components and features.
Note:
Some pictures in this guide are samples and can differ from actual product.
Revision History
Version
Date
Note
1.0
16-Aug-2018
Initial document release

9
Chapter 1: Introduction
Chapter 1: Introduction
This chapter provides the EAC Mini EACIL67 IoT Gateway
product overview, describes its features and hardware
specifications.

10
EAC Mini EACIL67 IoT Gateway User Manual
1.1 Product Overview
Congratulations on purchasing Winmate® EAC Mini EACIL67 IoT Gateway
The EAC Mini EACIL67 is a compact industrial IoT gateway with low power consuming Intel® Apollo Lake
N3350 processor and full IP67 design. Wireless connectivity and all necessary connectors allow the EAC
mini (EACIL67) to send data from manufacturing facilities directly to cloud server. Compact size and full
IP67 protection from dust and against the effects of immersion in water make EAC mini suitable for IoT,
smart factory and machine automation applications both indoor and outdoor.
1.2 Product Features
Winmate EAC Min EACIL67 IoT Gateway offers the following features:
Intel® Apollo Lake N3350, 1.1 GHz
Fanless cooling system
Compact size 100 x 115 x 30 mm (w/o mounting bracket)
Full IP67
USB Type-C Port
Various mounting options: desk, wall, VESA
Suitable for smart factory and outdoor applications
1.3 Optional Configuration
Optional Storage: Up to 1T GB mSATA SSD
Optional Mounting: VESA Mount

11
Chapter 1: Introduction
1.4 Hardware Specifications
Model Name
EACIL67
System
Specification
CPU
Intel® Apollo Lake N3350 1.1 GHz
Graphics
Engine
Intel® HD Graphics
BIOS
Insyde UEFI
Watchdog Timer
Programmable 256 levels, timer interval 1 to 255 sec.
Technology
4GB LPDDR3 1866MHz
Storage
eMMC
Onboard 64 GB
mSATA
Up to 1T Gb (Optional)
Expansion
mPCIe
1 x Full-size mPCIe slot
External I/O
USB
1 x USB2.0
1 x USB Type-C [Alt Mode] :
- Display Port A/V output
- USB data
- Provides up to 10W (5V/2A) Power
Ethernet
2 x Giga LAN
Power
Management
Power Supply
9V to 36V DC, M12 type connector
Mechanical
Specification
Dimensions
100 (W) x 115 (H) x 30 (D) mm
Weight
1 kg
Mounting
Desk Mount (Default), Wall Mount (Default), VESA Mount
(Optional)
Cooling System
Fanless
Enclosure
Metal Housing
Environment
Operating
Temp.
-20~60° C
Storage Temp.
-30~70° C
Operating
Humidity
10~90% RH
IP Rating
IP67
Certificate
EMC & Safety
CE, FCC
Operating
System
(Optional)
OS
Windows® 10 IoT Enterprise
Ubuntu 16.04

12
EAC Mini EACIL67 IoT Gateway User Manual
1.5 Package Contents
Carefully remove the box and unpack EAC Mini EACIL67 IoT Gateway. Please check if all the items listed
below are inside your package. If any of these items are missing or damaged contact us immediately.
Standard factory shipment list:
EAC Mini EACIL67
IoT Gateway
Quick Start Guide
(Hardcopy)
Driver CD & User
Manual
(Digital Version)
M12 Power Cable
Varies by product
specifications
P/N: 91521110102T
P/N: 91711110100V
P/N: 94JL020120K0
Optional accessories based on your order:
IP67 USB Type-C
Cable, 2 m
IP67 USB Type-A
Cable, 2 m
IP67 LAN
Cable, 2 m
VESA Mount
Kit
P/N: 9480240240K2
P/N: 9487048040P1
P/N: 94I0080080KF
P/N: 98K000A000BJ

13
Chapter 1: Introduction
1.6 Appearance
This section includes front and rear side I/O ports location of the EACIL67 IoT Gateway.
Front Side
Rear Side

14
EAC Mini EACIL67 IoT Gateway User Manual
1.7 Dimensions
All dimensions shown in mm (millimeters).

15
Chapter 2: Hardware Installation
Chapter 2: Hardware Installation
This chapter provides information on how to use external I/O and the
installation of EAC Mini EACIL67 IoT Gateway hardware.

16
EAC Mini EACIL67 IoT Gateway User Manual
2.1 Connectors
The following sections give you information about EAC Mini EACIL67 IoT Gateway standard connectors
and pin assignments.
2.1.1 Power Connector
EAC Mini EACIL67 has 3 pin M12 type power input connector that accepts 9 V DC to 36 V DC voltages.
Use power cable supplied with EACIP67 to connect the EACIP67 to the source of power.
Power Connector Pin Assignments
2.1.2 USB 2.0 Type-A Connector
EAC Mini EACIL67 has one M12 type USB 2.0 connector. Use waterproof cable to connect EACIL67 to
external devices such as mouse or keyboard.
USB 2.0 Type-A Connector Pin Assignments
2.1.3 Giga LAN Connector
EAC Mini EACIL67 has two M12 type Giga LAN connectors located in front and rear side. Use waterproof
cable to connect EACIP67 to Ethernet.
Giga LAN Connector Pin Assignments
Pin
Signal Name
Pin
Signal Name
1
VCC
7
GND
2
VCC
8
NC
3
VCC
9
NC
4
GND
10
NC
5
GND
11
Reset
6
GND
12
Clear CMOS
Pin
Signal Name
1
VCC
2
DM
3
DP
4
GND
Pin
Signal Name
1
TMDI0+
2
TMDI0-
3
TMDI1+
4
TMDI2+
5
TMDI2-
6
TMDI1-
7
TMDI03+
8
TMDI3-

17
Chapter 2: Hardware Installation
2.1.4 USB 3.1 Type-C Connector
EAC Mini EACIL67 has one USB 3.1 Type-C connector that works in Alt Mode and provides Display Port
A/V output, USB data transfer and provides up to 10W (5V/ 2A) power. Use waterproof cable to connect
EACIL67 to external devices such as external PC, mouse or keyboard.
Important:
The ALT mode display signal will have a picture after entering the OS.
USB 3.1 Type C Connector Pin Assignments
Pin
Signal Name
Pin
Signal Name
A1
GND
B1
GND
A2
TX1+
B2
TX2+
A3
TX1-
B3
TX2-
A4
VBUS
B4
VBUS
A5
CC1
B5
CC2
A6
D+
B6
D+
A7
D-
B7
D-
A8
SUB1
B8
SUB2
A9
VBUS
B9
VBUS
A10
RX2-
B10
RX1-
A11
RX2+
B11
RX1+
A12
GND
B12
GND

18
EAC Mini EACIL67 IoT Gateway User Manual
2.2 Hardware Installation
This chapter describes how to install optional expansion module in the system.
Caution
Always remove the power cord before installing the hardware.
2.2.1 mSATA Installation
To insert mSATA:
1. Unscrew the four screws on the bottom cover.
2. Plug in mSATA card with into the mPCIe slot.
3. Screw the two screws on board to fix mSATA.
4. Screw back the bottom cover.
2.2.2 External Antenna Installation
Notice that external antenna is an optional feature of the EAC Mini EACIL67. If you order EAC Mini
EACIL67 with Wi-Fi, SMA antenna comes pre-installed.
To install external SMA antenna:
1. Remove the rubber cap on the SMA connector before installing the antenna.
2. Align the antenna with the SMA connector located on the rear side of the EAC Mini and fasten it as
shown on the picture.
3. Adjust the position of external antenna for better signal.

19
Chapter 2: Hardware Installation
2.3 Connecting Power
The DC power supply connector of the EAC Mini IoT Gateway is on the front panel. The DC power input for
the EAC Mini allows a voltage input range from 9 V DC to 36 V DC.
Warning!
Ensure voltage and polarity is compliant with the DC input. Improper input voltage or
polarity can cause system damage.
Caution
When booting up at -20 deg. C environment, the computer will spend around 10 min
to warm up the internal components.
Connecting Power
Connect EAC Mini to 9-36V DC. The power source can either be from a power adapter or an in-house
power source.
Note:
If EAC Mini will start to open and go into Windows when you plug the power,
you can follow the BIOS setting.
State After G3: S0 state
For more BIOS settings, please refer to Ch. 4 of the User Manual.

20
EAC Mini EACIL67 IoT Gateway User Manual
Chapter 3: Mounting
The EAC Mini supports five types of mounting: wall and desk
mounting by default, and optional VESA mount solutions. You can
purchase mounting kit from Winmate as an optional accessory. This
chapter provides step-by-step mounting guide for all available
mounting options.
/