Page is loading ...

mm
OFF
ON/ZERO
HOLD
ADD
SUB
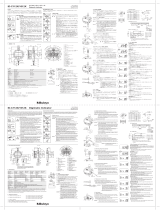
DIGITAL HEIGHT GAUGE
Model No.:VHS-30D/VHS-60D <combined>
INSTRUCTION MANUAL
Thank you for purchasing the Digital Height Gauge.
Please read this manual thoroughly before use for proper operation.
Scribe
Fine Adjust Carriage
Post
Fine Adjust Lock Screw
Clamp Lever
Base
Base Reference Surface
Crank Wheel
[OFF] Button
Battery Cover
LCD Display
[HOLD] Button
[ON/ZERO] Button
[ADD ] Button
[SUB ] Button
Scribe Clamp
Jaw
Scribe Clamp Screw
PART IDENTIFICATION
Measuring Surface
(w/ Carbide Tip)
ACCESSORIES
SR44 Silver Oxide Battery (For test)
Dial Indicator
Driver for Battery Cover
Dial Indicator Holder
Model: WTI-8038S
Indicator Mounting Arm
8mm Mounting Hole
Indicator Clamp Screw
6mm Mounting Hole
Dovetail
SR44
APPLICATIONS and FEATURES
Smooth operation of slide carriage using crank wheel.
Ideal for measuring and marking work for molds, jigs, and tooling.
Accessory arm for mounting 8mm or 6mm dial indicator.
Easy to ready digital display.
Origin can be set at any position.
Preset function.
HOLD function
.
Before using for the first time, please wipe off the corrosion
protectant with an oiled cloth.
This is a precision instrument, handle with care. Do not drop or
subject to excessive forces.
Please avoid damage to post. Do not scratch instrument, for
example by writing ID number.
Keep away from direct sunlight. Do not store instrument in
extreme temperatures.
When measuring using a dial indicator in place of scribe,
values for instrument error will vary from listed specifications.
How to Use Each Button
[ON/ZERO] Button
1
When power is OFF, press once to turn ON.
When power is ON, press once to set display to 0.00mm.
[OFF] Button
2
Press to turn OFF power.
[HOLD] Button
4
Press to freeze (hold) the reading, and the LCD will display the
HOLD icon.
[ADD ] , [SUB ] Buttons
3
Allows operator to change display reading to any value.
Press [ADD ] to increase value by 0.01mm, or [SUB ] to
decrease by 0.01mm. Press and hold to quickly increase or
decrease value.
Any number can be preset into instrument for a position using
these buttons.
NOTES

OFF
ON/ZERO
HOLD
ADD
SUB
OFF
ON/ZERO
HOLD
ADD
SUB
OFF
ON/ZERO
HOLD
ADD
SUB
OFF
ON/ZERO
HOLD
ADD
SUB
Example using dial indicator with measurement
read off the Height Gauge LCD display.
Scribe
Scribe Clamp Screw
Scribe Clamp Screw
Scribe
Scribe Clamp
Jaw
Jaw
Scribe Clamp
Scribe Clamp
Screw
Indicator Mounting Arm
Example with measurement read off the Dial
Indicator and LCD display of the Height Gauge.
INSTRUMENT ERROR WHEN USING ACCESSORY DIAL INDICATOR (WTI-8038S)
To measure the height from reference surface:
Place the Indicator Stylus on the reference surface, and set
the Indicator to 0.00mm.
Set the Height Gauge reading to 0.00mm. This is the
reference position.
Measuring Height.
Reposition the Dial Indicator Stylus to the surface to be
measured, and adjust the Height Gauge so that the Dial
Indicator reading is 0.00mm.
The LCD display of the Height Gauge now shows the height
relative to the reference surface.
For this method, the total error is the sum of the Height
Gauge Instrument Error (VHS-30D : 0.04mm,
VHS-60D : 0.05mm ) Dial Indicator repeatability
(0.003mm)
To measure the height from reference surface:
Place the Indicator Stylus on the reference surface, and set
the Indicator to 0.00mm.
Set the Height Gauge reading to 0.00mm. This is the
reference position.
Measuring Height.
Reposition the Dial Indicator Stylus to the surface to be
measured, and read the LCD display of the Height Gauge.
This value is 10.51mm
Read the scale of the Dial Indicator. This value is 0.10mm
The height relative to the reference surface is the sum, 10.51
0.1010.61mm
Make sure the sign (, ) of the measurement
from the Dial Indicator is same as sign for the
Height Gauge.
For this method, the total error is the sum of the Height
Gauge Instrument Error (VHS-30D: 0.04mm, VHS-60D:
0.05mm ) Dial Indicator Wide Range Error (0.013mm)2. Insert the Scribe to desired overhang and secure by
tightening the Scribe Clamp Screw.
Overhang Adjustment
Indicator Clamp
Screw
Dial Indicator
Workpiece
Surface Plate Surface Plate
Surface Plate Surface Plate
Workpiece
Reference Surface
Surface to Measure
Surface to Measure
Reference Surface
Dial Indicator
Digital Height Gauge
Stylus
Workpiece
Workpiece
Dial Indicator
Direction of
Measurement
Direction of
Measurement
Digital Height Gauge
Stylus
PLEASE NOTE
NOTE:
Digital Height Gauge
Max Measuring Height : VHS-30D300mm
VHS-60D600mm
Resolution 0.01mm
Instrument Error : VHS-30D0.04mm
VHS-60D0.05mm
Instrument error will vary when used with dial indicator;
Please refer to section: Instrument Error When Using
Accessory Dial Indicator (WTI-8038S)
Fine Adjustment Range : 10mm
Display : 5 Digit LCD
Approx. Weight : VHS-30D6.4kg
VHS-60D7.5kg
Power Supply : SR44 Silver Oxide Battery
Included Accessories : Dial Indicator (WTI-8038S)
Dial Indicator Holder
SR44 Silver Oxide Battery (For test)
Driver for Battery Cover
Dial Indicator WTI-8038S (Accessory)
Measurement Range : 00.8mm
Graduation : 0.01mm
Scale Type : 0400
Wide Range Error : 0.013mm
Retrace Error : 0.003mm
Repeatability : 0.003mm
Adjacent Error : 0.01mm
Measurement Force : Less than 0.5N
When using the Dial Indicator, make sure measuring element
(Stylus) is perpendicular to the direction of measurement. If
held at an angle, measurement will not be accurate.
When measuring using a Dial Indicator in place of the Scribe,
specified values for instrument error ( ) may not be
achieved.
VHS-30D : 0.04mm VHS-60D : 0.05m
SPECIFICATIONS
Direction of
Measurement
Direction of
Measurement
PREPARATION BEFORE USE
Inserting the Battery
1
1. Using the provided driver, remove the Battery Cover Screws.
2. Open the Battery cover by sliding in the direction of the
arrow ( ).
3. Insert the Battery with ( ) side facing outward.
4. Return the Battery Cover to it's original position.
5. Replace the Battery Cover Screws to secure the cover.
Only use SR44 Silver Oxide Battery.
Installing the Scribe
2
1. Loosen the Scribe Clamp Screw and insert onto Jaw.
Dial Indicator Holder
3
The Dial Indicator Holder is used to mount the accessory dial
indicator in place of the Scribe.
1. Loosen the Indicator Clamp Screw, insert the indicator shaft,
and secure by tightening the clamp screw.
2. Loosen the Scribe Clamp Screw and place the Clamp onto
the Jaw.
3. Insert the Indicator Mounting Arm into the Clamp, and
tighten Clamp Screw at the desired amount of overhang.
NOTE:

mm
OFF
ON/ZERO
HOLD
ADD
SUB
mm
OFF
ON/ZERO
ADD
SUB
HOLD
[ON/ZERO]
Button
Surface Plate
Scribe
(Figure : 1)
(Figure : 2)
Clamp Lever
Crank Wheel
When using the Crank
Wheel, please hold the
Base firmly with hand.
Crank
Wheel
Clamp
Lever
View from
alongside
display
Lock
Release
Lock
Base
Fine Adjust Carriage
Fine Adjust Lock Screw
Clamp Lever
Crank Wheel
Niigata seiki Co., Ltd.
6-15-22, Tsukanome, Sanjo, Niigata, Japan, 955-0055
Tel. : +81-256-31-5670 Fax. : +81-256-39-7730
MAIL:[email protected]
URL http://www.niigataseiki.co.jp
I248-K1 1806
SERVICE
If height gauge is not working properly, or if you have any
questions, please contact distributor or place of purchase.
Please note, manufacturer is unable to respond to inquires or
provide service directly. Please contact distributor or place of
purchase.
Q. Nothing is displayed, or the numbers are flashing.
A. The battery may be low. Please replace with new SR44
battery.
Q. With power on, the number on the LCD does not
change as the carriage is moved.
A. Please reset by removing battery for about 30sec., and
then replacing.
Q. Nothing happens when buttons are pressed.
A. Battery may not have good contact with terminals. Please
reset battery and confirm orientation with ( ) side
outward.
TROUBLESHOOTINGTAKING MEASUREMENTS
Absolute Measurement
1
Relative Measurement
2
1. Press the [ON/ZERO] Button to turn on power.
2. Release the Carriage by moving the Clamp Lever forward,
located next to the Crank Wheel. (Figure : 1)
3. Move the Scribe Measuring Surface to make good contact
with the Surface Plate using the Crank Wheel and the Fine
Adjust Feed Screw. (refer to Fine Adjust Feed Operation )
4. Press the [ON/ZERO] Button to set the LCD reading to
0.00mm.
5. Take a measurement by moving the Scribe to the surface to
be measured.
1. Press the [ON/ZERO] Button to turn on power.
2. Release the Carriage by moving the Clamp Lever forward.
3. Move the Scribe to the Reference Surface and press the
[ON/ZERO] Button to set the LCD reading to 0.00mm.
4. Moving the Scribe to the surface to be measured, and the
height relative to the reference surface will be displayed.
Fine Adjust Feed Operation
1. Release the Carriage by moving the Clamp Lever forward.
2. Tighten the Fine Adjust Lock Screw. (Figure : 2)
3. Turn the Fine Adjust Feed Screw for fine control of position.
Measuring Surface Reference Surface
Tighten
/


