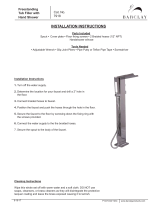
Installation Aerada 1000/1100 Series
Bradley Corporation • 215-1628 Rev. A; EN 08-201 5/21/08 11
Problem Possible Cause Solution
Water runs
continuously and
stops when object
present
Connector between
electronics module and
solenoid valve plug is
reversed
Plug connector properly
Water runs
continuously
Interfering object is in
monitoring range
Remove object from monitoring area
Remove and re-install shut-off screw. Do not disturb sensor scanning
procedure (wait until water fl ow stops and LED switches off)
Defective electronics module Replace electronics module (See “Replacement Parts”)
Improper sensor mode Change mode or reset sensor (See “Care and Maintenance”)
External water pressure too
high
Check external water pressure
Provide pressure between 20 - 125 psi
Solenoid valve inoperable Replace solenoid valve (See “Replacement Parts”)
Water fl ows although
shut-off screw is
removed
Electronics module is
inoperable
Replace electronics module (See “Replacement Parts”)
Water drops on infrared
window
Clean window with smooth cloth
Faucet turns on by
itself
Infrared window is dirty or
scratched
Clean window with smooth cloth
Input line pressure fl uctuates Install appropriate line pressure regulators
Faucet is leaking
water
Connections between
housing and braided hoses
are loose
Check O-rings
Replace O-rings when damaged or missing
Connection between braided
hose and inlet supply are
loose
Check rubber washers
Replace washers when damaged or missing
Connection between valve
body and solenoid valve is
loose
Check O-rings
Replace O-rings when damaged. Carefully reinstall solenoid valve and
do not overtighten.
Faucet drips, solenoid valve
does not close properly
Clean or replace solenoid valve (See “Replacement Parts”)
Temperature cannot
be adjusted properly
No, or too little hot or cold
water. Supply valves are not
fully opened
Fully open supply valves
Inlet water line fi lter is dirty or
blocked
Clean or replace fi lter (See “Care and Maintenance”)
Braided hose is kinked Eliminate braided hose kink
Backfl ow preventer in faucet
inlet is blocked
Unblock backfl ow preventer
Temperature of hot or cold
water supply is too low
Check inlet water temperature or inspect boiler
Hot water temperature not
suffi cient
Reverse hot water limiter (See “Care and Maintenance”)
Braided hoses are connected
improperly (cold to hot and
hot to cold)
Correct the connections