Page is loading ...

1
SLRF26SW/SLRF26SB
LED LIGHT
Specifications:
1. Power: 220-240V~ 50Hz.
2. Rated load: 32W
3. Lamp type: CREE COB LED 13W x 2 pcs, 2000 lm / 5000K
Lamp head:
The lamp head can turn 90° horizontally and 50° vertically allowing for optimum illumination.
Installation:
Warning: This product must be installed only by a qualified electrician. Installation must follow
local building codes as well as the instruction contained in this manual. Turn off power at circuit
breaker or fuse box, to make sure power is off before installation. If you have any doubts about
the installation procedure, please consult a professional mechanician.
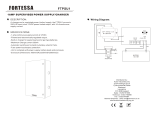
The product is to be mounted on wall (Figure 1). Ensure the product is screwed securely to the
wall.
Figure 1
90°
50°

2
Connection to the power supply:
1. Note: This
product
must be installed according to local Wiring Regulations and Code of
Practice.
2. Ensure the supply is disconnected at the distribution board before starting the electrical
wiring.
3. Study the wiring diagram below before making any electrical connections. Incorrect wiring of
the unit could destroy the
product
and will not be covered by the warranty.
4. Connect Brown wire from the supply circuit (incoming active/phase) to the active terminal (L).
5. Connect Blue wires (neutrals) from the supply circuit and output load to the Neutral
terminal (N).
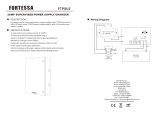
6. Plug the quick connector onto the terminal, as show in Figure 2.
Note: maximum cable size is 2 x 1.5mm².
←
BROWN
BLUE
220-240V
Figure 2
BLUE
BROWN
Trouble Shooting:
1. Unit will not function at all/Lights won’t come on
- Check wiring to make sure that you have correct AC power at the unit.
- Check the wiring from the unit to the source of power to make sure you have wired the unit
correctly.
- Check the ambient light control to see if it was set at your desired level.
- Check if LEDs are broken.
2. Maintenance and repair
- Do not attempt to repair as this could invalidate warranty or result in personal injury.
- Clean LED and outside casing with damp cloth.

3
Due to our policy of continuous improvement we reserve the right to change specification without
prior notice. Errors and omissions excepted. These instructions have been carefully checked prior
to publication. However, no responsibility can be accepted by Challenger for any misinterpretation
of these instructions.
Please contact details
CHALLENGER SECURITY PRODUCTS
10 Sandersons Way,
Blackpool, FY4 4NB
Tel: 01253 791888, Fax: 01253 791887
Email: [email protected]
Web: www.challenger.co.uk
RoHS
SLRF26S_Instructions Rev01
/


