Page is loading ...

1

2
»Dual Rate / Expo«
Fixed-wing model aircraft .......................................56
Model helicopter .....................................................58
»Phase Trim« (fi xed-wing model aircraft) ....................60
What is a mixer? ..........................................................61
»Wing mixers« ...........................................................61
»Heli mixer« ...............................................................66
Adjusting the throttle and collective pitch curve ......70
Autorotation settings ...............................................74
General notes regarding freely programmable mixers 76
»Free mixers« ............................................................77
Examples ................................................................80
»Swashplate mixers« ................................................81
»Fail-Safe« (SPCM modulation only) ..........................82
Programming examples
Introduction ..................................................................84
Fixed-wing model aircraft
First steps in programming a new model ................86
Including an electric power system .........................90
E-motor and butterfl y (crow) with the C1 stick ........92
Operating the timers ............................................... 94
Using fl ight phases .................................................95
Servos running in parallel ....................................... 96
Model deltas and fl ying wings ...................................... 97
F3A-models ...............................................................100
Model helicopters ......................................................104
Trainer (teacher / pupil) systems ...............................110
Appendix
Trainer operations with the mx-16s ............................ 111
Approved frequencies ................................................113
Approval certifi cate / Conformity declaration .............114
Guarantee certifi cate .................................................115
General Notes
Safety notes ................................................................... 3
Foreword ........................................................................6
Description of radio control system ...............................7
Power supply ............................................................... 10
Adjusting stick length ...................................................12
Opening the transmitter case ......................................12
Changing the stick mode ............................................. 13
Description of transmitter ............................................ 14
DSC (Direct Servo Control) .................................... 15
LCD screen ............................................................. 18
Operating buttons, function fi elds ........................... 19
Channel selection, transmitter ..................................... 20
Adjusting screen contrast ............................................21
Channel selection, receiver .........................................22
Installation notes .......................................................... 23
Defi nition of terms .......................................................24
Assigning switches and transmitter controls ................25
Digital trims ..................................................................26
Position display, INC / DEC buttons ............................. 27
Servo display ............................................................... 27
Fixed-wing model aircraft ............................................28
Receiver socket assignment ..............................29/30
Model helicopters ........................................................32
Receiver socket assignment ...................................33
Program description
Reserving a new memory ............................................ 34
»Model memories« ....................................................36
»Base settings« (model)
Fixed-wing model aircraft .......................................38
Model helicopter .....................................................42
»Servo settings« ........................................................48
»Control settings«
Fixed-wing model aircraft .......................................50
Model helicopter .....................................................52
Throttle limit function .........................................54
Contents
Environmental protection
This symbol on the product, in the operating instruc-
tions or the packaging indicates that the product must
not be discarded via the normal household refuse at the
end of its useful life. Instead it must be taken to a collec-
tion point for the recycling of electrical and electronic ap-
paratus.
The materials can be re-used according to their identifi -
cation code. You can make an important contribution to
the protection of our shared environment by recycling
old equipment and making use of its basic materials.
Dry and rechargeable batteries must be removed from
the device and taken to the appropriate collection point.
Please ask your local authority for the locati-
on of your nearest waste disposal site.
The sole purpose of this manual is to provide informati-
on; it is subject to amendment without prior notifi cation.
The GRAUPNER company accepts no responsibility or
liability for errors or inaccuracies which may be found in
the information section of this manual.
Contents

3
We all want you to have many hours of pleasure in our
mutual hobby of modelling, and safety is an important
aspect of this. It is absolutely essential that you read
right through these instructions and take careful note of
all our safety recommendations.
If you are a beginner to the world of radio-controlled mo-
del aircraft, boats and cars, we strongly advise that you
seek out an experienced modeller in your fi eld and ask
him or her for help and advice.
If you ever dispose of this transmitter, these instructions
must be handed on to the new owner.
Application
This radio control system may only be used for the pur-
pose for which the manufacturer intended it, i.e. for ope-
rating radio-controlled models which do not carry hu-
mans. No other type of use is approved or permissible.
Safety notes
SAFETY IS NO ACCIDENT
and …
RADIO-CONTROLLED MODELS ARE NOT
PLAYTHINGS
Even small models can cause serious personal inju-
ry and damage to property if they are handled incompe-
tently.
Technical problems in electrical and mechanical sys-
tems can cause motors to rev up or burst into life unex-
pectedly, with the result that parts may fl y off at great
speed, causing considerable injury.
Short-circuits of all kinds must be avoided at all times.
Short-circuits can easily destroy parts of the radio cont-
rol system, but even more dangerous is the acute risk of
fi re and explosion, depending on the circumstances and
the energy content of the batteries.
Aircraft and boat propellers, helicopter rotors, open ge-
arboxes and all other rotating parts which are driven by
a motor or engine represent a constant injury hazard.
Do not touch these items with any object or part of your
body. Remember that a propeller spinning at high speed
can easily slice off a fi nger! Ensure that no other object
can make contact with the driven components.
Never stand in the primary danger zone, i.e. in the rota-
tional plane of the propeller or other rotating parts, when
the motor is running or the drive battery is connected.
Please note that a glowplug engine or electric motor
could burst into life accidentally if the receiving system
is switched on when you are transmitting the transmitter.
To be on the safe side, disconnect the fueltank, or dis-
connect the fl ight battery.
Protect all electronic equipment from dust, dirt, damp,
and foreign bodies. Avoid subjecting the equipment to vi-
bration and excessive heat or cold. Radio control equip-
ment should only be used in “normal” ambient tempera-
tures, i.e. within the range -15°C to +55°C.
Avoid subjecting the equipment to shock and pressu-
re. Check the units at regular intervals for damage to ca-
ses and leads. Do not re-use any item which is dama-
ged or has become wet, even after you have dried it out
thoroughly.
Use only those components and accessories which
we expressly recommend. Be sure to use only genuine
matching GRAUPNER connectors of the same design
with contacts of the same material. Use only genuine
GRAUPNER plug-in crystals on the appropriate frequen-
cy band – if your equipment still uses them.
Before you use the system, check that all connectors
are pushed home fi rmly. When disconnecting compon-
ents, pull on the connectors themselves – not on the wi-
res.
It is not permissible to carry out any modifi cations to
the RC system components. Avoid reverse polarity and
short-circuits of all kinds, as the equipment is not protec-
ted against such errors.
Installing the receiving system and deploying the re-
ceiver aerial
In a model aircraft the receiver must be packed in soft
foam and stowed behind a stout bulkhead, and in a mo-
del boat or car it should be protected effectively from
dust and spray.
The receiver must not make contact with the fuselage,
hull or chassis at any point, otherwise motor vibration
and landing shocks will be transmitted directly to it.
When installing the receiving system in a model with a
glowplug or petrol engine, be sure to install all the com-
ponents in well-protected positions so that no exhaust
gas or oil residues can reach the units and get inside
them. This applies above all to the ON / OFF switch,
which is usually installed in the outer skin of the model.
Secure the receiver in such a way that the aerial, servo
leads and switch harness are not under any strain.
The receiver aerial is permanently attached to the recei-
ver. It is about 100 cm long and must not be shortened
or extended. The aerial should be routed as far away as
possible from electric motors, servos, metal pushrods
and high-current cables. However, it is best not to deploy
the aerial in an exactly straight line, but to angle it: e.g.
run it straight to the tailplane, then leave the fi nal 10 - 15
cm trailing freely, as this avoids reception “blind spots”
when the model is in the air. If this is not possible, we re-
commend that you lay out part of the aerial wire in an S-
shape inside the model, as close to the receiver if pos-
sible.
Installing the servos
Always install servos using the vibration-damping grom-
mets supplied. The rubber grommets provide some de-
gree of protection from mechanical shocks and seve-
re vibration.
Safety notes
Please read carefully!
Safety notes

4
Safety notes
Before you switch on the receiver, ensure that the thrott-
le stick is at the stop / idle end-point.
Always switch on the transmitter fi rst, and only then
the receiver.
Always switch off the receiver fi rst, and only then
the transmitter.
If you do not keep to this sequence, i.e. if the receiver
is at any time switched on when “its” transmitter is swit-
ched OFF, then the receiver is wide open to signals from
other transmitters and any interference, and may re-
spond. The model could then carry out uncontrolled mo-
vements, which could easily result in personal injury or
damage to property. The servos may run to their end-
stops and damage the gearbox, linkage, control sur-
face etc.
Please take particular care if your model is fi tted with a
mechanical gyro:
Before you switch your receiver off, disconnect the po-
wer supply to ensure that the motor cannot run up to
high speed accidentally.
As it runs down, the gyro can generate such a high
voltage that the receiver picks up apparently valid
throttle commands, and the motor could respond by
unexpectedly bursting into life.
Range checking
Before every session check that the system works pro-
perly in every respect, and has adequate range. This
means checking that all the control surfaces respond
correctly and in the appropriate direction to the transmit-
ter commands at a suitable ground range. Repeat this
check with the motor running, while a friend holds the
model securely for you.
Operating your model aircraft, helicopter, boat or car
Never fl y directly over spectators or other pilots, and
take care at all times not to endanger people or animals.
Keep well clear of high-tension overhead cables. Never
operate your model boat close to locks and full-size ves-
sels. Model cars should never be run on public streets or
motorways, footpaths, public squares etc..
Checking the transmitter and receiver batteries
It is essential to stop using the radio control system and
recharge the batteries well before they are completely
discharged. In the case of the transmitter this means –
at the very latest – when the message “Battery must be
charged” appears on the screen, and you hear an au-
dible warning signal.
It is vital to check the state of the batteries at regular in-
tervals – especially the receiver pack. When the batte-
ry is almost fl at you may notice the servos running more
slowly, but it is by no means safe to keep fl ying or run-
ning your model until this happens. Always replace or re-
charge the batteries in good time.
Keep to the battery manufacturer’s instructions and don’t
leave the batteries on charge for longer than stated. Do
not leave batteries on charge unsupervised.
Never attempt to recharge dry cells, as they may explo-
de.
Rechargeable batteries should always be recharged be-
fore every session. When charging batteries it is impor-
tant to avoid short-circuits. Do this by fi rst connecting the
banana plugs on the charge lead to the charger, taking
care to maintain correct polarity. Only then connect the
charge lead to the transmitter or receiver battery.
Disconnect all batteries and remove them from your mo-
del if you know you will not be using it in the near future.
Capacity and operating times
This rule applies to all forms of electrical power source:
battery capacity is reduced every time you charge the
pack. At low temperatures capacity is greatly reduced,
i.e. operating times are shorter in cold conditions.
Installing control linkages
The basic rule is that all linkages should be installed in
such a way that the pushrods move accurately, smooth-
ly and freely. It is particularly important that all servo out-
put arms can move to their full extent without fouling or
rubbing on anything, or being obstructed mechanically
at any point in their travel.
It is important that you should be able to stop your mo-
tor at any time. With a glow motor this is achieved by ad-
justing the throttle so that the barrel closes complete-
ly when you move the throttle stick and trim to their end-
points.
Ensure that no metal parts are able to rub against each
other, e.g. when controls are operated, when parts rota-
te, or when motor vibration affects the model. Metal-to-
metal contact causes electrical “noise” which can interfe-
re with the correct working of the receiver.
Always extend the transmitter aerial fully before
operating your model.
Transmitter fi eld strength is at a minimum in an imagina-
ry line extending straight out from the transmitter aeri-
al. It is therefore fundamentally misguided to “point” the
transmitter aerial at the model with the intention of obtai-
ning good reception.
When several radio control systems are in use on adja-
cent channels, the pilots should always stand together in
a loose group. Pilots who insist on standing away from
the group endanger their own models as well as those
of the other pilots.
Pre-fl ight checking
If there are several modellers at the site, check carefully
with all of them that you are the only one on “your” chan-
nel before you switch on your own transmitter. If two mo-
dellers switch on transmitters on the same channel, the
result is invariably interference to one or both models,
and the usual result is at least one wrecked model.
Safety notes

5
Frequent charging, and / or the use of maintenance pro-
grams, tends to cause a gradual reduction in battery ca-
pacity. We recommend that you check the capacity of all
your rechargeable batteries at least every six months,
and replace them if their performance has fallen off sig-
nifi cantly.
Use only genuine GRAUPNER rechargeable batteries!
Suppressing electric motors
All conventional electric motors produce sparks between
commutator and brushes to a greater or lesser extent,
depending on the motor type; the sparking generates
serious interference to the radio control system.
If an RC system is to work correctly, it is therefore im-
portant to suppress the electric motors, and in electric-
powered models it is essential that every motor should
be effectively suppressed. Suppressor fi lters reliably eli-
minate such interference, and should always be fi tted
where possible.
Please read the notes and recommendations supplied
by the motor manufacturer.
Refer to the main GRAUPNER FS catalogue for more
information on suppressor fi lters.
Servo suppressor fi lter for extension leads
Order No. 1040
Servo suppressor fi lters are required if you are obliged
to use long servo extension leads, as they eliminate the
danger of de-tuning the receiver. The fi lter is connected
directly to the receiver input. In very diffi cult cases a se-
cond fi lter can be used, positioned close to the servo.
Using electronic speed controllers
The basic rule is that the electronic speed controller
must be chosen to suit the size of the electric motor it is
required to control.
There is always a danger of overloading and possibly
damaging the speed controller, but you can avoid this by
ensuring that the controller’s current-handling capacity is
at least half the motor’s maximum stall current.
Particular care is called for if you are using a “hot” (i.e.
upgrade) motor, as any low-turn motor (small number of
turns on the winding) can draw many times its nominal
current when stalled, and the high current will wreck the
speed controller.
Electrical ignition systems
Ignition systems for internal combustion engines can
also produce interference which has an adverse effect
on the working of the radio control system.
Electrical ignition systems should always be powered by
a separate battery – not the receiver battery.
Be sure to use effectively suppressed spark plugs and
plug caps, and shielded ignition leads.
Keep the receiving system an adequate distance away
from the ignition system.
Static charges
Lightning causes magnetic shock waves which can in-
terfere with the operation of a radio control transmitter
even if the thunderstorm actually occurs several kilome-
tres away.
Cease fl ying operations immediately if you notice an
electrical storm approaching. Static charges through
the transmitter aerial can be life-threatening!
Caution
Radio control systems may only be operated on the fre-
quency bands and spot frequencies approved in each
EU country. You will fi nd information on frequencies in
the section entitled “Approved operating frequencies” on
page 113. It is prohibited to operate radio control sys-
tems on any other frequency, and such misuse will be
punished by the relevant authorities.
Care and maintenance
Don’t use cleaning agents, petrol, water or other sol-
vents to clean this equipment. If the case, the aerial etc.
gets dirty, simply wipe the surfaces clean with a soft dry
cloth.
Components and accessories
As manufacturers, the company of GRAUPNER GmbH
& Co. KG recommends the exclusive use of compo-
nents and accessories which have been tested by
GRAUPNER and approved for their capability, function
and safety. If you observe this rule, GRAUPNER accepts
responsibility for the product.
GRAUPNER cannot accept liability for non-approved
parts or accessories made by other manufacturers.
It is not possible for GRAUPNER to assess every in-
dividual item manufacture red by other producers,
so we are unable to state whether such parts can be
used without incurring a safety risk.
Liability exclusion / Compensation
We at GRAUPNER are unable to ensure that you ob-
serve the operating instructions, and are not in a positi-
on to infl uence the way you install, operate and maintain
the radio control system components. For this reason we
are obliged to refute all liability for loss, damage or costs
which are incurred due to the incompetent or incorrect
use and operation of our products, or which are connec-
ted with such operation in any way.
Unless otherwise prescribed by law, the obligation of the
GRAUPNER company to pay compensation is limited
to the invoice value of that quantity of GRAUPNER pro-
ducts which was immediately and directly involved in the
event in which the damage occurred. This does not ap-
ply if GRAUPNER is found to be subject to unlimited lia-
bility according to binding legal regulation on account of
deliberate or gross negligence.
Safety notes

6
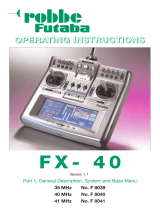
mx-16s – the latest generation of radio control technology
During the development phase of the mx-16s we retai-
ned and further refi ned the overall programming philo-
sophy of the mc-24. This system was introduced in 1997
and is renowned throughout the world; many thousands
are already in use.
Although this radio control system has been specially
developed for the beginner, it is capable of controlling all
current types of model, from fi xed-wing model aeropla-
nes and helicopters to model boats and cars.
In the area of fi xed-wing models and helicopters it is of-
ten necessary to employ complex mixer functions for the
control surfaces or the swashplate control system. Com-
puter technology enables you to activate a vast range of
functions to cope with special model requirements – just
by pressing a button. With the mx-16s all you do is se-
lect the appropriate model type, and the software then
presents you automatically with the appropriate mixer
and coupling functions. This means that the transmit-
ter requires no additional modules in order to implement
complex coupled functions, and you can forget all about
old-fashioned mechanical mixers in the model. The mx-
16s provides an extremely high level of safety and relia-
bility in use.
The software is carefully arranged in a logically structu-
red menu system. Options which are inter-connected in
terms of function are clearly organised in terms of con-
tent.
• Model memories
• Base settings
• Servo settings
• Control settings
• Dual Rate/Expo
• Phase trim (fi xed-wing only)
• Wing mixers / Heli mixer
• Free mixers
• Swashplate mixers (helicopter only)
• Fail Safe (SPCM transmission mode only)
The mx-16s provides 12 model memories, each of
which can store model settings for different fl ight pha-
ses. Individual phases can be called up in fl ight simp-
ly by operating a switch, so that you can try out various
settings quickly and without risk. This can be for test pur-
poses or for varying parameters for different phases of
fl ight.
The large graphic screen makes operating the transmit-
ter a simple, self-explanatory process. Mixers and other
functions can be displayed in graphic form, and this is
extraordinarily helpful.
The beginner soon becomes familiar with the wide ran-
ge of functions available thanks to the clear, logical-
ly arranged program structure. Adjustments are made
using just two rocker buttons, together with the SELECT
and CLEAR buttons to either side of the high-contrast
screen, and in this way you very quickly learn how to
make full use of all the options you need, depending on
your experience in handling radio-controlled models.
When used with the new “smc…” receivers the mx-16s
can provide servo travel at extremely high resolution
with 1024 control “steps” using the SUPER-PCM digital
modulation mode, for ultra-fi ne control. Naturally we gu-
arantee full compatibility with earlier PPM-FM and PCM
receiver systems.
This manual describes each menu in detail, and also
provides dozens of useful tips, notes and programming
examples to complement the basic information. More
general modelling terms, such as Transmitter controls,
Dual-Rates, Butterfl y (Crow) and many others, are all
explained in the manual.
The appendix contains comprehensive information on
the Trainer (teacher / pupil) system. The manual con-
cludes with a table of the frequencies approved for
use in individual European countries, copies of the Ap-
proval Certifi cate, the Conformity Declaration and the
transmitter’s Guarantee Certifi cate.
Please read the safety notes and the technical informa-
tion. We recommend that you read right through the in-
structions with great care, and check all the functions
as described in the text. This can be carried out simply
by connecting servos to the supplied receiver, and wat-
ching their response as you program the transmitter.
This is the quickest method of becoming familiar with the
essential procedures and functions of the mx-16s.
Always handle your radio-controlled model with a re-
sponsible attitude to avoid endangering yourself and
others.
All of us in the GRAUPNER team wish you every suc-
cess and many years of pleasure with your mx-16s,
which is an excellent example of the latest generation of
radio control systems.
Kirchheim-Teck, november 2006
Introduction

7
mx
-16s Computer System
Eight-channel digital proportional radio control system
High-technology micro-computer radio control sys-
tem with new high-speed single-chip micro-compu-
ter, fl ash memory and 10-bit A/D converter
A computer radio control system with twelve mo-
del memories, carefully optimised and incorporating
top-level technology.
Modern computer system for unbeatable reliability.
Simplifi ed, straightforward programming technique
using rocker buttons and momentary buttons.
The high-contrast graphic screen provides an effi -
cient means of monitoring set-up parameters, opera-
ting modes, timers and battery voltage.
• Modern hardware and integrated Synthesizer system
for channel selection, with security menu to guard
against setting the wrong frequency accidentally
• Methods of operation and programming based on the
proven concepts of the mc-19 to mc-24
• Eight control functions with extremely convenient,
simplifi ed method of assigning controls for auxiliary
functions such as switches and proportional controls
• Unrestricted assignment of all switches to switched
functions simply by operating the desired switch
• Twelve model memories for storing all model-specifi c
programming and set-up parameters
• The latest back-up system requiring no Lithium batte-
ry
• Four switches (of which one is a three-position
switch), one momentary button, one analogue con-
trol, two digital controls installed as standard; freely
programmable for extreme flexibility
• Function encoder with two rocker buttons and two
momentary buttons for simplified programming and
accurate set-up
• Convenient mode selector provides simple method
of switching the stick mode (modes 1 - 4, e.g. throttle
right / throttle left). When you change modes, all the
affected settings are switched at the same time
• Graphical servo display provides a straightforward
overview of the servo set-up and a fast method of
checking servo travels
• Receiver output swap
• Wing menu for: 1AIL, 2AIL, 2AIL + 2FLAP, V-tail, del-
ta / fl ying wing and two elevator servos
Wing mixer: AIL diff, FL diff, AIL RUD, AIL FL,
Brake ELE, Brake FL, Brake AIL, ELE
FL, ELE AIL, FL ELE, FL AIL and Diff. re-
duction
Description of radio control system

8
• Heli menu: 1-point, 2-point, 3-point and 4-point lin-
kages (1 SV, 2 SV, 3 SV (2 roll), 3 SV (2 nick), 4 SV
(90°))
• Two selectable modulations:
SPCM – Super PCM modulation with high system re-
solution of 1024 steps per control function. For the
following receivers: smc-14, smc-19, smc-20, smc-
19DS, smc-20DS, smc-16SCAN, smc-20DSYN, smc-
20DSCAN, R 330 S
PPM – The most widespread standard transmission
method (FM and FMsss). For the following receivers:
C12, C16, C17, R16SCAN, C19, DS18, DS19, DS20,
plus the following miniature receivers: XP4, XP10,
XP12FM, XP14, XN12, XM16, RB14 SCAN, R16
SCAN, R200 FM 40, R600, R600 light, R700 and C6,
C8, SB6 SYN 40S, SR6SYN
• Servo travel adjustment +/-150% for all servo chan-
nels, variable for each end-point separately (Single
Side Servo Throw)
• Sub-trim for fine-tuning the neutral position of all ser-
vos
• Servo reverse, programmable for all servos
• DUAL RATE/EXPO system, separately variable, can
be switched in-fl ight
• Mixer functions:
Aileron differential mixer, butterfly mixer, flaperon mi-
xer and three freely programmable mixers
• Convenient swashplate programs for model helicop-
ters
• Programmable Fail-Safe function with hold-mode and
preset function (SPCM only)
• Stopwatch / count-down timer with alarm function
• Model memory copy function
• Integral DSC socket for use with flight simulators and
Trainer systems
Description of radio control system

9
Transmission system SPCM und PPM (FM / FMsss)
Synthesizer RF section 35 MHz A-band and B-band
40/41 MHz band
Please refer to the table on page 13 for details of approved frequen-
cies in individual EU countries
Channel spacing, Synthesizer 10 kHz
Maximum control functions SPCM = 8, PPM = 8
Control functions 8 functions, 4 with trims
Channel pulse width 1,5 ms +/-0,5 ms
Temperature range -15 ... +55°C
Telescopic aerial 10-section, approx. 1150 mm long
Operating voltage 9,6 ... 12 V
Current drain approx. 225 mA (approx. 65 mA excl. RF)
Dimensions approx. 190 x 195 x 85 mm
Weight approx. 870 g incl. transmitter battery
Specifi cation of mx-16s transmitter
Accessories
Order No. Description
1121 Neckstrap, 20 mm wide
70 Neckstrap, 30 mm wide
3097 Wind-shield for hand-held transmitter
See page 111 for mx-16s Trainer leads
Replacement part
Order No. Description
3100.6 Telescopic aerial for mx-16s transmitter
Operating voltage 4,8 ... 6 V
Current drain approx. 24 mA
Spot frequencies, 35 MHz 61 ... 282 / 182 ... 191*
Spot frequ., 40 / 41 MHz 50 ... 92 / 400 ... 420**
Channel spacing 10 kHz
Sensitivity approx. 10 µV
Modulation PPM
Servo functions 8
Temperature range -15° ... +55° C
Aerial length approx. 1000 mm
Dimensions approx. 46 x 25 x 15 mm
Weight approx. 17 g
Specifi cation of R16SCAN receiver
The sets contain:
mx-16s transmitter with Synthesizer transmitter modu-
le on the appropriate frequency band, integral 8NH-1700
mAh NiMH battery (type may differ), R16SCAN receiver
on the appropriate frequency, one C 577 servo, switch
harness.
Order No. 4701 35 MHz band (A- and B-band)
Order No. 4703 40/41 MHz band
Please refer to the table on page 113 for details of approved frequen-
cies in individual EU countries.
Description of radio control system
* Channels 60, 281 and 282 not approved for use in Germany
** 41 MHz approved for use in France only

10
Operating notes
Power supply
The battery compartment in the mx-16s transmitter is
designed to be fi tted with a high-capacity 8NH-1700 TX
9.6 V NiMH battery (Order No. 3414) (type may differ).
When delivered, the standard rechargeable battery
fi tted is not charged.
When you are using the transmitter you can monitor the
battery voltage on the LCD screen. If the voltage of the
transmitter battery falls below a certain point, you will
hear an audible warning signal. The screen then dis-
plays a message reminding you that the transmitter bat-
tery needs to be recharged.
When you see this message, cease operations immedi-
ately and recharge the transmitter battery.
Charging the transmitter battery
The rechargeable transmitter battery can be charged
via the charge socket fi tted to the right-hand side of the
case. Leave the battery inside the transmitter for char-
ging, to avoid premature damage to the internal batte-
ry socket.
The transmitter must be switched “OFF” for the whole
period of the charge process. Never switch on the trans-
mitter when it is still connected to the charger; even a
very brief interruption in the charge process can cause
the charge voltage to rise to the point where the trans-
mitter is immediately damaged by the excess voltage.
For this reason check carefully that all connectors are
secure, and are making really good contact.
Polarity of the mx-16s charge socket
Commercially available battery charge leads produced
by other manufacturers are often made up with the op-
posite polarity. For this reason use genuine GRAUPNER
charge leads exclusively.
Charging the transmitter battery using an automatic
charger
The transmitter is designed as standard for use with au-
tomatic battery chargers. However, this requires care on
your part:
The transmitter charge socket is not protected
against short-circuit and / or reversed polarity. It
is therefore essential to use the correct procedu-
re when connecting the charge lead: fi rst connect
the banana plugs on the charge lead to the charger,
and only then connect the other end of the lead to
the transmitter charge socket. When the charge lead
is connected to the transmitter, never allow the bare
ends of the plugs to touch!
Charging the transmitter battery using a standard
charger
It is also possible to charge the transmitter battery using
a charger with no automatic termination (cut-off) circuit.
The basic rule in this case is to charge the battery for
fourteen hours, assuming that it is initially fl at. The char-
ge current should be one tenth of the capacity printed
on the battery. In the case of the standard transmitter
battery this means 170 mA. However, you are respon-
sible for terminating the charge process manually if you
use a standard charger …
Operating notes
Removing the transmitter battery
The fi rst step in removing the transmitter battery is to
open the battery compartment cover in the back of the
case. This is accomplished by pushing it in the direction
of the arrow; it can then be lifted off:
Disconnect the plug at the end of
the transmitter battery lead by pul-
ling carefully on the lead, or by en-
gaging a fi nger nail behind the lug
on the top of the connector. Howe-
ver, don’t pull the plug down or up;
keep it as parallel as possible to the
surface of the transmitter.
Transmitter charge
plug polarity
brown or
black
red
Battery timer, bottom left corner of the screen
This timer displays the cumulative operating time of the
transmitter since the last time the transmitter battery
was charged.
This timer is automatically reset to “0:00” when the
transmitter detects that the voltage of the transmitter
battery is signifi cantly higher than the last time it was
switched on, e.g. as a result of a charge process.

11
Receiver batteries
A wide variety of rechargeable 4.8 V NC and NiMH bat-
teries is available. For safety reasons do not use a batte-
ry box, and never use dry cells.
There is no direct method of checking receiver battery
voltage when operating a model.
Make it a standard part of your routine to check the
state of your batteries at regular intervals. Don’t
wait until you notice the servos running more slowly
than usual before recharging the packs.
Note:
Please refer to the main GRAUPNER FS catalogue for
full details of batteries, chargers, measuring equipment
and monitor units for checking batteries.
Charging the receiver battery
The charge lead, Order No. 3021, can be connected di-
rectly to the NC receiver battery for charging. If the bat-
tery is installed in a model and you have installed one of
the following switch harnesses: Order No. 3046, 3934 or
3934.1 or 3934.3, the battery can be charged via the se-
parate charge socket, or the charge socket which is bu-
ilt into the switch. The switch on the switch harness must
be left at the “OFF” position for charging.
General notes on battery charging
• Observe the recommendations provided by the char-
ger manufacturer and the battery manufacturer at all
times. Observe the maximum permissible charge cur-
rent stated by the battery manufacturer.
The maximum charge current for the transmitter bat-
tery is 1.5 A. Limit the charge current to this value on
the charger.
• Carry out a series of test charges to ensure that the
automatic charge termination circuit works correctly
with your battery.
This applies in particular if you are using an auto-
matic charger designed for NiCd batteries to rechar-
ge the standard NiMH battery.
You may need to adjust the Delta Peak trigger volta-
ge, if your charger provides this option.
• Do not discharge the battery or carry out a battery
maintenance program via the integral charge socket.
The charge socket is not suitable for this application.
• Always connect the charge lead to the charger fi rst,
and only then to the transmitter or receiver batte-
ry. Observing this rule eliminates the danger of acci-
dental short-circuits between the bare contacts of the
charge lead plugs.
• Never leave batteries on charge unsupervised.
Standard chargers
Order No. 6422 Minilader 2
Order No. 6427 Multilader 3
Order No. 6426 Multilader 6E*
Order No. 6428 Turbomat 6 Plus*
Order No. 6429 Turbomat 7 Plus*
Automatic chargers with special NiMH charge pro-
grams
Order No. 6419 Ultramat 5* **
Order No. 6410 Ultramat 10*
Order No. 6412 Ultramat 12* **
Order No. 6414 Ultramat 14*
Order No. 6417 Ultramat 25* **
Order No. 6416 Ultra Duo Plus 30* **
* To recharge the mx-16s system you will also need the transmitter
charge lead, Order No. 3022, and the receiver battery charge lead,
Order No. 3021.
** 12 V power source required
Operating notes
Disposing of dry cells and rechargeable batteries
Never dispose of exhausted batteries in
the household rubbish. As end-user you
are legally required (by the “Battery Re-
gulation”) to return old and exhausted
batteries. They should and must be ta-
ken to your local toxic waste collection
point so that the materials can be re-
used or re-cycled. They can also be re-
turned to any retail outlet where batte-
ries are sold.
Please contact your local authority if you are not sure
where your nearest battery recycling centre is located.

12
Operating notes
Adjusting stick length
Both sticks are infi nitely variable in length over a broad
range, enabling you to set them to suit your personal
preference to provide fi ne, accurate control.
Loosen the locking screw using a 2 mm allen key, then
screw the stick top in or out to shorten or extend it. Tigh-
ten the grubscrew again carefully to lock the set length.
Locking screw
Tighten
Loosen
Opening the transmitter case
Please read the following notes carefully before you
open the transmitter. If you have no experience in such
matters, we recommend that you ask your nearest
GRAUPNER Service Centre to carry out the work for
you.
The transmitter should only be opened in the following
cases:
• When a self-neutralising stick needs to be converted
to non-neutralising action, or a non-neutralising stick
to a self-neutralising action
• If you wish to adjust the stick centring spring tension
Before opening the transmitter check that it is switched
off (move Power switch to “OFF”).
There is no need to remove the transmitter battery. Ho-
wever, if you leave it in place be sure not to switch the
transmitter on (“ON” position). If you wish to remove the
transmitter battery, please read the section on page 10.
Locate the six recessed screws on the back on the
transmitter, and undo them using a PH1-size cross-point
screwdriver (see drawing right). Hold the two case sec-
tions together with your hand, and turn the unit over to
allow these six screws to fall out onto the table. Now ca-
refully raise the case back and fold it open to the left, as
if you were opening a book.
C A U T I O N
A two-core lead connects the case back to the trans-
mitter electronics in the front section. Please take
great care not to damage this cable!
Important note:
• Do not modify the transmitter circuit in any way,
as this invalidates your guarantee and offi cial ap-
proval for the system.
• Do not touch any part of the circuit boards with
any metal object. Avoid touching the contacts
with your fi ngers.
• Never switch the transmitter on while the case is
open.
Please note the following points when closing the
transmitter:
• Make sure that no cables are jammed between the
transmitter case sections when you close the back.
• Ensure that the DSC socket engages in its mounting.
• Check that the two case sections fit together flush all
round before fitting the retaining screws. Never force
the two case components together.
• Fit the case screws in the existing threads, and tigh-
ten them gently. Over-tightening them will strip the
threads in the plastic.
Arrangement of the transmitter case screws
Operating notes

13
Stick centring spring tension
The stick centring force can be adjusted to suit the
pilot’s personal preference. The adjustment system is lo-
cated adjacent to the stick centring spring. Rotate the
adjustor screw using a cross-point screwdriver until the
spring tension feels right to you:
• Turn to the right = harder spring tension;
• Turn to the left = softer spring tension.
Changing the stick mode
Either or both sticks can be converted from self-neutrali-
sing to non self-neutralising action: Start by opening the
transmitter as described on the previous page.
The procedure for changing the default stick mode set-
ting is as follows:
1. Use a pair of tweezers to disconnect the spring from
the centring lever on the stick whose mode you wish
to change. If you are not sure, move the appropriate
stick to make it obvious. Raise the lever and discon-
nect it.
2. Locate the hexagonal bush sup-
plied in the accessory pack, and
screw it into the hole. Now fi nd
the ratchet spring (also supplied)
and fi x it to the plastic pillar using
the black self-tapping screw
supplied. You can now set the
strength of the ratchet spring on
the side of the hexagonal bush by
screwing the M3 screw in or out.
3. Check that the stick works as you prefer, then close
the transmitter case once more.
Resetting the spring to “self-neutralising” action
Open the transmitter as already described.
1. Disconnect and remove the ratchet spring: see pictu-
re left.
2. Now re-connect the (previously removed) cen-
tring spring to the side of the stick where the ratchet
spring was located.
3. First loosen the stick centring spring adjustor screw
slightly – see picture right – and then draw a length
of thin thread through the upper loop of the spring –
but don’t tie it. Now use a pair of tweezers to connect
the spring to the bottom loop of the adjustment sys-
tem, and then engage the top end of the spring to the
centring lever using the thread. Once the spring is
correctly fi tted, the thread can be removed again.
4. The tension of the stick centring spring can be adjus-
ted as described in the next section.
Operating notes
Brass-
bush

14
Description of transmitter
transmitter controls
Aerial
CTRL 6: INC / DEC buttons*
SW 3: two-position switch
SW 2: two-position switch
CTRL 7: rotary propor-
tional control
Left-hand stick unit
Trims
ON / OFF switch
Input buttons
LCD screen
Input buttons
Trims
Right-hand stick unit
SW 1: two-position switch
Button: SW 4 / PB 8
Carry handle
Neckstrap lug
Attaching the transmitter neckstrap
You will fi nd a strap lug mounted in the centre of the
front face of the mx-16s transmitter, as shown in the dra-
wing on the right. This lug is positioned in such a way
that the transmitter is perfectly balanced even when sus-
pended from a neckstrap.
1121 Neckstrap, 20 mm wide
70 Neckstrap, 30 mm wide
SW 6 / 7: three-position switch
Description of transmitter – transmitter controls
* INC / DEC buttons (CTRL 5 and 6)
Each time you press the button the servo travel changes by 1% of
the set maximum; the system works as follows:
INC – in the positive direction;
DEC – in the negative direction.
CTRL 5: INC / DEC buttons*
Important note:
In the transmitter’s standard form any servos connec-
ted to the receiver can initially only be operated using
the dual-axis sticks. For maximum fl exibility, all the other
transmitter controls (CTRL 5 ... 7, SW 1 ... 7) are in soft-
ware terms “free”, and can be assigned to any channels
you like, enabling you to set up the system to suit your
personal preference or the requirements of a particu-
lar model. This is carried out in the »Control settings«
menu, as described on pages 50 and 52.

15
Description of transmitter – case back
Transmitter case back
Left vertical
Right vertical
Right horizontal
Left horizontal
DSC socket for connection to fl ight simu-
lators, Trainer lead and Diagnosis (closed
loop) lead (see right-hand column)
DSC = Direct Servo Control
Case screw
Adjusting the centring spring force
Case screw
Battery compartment cover
Case screw
Case screw
Case screw
Do not touch the trans-
mitter circuit board!
Case screw
Caution
The battery lead is polarised,
i.e. it can only be plugged in
one way round. Don’t use force
when disconnecting the battery
connector!
DSC
Direct Servo Control
The original function of this socket was for “Direct Ser-
vo Control”, and that’s why the abbreviation is still in use.
However, it is now much more versatile than simply pro-
viding a means of controlling servos by cable. The DSC
socket is now also used as an interface for fl ight simula-
tors, and for connecting a Pupil transmitter to a Teacher
transmitter to form a Trainer (buddy box) system.
For the DSC connection to work you must check the
following:
1. Carry out any adjustments required in the appropria-
te menus:
If you are connecting the transmitter to a fl ight simu-
lator (for example), these settings are found in the
»Modulation« line of the »Base settings« menu –
“PPM” is usually required.
If you are connecting a Diagnosis lead (Order No.
4178.1), the modulation must be selected to suit the
receiver – see below.
See page 110 for information on setting up the mx-
16s transmitter to work as part of a Trainer system.
2. Always leave the transmitter’s On / Off switch in the
“OFF” position, for only in this position is the RF sec-
tion of the transmitter module switched off (no RF si-
gnal) even when the DSC lead is plugged in.
This is particularly important if you are using a Dia-
gnosis lead or a Trainer lead, otherwise you can still
cause interference to other pilots.
3. Connect the appropriate connecting lead to the DSC
socket on the back of the transmitter. This renders the
transmitter ready for use, circumventing the channel
section, and the LCD screen operates. At the same
time the letters “DSC” appear on the right-hand side
of the LCD screen, instead of the usual display of the
selected transmission channel.
4. Connect the other end of the connecting lead to the
desired apparatus, taking into account the operating
Do not touch the trans-
mitter circuit board!
Transmitter battery charge socket

16
Description of transmitter – case back
instructions supplied with that equipment.
If you wish to use the Diagnosis lead, Order No.
4178.1, do not connect it directly to the receiver. First
connect the lead to a receiver battery using a Y-lead,
and connect this to the receiver’s battery input socket
instead of the receiver battery. The end with the bar-
rel plug can then be connected to the appropriate so-
cket on the back of the transmitter.
Once the transmitter is connected to the receiver as
described above, you can check the control func-
tions or make changes to settings even if another pi-
lot is using “your” frequency. Since in this state (po-
wer = “OFF”) the transmitter does not broadcast a ra-
dio signal, you can, for example, prepare your model
ready to fl y without causing interference to other pi-
lots. Another advantage is that the transmitter’s cur-
rent drain is reduced to only about 65 mA, since the
transmitter’s RF section is not active in this mode of
operation. Diagnosis mode operations therefore ex-
tend the operating time of the transmitter battery con-
siderably.
Important:
Ensure that all the cables are fi rmly plugged in.
Note regarding fl ight simulators:
The range of fl ight simulators available commercially
is now very wide, and you may fi nd that it is necessary
to swap over certain contacts at the battery plug or the
DSC module. Do not attempt this work yourself; it must
be carried out by a GRAUPNER Service Centre.
Caution:
Certain receivers – such as the R16SCAN – feature a
battery socket to which a servo can also be connec-
ted via a Y-lead. In this case it is not possible to use
a DSC lead.

17

18
Channel display
(fl ashes if RF section switched off; see pages 20 … 21)
Battery operating time since
last charge process, in hr : min
LCD screen and operating buttons
Error in Trainer mode Throttle stick dange-
rously high
Operating voltage in-
adequate
Flight timer in min : sec
(count-up / count-down)
Stopwatch in min : sec
(count-up / count-down)
Flight phase name
transition between fl ight
phases using switch
Modulation type
Right-hand rocker button
(value change)
CLEAR button
(erases, or resets
to default value)
Model name
Memory 1 … 12
Battery voltage
(if voltage falls below a particular value a warning display
appears – see images at top right – and an audible warning
signal sounds)
Visual display of trim lever positions; alternatively – if the SE-
LECT button is held pressed in – display of the current set-
tings of the two INC / DEC buttons (CTRL 5 + 6)
Model type display
(fi xed-wing / helicopter)
Left-hand rocker button
ENTER = confi rm
ESC = interrupt / back
SELECT button
SPCM mode only
Description of transmitter – LCD screen and operating buttons
no
student
signal
battery
needs
charging
throttle
too
high !
adjust
fail
safe !

19
CLEAR
(reset to standard
value)
ENTER button
(confi rm)
ESC button (inter-
rupt / back)
SELECT button
Larger – up button
(+)
Smaller – down
button (-)
Controlling the “Data Terminal”
Input buttons and function fi elds
ENTER, ESC, SELECT, +, -, CLEAR ... SEL, STO, CLR, SYM, ASY, ,
Buttons to the left of the screen
• ENTER button, left-hand rocker button
Pressing ENTER takes you from Channel Select
(which appears when you switch the transmitter on)
to the basic display, and then on to the multi-function
menus. You can also call up a selected menu using
ENTER.
• ESC button, left-hand rocker button
Pressing the ESC button returns you step by step
within the function select system, taking you right
back to the basic display. If you make a change in the
meantime, the change is retained.
• SELECT
The SELECT button is used for several tasks:
1. A brief press switches from the basic transmitter
display to the »Servo display«; see page 27.
2. Hold the button pressed in to display the current
positions of the two INC / DEC buttons CTRL 5 +
6 in the basic display. The information is shown for
the duration of the button-press. See page 27.
3. Within the set-up menus press the SELECT but-
ton to activate the adjustment fi elds, and then
press SELECT again to return to the function
fi elds at the bottom edge of the screen.
4. If you hold the SELECT button pressed in, you
can “leaf through” the menu lines within the indi-
vidual set-up menus using the right-hand rocker
button – symbolised by above and below the
two buttons.
Buttons to the right of the screen
• “+” and “-“ buttons, right-hand rocker button
1. “Leaf through” the menu lines within the individual
menus when the SELECT button is held pressed
in – symbolised by above and below the two
buttons.
2. “Leaf through” lists, e.g. the model select or multi-
function list – symbolised by on both sides
of the right-hand rocker button.
3. Change between the function fi elds, most of
which are located at the bottom edge of the
screen; see right-hand column – symbolised by
on both sides of the right-hand rocker but-
ton.
4. Select and adjust parameters in the adjustment
fi elds, after activating them by pressing the SE-
LECT button – symbolised by + and – above and
below the right-hand rocker button.
• CLEAR
Resets a changed parameter value in the active input
fi eld to the default value.
Function fi elds
Function fi elds appear in the bottom line of the screen
in certain menus; they can be selected using the right-
hand rocker button – .
Press the SELECT button to activate a function fi eld.
Function fi elds
• SEL select
•
switch symbol fi eld
(assigning switches of all kinds)
• STO store (e.g. transmitter control position)
• CLR clear reset to default value
• SYM adjust values symmetrically
• ASY adjust values asymmetrically
• switch to second page (next menu) within a
menu
Description of transmitter – Operating buttons
A S Y
S Y M
S E L
S T O C L R

20
Description of transmitter – Using the system for the fi rst time
20
Preliminary notes
In its standard form the mx-16s is programmed to PPM
mode, and is therefore suitable for use with receivers of
the “FM-PPM” type. If you have purchased a standard
radio control set on the 35 or 40 / 41 MHz band, you can
immediately operate the supplied R16SCAN receiver in
this transmission mode.
The standard PPM mode of operation is supple-
mented by the SPCM mode, which is suitable for all
GRAUPNER/JR receivers of the “smc” type.
The ability of the mx-16s transmitter to switch trans-
mission modes enables you to operate the unit with all
GRAUPNER receiving systems supplied with PPM-FM
and SPCM transmitters on the 35 and 40 / 41 MHz fre-
quency bands.
For example, if you do not wish to use a “PPM” type re-
ceiver, the fi rst step is to change the modulation to suit
the type of receiver you wish to use. If you do not set
the transmitter correctly, the receiver simply will not
work with the transmitter. The transmission mode can be
changed in the »Base settings« menu (description: pa-
ges 38 and 42); the set mode only applies to the current
model memory.
Which crystals can you use?
The mx-16s requires no plug-in crystals. The transmissi-
on channel is selected by software: see later.
Battery charged?
When you take receipt of your transmitter, the battery
will be in the discharged state, so you must fi rst charge
it as described on pages 10 … 11. If you do not do this,
the battery will soon fall below the
pre-set threshold voltage, and you
will see and hear a warning signal
to remind you to recharge it.
Aerial fi tted?
Never switch the transmitter on unless the aerial is scre-
wed in. Even for prolonged testing you should always fi t
the aerial and extend it fully, otherwise the transmitter
may malfunction, with possible damage to the RF mo-
dule.
When you wish to control a model it is fundamentally es-
sential to screw the ten-section telescopic aerial into the
transmitter and extend it fully. Transmitter fi eld strength
is at a minimum in an imaginary line extending straight
out from the transmitter aerial. It is therefore fundamen-
tally misguided to “point” the transmitter aerial at the mo-
del with the intention of obtaining good reception.
Switching the transmitter on / selecting a channel
Every time you switch the transmitter on you must fi rst
confi rm to the integral synthesizer system that you wish
to use the set frequency. This takes the form of a secu-
rity query, intended to prevent you switching the system
on accidentally whilst set to the wrong channel. The soft-
ware asks you: “RF off / on”. The last set channel is initi-
ally highlighted (inverse video – black background) and
fl ashes:
If you wish to activate this channel, use the right-hand
rocker button to move the highlighted square to the
“Yes” response in the function bar …
… and press the ENTER or SELECT button.
If not, move to the symbol at bottom right of the
screen. Press the ENTER or SELECT button to take
you to the Channel Select screen. The channels availab-
le at that point vary according to the RF module current-
ly fi tted:
Frequency band Channels
35/35B MHz band 61 … 282, 182 … 191
40/41 MHz band 50 … 95, 400 ... 420
Note:
Channels 281 and 282 in the 35 MHz band, and all
channels in the 41 MHz band, are not approved for
use in Germany. Please refer to the frequency ta-
ble on page 113, which lists the channels valid in the
European continent at time of going to press (infor-
mation not guaranteed).
Use the right-hand rocker button to select the channel
you wish to use. However, please check before you do
this that no other model fl yer is operating a radio control
system on the channel you intend to use.
Using the system for the fi rst time
Channel selection
battery
needs
charging
/