Page is loading ...

Printer User’s
Guide
The Future of Portable
Printing . . . Today!

Symbian OS is a trademark of Symbian Ltd.
PALM and PALM OS are trademarks of Palm, Inc.
PENTAX and PocketJet are registered trademarks of Pentax Imaging
Company
PSION is a trademark of Psion PLC.
RBRC is a trademark of the Rechargeable Battery Recycling Corporation.
WINDOWS is a trademark of the Microsoft Corporation.
EPSON is a trademark of Epson Corporation.
Copyright © 2004 by PENTAX Imaging Company,
A division of PENTAX of America, Inc.
All rights reserved.
Specifications subject to change without notice.
P/N
205559-551A
Page ii

Contents
Safety Information..............................................................................v
Printer Features................................................................................ vii
Warranty Information..................................................................... viii
Chapter 1 Setting Up the Printer
Unpacking the Printer.........................................................................1
Connecting to an AC Outlet................................................................2
Connecting to a DC Supply................................................................3
Using the Operation Panel..................................................................4
Main Switch Functions...................................................................4
Power ON...................................................................................4
Power OFF..................................................................................4
Manual Form Feed......................................................................4
Charge the Battery......................................................................4
To Power Off during Charge Mode............................................4
Service Mode..............................................................................4
Program Mode............................................................................5
Indicator Lights...............................................................................5
Chapter 2 Using the Printer
Printing Solutions ...............................................................................7
Driver Installation...............................................................................8
CD Install........................................................................................8
Manual Install.................................................................................8
Configuration Utility ..........................................................................9
Installing the Configuration Program .............................................9
Using the Configuration Program.................................................10
Configuration Options ..................................................................10
Printer Commands........................................................................20
Connecting to Your Computer..........................................................23
Via USB Cable .............................................................................23
Via Infrared (IrDA).......................................................................24
Printing.............................................................................................25
Turning the Printer Off.................................................................26
Making Prints Lighter or Darker.......................................................26
Accessing Advanced Software Features Through Windows ............27
Density Modes..............................................................................27
2-Ply Mode...................................................................................27
Form Feed Modes.........................................................................27
Windows CE.................................................................................28
Windows 2000/XP........................................................................28
Cut Sheet Paper Usage..................................................................28
Non-Perforated Roll Paper Usage.................................................29
Perforated Roll Paper Usage.........................................................30
Protecting the Printer........................................................................30
Installing the Battery ........................................................................31
Removing the Battery.......................................................................33
Charging the Battery.........................................................................34
Tips on Using the Battery.................................................................34
Page iii

Chapter 3 Tips on Using Paper
Inserting Paper..................................................................................35
Use Pentax Quality Paper.................................................................36
Usage and Handling Instructions......................................................36
Clearing a Paper Jam........................................................................37
Method 1.......................................................................................37
Method 2.......................................................................................37
Chapter 4 Maintaining the Printer
Cleaning the Print Head....................................................................39
Cleaning the Platen Roller................................................................41
Cleaning the Printer’s Exterior.........................................................43
Chapter 5 Reference
Indicator Lights ................................................................................45
Indicator Light Warnings..................................................................46
Self-Test Feature ..............................................................................48
Chapter 6 Troubleshooting
Overview..........................................................................................49
Paper Problems.................................................................................50
Printed Image Problems....................................................................50
Pages Don’t Print..............................................................................53
Pages Are Partially Printed...............................................................53
Windows CE-related Problems.........................................................54
Chapter 7 Technical Information
Specifications ...................................................................................55
Physical ........................................................................................55
Printing.........................................................................................55
Interfaces ......................................................................................56
Environmental ..............................................................................56
Electrical.......................................................................................56
Regulatory ....................................................................................57
Radio & Television Interference ......................................................64
United States FCC Regulations ....................................................64
Canadian Regulations...................................................................65
European Regulations...................................................................65
Chapter 8 Ordering Information
Supplies............................................................................................67
Accessories/Replacement Parts ........................................................67
Index
Page iv

Safety Information
Use Recommendations
• Because the printer uses a thermal printing method, it produces heat
during operation. Be sure to place it where it will receive adequate
ventilation.
• Don’t allow moisture to come in contact with the printer, the AC
adapter, or the AC power cord.
Outdoor Use Warning
To reduce the risk of electric shock, do not expose this printer, its AC
adapter, or the power cord to rain or moisture.
Caution: Using AC Power
To use AC power (with or without the battery installed), you must use
the AC adapter supplied with the printer.
The AC adapter allows you to connect to worldwide (100-240 volt)
power outlets. The power cord supplied with the PocketJet 3 / 3 Plus
AC adapter is designed to fit many 115 volt outlets and is shown
below. The AC adapter automatically adjusts to the correct voltage
when connected.
Check the power plug configurations and voltages that are used in your
country. If you need a different plug or power cord, you can either
purchase a plug adapter locally, or contact your local reseller or Pentax
for assistance in procuring a proper cord set.
Page v

Unplug AC Cable when Printer is Not in Use
Always unplug the AC cable from the AC power outlet when you stop
using the printer or finish charging the battery. The transformer inside
the AC adapter generates heat while it is plugged in. Unplugging the
AC adapter extends its life.
Battery Recycling/Disposal Information
This printer can run on an optional rechargeable Nickel-Metal Hydride
(NiMH) battery. The battery is recyclable. At the end of its useful life,
please consider recycling options (contact your local solid waste
officials) or proper disposal (see the paragraphs below). It may be
illegal under various state and local laws to dispose of the battery in
your solid waste collection.
The RBRC seal on the NiMH battery pack supplied for the
PocketJet 3 / 3 Plus printers indicates that Pentax is voluntarily
participating in an industry program to collect and recycle these battery
packs at the end of their useful life, when taken out of service
within
the United States. The RBRC program provides a convenient
alternative to putting spent NiMH battery packs into the trash or
municipal waste stream, which is illegal in some areas.
Pentax payments to RBRC makes it easy for you to drop the spent
battery pack at local retailers of replacement NiMH batteries or at
authorized Pentax product service centers. You may also contact your
local recycling center for information on where to return the spent
battery packs. The involvement of Pentax in this program is part of its
commitment to protecting our environment and conserving natural
resources.
For users
outside the United States, please contact your local reseller or
local solid waste official for information on recycling your used
batteries.
Page vi

Printer Features
The Pentax PocketJet® ultra-portable printers have been specifically
designed to meet the growing demands of mobile workers.
The Pentax PocketJet printer features include:
• The printer can be driven directly from Windows® (95, 98, ME,
2000, XP, CE, CE.NET), Symbian/EPOC OS, Linux, and MAC
OSX operating systems and other handheld devices such as software
applications with the supplied drivers. Most PocketPC, Windows
Mobile, and Palm units require third party software.
Note: Refer to the Pentax website (
www.pentaxtech.com) and click
on Technical Support for the most current driver solutions.
• High-quality images with a resolution of 203 by 200 dpi (for
PocketJet 3) or 300 by 300 dpi (for PocketJet 3 Plus).
• Print speed of up to three pages per minute.
• Operation via AC adapter (that automatically senses and
adjusts between 100 and 240 volt power), 12 Volt DC vehicle
power, or an internal battery.
• Interface via USB cable or built-in wireless infrared. For both
PocketJet 3 and 3 Plus models, a 3-foot (1 meter) USB cable is
supplied. The printers may also be used with IrDA capable hosts.
• Direct thermal technology — no toner, ribbons, or ink are needed.
• Selectable paper sources: cut sheet (US Letter, US legal, A4, or user-
defined), roll (continuous or perforated), and fanfold.
• “Infinite” paper size selection to allow printing of very long
continuous streams of data on roll paper without a page break.
Page vii

Warranty Information
Standard Warranty
Pentax provides, free of charge, a one-year limited warranty for your
new PocketJet printer. For one year from the date of original purchase,
Pentax will repair or replace a failed unit with a new or rebuilt unit
when it is returned postpaid to an authorized Pentax service center. A
return material authorization number (RMA) and proof of purchase are
required—in the United States and Canada call Pentax Customer
Support at 1-800-543-6144, ext. 1820.
Outside the United States and Canada, see the driver CD supplied with
this product for contact information and warranty details. You can also
contact your local dealer for information.
See the warranty information on the driver CD supplied with the unit
for details or you can log onto the Pentax web site at
www.pentaxtech.com/TechSupport/faxmailwarrantyform.htm
If the NiMH battery pack or the Pentax Quality Paper fails due to
defects in material or workmanship within the first 90 days of
ownership, it will be replaced. Contact Pentax or your local reseller for
further information.
Pentax makes no other warranty, either expressed or implied, with
respect to this product. Some states or provinces do not allow
limitations, so the above limitation may not apply to you.
Extended Warranty
See the information on the CD included with your PocketJet printer for
extended warranty information, or contact Pentax at 1-303-460-1820
(in Europe, +32.2.306.1194) and ask for Customer Support.
Warranty Registration
We recommend that you register your printer so that we can contact
you with product update information if necessary. Please use the
driver CD that came with your printer or register directly on-line at:
www.pentaxtech.com/onlinewarranty/online_warranty.htm.
Note: Failure to return warranty cards or complete on-line warranty
information will not diminish your warranty rights.
Page viii

Chapter 1 - Setting Up the Printer
Unpacking the Printer
Read and follow any instructions on any Read Me First sheet that may
be included in your kit.
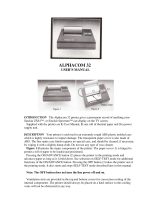
A typical printer kit contains the items shown in Figure 1.
FIGURE 1. The contents of your printer kit
Page 1

Connecting to an AC Outlet
Connect the printer to a nearby AC power outlet to run it on AC power
or to charge the battery (see Charge the Battery, page 4).
1. Connect the AC adapter to the printer as shown in Figure 2.
2. Connect the AC power cord to the AC adapter.
3. Plug the AC power cord into a nearby AC power outlet (100~240
VAC, 50-60 Hz).
FIGURE 2. Connecting the printer to an AC power outlet
The PocketJet works from DC sources from 10 to 17V, and can require
as much as 2.6A. Operation below 14 volts may slow printing
somewhat.
NOTE: The plug on the AC power cord shown in Figure 2 is
compatible with AC power outlets in the U.S.A., Canada,
and some Central and South American countries. A plug
adapter may be necessary for AC power in other countries
or you can contact your local reseller or Pentax for further
assistance.
Page 2

Connecting to a DC Supply
The PocketJet can be powered from its internal NiMH battery or from a
vehicle DC supply. To install the battery, see page 32. To connect
your PocketJet to a “12-volt” vehicle DC supply to print or maintain
the battery charge, follow the steps below.
1. Connect an appropriate power adapter cord (either with a cigarette
plug or direct wired) to the vehicle 12VDC supply as shown in
Figure 3. (These items are available as options - See Ordering
Information, Chapter 8.)
2. Connect the power cord to the PocketJet.
3. Turn on the vehicle power, then turn on the PocketJet.
FIGURE 3. Connecting the printer to DC power
The PocketJet printer works from DC sources from 10V to 17V.
Operation below 14 volts may slow printing somewhat.
Page 3

Using the Operation Panel
The operation panel consists of the main switch and three indicator
lights. See Figure 4.
FIGURE 4. Operation panel
Main Switch Functions
Power ON: Push once while the printer is OFF.
Power OFF: Push twice quickly.
Manual Form Feed: With power ON and paper inserted, press and
hold the main switch to feed (or eject) paper. In order to assure that
printing is complete before permitting a form feed, manual form feeds
cannot be performed for five seconds after the printer has received any
data. The button must then be held down for 1-1/2 seconds to start the
form feed.
Charge the Battery: With the printer off, push the main switch and
hold it down for two or more seconds until the POWER indicator
begins to blink. The POWER indicator light continues to blink until
charging is complete.
To Power Off During Charge Mode: Push the main switch twice
quickly (same as when in normal operating mode).
Service Mode: After powering the unit on, press and hold for 2
seconds until the DATA LED turns red. In this mode you may initiate
self test printing or head cleaning. See Chapter 5 for further details.
Page 4

Program Mode: After powering the unit on, press and hold for 2
seconds until the DATA LED turns red. Press and hold again for 6
seconds until the DATA and ERROR LEDs blink red. This mode
allows uploading font files or upgrading firmware files. See page 21
for further information.
NOTE: The printer may be configured for “auto off” operation. In
this mode, when the printer is operated under battery power, inactivity
for a period of a user-selected multiple of 10 minutes will cause the
printer to shut itself down to conserve battery power. By default, this
feature is enabled and set for 10 minutes. The printer may also be
configured for “Auto-on” operation where connecting it to an external
power source causes it to power on without using the Main Switch.
See page 11 for further information.
Indicator Lights
The three indicator lights—POWER, DATA, and ERROR— show
both normal operation and error conditions. Each light may appear as
green, red, or orange, and may either stay lit continuously or blink.
The meaning of the many possible indications of these lights is
explained in more detail in Chapter 5.
Some of the more common indications follow:
• POWER light is steady green: Power is on, external power.
• POWER light is red or orange: The printer is operating on battery
power. Color and blink/solid indicates approximate charge
remaining.
• POWER light is blinking green: Battery is charging.
• DATA light is steady green: Unprinted data is in the printer buffer or
a command has been received from the computer.
• DATA light is blinking green: Printer is receiving data.
• ERROR light is steady or blinking in any color: Except when
sending new flash code or fonts, an error has occurred.
Please refer to the table in Chapter 5 that contains all combinations of
indicator lights and their meanings.
Page 5

Notes:
Page 6

Chapter 2 - Using the Printer
Printing Solutions
Pentax provides printing solutions for many different operating systems and
device types.
Device types include:
• PDA Systems (Windows Mobile [Pocket PC] systems, Palm
systems, Psion/Symbian EPOC systems, and Windows CE
systems)
• Windows systems, Mac OS X, and Linux
Drivers that can be
installed automatically, once selected from the
Installation CD’s main setup program, are:
• Windows 95/98/Me
• Windows 2000/XP
• PocketPC* applets – time trials only
• Palm OS* applets – time trials only (Stevens Creek)
• Psion/Symbian (EPOC – V. 5 and V. 6)
• Windows CE
* These operating systems do not support printing without the addition of
a printing applet. Trial versions of the printing applet are supplied on
the driver CD and on the Pentax website. Contact the applet provider
to purchase the one you want after the trial period. PocketPC 200 and
higher systems may use the WinCE driver if using application software
that is enabled to use it.
Drivers that must be installed
manually from the CD are:
• Linux – see Read Me instructions in CD directory.
• Mac OSX – see Read Me instructions in CD directory.
Please take time to fill out the warranty registration information
before installing any drivers to ensure you the best technical
support, should you need it.
The printer’s configuration, its use of selections about print density,
paper type, margins, etc., can be adjusted by using the Configuration
Utility, explained later in this chapter. A default set of configuration
data is programmed into the printer at the factory and may be
suitable for many users.
Page 7

Driver Installation
CAUTION: Please do NOT connect your PocketJet printer to your
computer via the USB cable UNTIL you have performed the
driver installation. If you accidentally do so, cancel the “New
Hardware Wizard”, disconnect the printer, and begin the driver
installation described below.
Your printer requires software drivers to communicate with your
computer and print properly. A CD with drivers and installation
information is provided with your PocketJet kit. The newest
information and drivers are available from the Pentax web site,
www.pentaxtech.com by selecting “Technical Support.” The
supplied driver CD and the website both list the latest driver version
numbers. If the website version is newer (with a higher version
number), we recommend that you install the website version.
CD Install
1. If you are installing PDA software, connect your PDA to your PC
now (PDA means a WinCE, PocketPC, Palm OS, or Symbian OS
device).
2. Insert the Driver CD in your PC’s CD drive.
3. Select “Installation,” select your printer type, and click
“Continue.”
4. Complete the Registration Information.
5. Select ALL operating systems you wish to install drivers for, and
then click “Continue.” Note: Your Windows operating system
will be selected by default.
6. Follow all on-screen instructions to install all the software you
selected. Each option selected has its own installer. They will run
one-by-one until all have been installed.
7. If installing PDA software, it may be necessary to “HotSync” with
your PDA now.
8. Complete any additional warranty information requested and then
submit it using your preferred method.
9. Click “Exit” to close the CD or feel free to browse the CD to learn
about additional solutions available for your PocketJet printer or
other Pentax products.
Note: If the automatic CD installation does not proceed as explained
above, use the manual install procedure below.
Manual Install
Some operating systems require installing the driver manually,
including Mac OS X and Linux. View the “Readme.txt” file on the CD
Page 8

for more information. Note that every driver can be installed manually
if necessary.
Browse the CD to locate the “Setup” or “Install” program for your
operating system, then double click on the “.exe” program icon and
follow the on-screen instructions.
If the installation does not proceed as explained above, contact Pentax
Customer Service.
Configuration Utility
The disk supplied with the PocketJet3 and 3Plus printers contains a
printer setup program that allows the user to modify the storable
configuration parameters of the printer.
While some features will be of potential benefit to all users, those
whose host devices are capable of sending only text and not special
commands will find this especially helpful in presetting margins,
page sizes and the like.
This program, PJ3CONFIG.EXE (and PJ3plusCONFIG.EXE), is
accompanied by the file PJ3FACTORY.CFG (and
PJ3plusFACTORY.CFG). The PJ3FACTORY.CFG file contains the
information that matches the printer configuration as it was shipped.
As you modify this information for your preferences and save them to
the printer, the file PJ3DEFAULT.CFG will be created with your
preferences. The PJ3CONFIG.EXE and any *.CFG files should be
located in the same folder when running the program.
Installing the Configuration Program:
When using the CD Installation program to install drivers for Windows
XP, 2000, Me, 98, and 95, the Configuration Program’s SETUP
utility will be launched at the same time automatically. You must
follow the onscreen instructions to complete the installation.
To install the Configuration Program independently, browse the CD
into the <CD-Drive>:\<PJ3 or PJ3plus>\Config folder, and then
double-click the PJ3ConfigSETUP.EXE (or
PJ3plusConfigSETUP.EXE), and follow the onscreen instructions.
Page 9

Using the Configuration Program:
• Connect an external power source, or be sure that the battery is
freshly charged.
• Assure that the Printer Driver has been installed and is functional.
• Connect the supplied USB cable between the printer and host
computer, or align the computer and printer Infrared ports.
• From the Start Menu, select Programs, select Pentax PocketJet 3,
and then select “PocketJet 3 (or 3plus) Configuration”
The application will load and will appear as follows:
FIGURE 5. Configuration Utility
If you prefer a language other than English, you may select this
first. Then, using either the ‘File’ pull-down, or the ‘Printer’
selector, you may choose the appropriate PocketJet printer.
The display above shows the parameters for the printers as they
are typically shipped in the U.S. market. These parameters
may be different in other countries or may have been specially
configured for some customers.
Configuration Options
Note: These configuration options are in some cases relevant only
where the host computer will be sending simple text data to the
printer and cannot send commands to perform these
configuration changes. Others affect the printer in all modes.
The first two items below are common to all modes.
Page 10

Auto-On:
When external power is applied to the printer, there are three
possible actions that the printer may take.
If Auto-On is set to ‘Disabled’, the printer will place itself in a
“sleep” state where minimal power is used. The printer’s
internal processor is kept alive, but no LEDs are lit and no
printing is possible. The Main Switch must be pressed to
wake the printer up for printing.
If Auto-On is set to ‘Enabled’, the printer will power up as
soon as an external power source is connected to the printer.
This can be useful in certain mobile installations where
access to the Main Switch is difficult or unavailable.
If Auto-On is set to ‘Enabled-No Main Switch’, the printer will
power up as soon as an external power source is connected,
and furthermore, the Main Switch cannot be used to turn the
printer off. This may be useful in some mobile installations
where the button could be accidentally pressed. Power
must be disconnected to shut off the printer.
Auto-Off:
When the printer is running on battery power, you may wish to
have the printer turn off automatically to conserve the battery.
You may choose to disable this feature by selecting ‘None’, or
you may select either a 10-minute or 30-minute time-out
period. If no data is received within the period selected, the
printer will turn itself off.
Page 11

Pre-Feed:
When the printer is powered on and paper is found in the infeed
area, the printer will normally advance the paper a short
distance. This is the default ‘Enabled’ operation of the printer.
However, roll paper users who leave paper loaded while
powering the printer up/down may find that this is
inconvenient as it will misregister the top of form on pre-
printed and perforated roll paper. Those users will likely wish
to ‘Disable’ this feature.
The following configuration options will be set automatically by
the Windows driver. If using text mode, they should be set by
the user.
Print Density:
This sets the default print density (darkness) of the printing.
Darker print will use more battery power, but may be easier to
read if the font or other printed information is made up of
very narrow lines. If battery conservation is more important,
adjusting the setting for lightest print will do so. ‘Low’ =
lighter, and ‘High’ = darker print.
Form Feed Mode:
This setting effects what the printer will do in response to a
Form Feed command from any source. Different modes are
appropriate depending upon the type of paper being used.
Page 12
/