Installation Manual for
RockBoard® Frame 4 XL
Mounting Brace for large Multi-Power Supplies
English
Note: The manufacturer reserves the right to change these specicaons without noce.
USA DISTRIBUTION: Framus &
W
ar
wick Music USA, Inc. |
[email protected] | 629.202.6790
CHINESE DISTRIBUTION: Warwick Music Equipment Trading (Shanghai) Co. Ltd. | info@warwick.cn | +862134060110
NORTH EUROPEAN DISTRIBUTION: ww
w
.rockboard.de |
[email protected] | www
.w-
distribution.de | www.facebook.com/warwickmusicdistribution
Headquarters: Warwick GmbH & Co. Music Equipment KG | 08258 Markneukirchen / Germany | +49 (0) 37422 / 555 - 0
Family Owned • Solar Powered • Sustainably Manufactured in a Green Environment
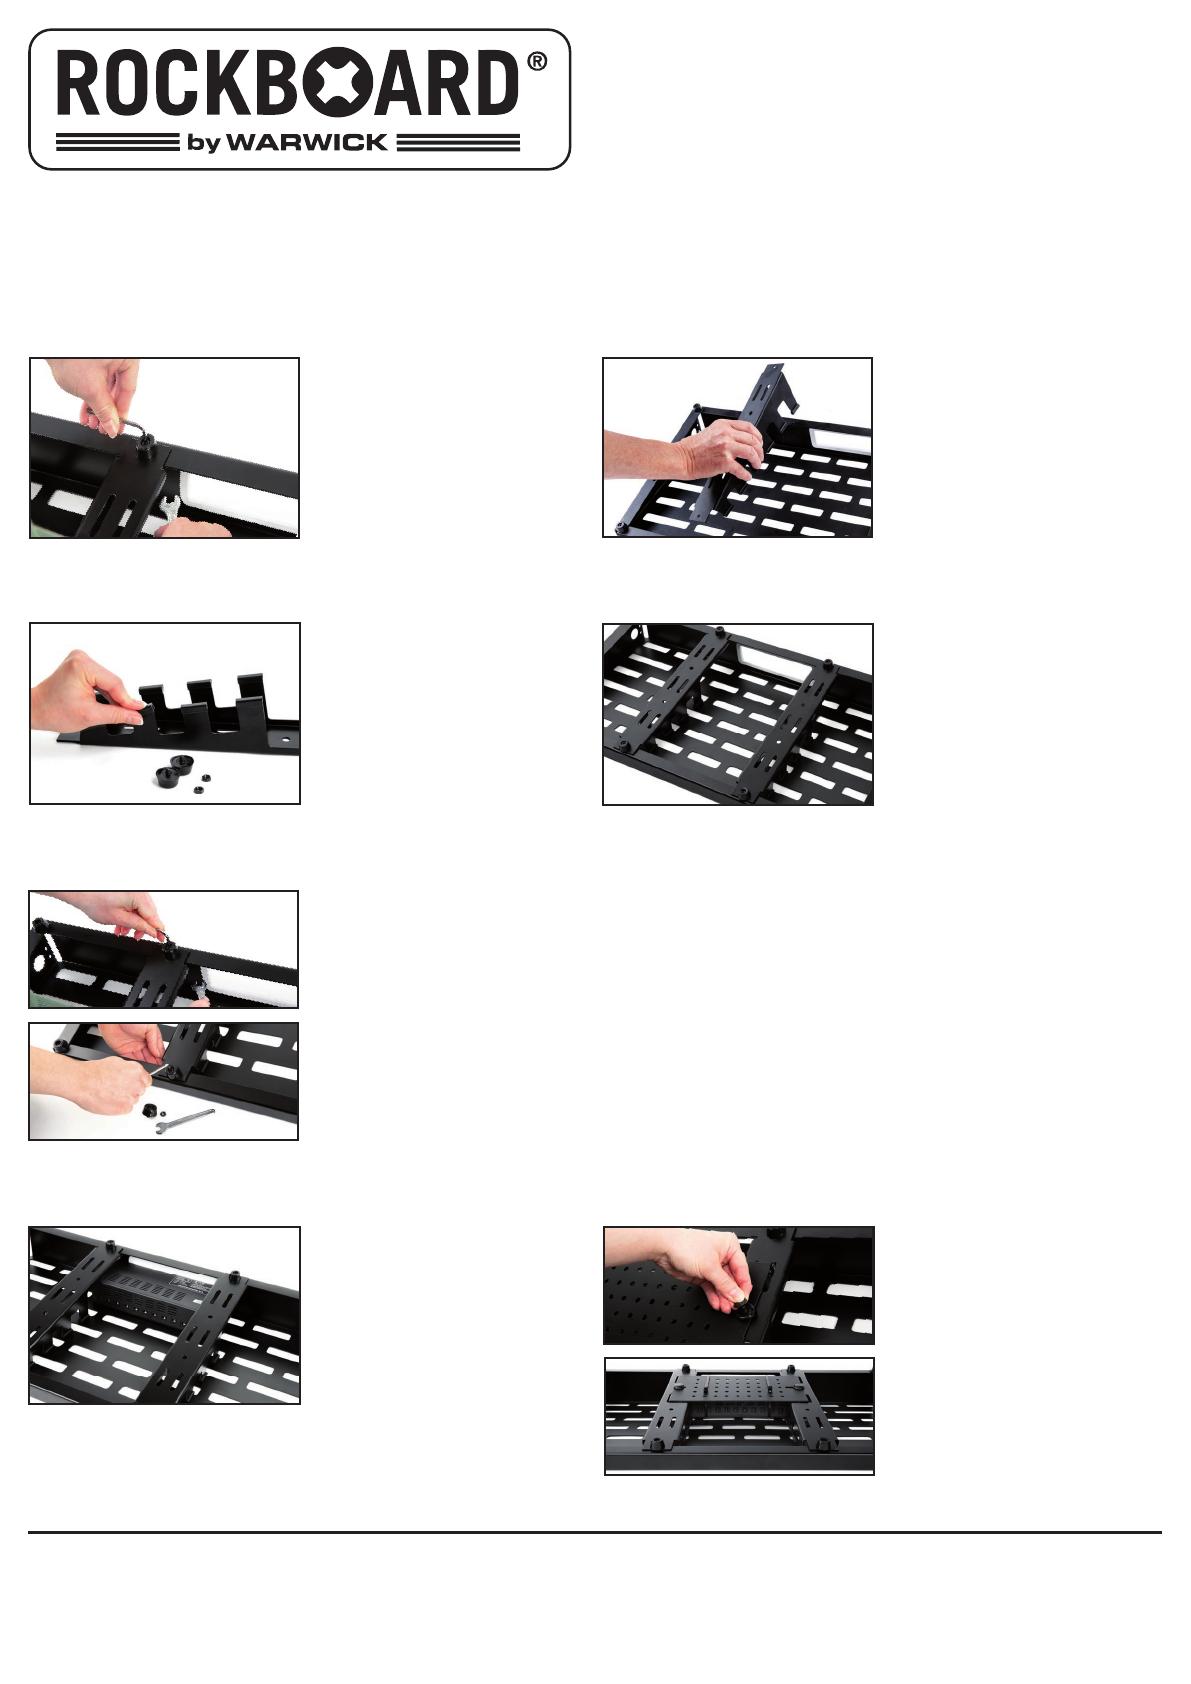
Mounng
Step 1
All tools required to mount the
RockBoard® Frame XL are included.
Remove one of the standard support
braces on your RockBoard®. To do
this, loosen and remove both screws
on the rubber feet.
Thank you for choosing a RockBoard® Frame 4 XL! The Frame 4 XL is an oponal replacement brace for the RockBoard® Quad 4.1, 4.2 & 4.3 pedalboards. This
allows you to mount even larger and wider mul-power supplies without sacricing the stability of your board.
Step 2
Once both screws are removed, you
can remove the support brace.
Step 3
Place the rubber shock absorbers on
the matching support pads of the
RockBoard® Frame 4 XL.
Step 4
Place the Frame 4 XL into your
RockBoard® pedalboard.
Step 5
Screw the RockBoard® Frame 4 XL to
the RockBoard® pedalboard.
Use the included wrench to posion
the nut. Ensure the Frame 4XL is
secure.
Your RockBoard® Frame 4 XL is now
completely mounted!
Mount two RockBoard® Frame 4 XL
(Quad 4.2 & Quad 4.3 only)
You also have the opon to install
two RockBoard® Frame 4 XL on the
Quad 4.2 and 4.3.
To do this, simply repeat the steps
described above using a second
Frame 4 XL in place of original
bracket.
Mounng of a RockBoard® The Tray
If you also have a RockBoard® The
Tray, you can now aach it as well, as
described in the associated manual.
The Frame 4 XL is fully compable
with The Tray system. To install, use
the associated manual.


