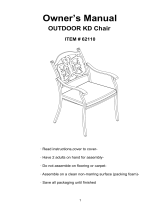
Noble House 21609 Operating instructions

Type
Operating instructions
Label Picture Description QTY
A Right Armrest 1
B Left Armrest 1
C Seat 1
D Backrest 1
E
Swivel Plate
(Pre-attached Levellers)
1
F Seat Cushion 1
G Back Cushion 1
Caution : You must read this before you proceed
Swivel Chair
Noble House Home Furnishings LLC
Page 1 OF 6
Label Picture Description QTY
Bolt (M6*40mm) 15
Washer 15
Allen Key 1
Before Beginning
Assembly:
Overview
This Swivel Chair has multiple parts and may require up to 30 minutes to assemble. To give you an overview of the Swivel
Chair parts, the above picture is to help you put the various parts into perspective. Please read through the instructions
below to familiarise yourself with the parts and steps before assembly.
Righ Armrest (A)
Left Armrest (B)
Backrest (D)
Seat (C)
Swivel Plate (E)
Seat Cushion (F)
Back Cushion (G)
Noble House Home Furnishings LLC
Page 2 OF 6
Step 1
Step 2
Place the Seat(C) between the Right Armrest(A) and Backrest(D).
Attach Seat(D) to Right Armrest(B) using Bolts(), and Washers() with Allen Key() as shown above.
Do not fully tighten the Bolts.
Open the carton and place all the parts onto a clean, non-marring surface.
Place the Right Armrest(A) with its inside facing skywards.
Align the Backrest(D) with Right Armrest(A), by inserting the Dowel on the Backrest(D) into the mounting position of the Right
Armrest(B) as shown above.
Attach Backrest(D) to Right Armrest(A) using Bolts(), and Washers() with Allen Key().
Do not fully tighten the Bolts.
Note: Occationally some of the PE wicker will cover the Bolt points, preventing easy
assembly, the PE wicker should not be cut but moved away from the mounting positions.
Dowel
Noble House Home Furnishings LLC
Page 3 OF 6
Step 3
With the help of an adult partner, stand the Chair up.
Align the Left Armrest with Backrest(D) and Seat(C) by inserting the Dowel on the Backrest(D) into the Left Armrest(B).
Attach Left Armrest(B) to Seat(C) and Backrest(D) using Bolts(), and Washers() with Allen Key().
Do not fully tighten the Bolts.
Step 4
With the help of your adult partner, place the Chair on a level surface to check for wobbles.
If it wobbles, lift the Chair some 30cm to 50cm high from the ground.
Keep your feet and toes well away from the drop zone.
Drop the Chair freely and vertically with all four legs, hitting the ground, all at the same time.
This Drop Test will help to ensure that all the Bolts and gaps reach full alignment status.
Test again for evenness on a level surface.
If no wobbles are found, slowly and steadily, place the Chair facedown.
Then, proceed to tighten all Bolts at all joints in a sequential manner.
When tightening the Bolts, tighten sequentially.
DO NOT tighten any Bolt fully and then move on towards the next one.
This could cause the frame to warp. If there are still wobbles, loosen the Bolts and execute the same drop test.
If the Chair is not stable, it could lead to damage to the product.
Dowel
Noble House Home Furnishings LLC
Page 4 OF 6
Place the Seat Cushion(F) and Back Cushion(G) on the Swivel Chair.
Your Swivel Chair is ready for use.
This Swivel Chair can only be used on a flat, level surface.
Step 5
Step 6
Step 6
With the help of your adult partner, lay the Chair down on a clean, non-marring surface.
Place the Swivel Plate(E) between the inner bottom bars of the Left Armrest(B) and Right Armrest(A).
Attach the Swivel Plate(E) to Left Armrest(B) and Right Armrest(A) using Bolts(), and Washers() with Allen Key().
Please attach the Swivel Plate(E) to the Armrest on the floor first. Then, with the help of your adult partner, turn the
Chair over onto the other Armrest and assemble the Swivel Plate(E).
Tighten all Bolts fully in a sequential manner.
With the help of your adult partner, stand the Swivel Chair up.
Adjust the Pre-attached Levellers on the Swivel Plate(E) until the Chair is level with the ground.
Adjust height for balance
Adjust low for balance
Noble House Home Furnishings LLC
Page 5 OF 6
What is Proposition 65?
Proposition 65 is a California law that requires warning labels on products that may contain one of more than 800-plus
chemicals or ingredients that the California Office of Environmental Health Hazard Assessment (OEHHA) has deemed to
cause cancer or other reproductive toxicity. Chemicals and elements on this list include wood dust, brass, and other
everyday substances, which can be found in very common household items, such as: lamps, tableware, jewelry, crystal
glasses, electric cords, beauty products, automobiles, and furniture.
Why Did I Find a Proposition 65 Warning on My Home Goods Product?
We include Proposition 65 warnings on all of our products because there is always a chance that one of the 800-plus
common chemicals and ingredients listed under this law could potentially be on our furniture or packing materials. We risk
large fines under this law, if we don't include this warning.
Should I worry?
We realize you may be worried finding this warning on our products, but we want to reassure you that the hazardous
exposure limits for any of these chemicals have never been found on furniture products that we’ve shipped to our customers.
Additionally, this warning label is very common and can be found on almost every piece of furniture sold in the state of
California.
Just How Common Are Proposition 65 Warnings?
Proposition 65 warnings have become so common in California that it is hard to take a trip to a local bank, grocery store, or
restaurant without finding at least one warning. In fact, even the Disney Land Resort has a Proposition 65 warning:
Noble House Home Furnishings LLC
Page 6 OF 6
  • Page 1 1
  • Page 2 2
  • Page 3 3
  • Page 4 4
  • Page 5 5
  • Page 6 6

Noble House 21609 Operating instructions

Type
Operating instructions

Ask a question and I''ll find the answer in the document

Finding information in a document is now easier with AI