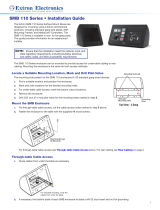
SMB 210 Series • Installation Guide
The Extron SMB 210 Series Surface Mount Boxes are designed for mounting Extron Flex55 mounting kits and EU devices. The
SMB 210 Series enclosures are available in various sizes. The SMB enclosures can be installed in any of three methods: set
unattached on a table, fastened to a table with screws, or clamped to a table using the optional SMB Table Clamp Kit. The bottom
plate of each SMB enclosure includes a #6‑32 stud insert and nut, if necessary for grounding.
This guide provides installation instructions for an experienced installer.
NOTE: Ensure that the installation meets the national, local, and state regulatory requirements, including building,
electrical, safety codes, and ADA accessibility requirements.
Setting SMB on a Table
Refer to Rear Panel Cabling on the next page to position
your cables. Place the enclosure in any convenient
location.
Fastening SMB to the Table
Find a suitable location for the enclosure. Position it and mark pilot hole locations for the two mounting holes. If desired, mark and
drill a cutout location for cable access or refer to Rear Panel Cabling.
SMB Table Clamp: Optional Accessory
As an option, the SMB Table Clamp Kit can be used
to anchor 1‑ to 4‑gang enclosures to the edge of a
table via non‑destructive means (no cutting, drilling,
no marring of table surface). Go to www.extron.com
for more information about the SMB Table Clamp Kit.
Fasten with supplied
#8 wood screws.
For standard mounting,
route the cables from
under the table.
Cable
Shield
Table
Clamp
Plastic
Rivet
2
3
1
Extron
VOLUME
PC
VIDEO
DISPLAY
ON
OFF
PC
Mounting Hole
Mounting Hole
Drill 3/32" pilot holes for the
mounting holes.
Alternate Mounting Hole
Fasten with supplied
#8 wood screws.
with supplied
ws.
For standard mounting,
route the cables from
under the table.
Cable
Shield
Table
Clamp
Plastic
Rivet
Extron
VOLUME
PC
VIDEO
DISPLAY
ON
OFF
PC
Mounting Hole
Top View - 3 Gang
Mounting Hole
Alternate Mounting Hole
Drill 3/32" pilot holes for the
mounting holes.
1
Fasten with supplied
#8 wood screws.
For standard mounting,
route the cables from
under the table.
Cable
Shield
Table
Clamp
Plastic
Rivet
2
3
1
Extron
VOLUME
PC
VIDEO
DISPLAY
ON
OFF
PC
Mounting Hole
Mounting Hole
Drill 3/32" pilot holes for the
mounting holes.
Alternate Mounting Hole


