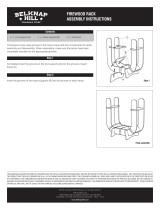
Step 1
Final assembly
THE DIAGRAMS AND INSTRUCTIONS IN THIS BROCHURE ARE FOR ILLUSTRATION PURPOSES ONLY AND ARE NOT MEANT TO REPLACE A LICENSED PROFESSIONAL. ANY CONSTRUCTION OR USE OF THE
PRODUCT MUST BE IN ACCORDANCE WITH ALL LOCAL ZONING AND/OR BUILDING CODES. THE CONSUMER ASSUMES ALL RISKS AND LIABILITY ASSOCIATED WITH THE CONSTRUCTION OR USE OF THIS
PRODUCT. THE CONSUMER OR CONTRACTOR SHOULD TAKE ALL NECESSARY STEPS TO ENSURE THE SAFETY OF EVERYONE INVOLVED IN THE PROJECT, INCLUDING, BUT NOT LIMITED TO, WEARING
THE APPROPRIATE SAFETY EQUIPMENT. EXCEPT AS CONTAINED IN THE WRITTEN LIMITED WARRANTY, THE WARRANTOR DOES NOT PROVIDE ANY OTHER WARRANTY, EITHER EXPRESS OR
IMPLIED, AND SHALL NOT BE LIABLE FOR ANY DAMAGES, INCLUDING CONSEQUENTIAL DAMAGES.
©2014 Universal Forest Products, Inc. All rights reserved.
UFP Woodburn LLC
2895 Progress Way | Woodburn, OR 97071 | 503-226-6240
8012 8/15
www.BelknapHill.com
KNOCKDOWN SAWHORSE
ASSEMBLY INSTRUCTIONS
Contents
• 2 Leg supports • 1 Center support
Completely insert the groove of center support into the groove of a leg support.
Repeat this step for the other leg support.
Step 1
The knock-down sawhorse uses grooves in the leg supports and center support
for quick assembly and disassembly. When assembling, make sure the pieces have
been completely inserted into the appropriate groove.

Paso 1
Armado final
LOS DIAGRAMAS E INSTRUCCIONES DE ESTE FOLLETO SON PARA FINES ILUSTRATIVOS SOLAMENTE Y NO ESTÁN DESTINADOS A REEMPLAZAR A UN PROFESIONAL CERTIFICADO. CUALQUIER
CONSTRUCCIÓN O USO DEL PRODUCTO DEBEN ESTAR DE ACUERDO CON TODOS LOS CÓDIGOS LOCALES DE CONSTRUCCIÓN O DE ZONIFICACIÓN. EL USUARIO ASUME TODOS LOS RIESGOS Y
RESPONSABILIDADES ASOCIADOS CON LA CONSTRUCCIÓN O EL USO DE ESTE PRODUCTO. EL USUARIO O CONTRATISTA DEBEN TOMAR TODAS LAS MEDIDAS NECESARIAS PARA GARANTIZAR LA
SEGURIDAD DE TODAS LAS PERSONAS INVOLUCRADAS EN EL PROYECTO, INCLUYENDO, ENTRE OTRAS, EL USO DEL EQUIPO DE SEGURIDAD APROPIADO. A EXCEPCIÓN DE LO CONTENIDO EN LA
GARANTÍA LIMITADA POR ESCRITO, EL GARANTE NO PROPORCIONA NINGUNA OTRA GARANTÍA, YA SEA EXPRESA O IMPLÍCITA, Y NO SERÁ RESPONSABLE DE NINGÚN DAÑO, INCLUIDOS DAÑOS
CONSECUENTES.
©2014 Universal Forest Products, Inc. Todos los derechos reservados.
UFP Woodburn LLC
2895 Progress Way | Woodburn, OR 97071 | 503-226-6240
8012 8/15
www.BelknapHill.com
CABALLETE DESARMABLE
INSTRUCCIONES DE ARMADO
Contenido
• 2 Soportes para patas • 1 Soporte central
Inserte completamente la ranura del soporte central en la ranura de uno de los
soportes de pata.
Repita este paso para el otro soporte de pata.
Paso 1
El caballete desarmable utiliza ranuras en los soportes de patas y en el soporte
central para su rápido armado y desarmado. Al armar, asegúrese de que las piezas
estén insertadas por completo en la ranura adecuada.
/


