Page is loading ...

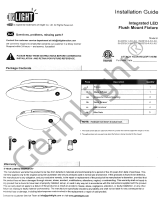
INSTALLATION INSTRUCTIONS
KNOOK FA UNDERCABINET
®
RAB Lighting is committed to creating high-quality, affordable, well-designed and energy-efficient LED lighting and controls that make it easy for electricians to install
and end users to save energy. We’d love to hear your comments. Please call the Marketing Department at 888-RAB-1000 or email: marketing@rablighting.com
WARNING: Risk of fire or electric shock. Suitable For Indoor Dry
Locations Only.
WARNING: To prevent overheating do not install in small
enclosed spaces.
WARNING: Do not install this product in an environment
outside the listed ambient temperature (-20° to +40°C).
WARNING: 300W maximum linear run.
Knockout
Housing
Rear Access
Door Screw
The fixture is suitable for indoor dry locations only.
1. Determine location to install fixture(s).
WARNING: To prevent wiring damage or abrasion, do not
expose wiring to edges of sharp objects.
2. Access wiring compartments using option A or B:
A) Rear access door knockout (Fig. 1).
Remove Knockout by using a punch tool (not supplied.
Loosen Rear Access Door Screw and remove door.
B) Alternate Knockouts for 24” or 32” only(Fig. 2 and 3).
Alternate Knockouts are located along back and top of
housing. Remove Wiring Compartment Cover.
3. To access internal wiring remove Wiring Compartment Cover
(Fig.3).Feed wires through 3/8” Wire Connector (supplied) and
install connector to Rear Access Door. Wire cable to push in
connectors. Secure Rear Access Door to fixture (Fig. 4).
4. Secure fixture to mounting surface using (2) flat head wood
screws (supplied), be careful not to drive screws all the way
through the cabinet bottom. Use shorter screws if neccessary
(supplied by others). Once the fixture is secure to surface insert
Screw Hole Covers (supplied).
KNOOK FA 8” KNOOK FA 16” KNOOK FA 24” KNOOK FA 32”
Alternate Knockouts
24”, 32” only
Wiring Compartment Cover
On-O
Switch
Screw Hole Covers
(supplied)
Rear Access Door
3/8” Wire Connector
(supplied)
Push-In Connectors
IMPORTANT
READ CAREFULLY BEFORE INSTALLING FIXTURE. RETAIN THESE INSTRUCTIONS FOR FUTURE REFERENCE.
RAB fixtures must be wired in accordance with the National Electrical Code and all applicable local codes. Proper grounding is
required for safety. THIS PRODUCT MUST BE INSTALLED IN ACCORDANCE WITH THE APPLICABLE INSTALLATION CODE BY A PERSON
FAMILIAR WITH THE CONSTRUCTION AND OPERATION OF THE PRODUCT AND THE HAZARDS INVOLVED.
WARNING: Make certain power is OFF before installing or maintaining fixture. No user serviceable parts inside.
SAFETY INSTRUCTIONS
MOUNTING INSTRUCTIONS
Fig: 1
Fig: 2
Fig: 3
Fig: 4

INSTALLATION INSTRUCTIONS
KNOOK FA UNDERCABINET
®
RAB Lighting is committed to creating high-quality, affordable, well-designed and energy-efficient LED lighting and controls that make it easy for electricians to install
and end users to save energy. We’d love to hear your comments. Please call the Marketing Department at 888-RAB-1000 or email: marketing@rablighting.com
Use In-Line Connector supplied with each fixture to connect
fixtures directly to each other end-to end.
Use Junction Box with Motion Sensor (ordered separately) for
automatic on/off control.
Use Junction Box (ordered separately) to split electrical connections
between two fixtures.
In-Line Connector (supplied)
Use 6”, 12”, 24”, 72” flexible Jumper Cables (ordered separately) to
interconnect nearby fixture.
Use 6FT flexible Cord and Plug (ordered separately) to
power fixture.
Use 6FT flexible Power Feed Cord (ordered separately) to connect
fixture to Junction Box (supplied by others).
Junction box with Occupancy Sensor
(ordered separately)
Junction Box
(ordered separately)
Jumper Cable
(ordered separately)
Cord and Plug
(ordered separately)
Power Feed Cord
(ordered separately)
Fixture
Fixture
INTERCONNECTING FIXTURES
ACCESSORIES KCP
ACCESSORIES JBKNOOK
ACCESSORIES KJC6, KJC12, KJC24, KJC72
ACCESSORIES KPCJ
ACCESSORIES OCSKNOOK

INSTALLATION INSTRUCTIONS
KNOOK FA UNDERCABINET
®
RAB Lighting is committed to creating high-quality, affordable, well-designed and energy-efficient LED lighting and controls that make it easy for electricians to install
and end users to save energy. We’d love to hear your comments. Please call the Marketing Department at 888-RAB-1000 or email: marketing@rablighting.com
• DIVA DV-603P
• SKYLARK S-600P
• SKYLARK SELV-300P
• SKYLARK CTCL-153P
• DECORA IPL06-10Z
• DECORA 6631-P
• COOPER-TAL06P-C1
• LUTRON-RRD-8ANS-WH
• LUTRON-RRD-6NA-WH
• LEVITON 35A00-1
1. Check that the line voltage at fixture is correct. Refer to
wiring directions.
2. Is the fixture grounded properly?
CAUTION: Be sure fixture temperature is cool enough to touch.
Do not clean or maintain while fixture is energized.
1. Clean polycarbonate lens with non-abrasive glass cleaning
solution.
2. Do not open fixture to clean the LED. Do not touch the LED.
KNOOKFA 0720
Easy Answers
rablighting.com
Visit our website for product info
Tech Help Line
Call our experts: 888 722-1000
e-mail
Answered promptly - sales@rablighting.com
Free Lighting Layouts
Answered online or by request
© 2020 RAB LIGHTING Inc.
Northvale, New Jersey 07647 USA
Note: These instructions do not cover all details or variations in equipment nor do they provide for every possible situation during installation operation or maintenance.
Make sure the supply voltage is the same as the luminaire voltage,
see fixture spec label. Diming compatible with most incandescent
dimmers.
1. Connect the black fixture lead to the LINE supply lead.
2. Connect the white fixture lead to the COMMON supply lead.
3. Connect the GROUND wire from fixture to supply ground.
This partial list contains a representative selection of known
compatible dimming controls.
FIELD ADJUSTMENT
Follow instructions below to change the fixture color temperature
from the factory settings. Factory Settings: 3000K.
1. Locate the Selector Switch on the surface of the fixture as
shown in Fig. 5.
2. Select desired color temperature by sliding the respective
switch left or right to the deisred value.
3. Power Switch position | is 50% output, O is off position, || is
100% output.
Power
Switch
Selector
Switch
Selector
Switch
73691-RAB
ON OFF WIRING
COMPATIBLE DIMMERS
TROUBLESHOOTING
CLEANING & MAINTENANCE
Fig: 5
1/3