Page is loading ...

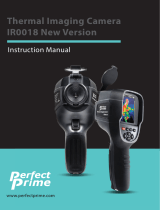
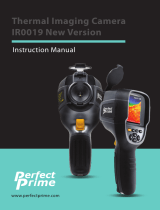
Thermal Imaging Camera
IR0280
Instruction Manual

Contents
P. 1
1. Overview ................................................
2. Safety & Considerations ..............................
3. Product Features .......................................
4. Product Specifications
4.1. Product Specications ............................
4.2. Thermal Image Specications ....................
4.3. Software Features .................................
5. Operation Flow
5.1. Power On ..........................................
5.2. Power O ..........................................
5.3. Display O (Sleep Mode) .........................
5.4. Menu Screen .......................................
5.5. Measurement Screen .............................
5.6. Display Brightness ................................
5.7. Date and Time .....................................
5.8. Auto-o Timer ....................................
5.9. Hi-Low Temperature Alarm ......................
5.10. Auto-monitor Alarm ..............................
5.11. Temperature Unit .................................
5.12. Image Format .....................................
5.13. Factory Reset ......................................
5.14. Min/Max Crosshair ................................
5.15. Color Palette ......................................
5.16. Color Palette Guide ..............................
5.17. View Images/Videos ..............................
5.18. Delete Images/Videos ............................
5.19. Image Overlay Adjusting ........................
5.20. CSV Files ..........................................
5.21. Emmisivity ........................................
2 - 3
4
5
6
6
7
8
8
8
8 - 9
10 - 11
12
12
12
13
13
14
14
14
14
15
15
16
17
17
18
18 - 19

1. Overview
P. 2
IR0280 is a thermal imaging camera that integrates surface tempera-
ture measurement and real-time thermal image. With this product,
the potential problems can be identied on the color display screen
which is helpful for users to locate problems, take readings and solve
the issue.
The product has a visual camera integrated to increase the dierenti-
ation degree. The thermal and full vision images and videos can be
stored in the internal memory card or an additional detachable SD
card. The image or video can be stored in PC to generate a report and
print.
The following are the major features of IR0280:
1. High accuracy: The adjustable radiation coecient increases
the measurement accuracy of reective
surfaces.
2. Time-saving: The traditional infrared thermometer needs
to measure every component one by one,
this is not necessary for the IR0280.
3. Easy to use: Turn on the device and start measuring
temperature right away.
4. Image & Video: The IR0280 has the capabilities to take both
images and videos, making it easier for users
to analyze the situation.
5. Adjustable: 9 types of color palettes and wide range of
emissivity values provided.

1. Overview
P. 3
The product can be utilized in many elds, for instance:
1. Detect spills and leaks of chemicals which have dierent
thermal signatures to the surroundings.
2. Fire fighting: Vision can be obscured by smoke and debris in the
event of a re, thermal imaging can see through this and locate
victims or re spots.
3. Locate the source of abnormal leaking of heat of a house or a
machine, nd out the problem area and x it.
4. Enable drug-enforcement units to locate cannabis plants by
detecting abnormal amount of heat spot in buildings.
5. Moisture detection: Areas with lower temperatures to its
uniform surroundings can be a source of moisture staining or
damage.
6. Measure body temperatures: Point the thermal imaging camera
at a person to nd their surface body temperature.
7. Night vision: Measuring the electromagnetic energies given o
when objects emit heat, the IR0280 translates those energies into
visible light for users to see them in the dark.
8. Building inspection: Check that heat is retained uniformly in a
building.
IR0280 is the ideal selection for electrician, maintenance personnel,
technicians and even the emergency personnel.

P. 4
2. Safety & Considerations
Please read the instructions carefully so as to
ensure accurate measurement results and safety:
DANGER
Do not use device in explosive,
ammable or corrosive
environment.
Do not dismantle the product,
doing so can damage it and
revoke the warranty.
Since the product is a precision
electronic and sensitive optical
device. Do not drop it or allow
impacts to occur to prevent
damage.
Please use a damp cloth or
gentle soap to clean the
enclosure of the device. Do not
use abradant, isopropanol or
solvent to clean. Special optical
lens cleaner should be used to
clean the screen.
It is suggested to used the
attached USB cable.

3. Product Features
P. 5
Visual IR Thermometer
1
2
3
4
5
6
7
Menu Button
Up, Down, Left and
Right Keys
Power Button
USB Port & SD Card Slot
1
2
3
4
Visible Light Camera
Thermal Camera
Measure Button
7
5
6

4. Product Specications
P. 6
Power Supply 3.7V Li-ion rechargeable battery,
2500mAh, Size 18650
Panel 2.8” color LCD display
Touch Panel Resistive type Touch Panel
Keys 7 keys (Power, Up/Down/Left/Right,
Menu, Measure)
Sensors 32 x 32 Thermal Array, Humidity Sensor,
CMOS sensor
Internal memory 1GB memory
External memory 16GB SD card included
(Micro SD Slot)
USB connection Photo upload to PC, and USB charging
battery
Battery life 6hrs
Auto Power-off time
5min
Operating temperature -10°C ~ +50°C (14°F ~ 122°F)
Storage temperature -20°C ~ +60°C (-4°F ~ 140°F)
Dimensions 215 x 55 x 62 mm
Weight 230g
Warranty 2 years
4.1. Product Specifications
Resolution of infrared image 32*32(1024) pixel
Resolution of visible image 0.2 megapixels
4.2. Thermal Image Specifications

Field angle/shortest focal
distance
Thermal sensitivity
Range of temperature
measurement
Measure accuracy
Emissivity
Image capturing frequency
Range of wave length
Focal distance
Vision option
Image format
Video format
4. Product Specications
P. 7
Blending mode Hue blending
Temperature Alert High or Low Temperature Alert
Image & Video recording BMP/JPG (Image), MP4 (Video)
Brightness Adjustable Brightness
Auto off function Adjustable Auto-o function
4.3. Software Features
33°x33°/0.1m
0.15°C (32.27°F)
-30°C ~ 1000°C (-22°F~1832°F)
-30~ 300°C ±1% or ±1°C (-22~572°F±1% or ±33.8°F)
300~1000°C ±2% or ±2°C (572~1832°F±2% or ±25.6°F)
0.01 – 1.0
6Hz
8-11.5µm
Fixed
5 variants
BMP, JPG
MP4

5. Operation Flow
P. 8
7
Opening Screen
(wait for
initialization)
5.1. Power ON: Press & Hold Power button for 2 sec.
5.2. Power OFF: Press & Hold Power button for 2 sec.
• A pop-up
menu
appears for
Power O or
Reboot
selection.
• Use Up/down
button to
select, and
press Measure
button to
conrm.
Measurement
Screen
5.3. Display OFF (Sleep Mode): Press Power button once to turn o
display. Press Power button again to turn on it.
Remark:
a. The Measurement screen is the default screen when turn on the display.
5.4. Menu Screen: Press the Menu button to enter Menu mode.
The default selection is rst icon (i.e. Display brightness)
- Use Up/Down/Left/Right button to select the icon.
Then, press Measure button to open the selected item.
- Press Menu button to back to Measurement Screen.

5. Operation Flow
P. 9
The summary of Menu icons:
Display Brightness: To set the brightness of display
Date and Time: To set time and date
Auto-Off Timer: To set the auto-o timer for the Display
Hi-Low Temperature Alarm: To set the high or low temperature
alarm
Auto-monitor Alarm: To capture the thermal image when over the
Temperature Alarm over a period of time
Temperature Unit: To set temperature unit degree C° / degree F°
Emissivity: To adjust the emissivity from 0.01 to 1.0
View Image: To view the captured thermal image/video
Image format: To set the image output format (Bitmap or JPEG)
Factory Reset: To reset factory setting
Color Palette: To select the thermal image color palette
Color palette guide: To turn on/o the color palette reference
guide
Trash: To delete image/video permanently
Max/Min: To show/ not show the maximum and minimum points

5. Operation Flow
P.10
Time & Emissivity
5.5. Measurement Screen
Image View Area
Object Temperature mark
Palette guide bar included min/max
object temperature
- Press Menu button to enter Menu mode.
- Press Up/Down to select image mode: Thermal Image, Visual Image,
Overlay Image.
Thermal
Image
Visual
Image
Overlay
Image
- Press Left button to select
lter mode: Temporal
lter, Wide Gaussian lter,
No lter.
Temporal
Filter
Wide Gaussian No lter

P.11
5. Operation Flow
- Press Right button to select zoom in or
zoom out.
- Press Measure button to capture image;
Press & Hold Measure button to take
video.
If external SD card is not present, the image will be saved to the internal
memory. If external SD card is present, the image will be saved to the SD
card.
The recording icon appear to indicate the
video recording. The video is saved in mp4
format. When the measure button is
released, the recording will stop and be
saved.
- Touchable object temperature mark
Touch the screen to move the
object temperature mark, and
show the temperature of that
location.

5. Operation Flow
P.12
5.6. Display Brightness
- Press Left/Right button to increase/ decrease the % of
display brightness.
- Press Measure to conrm.
- Press Menu to return to the previous screen.
5.7. Date and time
- Press Up/Down button to increase/decrease the selected
item.
- Press Left/Right button to select the item for change.
- Press Measure to conrm.
- Press Menu to return to the previous screen.
5.8. Auto-off timer
- Press Left/Right to increase/decrease the
selected item.
- Press Up/Down to select the Minute or Second.
- Press Measure to conrm.
- Press Menu to return to the previous screen.
Remark:
a. The minimum Auto-o timer is 0 min,30 sec.
b. The maximum Auto-o timer is 30 min,0 sec.
c. The timer is for Display OFF only.

5. Operation Flow
P.13
5.9. Hi-Low Temperature Alarm
- Press and hold the Measure button to turn ON
or OFF the Hi-Lo temperature alarm setting
- Press Left/Right button to increase/ decrease
the selected item.
- Press Up/Down button to select the High or
Low Temperature setting.
- Press Measure to conrm
- Press Menu to return to the previous screen.
Remark:
a. The Hi-Low Temperature Alarm is OFF by default.
b. Press and Hold Measure button to turn ON or OFF
the Hi-Low Temperature Alarm
Low
Temperature
Alarm Palette
guide (Blue
color)
High
Temperature
Alarm Palette
guide (Red
color)
5.10. Auto-Monitor Alarm
Remark:
a. Duration is from 15min, 30min, 45min, 60min, 90min and 120min.
b. The Auto-monitor Alarm Duration is OFF by default.
c. Press and Hold Measure button to turn ON or OFF the Auto-Monitor Alarm.
- Press and hold the Measure button to turn ON or
OFF the Hi-Lo temperature alarm setting
- Press Left/Right button to increase/
decrease the selected item.
- Press Up/Down button to select the Temperature
or Duration.
- Press Measure to conrm.
- Press Menu to return to the previous screen.

5. Operation Flow
P.14
5.12. Image Format
- Press Left/Right to select BMP or JPG image format.
- Press Measure to conrm.
- Press Menu to return to the previous screen.
5.13. Factory Reset
- Press Left/Right button to select YES or NO.
- Press Measure to conrm.
- Press Menu to return to the previous screen.
5.11. Temperature Unit
- Press Left/Right button to select degree °C or degree °F.
- Press Measure to conrm.
- Press Menu to return to the previous screen.
5.14. Min/Max Crosshairs
Min/Max ON Min/Max OFF

5. Operation Flow
P.15
Remark:
a. When ON, exact maximum and minimum points and temperatures
will both show on the measurement screen.
b. When OFF (default), maximum and minimum temperatures will only
show at the bottom of the measurement screen.
5.15. Color Palette
- Press Up/Down button to select the color palette.
- Press Measure to conrm.
- Press Menu to return to the previous screen.
5.16. Color palette guide
- Press Left/Right button to select ON or OFF.
- Press Measure to conrm and back to the previous
screen.
- Press Menu to back to the previous screen.
- Palette guide
ON
- Palette guide
OFF

P.16
5. Operation Flow
5.17. View Images/Videos
- Press Up/Down/Left/Right button to select Image Icon.
- Press Measure to open image/video; Press and Hold
Measure to delete selected item.
- Press Menu to return to the previous screen.
a) View Image or Video
Image Video
- For the video, press Measure. button to
start the video
- Press Left/Right button for Previous/Next
Image or Video.
- Press Menu button to return to the
previous screen
b) View Image with touchable object temperature mark
- Touch the screen to show the
temperature of that location.
Original Image New movable
temperature mark
c) Delete Image or Videos
- Hold the measure button until the pop-up
menu appears.
- Press Left/Right button to select BACK or
Trash icon.
- Press Measure to conrm.

5. Operation Flow
P.17
5.18. Deleted Images/Videos
- Press Up/Down/Left/Right button to select Image Icon.
- Press Measure to open the image or video; Press and
Hold Measure to pop-up the recover or permanent
delete menu.
- Press Menu to return to the previous screen.
a) Recover Image
- Press and Hold Measure to pop-up the
recover or permanent delete menu.
- Select the Recover button, and press
Measure to conrm.
- The selected item will be recovered.
b) Permanently delete image
- Select the Permanent Delete button, and
press Measure to conrm.
- The selected item will be deleted
permanently.
5.19. Image Overlay Adjusting
When using the Image overlay mode (50%
infrared, 50% visual), hold on to the menu
button until you see the word “calibration”
at the top of the screen in red. Use the
Up/Down/Left/Right key to adjust the
thermal image and visual image until they
align (see above images for reference).
Before adjusting After adjusting

P.18
5. Operation Flow
5.21. Emissivity
- Press Up/Down button to adjust the emissivity.
- Press Measure to conrm
- Press Menu to return to the previous screen.
5.20. CSV Files
For every image you take, CSV Files of each image would be saved for you
to analyze and generate reports. The le shows the temperature point of
each 32 x 32 pixel. You can view these les in Internal Storage/SD Card ->
DCIM -> Csv.
Here is an example of what the le looks like:

P.19
5. Operation Flow
There are four types of object measurement mode:
1. Coarse object (easy to give out energy)(0.95);
2. Semi-matte object (0.80);
3. Semi-shiny object (0.60);
4. Shiny object (0.30);
Substance Thermal Substance Thermal
radiation radiation
Bitumen 0.90-0.98
Concrete 0.90
Cement 0.96
Sand 0.90
Earth 0.92-0.96
Water 0.92-0.96
Ice 0.96-0.98
Snow 0.83
Glass 0.90-0.95
Ceramics 0.90-0.94
Marble 0.94
Gypsum 0.80-0.90
Mortar 0.89-0.91
Brick 0.93-0.96
Black cloth 0.98
Human skin 0.88
Foam 0.75-0.80
Charcoal dust 0.96
Paint 0.80-0.95
Matte paint 0.97
Black rubber 0.9
Plastic 0.85-0.95
Timber 0.90
Paper 0.70-0.94
Chromium 0.81
hemitrioxide
Copper oxide 0.78
Ferric oxide 0.78-0.8
Textile 0.90
The table of Emissivity Table:
/