Page is loading ...

Universal Base Stand
MPT-200S
instructions manual
(ver.2.0 2014/8)
!
About MPT-200S
● MPT-200S is a multi-use base stand
that accepts many of Minoura's
accessory attachments.
● You can choose the leg pattern from
K-style or X-style.
K-Style allows set-up next to a wall only
while X-Style oers more exibilty in
where the stand and attachments can
be placed.
● The pillar is light weight and durable
made of 45mm diameter light alloy
tubing.
Choose the attachment for 45mm size.
Cautions
● Place the stand only on a level, stable
oor. Adjust all four feet to level the
stand.
● When using the stand in the K-Style
layout, place the stand as close to the
wall as possible to prevent the stand
from tipping over backwards.
Do not install the attachments on the
back side of the stand.
Contact
MINOURA JAPAN MINOURA NORTH AMERICAN TECH CENTER
(for ALL customers, including Canada) (for U.S. residents ONLY)
1197-1 Godo, Anpachi, Gifu 503-2305 Japan Mon - Fri, 9 am - 5 pm (PCT)
Fax +81-584-27-7505 Phone 1-510-538-8599 / Fax 1-510-538-5899
If you have question or problem on this product, please contact the shop where you originally purchase this product
or the distributor in your country first. The distributor information can be found on our web site. Only when you
cannot obtain enough service from them, you can contact Minoura directly.
Made in Japan
(Image: MPT-200S in K-style leg)

- 2 -
Assemble MPT-200S in K-style Leg
1
2
3
Bolts stay in loose
Pillar Joint
Setting up your MPT-200S in the K-Style leg conguration saves valuable
room because the stand can be placed next to a wall. ONLY place the
bikes on the front side of the stand so as to maintain balance and keep the
stand from toppling over. Maximum bikes per stand is TWO (2).
Pillar
(Fig. A)
Leg Bracket
(both are exactly
same)
Collar (Silver)
M6x70 Bolt
Spring Washer
Attach two Leg Brackets to the
Pillar.
One is set directly, and another
one is set beyond the silver
Collars.
Do not tighten the M6x70 Bolts
firmly yet. (see Fig. B)
Screw the bolts to
these slots
(Fig. B) (Fig. C)
Put the black Collars to the designated holes (see Fig. D) on
both Long and Short Legs. Collar is put from the larger hole.
The collar works to prevent deforming the tube
by the bolt tightening power. You must set
the collar correctly.
Long Leg
Collar (Black)
Short Leg
(Fig. D)
Place the legs as shown in Fig.E.
(Fig. E)
Required Tools
1 x M5 Hex Wrench
(included)
1 x Phillips Screwdriver
(not included)
1 x 13mm Spanner
(not included)
(We strongly recommend to use the fatter No.3
screwdriver instead of standard No.2)
How To Read Bolt Size
Length
Diameter
Ex) 6 x 30
Diameter Length
Foot Adjuster
Short Leg
Long Leg
Lower Pillar
Upper Pillar
Part Name

4
5
6
- 3 -
Assemble MPT-200S in X-style Leg
1
(図M)
Inside layout is as shown in Fig.F.
You will install short Legs first, so you don't have to
set Long Leg at this moment.
(Fig. F)
Put the longer M6x70 Bolt to the end hole on the
Short Leg, then screw it into the Pillar.
M6x70 Bolt
Spring Washer
(Fig. G)
Put the shorter M6x45 Bolt into the corner hole to fix
the Long and Short Legs. M6x45 Bolt will be screwed
to the Dome Nut.
Dome Nut
M6x45 Bolt
Spring Washer
(Fig. H)
Tighten every bolt.
Over-tightening the M6x70 Bolt may cause serious
damage to the alloy Pillar. Do not overtighten.
(Fig. I)
to be placed anywhere due
to the larger footprint and
maximum stability of the X.
It also allows you to install
extra bike cradles and/or
optional attachments on the
back side (max number of
bikes is 4).
Setting up the MPT-200S in the X-style allows the stand
(Fig. J)
Please note, setting the stand up in the
X-style does require more oor space.
Put 4 black Collars to the designated holes on the
Long Leg. Sandwitch the Long Leg with 2 Leg
Brackets, then attach to the Pillar.
Pillar
Long Leg
Dome Nut
Leg Bracket
(both are exactly same)
M6x45 Bolt
Spring Washer
Collar
(Black)
M6x45 Bolt
Spring Washer
M6x70 Bolt
Spring Washer
(Fig. K)
Screw the bolts
to these slots
(Fig. L)
Use the longer M6x70 Bolts
to the center 2 holes for
screwing into the Pillar.
Use the shorter M6x45 Bolts
to the outer holes, then screw
to the Dome Nuts.
Every bolt should not be
tightened firmly yet.
This is the image after every bolt is screwed in.

2
- 4 -
3
4
5
6
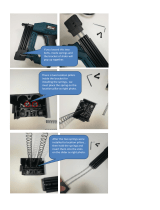
Joint the Pillars
1
2
3
!
Loosen
Put the black Collars to all holes on the Short Leg.
Collar must be inserted from the larger hole.
Short Leg
Collar (Black)
(Fig. N)
Set the Short Legs as
they make "X" shape.
(Fig. O)
Inside layout is as shown in Fig. P.
Long Leg
Short Leg
Short Leg
(Fig. P)
Put the longer
M6x70 Bolt to the
end hole on the
Short Leg, then
screw into the
Pillar.
M6x70 Bolt
Spring Washer
(Fig. Q)
Put the shorter
M6x45 Bolt to other
hole, sandlwich the
Short Leg with two
Leg Brackets, then
screw to the Dome
Nut.
Dome Nut
M6x45 Bolt
Spring Washer
(Fig. R)
Tighten every bolt.
Over-tightening
the M6x70 Bolt
may cause serious
damage to the alloy
Pillar.
Do not overtighten.
(Fig. S)
The pillars on MPT-200S are separated.
Both pillars have same diameter, and the pillar joint fastens
the pillars.
The pillar joint has already been installed on the upper pillar.
You insert it into the lower pillar, then tighten the clamps to
fix.
At first, loosen the clamp on the
lower pillar by M5 hex wrench.
Insert the pillar joint
into the lower pillar.
While keeping both
pillars are tightly
attached, tighten
the clamp firmly
(tightening torque:
3 N.m).
Upper Pillar
Pillar
Joint
Clamp
(Fig. T)
Lower Pillar
Pillar Joint
If some space remains
between the pillars, it
may be bent or broken
caused by the bike
weight. Make sure
the pillars are tightely
attached.
/