Rockwell Automation 1769-PA2 Specification

Category
Power supply units
Type
Specification

This manual is also suitable for

Installation Instructions
Compact I/O Expansion Power Supplies
Catalog Numbers 1769-PA2, 1769-PB2, 1769-PA4,
1769-PB4
About the Power Supplies
Compact I/O power supplies provide 120/240V AC and 24V DC power to modules, which
can be placed to the left or the right side of the 1769 power supply. As many as eight I/O
modules can be placed on each side of the power supply.
Topic Page
Important User Information 2
Environment and Enclosure 3
North American Hazardous Location Approval 4
Install Safety Circuits 4
European Hazardous Location Approval 5
Before You Begin 6
Assemble the System 9
Mount an I/O Expansion Power Supply 11
Verify Your System Power 14
Power Considerations 15
Use a Master Control Relay 17
Schematic (Using IEC Symbols) 18
Schematic (Using ANSI/CSA Symbols) 19
Connect the Power Supplies 19
Connect Field Wires 21
Replace the Fuse 24
Temperature Derating 25
Power Dissipation 28
Specifications 30
Additional Resources 35
2 Compact I/O Expansion Power Supplies
Publication 1769-IN028B-EN-P - October 2008
Important User Information
Solid state equipment has operational characteristics differing from those of electromechanical equipment.
Safety Guidelines for the Application, Installation and Maintenance of Solid State Controls (Publication
SGI-1.1 available from your local Rockwell Automation sales office or online at
http://literature.rockwellautomation.com
) describes some important differences between solid state
equipment and hard-wired electromechanical devices. Because of this difference, and also because of the
wide variety of uses for solid state equipment, all persons responsible for applying this equipment must
satisfy themselves that each intended application of this equipment is acceptable.
In no event will Rockwell Automation, Inc. be responsible or liable for indirect or consequential damages
resulting from the use or application of this equipment.
The examples and diagrams in this manual are included solely for illustrative purposes. Because of the many
variables and requirements associated with any particular installation, Rockwell Automation, Inc. cannot
assume responsibility or liability for actual use based on the examples and diagrams.
No patent liability is assumed by Rockwell Automation, Inc. with respect to use of information, circuits,
equipment, or software described in this manual.
Reproduction of the contents of this manual, in whole or in part, without written permission of Rockwell
Automation, Inc., is prohibited.
Throughout this manual, when necessary, we use notes to make you aware of safety considerations.
WARNING
Identifies information about practices or circumstances that can cause an explosion in
a hazardous environment, which may lead to personal injury or death, property
damage, or economic loss.
IMPORTANT
Identifies information that is critical for successful application and understanding of
the product.
ATTENTION
Identifies information about practices or circumstances that can lead to personal injury
or death, property damage, or economic loss. Attentions help you identify a hazard,
avoid a hazard and recognize the consequences.
SHOCK HAZARD
Labels may be on or inside the equipment (for example, drive or motor) to alert people
that dangerous voltage may be present.
BURN HAZARD
Labels may be on or inside the equipment (for example, drive or motor) to alert people
that surfaces may reach dangerous temperatures.
Compact I/O Expansion Power Supplies 3
Publication 1769-IN028B-EN-P - October 2008
Environment and Enclosure
Prevent Electrostatic Discharge
ATTENTION
This equipment is intended for use in a Pollution Degree 2 industrial environment, in
overvoltage Category II applications (as defined in IEC publication 60664-1), at altitudes
up to 2000 meters (6562 ft) without derating.
This equipment is considered Group 1, Class A industrial equipment according to
IEC/CISPR Publication 11. Without appropriate precautions, there may be potential
difficulties ensuring electromagnetic compatibility in other environments due to
conducted as well as radiated disturbance.
This equipment is supplied as open-type equipment. It must be mounted within an
enclosure that is suitably designed for those specific environmental conditions that will
be present and appropriately designed to prevent personal injury resulting from
accessibility to live parts. The enclosure must have suitable flame-retardant properties to
prevent or minimize the spread of flame, complying with a flame spread rating of 5VA,
V2, V1, V0 (or equivalent) if non-metallic. The interior of the enclosure must be accessible
only by the use of a tool. Subsequent sections of this publication may contain additional
information regarding specific enclosure type ratings that are required to comply with
certain product safety certifications.
In addition to this publication, see:
Industrial Automation Wiring and Grounding Guidelines, for additional installation
requirements, Allen-Bradley publication 1770-4.1
.
NEMA Standards publication 250 and IEC publication 60529, as applicable, for
explanations of the degrees of protection provided by different types of enclosure.
ATTENTION
This equipment is sensitive to electrostatic discharge, which can cause internal damage
and affect normal operation. Follow these guidelines when you handle this equipment:
Touch a grounded object to discharge potential static.
Wear an approved grounding wriststrap.
Do not touch connectors or pins on component boards.
Do not touch circuit components inside the equipment.
Use a static-safe workstation, if available.
Store the equipment in appropriate static-safe packaging when not in use.
4 Compact I/O Expansion Power Supplies
Publication 1769-IN028B-EN-P - October 2008
North American Hazardous Location Approval
Install Safety Circuits
Circuits that are installed on the machine for safety reasons, like overtravel limit switches, stop
push buttons, and interlocks, should always be hard-wired directly to the master control relay.
These devices must be wired in series so that when any one device opens, the master control
relay is de-energized, thereby removing power to the machine.
The following information applies when
operating this equipment in hazardous
locations:
Informations sur l’utilisation de cet
équipement en environnements dangereux:
Products marked "CL I, DIV 2, GP A, B, C, D" are suitable for use in
Class I Division 2 Groups A, B, C, D, Hazardous Locations and
nonhazardous locations only. Each product is supplied with
markings on the rating nameplate indicating the hazardous
location temperature code. When combining products within a
system, the most adverse temperature code (lowest "T" number)
may be used to help determine the overall temperature code of
the system. Combinations of equipment in your system are subject
to investigation by the local Authority Having Jurisdiction at the
time of installation.
Les produits marqués "CL I, DIV 2, GP A, B, C, D" ne conviennent
qu'à une utilisation en environnements de Classe I Division 2
Groupes A, B, C, D dangereux et non dangereux. Chaque produit
est livré avec des marquages sur sa plaque d'identification qui
indiquent le code de température pour les environnements
dangereux. Lorsque plusieurs produits sont combinés dans un
système, le code de température le plus défavorable (code de
température le plus faible) peut être utilisé pour déterminer le
code de température global du système. Les combinaisons
d'équipements dans le système sont sujettes à inspection par les
autorités locales qualifiées au moment de l'installation.
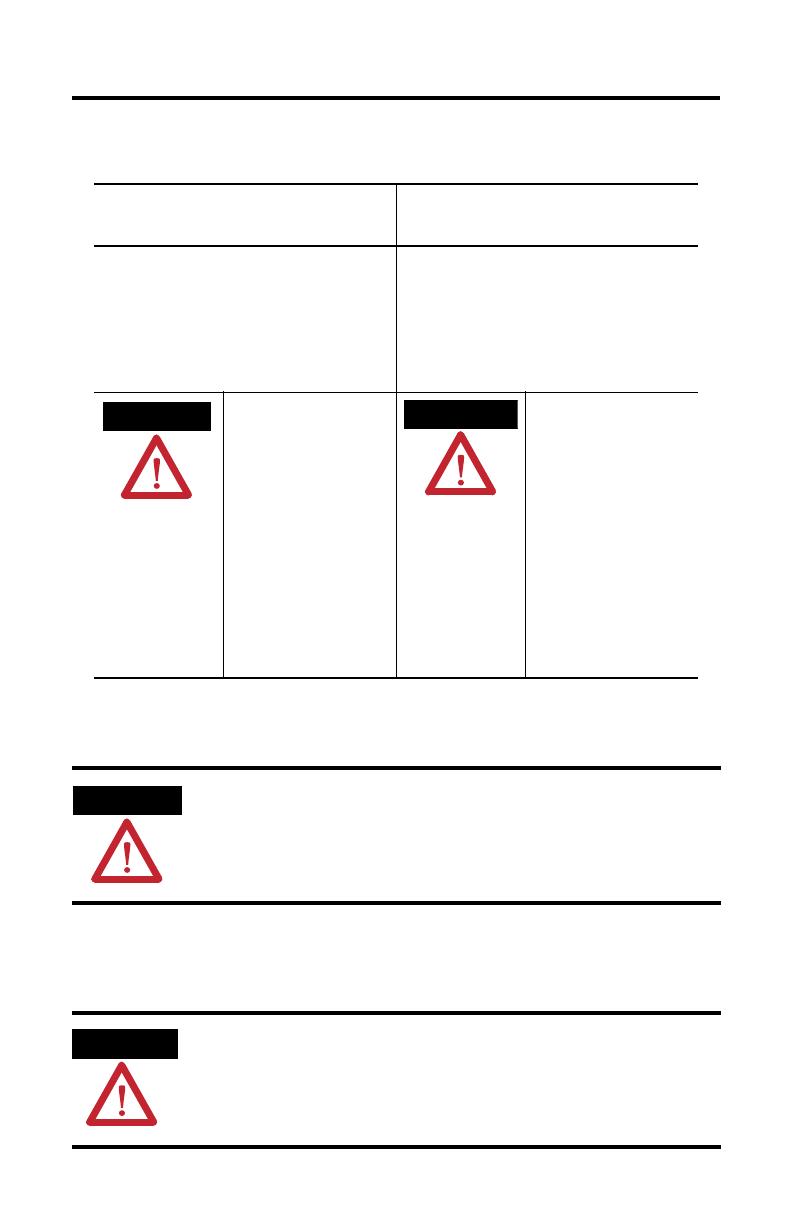
WARNING
EXPLOSION HAZARD -
• Do not disconnect equipment
unless power has been removed
or the area is known to be
nonhazardous.
• Do not disconnect connections to
this equipment unless power has
been removed or the area is
known to be nonhazardous.
Secure any external connections
that mate to this equipment by
using screws, sliding latches,
threaded connectors, or other
means provided with this product.
• Substitution of components may
impair suitability for Class I,
Division 2.
• If this product contains batteries,
they must only be changed in an
area known to be nonhazardous.
AVERTISSEMENT
RISQUE D’EXPLOSION –
• Couper le courant ou s'assurer
que l'environnement est classé
non dangereux avant de
débrancher l'équipement.
• Couper le courant ou s'assurer
que l'environnement est classé
non dangereux avant de
débrancher les connecteurs. Fixer
tous les connecteurs externes
reliés à cet équipement à l'aide
de vis, loquets coulissants,
connecteurs filetés ou autres
moyens fournis avec ce produit.
• La substitution de composants
peut rendre cet équipement
inadapté à une utilisation en
environnement de Classe I,
Division 2.
S'assurer que l'environnement est
classé non dangereux avant de
changer les piles.
WARNING
Explosion Hazard - Do not connect or disconnect connectors while circuit is live.
ATTENTION
Never alter these circuits to defeat their function. Serious injury or machine damage
could result.
Compact I/O Expansion Power Supplies 5
Publication 1769-IN028B-EN-P - October 2008
European Hazardous Location Approval
1769-PB2, 1769-PB4 Only
European Zone 2 Certification (The following applies when the product bears the Ex or EEx
Marking)
This equipment is intended for use in potentially explosive atmospheres as defined by European Union
Directive 94/9/EC and has been found to comply with the Essential Health and Safety Requirements
relating to the design and construction of Category 3 equipment intended for use in potentially explosive
atmospheres, given in Annex II to this Directive.
Compliance with the Essential Health and Safety Requirements has been assured by compliance with EN
60079-15 and EN 60079-0.
WARNING
This equipment must be installed in an enclosure providing at least IP54 protection
when applied in Zone 2 environments.
This equipment shall be used within its specified ratings defined by Allen-Bradley.
Provisions shall be made to prevent the rated voltage from being exceeded by
transient disturbances of more than 40% when applied in Zone 2 environments.
This equipment must be used only with ATEX certified backplanes.
Secure any external connections that mate to this equipment by using screws, sliding
latches, threaded connectors, or other means provided with this product.
Do not disconnect equipment unless power has been removed or the area is known to
be nonhazardous.
ATTENTION
This equipment is not resistant to sunlight or other sources of UV radiation.
6 Compact I/O Expansion Power Supplies
Publication 1769-IN028B-EN-P - October 2008
Before You Begin
There are some points about power distribution that you should know.
The master control relay must be able to inhibit all machine motion by removing
power to the machine I/O devices when the relay is de-energized. We recommend
that the controller remains powered even when the master control relay is
de-energized.
If you are using a DC power supply, interrupt the load side rather than the AC line
power. This avoids the additional delay of power supply turn-off. The DC power
supply should be powered directly from the fused secondary of the transformer.
Power to the DC input and output circuits should be connected through a set of
master control relay contacts.
Perform Periodic Tests of Master Control Relay Circuit
Any part can fail, including the switches in a master control relay circuit. The failure of one of
these switches would most likely cause an open circuit, which would be a safe power-off
failure. However, if one of these switches shorts out, it no longer provides any safety
protection. These switches should be tested periodically to assure they will stop machine
motion when needed.
Compact I/O Expansion Power Supplies 7
Publication 1769-IN028B-EN-P - October 2008
Parts Illustration of a Power Supply
The sample illustrations of a 1769-PA4 power supply let you review the various components
that comprise a power supply, which is attached to a DIN rail.
Item Description
1
Bus lever (with locking function)
2a
Upper panel mounting tabs
2b
Lower panel mounting tabs
3
Status Indicator
4
Power supply door with terminal identification label
5a
Movable bus connector with female pins
5b
Stationary bus connector with male pins
6
Nameplate label
44716
44717
44718
44719
1
2a
3
4
9
10
2b
11
1769-PA4
12
5b
6
5a
7a
7a
8a
8b
7b
7b
8 Compact I/O Expansion Power Supplies
Publication 1769-IN028B-EN-P - October 2008
Install an I/O Expansion Power Supply
Compact I/O Expansion Power Supplies are suitable for use in an industrial environment
when installed in accordance with these instructions. Specifically, this equipment is intended
for use in clean, dry environments (Pollution degree 2
(1)
) and to circuits not exceeding Over
Voltage Category II
(2)
(IEC 60664-1).
(3)
Disconnect the Power
7a
Upper tongue-and-groove slots
7b
Lower tongue-and-groove slots
8a
Upper DIN rail latches
8b
Lower DIN rail latches
9
Terminal block with finger-safe cover
10
Fuse housing cover for replaceable fuse
11
120V AC or 240V AC line input power selector switch (PA4 only)
12
Removable selector switch label (PA4 only)
(1)
Pollution Degree 2 is an environment where, normally, only non-conductive pollution occurs except that occasionally a
temporary conductivity caused by condensation shall be expected.
(2)
Over Voltage Category II is the load level section of the electrical distribution system. At this level transient voltages are
controlled and do not exceed the impulse voltage capability of the product’s insulation.
(3)
Pollution Degree 2 and Over Voltage Category II are International Electrotechnical Commission (IEC) designations.
WARNING
Remove power before removing or inserting this power supply from the 1769 I/O system.
When you remove or insert a power supply with power applied, an electrical arc may
occur. An electrical arc can cause personal injury or property damage by:
sending an erroneous signal to your system’s field devices, causing unintended
machine motion.
causing an explosion in a hazardous environment.
Electrical arcing causes excessive wear to contacts on both the power supply and its
mating connector. Worn contacts may create electrical resistance.
Item Description
Compact I/O Expansion Power Supplies 9
Publication 1769-IN028B-EN-P - October 2008
Assemble the System
1769 Compact I/O power supplies distribute power from either side of the power supply.
The maximum amount of current the system supports in both directions is:
1769-PA2, 1769-PB2: 2 amps at 5V DC; 1 amp at 24V DC.
1769-PA4, 1769-PB4: 4 amps at 5V DC; 2 amps at 24V DC.
The power supply can be attached to an adjacent I/O module before or after
mounting.
EXAMPLE
A 2 amp at 5V DC power supply (1769-PA2, 1769-PB2) can provide 1 amp to the right side
of the power supply and 1 amp to the left. A 4 amp at 5V DC power supply (1769-PA4,
1769-PB4) can provide 2 amps to the right side of the power supply and 2 amps to the
left.
IMPORTANT
The maximum amount of current that can be distributed from either side of any 1769
power supply is 2 amps at 5V DC and 1 amp at 24V DC.
This is a limit of the 1769 Compact I/O Bus.
Item Description
1 Upper and lower tongue-and-groove slots
2 Bus connectors
3 Positioning tab
4 Direction of the bus lever of the power supply to the I/O modules
5 End cap terminator
6 End cap bus terminator
2
1
1
3
4
5
6
44720
44721
10 Compact I/O Expansion Power Supplies
Publication 1769-IN028B-EN-P - October 2008
Follow these steps to assemble the Compact I/O system.
1. Disconnect your line power.
The power supply does not support removal or insertion of modules under power.
2. Check that the bus lever of the power supply to be installed is in the unlocked (fully
right) position.
3. Use the upper and lower tongue-and-groove slots to secure the power supply to an
I/O module.
4. Move the power supply back along the tongue-and-groove slots until the bus
connectors line up with each other.
5. Push the bus lever back slightly to clear the positioning tab.
Use your fingers or a small screwdriver.
6. To allow communication between the controller and the I/O, move the bus lever of
the power supply and its adjacent I/O modules fully to the left until it clicks.
Make sure it is locked firmly in place.
7. Attach an end cap terminator to the last I/O module in the system by using the
tongue-and-groove slots as before.
8. Lock the end cap bus terminator.
WARNING
If you connect or disconnect wiring while the field-side power is on, an electrical arc can
occur. This could cause an explosion in hazardous location installations. Be sure that
power is removed or the area is nonhazardous before proceeding.
ATTENTION
When attaching expansion I/O power supplies, it is very important that the bus
connectors are securely locked together to ensure proper electrical connection.
IMPORTANT
A 1769-ECR or 1769-ECL right or left end cap (respectively) must be used to terminate the
end of the serial communication bus.
Compact I/O Expansion Power Supplies 11
Publication 1769-IN028B-EN-P - October 2008
Mount an I/O Expansion Power Supply
Minimum Spacing
Maintain spacing from enclosure walls, wireways, adjacent equipment, and so forth. Allow 50
mm (2 in.) of space on all sides for adequate ventilation.
Prevent Excessive Heat
For most applications, normal convective cooling keeps the system within the specified
operating range. Verify that the specified temperature range is maintained. Proper spacing of
components within an enclosure is usually sufficient for heat dissipation.
In some applications, a substantial amount of heat is produced by other equipment inside or
outside the enclosure. In this case, place blower fans inside the enclosure to assist in air
circulation and to reduce hot spots near the system.
ATTENTION
During panel or DIN rail mounting of all devices, be sure that all debris (for example,
metal chips, wire strands) is kept from falling into the module. Debris that falls into the
module could cause damage on power up.
Item Description
1 This could be an end cap, controller, adapter, or
expansion cable depending on your system
configuration.
2 This could be an end cap or expansion cable
depending on your system configuration.
Power Supply
Compact I/O
Compact I/O
Compact I/O
Compact I/O
Top
Bottom
Side
Side
End Cap
End Cap
(1) (2)
50 mm
(2 in.)
50 mm
(2 in.)
12 Compact I/O Expansion Power Supplies
Publication 1769-IN028B-EN-P - October 2008
Additional cooling provisions might be necessary when high ambient temperatures are
encountered.
Mount the Panel
Mount the power supply to a panel by using four screws per module. Use M4 or #8 panhead
screws. Mounting screws are required on each power supply panel mounting tab.
Panel Mounting Using the Dimensional Template
Note: All dimensions are in mm (in.). Hole spacing tolerance: ±0.4 mm (0.016 in.)
TIP
Do not bring in unfiltered outside air. Place the Compact I/O system in an enclosure to
protect it from a corrosive atmosphere. Harmful contaminants or dirt could cause
improper operation or damage to components. In extreme cases, you may need to use air
conditioning to protect against heat build-up within the enclosure.
ATTENTION
This product is intended to be mounted to a well-grounded mounting surface such as a
metal panel. Additional grounding connections from the power supply's mounting tabs or
DIN rail (if used) are not required unless the mounting surface cannot be grounded. Refer
to Industrial Automation Wiring and Grounding Guidelines, Allen-Bradley publication
1770-4.1
, for additional information.
Compact I/O
Compact I/O
End Cap
End Cap
Power Supply
For more than 2 modules: (number of modules -1) X 35 mm (1.38 in.)
132
(5.197)
40
(1.58)
70
(2.76)
28.5
(1.12)
35
35
122,6±0.2
(4.826±0.008)
(1.38)
(1.38)
Compact I/O Expansion Power Supplies 13
Publication 1769-IN028B-EN-P - October 2008
Mount a Power Supply on a DIN Rail
The power supply can be mounted using the following DIN rails:
35 x 7.5 mm (EN 50 022 - 35 x 7.5)
35 x 15 mm (EN 50 022 - 35 x 15)
1. Before mounting a power supply or module on a DIN rail, close the DIN rail latches.
2. Press the DIN rail mounting area of the module against the DIN rail.
The latches will momentarily open and lock into place. The following illustration
shows a power supply being attached to the I/O modules in a DIN rail mounted
Compact I/O system.
1769 Cable
44722
14 Compact I/O Expansion Power Supplies
Publication 1769-IN028B-EN-P - October 2008
Verify Your System Power
Your system power budget is a consideration when using 1769 power supplies. This
determines the power that is being provided to the I/O modules. Refer to Calculate System
Power Requirements in the Compact I/O Selection Guide, publication 1769-SG002-EN-P
,
for the power budget calculation worksheet.
1. After you have reviewed the amount of current consumed by your system, verify that
your power supply has adequate capacity for its bank of I/O modules.
See page 25
for graphs.
2. To do so, compare the current graphs to your totals for the following:
•total 5V DC
•total 24V DC
total 24V DC sensor power (1769-PA2 only)
3. If your power supply load is at or above the limits of the allowable ranges shown in
the graphs, you must add an additional I/O bank.
See Connect the Power Supplies
for additional information.
TIP
The total number of I/O modules cannot exceed 16 on a single bank with a maximum of 8
I/O modules on either side of the power supply.
When configuring your system using a MicroLogix 1500 controller, only one expansion
cable, one expansion power supply and a total of eight I/O modules may be used in a
maximum of two banks of I/O modules. The expansion power supply cannot be directly
connected to the MicroLogix 1500 controller.
IMPORTANT
An additional I/O bank must include its own power supply.
An end cap/terminator (1769-ECR or 1769-ECL) must also be used if the I/O bank is the
last in the system.
Compact I/O Expansion Power Supplies 15
Publication 1769-IN028B-EN-P - October 2008
Power Considerations
The following sections explain power considerations for the Compact I/O system.
Disconnect the Main Power
Install the main power disconnect switch where operators and maintenance personnel have
quick and easy access to it. Besides disconnecting electrical power, de-energize all other
sources of power (pneumatic and hydraulic) before you begin working on a machine or
process controlled by a controller.
Isolation Transformer Usage
You may want to use an isolation transformer in the AC line. This type of transformer
provides isolation from your power distribution system to reduce electrical noise and is often
used as a step down transformer to reduce line voltage. Any transformer used with the
Compact I/O system must have a sufficient power rating for its load. The power rating is
expressed in volt-amperes (VA). See Schematic (Using IEC Symbols)
for an example of
circuits using isolation transformers.
Power Supply Inrush
During powerup, the power supply allows a brief inrush current to charge internal capacitors.
Many power lines and control transformers can supply inrush current for a brief time. If the
power source cannot supply this inrush current, the source voltage may sag momentarily.
The only effect of limited inrush current and voltage sag on the system is that the power
supply capacitors charge more slowly. However, the effect of a voltage sag on other
equipment should be considered. For example, a deep voltage sag may reset a computer
connected to the same power source. The following considerations determine whether the
power source must be required to supply high inrush current:
Power-up sequence of devices in a system
Amount of the power source voltage sag if the inrush current cannot be supplied
Effect of voltage sag on other equipment in the system
If the entire system is powered up at the same time, a brief sag in the power source voltage
typically will not affect any equipment.
WARNING
Explosion Hazard - Do not replace components or disconnect equipment unless power
has been switched off.
If you connect or disconnect wiring while the field-side power is on, an electrical arc can
occur. This could cause an explosion in hazardous location installations. Be sure that
power is removed or the area is nonhazardous before proceeding.
16 Compact I/O Expansion Power Supplies
Publication 1769-IN028B-EN-P - October 2008
Loss of Power Source
The power supply is designed to withstand brief power losses without affecting the operation
of the system. The time the system is operational during power loss is called “program scan
hold-up time after loss of power.” The duration of the power supply hold-up time depends
on the type and state of the I/O, but is typically between 5 milliseconds…10 seconds. When
the duration of power loss reaches this limit, the power supply signals the processor that it
can no longer provide adequate DC power to the system. This is referred to as a power supply
shutdown. The processor then performs an orderly shutdown of the controller.
Input States on Power Down
The power supply hold-up time is generally longer than the turn-on and turn-off times of the
inputs. Because of this, the input state change from ‘On’ to ‘Off’ that occurs when power is
removed may be recorded by the processor before the power supply shuts down the system.
Understanding this concept is important. The user program should be written to take this
effect into account.
Other Types of Line Conditions
Occasionally the power source to the system can be temporarily interrupted. It is also
possible that the voltage level may drop substantially below the normal line voltage range for
a period of time. Both of these conditions are considered to be a loss of power for the system.
User Power Overcurrent Condition
The power supply shuts down in the event of an overcurrent condition. All outputs latch off
and remain off until you remove the overcurrent and cycle power. Reload the user program
following a power supply shutdown.
ATTENTION
To avoid unexpected operation due to 24V DC user power shutdown (1769-PA2 only),
monitor the 24V DC user output with a 24V DC input channel.
Compact I/O Expansion Power Supplies 17
Publication 1769-IN028B-EN-P - October 2008
Use a Master Control Relay
A hard-wired master control relay (MCR) provides a reliable means for emergency machine
shutdown. Since the master control relay allows the placement of several emergency-stop
switches in different locations, its installation is important from a safety standpoint.
Overtravel limit switches or mushroom-head push buttons are wired in series so that when
any of them opens, the master control relay is de-energized. This removes power to input and
output device circuits.
Place the main power disconnect switch where operators and maintenance personnel have
quick and easy access to it. If you mount a disconnect switch inside the enclosure, place the
switch operating handle on the outside of the enclosure, so that you can disconnect power
without opening the enclosure.
Whenever any of the emergency-stop switches are opened, power to input and output devices
should be removed.
When you use the master control relay to remove power from the external I/O circuits,
power continues to be provided to the system’s power supply so that diagnostic indicators on
the processor can still be observed.
The master control relay is not a substitute for a disconnect to the system. It is intended for
any situation where the operator must quickly de-energize only I/O devices. When inspecting
or installing terminal connections, replacing output fuses, or working on equipment within
the enclosure, use the disconnect to shut off power to the rest of the system.
ATTENTION
Never alter these circuits to defeat their function since serious injury and/or machine
damage could result.
TIP
If
If you are using an external DC power supply, interrupt the DC output side rather than
the AC line side of the supply to avoid the additional delay of power supply turn off.
The AC line of the DC output power supply should be fused.
Connect a set of master control relays in series with the DC power supplying the
input and output circuits.
TIP
Do not control the master control relay with the Compact I/O system. Provide the
operator with the safety of a direct connection between an emergency-stop switch and
the master control relay.
18 Compact I/O Expansion Power Supplies
Publication 1769-IN028B-EN-P - October 2008
Schematic (Using IEC Symbols)
L1 L2
Disconnect
Isolation
Transformer
X
1
X2
115V AC
or 230V
AC
Fuse
Operation of either of these
contacts will remove power from
the external I/O circuits, stopping
machine motion.
Emergency-Stop
Push Button
Overtravel
Limit Switch
Stop
Start
Fuse
MCR
230V AC
I/O
Circuits
Master Control Relay (MCR)
Cat. No. 700-PK400A1
Suppressor
Cat. No. 700-N24
MCR
Suppr
MCR
MCR
115V AC or
230V AC
DC Power Supply Use
IEC 950/EN 60950.
MCR
(Lo)
(Hi)
230V AC
24V DC
I/O
Circuits
Line Terminals: Connect to the AC
1769 power supply terminals.
Line Terminals: Connect to the 24V
DC 1769 power supply terminals.
Compact I/O Expansion Power Supplies 19
Publication 1769-IN028B-EN-P - October 2008
Schematic (Using ANSI/CSA Symbols)
Connect the Power Supplies
Compact I/O system architecture and the power supply design support connection of I/O
on either side of the power supply. Each I/O bank requires its own power supply.
To connect 2 I/O banks, attach a 1769 expansion I/O cable to a power supply or I/O
module as shown in the Power Supply Connection
illustration. Up to 8 I/O modules can be
connected on either side (A or B in the illustration) of the power supply for a maximum of 16
modules per bank.
L1 L2
Disconnect
Isolation
Transformer
X1
X2
Fuse
Operation of either of these
contacts will remove power from
the external I/O circuits, stopping
machine motion.
Emergency-Stop
Push Button
Overtravel
Limit Switch
Stop
Start
Fuse
MCR
230V AC
I/O
Circuits
Master Control Relay (MCR)
Cat. No. 700-PK400A1
Suppressor
Cat. No. 700-N24
MCR
Suppr
MCR
MCR
115V AC or
230V AC
DC Power Supply.
Use NEC Class 2 for
UL Listing.
_+
24V DC
I/O Circuits
MCR
(Lo) (Hi)
230V AC
Line Terminals: Connect to the 24V
DC 1769 power supply terminals.
Line Terminals: Connect to the AC
1769 power supply terminals.
115V AC
or 230V
AC
20 Compact I/O Expansion Power Supplies
Publication 1769-IN028B-EN-P - October 2008
Each 1769 I/O module has a power supply distance rating, with a maximum value of
eight. Refer to the specific 1769 I/O module’s installation instructions for more
information.
Power Supply Connection
Item Description
A - B The maximum amount of bus current that can be distributed on the 1769 bus (on either side of
the power supply, A or B) is:
2 amps at 5V DC (assume supported by power supply)
1 amp at 24V DC (assume supported by power supply)
C Expansion I/O power supplies
D I/O communication expansion cable
IMPORTANT
To use a 1769 expansion I/O power supply with a controller that has an embedded power
supply (for example, MicroLogix 1500), you must use a 1769 expansion I/O cable. Do not
directly attach the expansion power supply to a controller that has an embedded power
supply.
A
B
C
D
44723
Bank 1
Bank 2
  • Page 1 1
  • Page 2 2
  • Page 3 3
  • Page 4 4
  • Page 5 5
  • Page 6 6
  • Page 7 7
  • Page 8 8
  • Page 9 9
  • Page 10 10
  • Page 11 11
  • Page 12 12
  • Page 13 13
  • Page 14 14
  • Page 15 15
  • Page 16 16
  • Page 17 17
  • Page 18 18
  • Page 19 19
  • Page 20 20
  • Page 21 21
  • Page 22 22
  • Page 23 23
  • Page 24 24
  • Page 25 25
  • Page 26 26
  • Page 27 27
  • Page 28 28
  • Page 29 29
  • Page 30 30
  • Page 31 31
  • Page 32 32
  • Page 33 33
  • Page 34 34
  • Page 35 35
  • Page 36 36

Rockwell Automation 1769-PA2 Specification

Category
Power supply units
Type
Specification
This manual is also suitable for

Ask a question and I''ll find the answer in the document

Finding information in a document is now easier with AI