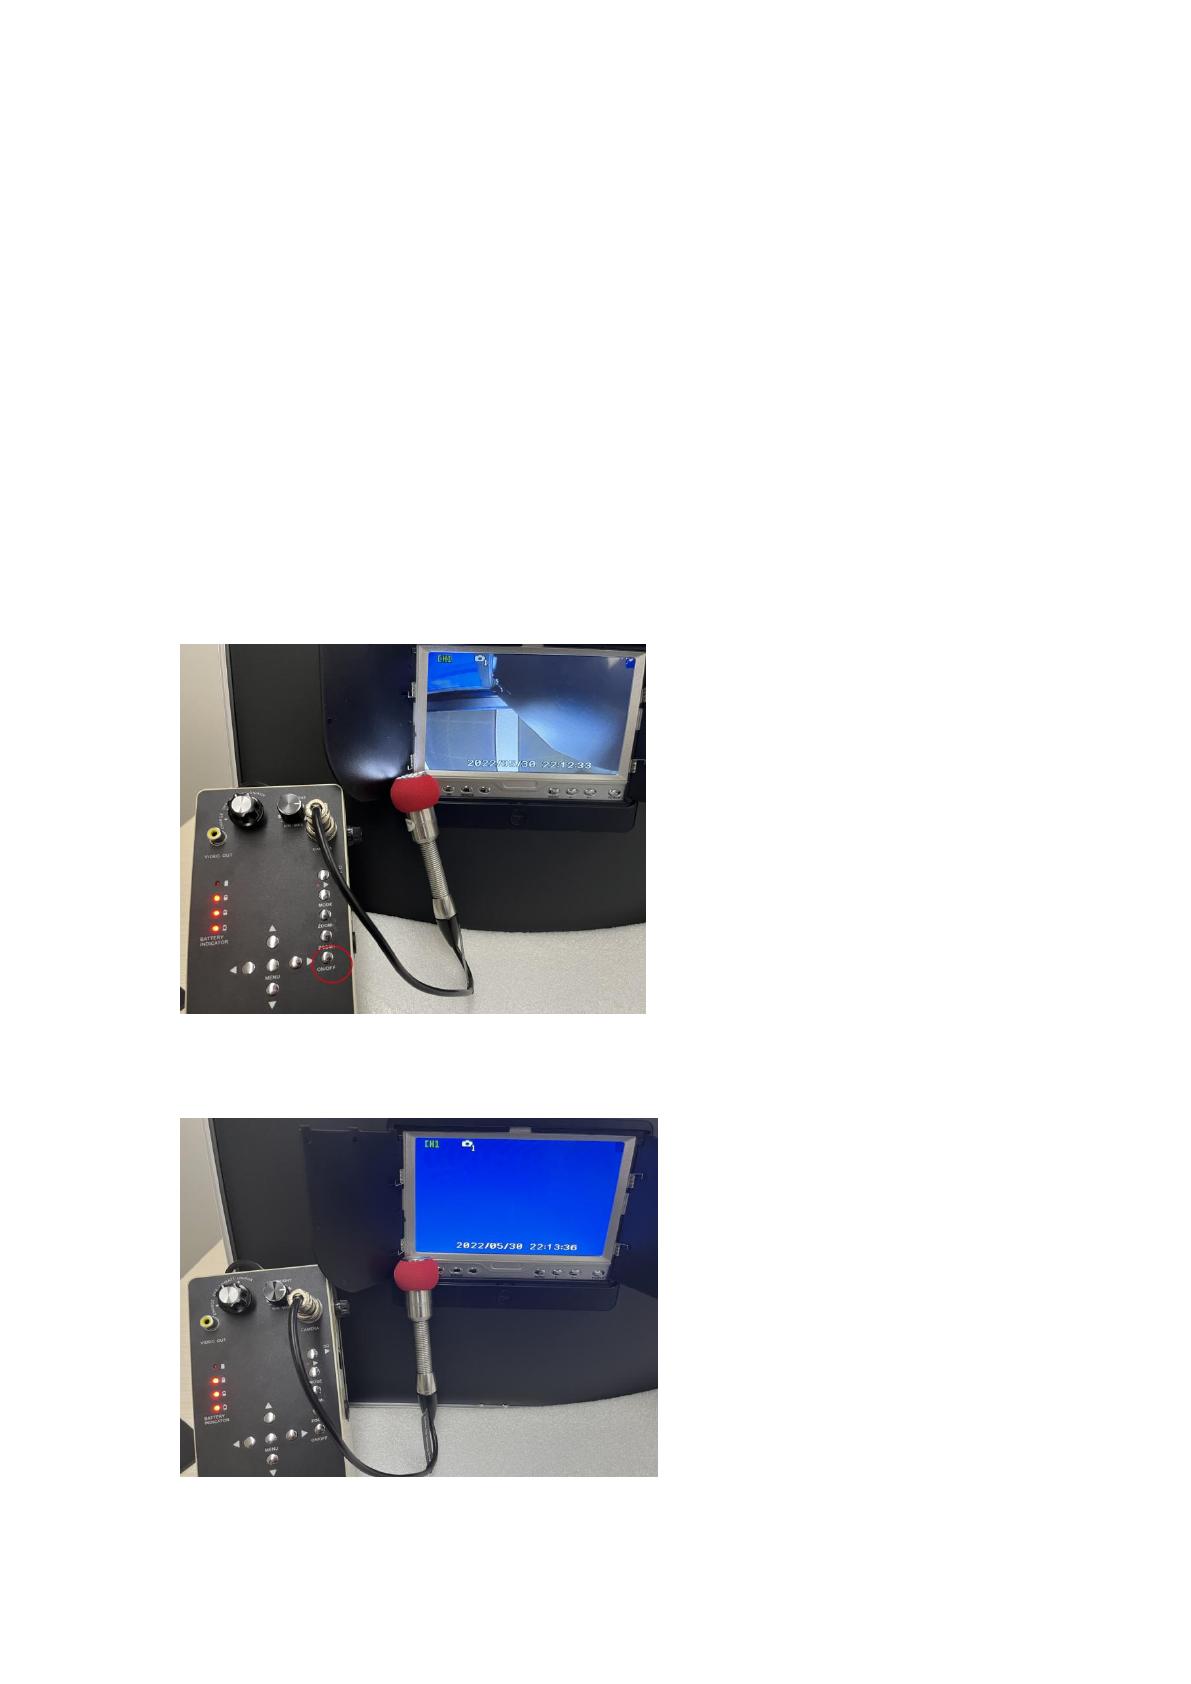
2. How to use the test cable
The test cable is used when you are getting a blue image on your screen.
1. Insert the test cable on the control unit where it says "CAMERA" and on the
other end screw the camera onto the test cable.
2. Check that the connections on both ends are secure and tight.
3. Position control unit to ON/BATT and turn LED BRIGHT to max and look at the
camera to make sure the LEDs are working and that the screen has a clear
image. If both the lights and image are working properly then the issue
resides with the cable. Contact customer support and we can assist you with
after-sales part.
4. If the LEDs on the camera or if the screen still remains blue after connecting
camera probe to the test cable, then the issue is the camera and needs to be
replaced. Contact customer support and we will gladly assist you.
Normal working condition:
The status of monitor when damage (Blue screen):