Page is loading ...

INSTRUCTION MANUAL
Model Number: HE180106
4 CAMERA
HOME SECURITY SYSTEM
WITH DVR
VERSION 1.5


Warranty Note
If you experience any issues with this product or its
performance is not what you had expected, please contact
us at Winplus before returning the item to the store.
It is likely that we can resolve any problems for you via
phone or email.
We can be reached on:
Phone: 1300 663 907 (Mon - Fri; 8:30am - 6:00pm AEST)
Email: customercare@winplus.com.au
Web: www.winplus.com.au
Important
Getting the most out of your 4 Camera Home Security
System with DVR:
Read the manual
It will help you set up with ease
Visit www.winplus.com.au
We have additional support videos and guides
Call After Sales Support - 1300 663 907
Or email [email protected]om.au - we’re always happy to help

Warranty Details
The product is guaranteed to be free from defects in workmanship and parts for a period
of 12 months from the date of purchase. Defects that occur within this warranty period, under
normal use and care, will be repaired, replaced or refunded at our discretion. The benets
conferred by this warranty are in addition to all rights and remedies in respect of the product
that the consumer has under the Competition and Consumer Act 2010 and similar state and
territory laws.
Our goods come with guarantees that cannot be excluded under the Australian Consumer Law.
You are entitled to a replacement or refund for a major failure and for compensation
for any other reasonably foreseeable loss or damage. You are also entitled to have the goods
repaired or replaced if the goods fail to be of acceptable quality and the failure
does not amount to a major failure.
AFTER SALES SUPPORT
MODEL: HE180106 PRODUCT CODE: 63131 12/2018
REGISTER YOUR PURCHASE AT www.aldi.com.au/en/about-aldi/product-registration/ TO KEEP UP-TO-DATE WITH IMPORTANT PRODUCT INFORMATION
1300 663 907
AUS
customercare@winplus.com.au
YEAR WARRANTY
1
HOME SECURITY SYSTEM WITH DVR
.

5
After Sales Support
1300 663 907
Model Number HE180106
Warranty Details
The product is guaranteed to be free from defects in workmanship and parts for a period
of 12 months from the date of purchase. Defects that occur within this warranty period, under
normal use and care, will be repaired, replaced or refunded at our discretion. The benets
conferred by this warranty are in addition to all rights and remedies in respect of the product
that the consumer has under the Competition and Consumer Act 2010 and similar state and
territory laws.
Our goods come with guarantees that cannot be excluded under the Australian Consumer Law.
You are entitled to a replacement or refund for a major failure and for compensation
for any other reasonably foreseeable loss or damage. You are also entitled to have the goods
repaired or replaced if the goods fail to be of acceptable quality and the failure
does not amount to a major failure.
AFTER SALES SUPPORT
MODEL: HE180106 PRODUCT CODE: 63131 12/2018
REGISTER YOUR PURCHASE AT www.aldi.com.au/en/about-aldi/product-registration/ TO KEEP UP-TO-DATE WITH IMPORTANT PRODUCT INFORMATION
1300 663 907
AUS
customercare@winplus.com.au
YEAR WARRANTY
1
HOME SECURITY SYSTEM WITH DVR
Safety Instructions
Read Instructions
Carefully read all safety instructions and the user manual before operation.
Power Source
Only use the supplied power adaptors. Using other power adaptors may cause damage to the unit or
potentially start a re. Power adapters for INDOOR use only. The electrical socket outlet shall be installed
near the equipment and shall be easily accessible.
Do not expose the DVR Unit to Moisture
Avoid installing the DVR unit in a location with high humidity or in a location where liquid may spill onto
the unit. Liquid may cause a short circuit which can result in electric shock or re.
Do not expose the DVR to Heat Sources
Do not install the DVR near any heat sources such as radiators, stoves or other appliances that can
generate heat.
Do not expose the DVR to Dust
Do not use the DVR unit in dusty areas as dust can impair electronic components.
Cleaning the DVR Unit
Unplug all equipment from the wall outlet before cleaning. Do not use liquid aerosol cleaners. Use a
damp soft cloth for cleaning.
Lightning
Unplug all equipment during lightning storms to prevent damage. Unplug the DVR unit if it will not be
used for long periods of time.
Modications & Attachments
Never add any attachments and/or equipment without the approval of the manufacturer. Unauthorized
modications may result in re, electric shock or other personal injury and may void your warranty.
Ventilation
Do not block any ventilation holes. Do not place objects on top of the DVR unit or cover the ventilation
holes on the sides of the DVR unit.
Grounding Mounted Equipment
If mounting the DVR unit onto a rack, ensure the rack is properly grounded before turning the power on
to prevent electric shock and re when using the DVR unit.
Do not open DVR Unit Case
There are no user serviceable parts inside the DVR unit. Modifying any parts may void your warranty.
Battery
CAUTION: Risk of explosion if battery is replaced by an incorrect type. Dispose of used batteries according to
the instructions
CAUTION: Do not ingest battery, chemical burn hazard
This product contains a coin/button cell battery. If the coin/button cell battery is swallowed, it can cause
severe internal burns in just 2 hours and can lead to death
Keep new and used batteries away from children
If the battery compartment does not close securely, stop using the product and keep it away from
children
If you think batteries might have been swallowed or placed inside any part of the
body, seek immediate medical attention
This DVR has been tested according to AS/NZS 60950.1 and EN 55032

6
After Sales Support
1300 663 907
Model Number HE180106
Contents
Warranty Details 4
Safety Instructions 5
Parts List 8
Camera Specications 9
DVR Specications 9
Product Overview 10
1.1 DVR Front and Side Panel 10
1.2 DVR Rear Panel 10
DVR Initial Setup 11
2.1 Initial Setup 11
2.2 DVR Unit Connections 11
2.3 Installation Location 12
DVR Operation 13
3.1 Powering on the DVR unit 13
3.2 Mouse 13
3.3 Setup Wizard 13
3.4 Main Screen 13
3.5 Navigating the DVR Menu & Logging in 14
3.6 Quick Pop-up Menu 16
Mobile Phone Setup 17
4.1 Use Apple or Android mobile to access footage 17
4.2 Download the Cocoon HD DVR App on your Mobile 17
4.3 Logging into or creating a Cocoon HD DVR Account 18
4.4 Adding your DVR device to the App 18
4.5 Navigating the App menus 19
4.6 Viewing your DVR footage 19
4.7 Take Screenshots (Photos) or Video 20
4.8 View Footage from DVR’s Recorded Events. 20
PC Setup 21
5.1 Cocoon HD Software for PC Use 21
5.1.1 Installing Cocoon HD for PC 21
5.2 Logging into Cocoon HD for PC 21

7
After Sales Support
1300 663 907
Model Number HE180106
5.3 Adding your DVR to the Cocoon HD for PC Software 22
5.4 Watching Footage on Cocoon HD for PC Software 22
5.5 PC Menu Overview 23
5.6 Taking a Screenshot with Cocoon HD for PC 24
5.7 Taking a Video with Cocoon HD for PCs 24
Advanced Settings 25
6.1 Main Menu - Setup 25
6.1.1 Basic 25
6.1.2 Live 26
6.1.3 Record 27
6.1.4 Schedule 28
6.1.5 Alarm 29
6.1.6 Network 30
6.1.7 Users 32
6.1.8 PTZ 33
6.1.9 Advanced 34
6.2 Main Menu - Search 34
6.3 Main Menu - Backup 35
6.4 Main Menu - Information 35
6.4.1 System 35
6.4.2 Event 35
6.4.3 Log 35
6.4.4 Network 35
6.4.5 Online Users 36
6.5 Main Menu - Disk Management 36
6.6 Main Menu - Logo 36
6.7 Main Menu - Shutdown 36
Disposal of Packaging 37
Disposal of Product 37
FAQs 38
Glossary of Terms 40
Repair and Refurbished Goods or Parts Notice 42

8
After Sales Support
1300 663 907
Model Number HE180106
Parts List
1 x DVR Unit with 500GB HDD
1
4 x IR Cameras
2
4 x 18m BNC Cables
3
2 x Power Adaptors
4
(DVR) &
5
(Cameras)
1 x Power Splitter Cable
6
1 x 1m HDMI Cable
7
1 x 1m Ethernet Cable
8
1 x Mouse
9
1 x DVR BNC Splitter Cable
10
4 x Mounting Accessories for Cameras*
1 x Instruction Manual*
1 x Getting Started Guide*
1 x Network Setup Guide*
1 x Warranty Card*
4 x CCTV Stickers*
* Not shown
1
3
7
8
2
4 5
9
6
10

9
After Sales Support
1300 663 907
Model Number HE180106
Camera Specications
Image Sensor: 1/4” Colour CMOS Sensor
Video Resolution: 720P
Video System: PAL
Infrared IRs: 24
Day/Night mode: Smart IR Cut Filter
Night Vision Distance: Max 24m
Scan Frequency: 50Hz
Minimum Illumination: 0 Lux (IR On)
Backlight Compensation: Auto
Electronic Shutter: 1/50~10,000 AUTO
Lens: F=3.6 ~ 60 degrees
Operating Temperature: -10 – 50C
Input Rating: DC 12V 780mA
DVR Specications
Video Compression: H.264
Video Input: 4 x composite BNC
Video Output: 1 x BNC composite
1 x HDMI
1 x VGA
Display Resolution: Up to: 1920 x 1080
Record Resolution: Up to 720p each camera
Record Speed: Selectable from 1 to 25 fps
Recording Modes: Continuous, Manual, Motion Detection
Playback Channels: 1/4 channel split screen
Network: LAN, DHCP, Dynamic IP, DDNS and P2P
HDD Interface: 1 x 2.5” SATA HDD, upgradable up to 4TB
USB: 2 x USB (for mouse and backup)
PTZ Control: Built-in RS485 Port
Mobile Surveillance: Supports iOS & Android
Input Rating: DC 5V/2A

10
After Sales Support
1300 663 907
Model Number HE180106
Product Overview
1.1 DVR Front and Side Panel
1.2 DVR Rear Panel
1. PWR – Power LED lights up solid when powered on
2. VGA – Output using a VGA cable
3. Video Input/Output
1. HDMI Port
2. LAN – Ethernet connection to modem / router (required for remote viewing over internet or
mobile)
3. USB Ports x2 – For mouse and ash drive backup / rmware updates
4. RS485 – For use with PTZ cameras (Cable and PTZ camera not included)
5. 5V Socket – Connect 5V Power Adaptor
1
1
2
2
3
3
4
5

11
After Sales Support
1300 663 907
Model Number HE180106
DVR Initial Setup
2.1 Initial Setup
Prior to installing the home security system, we highly recommend that you test all components to
ensure they are in good working order. To do this, the DVR unit must be connected (temporarily)
to a HDMI compatible TV screen or computer monitor (not a laptop) to complete your initial setup.
Once setup is fully complete, the TV screen or computer monitor can be disconnected and setup
as per your requirements.
2.2 DVR Unit Connections
1. Connect each of the camera BNC extension cables to the camera and
power connectors taking note of the labelling on the extension cable
i.e. Do not connect the incorrect end of the BNC cable to the DVR or
the camera as it will not function
2. Connect the other end of the BNC extension cables to the DVR BNC
cable splitter, and then connect the DVR BNC cable splitter to the port
marked “Video In/Out”
3. Connect the 4-way power splitter to each of the BNC extension cables
(red)
4. Connect the power adaptor to the 4-way splitter cable and plug into a
mains outlet, then switch the outlet on
5. Connect the included HDMI cable to the back of the DVR unit and
connect the other end of the cable to your monitor or TV
NOTE:
• You must switch your TV or monitor to the correct INPUT once the DVR
unit has been powered on, for example HDMI 1
• Connecting the DVR to your laptop will not work unless it has HDMI
input
6. Connect the mouse to the USB port (on the back of the DVR unit)
NOTE: Ensure you are connecting the12v power adaptor with the larger pin to
the 4-way splitter cable
7. Connect the other power adaptor to the DVR unit labelled DC5V and
plug the other end into a mains outlet
8. Switch the outlet on. The DVR unit will begin the boot sequence
NOTE: Both the DVR unit and cameras operate as soon as they are connected
to a power source and the power adaptors are switched on. To turn the cameras
or DVR unit o, switch o the power adaptors at the power outlet.
1
2
3
5
7

12
After Sales Support
1300 663 907
Model Number HE180106
DVR Initial Setup
9. Cocoon DVR allows you to view footage remotely either on compatible Smartphone, Tablets
or internet-ready Windows PCs. If you are wanting to set this up (instructions provided in
section 4.1 Use Apple or Android mobile to access footage on page 17) you must have
a constant, smooth and stable broadband internet connection via your modem/ router.
To connect your DVR to the internet:
a. Plug one end of the Ethernet cable into the back of the DVR into the ‘RJ45’ Port
b. Plug the other end of the Ethernet cable into a spare LAN (Not WAN.) port on your
network’s modem/ router
2.3 Installation Location
Before installing the Home Security System, it is essential to plan where to locate the DVR unit.
Below are a few points to consider:
• The DVR unit should be positioned in a central location with easy access to mains power,
cameras and installed cables
• If you plan to view footage over the internet or on your mobile phone, the DVR unit should also
be located near and connected to your modem / router or ethernet network point
• Plan out where you would like to place your cameras and test all connections BEFORE
permanently installing cables and cameras
• The DVR unit should be installed in a secure location to avoid tampering
• Do not place heavy objects on top of the DVR unit
• Do not block ventilation holes on the top and sides of the DVR unit or use in an enclosed area
as this may cause overheating
• Cameras should be placed covertly indoors where you do not want to see them every day
• Outdoor cameras can be placed in plain sight to act as a deterrent to would-be intruders
• Cameras are weatherproof, however if installed outside should be done in protected areas,
such as under eaves.
Once you have decided the location of the cameras and the DVR unit itself, use the supplied
screws to install the cameras in placed and setup the DVR unit as per the instructions provided in
section 2.2 DVR Unit Connections on page 11.
Once this is completed, you can setup the basic features of the DVR.

13
After Sales Support
1300 663 907
Model Number HE180106
DVR Operation
3.1 Powering on the DVR unit
1. Connect the power adaptor to the back of
the DVR unit
2. Plug the power adaptor into a mains
power outlet and switch the outlet ON
3. Once the power adaptor is connected to
the DVR unit, it will proceed through the
boot sequence
3.2 Mouse
1. USB Connection – ensure the mouse USB cable is connected to the
back of the DVR unit
2. Left Mouse Button (LMB) – click to see main menu and make
selections
3. Right Mouse Button (RMB) – click to return to previous screen or exit
menu
3.3 Setup Wizard
Before viewing footage on your monitor, smartphone or PC screen, the DVR must be fully setup
and congured. Once the DVR has booted up and the start-up screen is displayed, the Cocoon
DVR System will run a setup wizard to assist in setting up key features of the unit such as time &
date format, language.
You can enable or disable the setup wizard to be shown on start-up screen by selecting or
unselecting the check box.
3.4 Main Screen
Once the DVR unit has nished the boot sequence and you have completed the setup wizard,
the main split screen display will appear. Each camera will be labelled CH1 to CH4. A small green
square will appear in the cameras that are
active. If you have not connected a camera
correctly, you will see ‘video loss’.
TIP: Once you’re logged in, double clicking a
camera view with LMB will switch to single full
screen mode. Double click again to go back to
split screen mode
1
2
3
System initialising, please wait...

14
After Sales Support
1300 663 907
Model Number HE180106
3.5 Navigating the DVR Menu & Logging in
The way to navigate the DVR menu is by using the mouse. The mouse operates in much the same
way as on your computer. Left-click to make selections and choose options. Right-click (RMB)
operates as a cancel or previous menu button.
NOTE:
• This manual assumes the user has connected the mouse to control the DVR unit.
• Any standard wired USB mouse will work with the DVR unit
To enter the main menu, use RMB on the viewing screen and a quick pop up menu will appear.
Click on the main menu option and a log in box will appear.
For initial system setup, you will need to access the main menu and login.
Logging into the main menu
1. Using the mouse, input your user name.
If this is your rst time logging in, then
leave user name as ‘admin’.
2. Using the mouse, input your password. If
this is your rst use, leave password blank
3. Press ‘Login’
You will now have access to the main menus
functions which are outlined in section 6.1
Main Menu - Setup on page 25
DVR Operation

15
After Sales Support
1300 663 907
Model Number HE180106
Setting a password for ‘Admin’
For security, it is highly recommended to set a password for the administrator account.
To do this, RMB on the viewing screen and a quick pop up menu will appear click on the main
menu option.
1. From the main menu, select ‘Setup’, then ‘Users’
2. Double-click on the ‘admin’ account to open the ‘Change Password’ popup. If this is your rst
time setting a password the old password will be left blank.
3. Using the mouse, input your desired password in the ‘New Password’ eld
4. Input your password again in the ‘Conrm Password’ eld
5. Press ‘Ok’. Your new password has now been set
NOTE: The ‘Admin’ account cannot be removed. Please ensure that a secure password is set. Always
keep your password safe. If you wish, you may use the space provided below to write your password,
then keep this manual in a secure location.
User (Device) Name:___________ (Device) Password:___________
DVR Operation

16
After Sales Support
1300 663 907
Model Number HE180106
3.6 Quick Pop-up Menu
Right-clicking the mouse whilst on the viewing screen will show the pop-up menu for quick access
to basic functions.
1. Single – Switch to single camera view mode. Select the camera
you want to view
2. Multi – Switch to split screen mode
Tip: Alternatively, use the mouse and double click with LMB on the
image to switch between the two modes
3. PTZ - Access PTZ (Pan Tilt Zoom) controls via shortcut. Must have
PTZ camera (not included) installed and connected
4. Start/Stop Scan – This will show each camera in single view and at
selected intervals switch between each camera automatically
5. Colour – Adjust the colour settings of the selected camera
6. E-Zoom - Select an area on the camera screen to get a close up view. You can also select the
size in which you want to zoom to by selecting the numbers in the bottom right corner of the
screen. Right-click to return to full screen mode
7. Snap – Take a photo from the selected camera (A camera icon will show up indicating a photo
has been taken). To access photos, see section 6.2 Main Menu - Search on page 34
8. Start/Stop Record – Start and Stop 24/7 recording all cameras (default settings). In the
bottom left corner of each camera view, you will notice a green box, this means the cameras
are recording. If there is no green box they are not recording.
NOTE: If footage is captured by motion detection (see section 6.1.4 Schedule on page 28), a
yellow square and ‘MD’ will appear instead
9. Playback – Enter playback mode to view recently recorded footage
10. Main Menu – Access the main menu to congure DVR settings
Once you have set your username and password, your Home Security System is fully setup. To
setup and view your cameras on mobile see section 4.1 Use Apple or Android mobile to access
footage on page 17 or for PC see section 5.1 Cocoon HD Software for PC Use on page 21
DVR Operation

17
After Sales Support
1300 663 907
Model Number HE180106
Mobile Phone Setup
4.1 Use Apple or Android mobile to access footage
Footage can be viewed on your mobile using the ‘Cocoon HD’ iOS and Android compatible
application. Before setting up the application, ensure your DVR is connected to the internet
using the supplied ethernet cable. The DVR must have a constant, smooth and stable internet
connection via your modem to work. To connect:
• Ensure an ethernet cable is plugged into the back of the DVR in the ‘RJ45’ port.
• To check your network settings (i.e. is your DVR connected to the internet), go to Main Menu
Setup
Network then press the “Test” button. If a message on the on the left hand side says
“ok” your DVR is connected to the internet
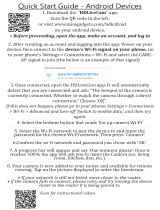
4.2 Download the Cocoon HD DVR App on your Mobile
1. On the DVR main menu, press ‘Information’, then ‘System’ - here you will nd the device ID and
QR codes
iOS: Using a QR code reader, scan the iOS QR code to download the app ‘Cocoon HD’.
Alternatively search and download the “Cocoon HD” app in the iOS Appstore
Android: Using a QR code reader, scan the Android QR code. Alternatively search and
download the Cocoon HD app in the Google Play Store.
2. Click on the app icon to launch the app
iOS Android

18
After Sales Support
1300 663 907
Model Number HE180106
4.3 Logging into or creating a Cocoon HD DVR Account
1. If you don’t have a Cocoon HD DVR Account, use the ‘Register’ button and input the required
elds to create one
NOTE:
• Your DVR’s username and password cannot be used to log into the app. If you have never used
the app, you will need to create a new username and password on the app.
• The DVR User Account and the Cocoon HD App Account are separate accounts and must use
dierent usernames.
2. Follow the prompts for setup
3. Enter validation code and email address
4. Create a password. Enter twice to make sure they match and hit “register”
5. Enter your User ID and Password into their respective elds.
6. Press the Login button to login
Please write down your Cocoon DVR app password
User (Device) Name: ___________ (Device) Password:___________
4.4 Adding your DVR device to the App
Enabling your DVR footage to be watched and recorded on your smartphone is simple via the app.
1. Within the DVR Main Menu, navigate to Information
System. You will notice a ‘Device ID’ QR
code on the bottom right hand side. Keep this menu option open and complete the below
instructions.
2. On the Cocoon HD App select the + symbol in the top-right hand
corner to add the Cocoon HD security system as your device. From
there you will be within the add device sub-menu
3. Select type of device you wish to add. In this case it will be “DVR”
4. Pair your device using one of two methods:
a. Scan QR Code Device ID
On the App, click on the QR scan button next to the words
‘Enter Device ID”. Your camera should pop up which will allow
you scan your DVR’s unique QR code found on the DVR’s main
MENU as mentioned above in point 1. Point your smartphone camera at the QR code
in the bottom right hand corner with the heading “Device ID”. It will scan and add your
device automatically.
b. Manual type the Device ID
Type the Device ID (as noted above in point 1) into your Cocoon HD app under ‘Enter
Device ID’
Mobile Phone Setup

19
After Sales Support
1300 663 907
Model Number HE180106
Mobile Phone Setup
5. Enter your DVR device name password from section 3.5 Navigating the DVR Menu &
Logging in on page 14.
6. Once done, click the tick symbol in the right-hand corner of the APP to complete the pairing
process. The registration and pairing process may take several minutes to register.
NOTE: Step by step prompts are located within the app to help you through this process.
Once paired, return to your app and return to the ‘My Device’ menu.
4.5 Navigating the App menus
Device - This screen shows you basic information about your device and allows you to access
footage
Message - Receive and view messages from with your APP
Media - View photos on videos from the APP you have manually recorded and saved into the APP
on your Smartphone
Me – Update details such as app password and logout of the APP. You can also allow access to
other users. To do this:
1. Click in the top right-hand corner of the ‘Me’ menu
2. Enter the login account of other user(s) you wish to grant access to view your footage. They
must be a registered user of the Cocoon HD app. To register, they must follow the registration
process outlined in section 4.3 Logging into or creating a Cocoon HD DVR Account on
page 18
4.6 Viewing your DVR footage
1. On the ‘Device’ menu, click into the orange box at the top of the screen to select the cameras
you would like shown on your mobile.
2. By tapping the plus button on one of the blank cameras screen a channel menu will appear
allowing you to select the cameras you would like to view on your mobile.
3. Once selected hit ‘save’.
4. If paired correctly you will be able to see footage of your camera on your app and a green
“Live” symbol in the left-hand corner will inform you that you are viewing livestreamed
pictures of your cameras
5. For full screen views of each individual camera, tap on the desired camera. In this mode you
can also record stills or video onto your phone

20
After Sales Support
1300 663 907
Model Number HE180106
Mobile Phone Setup
6. Hit the return button in the top left-hand corner, when you wish to return to view footage for
all cameras
4.7 Take Screenshots (Photos) or Video
1. Click into an individual camera ensuring that footage is streaming
2. To take a screenshot (photo), tap on the “Screenshot” icon
3. To take a video, click the “Video” icon. To stop recording tap the video icon again.
NOTE: Your cameras will continue to capture footage and record to your DVR
4. Videos/Photos will be saved in the media menu of the Cocoon HD App. To access the media
menu, select back arrow in the top left corner to arrive back to “My Device” page and then
click the “Media” menu at the bottom of the App screen.
5. At the top of the “Media” menu, select between photos and videos
6. For iOS devices, to save photos/videos, click the “Manage” button in the top right corner.
Select the photos or videos you want to save to your mobile’s photo gallery and hit “Store to
photo album”. Follow the prompts to nalise saving the photos/videos.
7. A folder called “Cocoon HD” will be automatically created in your albums folder where you
can view the photos/videos
4.8 View Footage from DVR’s Recorded Events.
You can stream recent footage captured and recorded on your DVR’s hard disk drive to your phone
app. To do this click on one of the four cameras and click the ‘Playback’ icon.
Past events which remain recorded on your DVR according to your settings are revealed in date
order from most recent to oldest.
IMPORTANT: there is limited space on your DVR’s HDD; new footage records over old footage
depending on your settings. Unless saved, protected or archived, footage will be overwritten
on your DVR’s HDD.
/