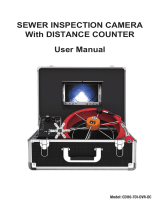
ANYSUN SY3800 User manual

Type
User manual

The ANYSUN SY3800 is a sewer inspection camera system designed for examining hard-to-reach areas. With a 7" high-resolution monitor, you can easily view live footage and captured images. The 1/3 CMOS sensor captures clear and detailed images, while the 12 adjustable LED lights provide ample illumination in dark environments. The camera is IP68 waterproof, making it ideal for underwater inspections. The 30-meter cable allows you to reach deep into pipes and other confined spaces. The built-in DVR lets you record videos and take snapshots for later viewing.

The ANYSUN SY3800 is a sewer inspection camera system designed for examining hard-to-reach areas. With a 7" high-resolution monitor, you can easily view live footage and captured images. The 1/3 CMOS sensor captures clear and detailed images, while the 12 adjustable LED lights provide ample illumination in dark environments. The camera is IP68 waterproof, making it ideal for underwater inspections. The 30-meter cable allows you to reach deep into pipes and other confined spaces. The built-in DVR lets you record videos and take snapshots for later viewing.

AnysunSY3800Sewer Inspection Camera
User Manual
Pleasereadthisusermanualcarefullybeforeusingthisproduct
Catalog
1.Notice
2.Specification
3.Battery Control Box Display
4.How to Power on The Sewer Camera
5.Monitor Operation
6.How to Remove and Install Memory Card
7.How to Record Video
8.How to View Recorded Video
9.How to Take Picture
10.How to View Picture
11.Camera Diagram
12.How to Operate Pushrod
13. How to Rotate the Screen Image
14.How to Charge
15.Package Includes
16. Warranty
17.How to Contact Seller
1.Notice 1
2.Specication 1
3.Battery Control Box Display 2
4.How to Turn on The Sewer Camera 3
5.Monitor Operation 4
6.How to Remove and Install Memory Card 5
7.How to Record Video 6
8.How to View Recorded Video. 7
9.How to Take Picture 7
10.How to View Picture 9
11.Camera Introduction: 10
12.How to Operate Pushrod 11
13. How to Rotate the Screen Image 12
14.How to Charge 13
15.Package Include: 13
16. Warranty 14
17.How to Contact Seller: 14
1
1
2
3
4
5
6
7
7
10
11
12
13
13
14
15
15
How to Sewer Camera
Thank you for choosing an ANYSUN product. You will find our inspection system to be
very useful for site inspection and home maintenance. This industrial inspection
system is very easy to use and comes with all the needed equipment to begin your
first survey. This modern device responds to strict standards governing quality and
safety. In order to use the inspection camera to its optimal performance, it is advice
that you read these instructions carefully. They will provide you with essential
information about the device’s functions and how to maintain the product correctly.
Please retain this manual in case you need to refer to it at a later date.
Please read all instructions. Save all warnings and instructions for future reference.
1. Handle with care and keep away from any heat source such as radiators, stoves, or
other appliances that produce heat.
2. If the users disassemble or deliberately damage the inspection system, it will void
the warranty.
3. After every use power off and disconnect connection cables from the monitor and cable
reel.
4. Format the memory card during first use.
5. Do not power off when recording or can cause the memory to corrupt.
6. Charge battery to full capacity every time to have a longer lasting battery.
7. If system is idle for long period of time, charge the unit once a month to prevent
battery from degrading.
8. Only the camera probe and fiber optic cable are water resistant.
9. Turn off the unit when not in use and store in a dry place.
10. Always keep lens clean and dry, do not expose the inspection camera to any
moisture, gases or other material that may cause corrosion after every use.
11. Keep inspection system out of reach from children and do not allow anyone
unfamiliar with the system or these instructions to operate.
2.Specication
1.Notice
Monitor Display Size
Camera Sensor
Memory Card Max Support
Camera Resolution
Camera Diameter
Cable Length
LED Lights
Camera View Angle
Camera Material
Camera Waterproof Rating
Battery Capacity
Battery Work Time
Operating Temperature
7”
1/3 CMOS
32GB | (8GB included)
1000TVL
21mm * 120mm
30m / 100ft
12pcs
140 degrees
Stainless Steel
IP68
Lithium-ion | 12V 4500mAh
6-8 Hrs
-20-60 degrees
1
1.Connect all cables. Each wire on the connection cable is marked with "VIDEO", "LED
DC", "CAMERA DC" corresponding to "VIDEO", "LED DC", "CAMERA DC" on the side
of the power control box.
2.Connect camera head to cable camera port.
3.Switch “ON” from the side of the control unit and press power button on the monitor.
3.Battery Control Box Display
Catalog
Connect to Screen Video Cable
Screen Power Output/Charger
VIDEO IN
LED DC OUT
CAMERA DC OUT
ON/OFF
LED Brightness
Adjustment
Battery Power Display
1.Connect all cables. Each wire on the connection cable is marked with "VIDEO", "LED
DC", "CAMERA DC" corresponding to "VIDEO", "LED DC", "CAMERA DC" on the side
of the power control box.Install camera head, turn on the power battery control box and
screen power button, the system is starting up.
2
4.How to Power on The Sewer Camera
Catalog
Camera port
Screen
Cable
wheel port
Screen port
Connection cable
Camera port
1.Connect all cables. Each wire on the connection cable is marked with “VIDEO, LED
DC, “CAMERA DCcorresponding to “VIDEO”, “LED DC, CAMERA DCon the side
of the power control box.
2.Connect camera head to cable camera port.
3.Switch “ON” from the side of the control unit and press power button on the monitor.
3
3.Battery Control Box Display
5.Monitor Operation
4.How to Turn on The Sewer Camera
1.Connect all cables. Each wire on the connection cable is marked with "VIDEO", "LED
DC", "CAMERA DC" corresponding to "VIDEO", "LED DC", "CAMERA DC" on the side
of the power control box.Install camera head, turn on the power battery control box and
screen power button, the system is starting up.
1.Connect all cables. Each wire on the connection cable is marked with "VIDEO", "LED
DC", "CAMERA DC" corresponding to "VIDEO", "LED DC", "CAMERA DC" on the side
of the power control box.Install camera head, turn on the power battery control box and
screen power button, the system is starting up.
REC/OK
Play
Menu/Exit
OFF/ON
up
down
1.REC/- : Press to record video and press again to end recording.
2.PLAY/+ : Press to play and press again to pause recorded video.
3.MENU/EXIT: Press to enter into menu. Press MENU/EXITto toggle between each
setting. PLAY/+to enter input.
Brightness Adjust monitor brightness
Chroma Adjust monitor chroma
Contrast Adjust monitor contrast
Reset Restore to factory setting
Language English / Chinese
Rotate Monitor orientation
Date Adjust date
Time Adjust time
Picture View View pictures
Snapshot Take a snapshot picture
Delete All – Erase all video and picture
Format Format memory card
Copy – Create a copy of a file
4.< and > : Press to move and select.
4
6.How to Remove and Install Memory Card
1. Press buttons on both sides to remove display.
2.Find the memory card on the side of the display, press to remove and install.
4.How to Turn on The Sewer Camera
1.Connect all cables. Each wire on the connection cable is marked with "VIDEO", "LED
DC", "CAMERA DC" corresponding to "VIDEO", "LED DC", "CAMERA DC" on the side
of the power control box.Install camera head, turn on the power battery control box and
screen power button, the system is starting up.
4.How to Turn on The Sewer Camera
5
5.Monitor Operation
7.How to Record Video
1.Turn on the sewer camera.
1. Press “REC/-” to record, press again to end recording.
4.How to Turn on The Sewer Camera
1.Connect all cables. Each wire on the connection cable is marked with "VIDEO", "LED
DC", "CAMERA DC" corresponding to "VIDEO", "LED DC", "CAMERA DC" on the side
of the power control box.Install camera head, turn on the power battery control box and
screen power button, the system is starting up.
4.How to Turn on The Sewer Camera
1.Press the buttons on both sides to take down the display
6
2.Find the memory card on the side of the display, press to remove and install
5.Monitor Operation
8.How to View Recorded Video.
Press “PLAY/+” to view recorded video, press “<” “>” to select video,
press “PLAY/+” to play and pause, press “MENU/EXIT” to exit.
9.How to Take Picture
1. Press MENU/EXIT” button to enter menu.
4.How to Turn on The Sewer Camera
1.Connect all cables. Each wire on the connection cable is marked with "VIDEO", "LED
DC", "CAMERA DC" corresponding to "VIDEO", "LED DC", "CAMERA DC" on the side
of the power control box.Install camera head, turn on the power battery control box and
screen power button, the system is starting up.
1.Turn on the sewer camera.
4.How to Turn on The Sewer Camera
7
5.Monitor Operation
2.Find the memory card on the side of the display, press to remove and install
4.How to Turn on The Sewer Camera
1.Connect all cables. Each wire on the connection cable is marked with "VIDEO", "LED
DC", "CAMERA DC" corresponding to "VIDEO", "LED DC", "CAMERA DC" on the side
of the power control box.Install camera head, turn on the power battery control box and
screen power button, the system is starting up.
Press PLAY/+ to view recorded video, press < > to select video,
press PLAY/+ to play and pause, press MENU/EXIT to exit.
2. Press “MENU/EXIT” button to select “picture” mode.
3.. Press “<” and “>” to select “Snapshot”.
8
2.Find the memory card on the side of the display, press to remove and install
4. Press” PLAY/+” to take picture, picture will be saved automatically.
4.How to Turn on The Sewer Camera
1.Connect all cables. Each wire on the connection cable is marked with "VIDEO", "LED
DC", "CAMERA DC" corresponding to "VIDEO", "LED DC", "CAMERA DC" on the side
of the power control box.Install camera head, turn on the power battery control box and
screen power button, the system is starting up.
2.Press MENU/EXIT button to select to photo mode.
9
2.Find the memory card on the side of the display, press to remove and install
10.How to View Picture
1.Press “MENU/EXIT” to enter menu. Press “MENU/EXIT” to toggle to picture mode
and select “Picture View”.
2.Press “PLAY/+” to confirm selection. Go to “Picture View”. Press <” and “>” button
to select the picture you want to view.
4.How to Turn on The Sewer Camera
1.Connect all cables. Each wire on the connection cable is marked with "VIDEO", "LED
DC", "CAMERA DC" corresponding to "VIDEO", "LED DC", "CAMERA DC" on the side
of the power control box.Install camera head, turn on the power battery control box and
screen power button, the system is starting up.
4.How to Turn on The Sewer Camera
4.Press PLAY/+ button to take a picture, picture will be saved automatically
10
11.Camera Introduction:
4.How to Turn on The Sewer Camera
1.Connect all cables. Each wire on the connection cable is marked with "VIDEO", "LED
DC", "CAMERA DC" corresponding to "VIDEO", "LED DC", "CAMERA DC" on the side
of the power control box.Install camera head, turn on the power battery control box and
screen power button, the system is starting up.
4.How to Turn on The Sewer Camera
120mm
40mm
21mm
21mm
Stainless Steel Spring
68 Waterproof Camera
Ip
12pcs Adjustable Lights
11
8.How to View Recorded Video.
12.How to Operate Pushrod
1.Pull the cable: Hold the handle with your left hand. The cable needs to be extended
and hooked onto a hook on the handle and placed on top of the guardrail via the hook,
then pull cable with right hand to release the cable.
2.Wrap Cable: The cable needs to be placed onto the hook on the handle and placed
on top of the guardrail, hold the handle with your left hand and push the line in with your
right hand.
4.How to Turn on The Sewer Camera
1.Connect all cables. Each wire on the connection cable is marked with "VIDEO", "LED
DC", "CAMERA DC" corresponding to "VIDEO", "LED DC", "CAMERA DC" on the side
of the power control box.Install camera head, turn on the power battery control box and
screen power button, the system is starting up.
(Please note: because the
coil is made of fiber optic
glass, do not bend less than
90 degrees or else you will
break the glass and the cable
will not work properly.
(Improper use of the pushrod
will not be covered by the
warranty.)
1. Press MENU/EXIT button to enter menu, Press the "MENU/EXIT"
button to select the camera mode and choose the "Picture View" mode.
12
8.How to View Recorded Video.
1.Press “MENU/EXIT” to enter menu. Press "MENU/EXIT" to toggle to picture mode
and select "Picture View".
13. How to Rotate the Screen Image
4.How to Turn on The Sewer Camera
1.Connect all cables. Each wire on the connection cable is marked with "VIDEO", "LED
DC", "CAMERA DC" corresponding to "VIDEO", "LED DC", "CAMERA DC" on the side
of the power control box.Install camera head, turn on the power battery control box and
screen power button, the system is starting up.
1.Press “MENU/EXIT” button to enter menu, Press “MENU/EXIT” button to select the
second mode. Press “<” and “>” button to select “Rotate” mode.
2.Press “PLAY/+” button to conrm selection, press “PLAY/+” button again to
star rotate, Rotate 90 degrees with each press of the “PLAY/+” button.
14.How to Charge
Charging status: Red LED on
Note: It can’t work when the battery is less than 20%
Full charging: Green LED on
13
8.How to View Recorded Video.
1.Press “MENU/EXIT” to enter menu. Press "MENU/EXIT" to toggle to picture mode
and select "Picture View".
Press MENU/EXIT” button to enter menu, Press MENU/EXIT” button to select the second mode. Press “<and “>” button to select “Rotate” mode.
15.Package Include:
4.How to Turn on The Sewer Camera
1.Connect all cables. Each wire on the connection cable is marked with "VIDEO", "LED
DC", "CAMERA DC" corresponding to "VIDEO", "LED DC", "CAMERA DC" on the side
of the power control box.Install camera head, turn on the power battery control box and
screen power button, the system is starting up.
Screen with 8GB card.
How to Charge
Screen
HD Camera
Connection CableScrewdriver
Battery Cable Wheel
Power Plug
Aluminum box
14
8.How to View Recorded Video.
1.Press “MENU/EXIT” to enter menu. Press "MENU/EXIT" to toggle to picture mode
and select "Picture View".
17.How to Contact Seller:
If you have any question about the sewer camera, please feel free to contact us with
your order number by the email provided below:
support@anysuntech.com
You can also contact us by Amazon by taking the following steps below:
1. Sign in to your Amazon account.
2. Click Your Account”, then select “Your Orders”.
3. Click Contact Seller” which can be located next to order.
4.How to Turn on The Sewer Camera
1.Connect all cables. Each wire on the connection cable is marked with "VIDEO", "LED
DC", "CAMERA DC" corresponding to "VIDEO", "LED DC", "CAMERA DC" on the side
of the power control box.Install camera head, turn on the power battery control box and
screen power button, the system is starting up.
16.Warranty
This product is guaranteed for 1 years from the date of purchase. The warranty covers
device breakdown and malfunctions when the device is used in compliance with the
manner its intended and the instructions that are provided within the manual. To be
covered by the warranty, proof of purchase is required (Order #) and the product must be
in its entirety.
The warranty does not cover wear and tear through normal use, lack of maintenance,
negligence, immersion or inappropriate use (impact damage, storage, usage conditions,
etc). Also excluded from the warranty are harmful consequences due to dismantling or
modifying device.
3.Battery Control Box Display
Charging status: Red LED on
15
8.How to View Recorded Video.
1.Press “MENU/EXIT” to enter menu. Press "MENU/EXIT" to toggle to picture mode
and select "Picture View".
  • Page 1 1
  • Page 2 2
  • Page 3 3
  • Page 4 4
  • Page 5 5
  • Page 6 6
  • Page 7 7
  • Page 8 8
  • Page 9 9
  • Page 10 10
  • Page 11 11
  • Page 12 12
  • Page 13 13
  • Page 14 14
  • Page 15 15
  • Page 16 16
  • Page 17 17

ANYSUN SY3800 User manual

Type
User manual

The ANYSUN SY3800 is a sewer inspection camera system designed for examining hard-to-reach areas. With a 7" high-resolution monitor, you can easily view live footage and captured images. The 1/3 CMOS sensor captures clear and detailed images, while the 12 adjustable LED lights provide ample illumination in dark environments. The camera is IP68 waterproof, making it ideal for underwater inspections. The 30-meter cable allows you to reach deep into pipes and other confined spaces. The built-in DVR lets you record videos and take snapshots for later viewing.

Ask a question and I''ll find the answer in the document

Finding information in a document is now easier with AI