Page is loading ...

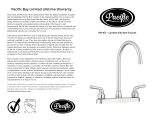
DF-PK640 – RV Kitchen, Galley, or Bar Faucet with Crystal Acrylic Knobs
Dura Faucet Limited Lifetime Warranty
!
Dura Faucet products have been manufactured under the highest standards of
quality and workmanship. Dura Faucet warrants to the original purchaser for as long
as the original purchaser owns their RV that this product will be leak- and drip-free
during normal use, and that all parts and finishes of this product will be free from
defects in material and manufacturing workmanship. Plated metal and plated plastic
finishes are warranted for (1) year.
If the product should develop a leak or drip during the warranty period, Dura Faucet
will, free of charge, provide the parts necessary to put the product back into good
working condition by you. They may also replace any part or finish that proves
defective in material and manufacturing workmanship, under normal installation,
use and service, free of charge. Proof of purchase (original sales receipt) from the
original purchaser must accompany all warranty claims. Defects or damages
caused by the use of other products or parts is not covered by this warranty. If
repair or replacement is not practical, Dura Faucet may elect to refund the purchase
price in exchange for the return of the product.
This warranty covers replacement of all defective parts and finishes. However,
damage due to product abuse, product misuse, installation error, or the use of
cleaners containing alcohol, abrasives, or other solvents, whether performed by a
contractor, service company, or yourself, will void this warranty. Dura Faucet will
not be responsible for labor charges and/or damages incurred in installation, repair
or replacement, nor any indirect, incidental or consequential damages, losses, or
injury costs of any nature relating to this product. Except as provided by law, this
warranty is in lieu of and excludes all other warranties, conditions and guarantees,
whether expressed or implied, statutory or otherwise, including without restriction
those of merchantability or of fitness for use.
Dura Faucet will advise you on how to proceed in making warranty claims. To begin
a warranty claim, write to Dura Faucet explaining the defect and include proof of
purchase and your name, address and telephone number. Email is
warranty@durafaucet.com.
* Never use cleaners containing abrasive cleansers, ammonia, bleach, acids, waxes,
alcohol, solvents or other products not recommended for plated metal or plastic
finishes. This will void the warranty.
19215 SE 34
th
St. Ste. 106-382
Camas, WA 98607
!
!
!
!
!
!

INSTALLATION OF THE FAUCET
!
1 New Faucet Preparation
Completely shut off the water supply.
Remove the old faucet by disconnecting it
from the water supply tubes under the sink
and then unscrewing the faucet from the
counter top by removing the mounting
nuts. Clean the sink’s top surface in
preparation for installation of the new
faucet.
2 Install Faucet on Sink
Place the faucet in position on the sink top
and screw nuts upward from under the
sink onto faucet connectors. Tighten the
nuts alternating until they are nearly flush
with the underside of the sink top. Then,
align the faucet as desired. While
maintaining set alignment, tighten down
lock nuts by hand to lock faucet into place.
3 Connect to Water Supply
Slide water supply hose into faucet’s
connections, and slide nut up to a flush
position. Hose will go partially into faucet’s
connection. Carefully hand tighten nuts,
then use a wrench to hold the hoses
securely into place. Plumbers Tape may be
used to help prevent leaks.
4 Remove Aerator and Flush
Once installation of hoses is complete,
remove the aerator. Turn the water supply
on and allow both the hot and cold water
to run for 30 to 60 seconds. While water is
running, check for leaks around and under
the sink. Once done replace aerator. Your
new Dura Faucet is ready to use.
MAINTENANCE AND CLEANING
Cleaning Tips: The finish on your product
is designed to retain its beautiful sheen
for years. To maintain the original look of
the finish, a little care and caution should
be used. We recommend the use of mild
soap and water to clean the product.
THE USE OF ABRASIVE CLEANERS MAY
SCRATCH THE FINISH OR CAUSE
OTHER DAMAGE.
RECOMMENDED TOOLS AND
MATERIALS
¨ Adjustable Wrench
¨ Plumbers Tape (Thread Seal
Tape)
BEFORE YOU BEGIN
There are a variety of things to do before
installing any new plumbing system into
your home or residence. Before you begin
work make sure you:
¨ Shut off the main water supply
¨ Cover your drain to prevent
loss of parts
¨ Observed any local plumbing
codes
¨ Inspect fixture for damage -
Replace as necessary
* Dura Faucet reserves the right to make
any revisions in the design of products
without notice.
!
!
!
!
!
!
!
!
!
!
!
!
!
!
!
!
!
!
!
!
!
!
!
!
!
!
!
1. Acrylic/AI H-Button (1)
2. Acrylic/AI C-Button (1)
3. Stainless Steel Handle Screw (2)
4. ABS Base (2)
5. ABS Nut (2)
6. ABS Spout (1)
7. ABS Base Plate (1)
8. Rubber O-Ring (1)
9. ABS Plug (1)
10. ABS Spout Nut (1)
11. POM C-Ring (1)
12. Rubber O-Ring (1)
13. ABS Escutcheon (1)
14. POM/Rubber/Stainless Steel Cartridge
Hot (2)
15. Rubber Washer (2)
16. Stainless Steel Spring (2)
17. POM/Rubber Body (1)
18. PP Base Plate (1)
19. Rubber Washer (2)
20. ABS Mounting Nut (2)
21. Rubber Washer (2)
22. ABS Coupling Nut (2)
23. Rubber Washer (1)
24. POM Flow Restrictor (1)
25. POM Filter Nut (1)
26. POM Ring (1)
27. Stainless Steel Filter (1)
28. POM Filter Seat (1)
29. ABS Aerator Nut (1)
/