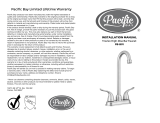
Pacific Bay PB-L04CP Installation guide
- Category
- Sanitary ware
- Type
- Installation guide
Pacific Bay PB-L04CP is a durable and versatile bathroom faucet designed to enhance your bathroom experience. With its sleek design and exceptional performance, it offers a range of features that ensure effortless functionality and lasting satisfaction.
Pacific Bay PB-L04CP is a durable and versatile bathroom faucet designed to enhance your bathroom experience. With its sleek design and exceptional performance, it offers a range of features that ensure effortless functionality and lasting satisfaction.


-
 1
1
-
 2
2
Pacific Bay PB-L04CP Installation guide
- Category
- Sanitary ware
- Type
- Installation guide
Pacific Bay PB-L04CP is a durable and versatile bathroom faucet designed to enhance your bathroom experience. With its sleek design and exceptional performance, it offers a range of features that ensure effortless functionality and lasting satisfaction.
Ask a question and I''ll find the answer in the document
Finding information in a document is now easier with AI
Related papers
Other documents
-
Dura Faucet DF-PB150A-CP Installation guide
-
Dura Faucet DF-PK100-SN Installation guide
-
Dura Faucet DF-PK640S-WT Installation guide
-
Dura Faucet DF-PL700L-CP User manual
-
Dura Faucet DF-PK600A-CP User manual
-
Dura Faucet DFPL620LSN User manual
-
Dura Faucet DF-PK330HC-WT User manual
-
HOMEWERKS 10-K82WNCH1B-Z Installation guide
-
HOMEWERKS 16-U42WNCHB Installation guide
-
Dura Faucet DF-PK210S-WT User manual


