
MANUAL IRONWORKER
INS TRUCTIONS
Item #21566

2 Eastwood Technical Assistance: 800.343.9353 >> techelp@eastwood.com
The EASTWOOD MANUAL IRONWORKER is a serious, industrial metal working machine designed for production environments and high-volume fabrication shops.
TOOLS REQUIRED (not included)
• 13mm Wrench
• Two 18mm Wrenches
• 1/4” Drift or Punch
• Medium Hammer
• 6mm Wrench (Main Blade removal only)
• Medium Snap ring Pliers (Shear Blade removal only)
SPECIFICATIONS
The following material shearing capacities are rated for low-carbon steel, aluminum or other materials not exceeding a maximum tensile strength of 64,000 PSI.
Main Blade Shear Capacity, Flat Stock: 4” x 0.312” [100 x 8mm]
Round Stock Capacity: 0.625” [16mm]
Square Stock Capacity: 0.787” [20mm]
Angle Stock Capacity: 2.36” x 2.36” x 0.25” [60 x 60 x 6mm]
Exceeding rated material limitations can result in severe personal injury and/or damage to the unit.
CONTENTS
(1) Ironworker
(1) Upper Handle
(1) Lower Handle
(1) M8 x 20mm Bolt, Lock Washer, and Nut

READ INSTRUCTIONS
• Thoroughly read and understand this manual before using.
• Save for future reference.
PINCH AND CRUSH HAZARD!
• The Eastwood Manual Ironworker consists of heavy metal components which can present a hand/finger pinch hazard and cause
potentially serious injuries if dropped. Avoid pinching hands while handling. The use of safety shoes is strongly recommended. Keep
fingers and hands away from moving parts when operating.
CUT HAZARD!
• Handling sharp metal can cause serious cuts. Wear thick, well-fitting work gloves to prevent cuts from handling sharp metal.
EYE INJURY HAZARD!
• Metal particles can be ejected from the tool when bending and cutting. Sheet metal edges and corners are sharp and can injure eyes.
Always wear ANSI approved eye protection when operating this tool.
• Before beginning ANY work with this tool, it is absolutely necessary that it be securely bolted to a sturdy workbench anchored to the
floor or wall.
• Strenuous physical force may need to be applied to the Manual Ironworker during use. Failure to ensure proper footing can quickly
result in a fall which could inflict serious personal injury or property damage. Always work in a clean, uncluttered environment.
• Be sure there is sufficient working room around the tool to allow for safe handling of various sizes of metal.
• The Eastwood Manual Ironworker was specifically designed to be operated by one person only. Never have one person operate the
Handle while another feeds the workpiece or serious injury could occur.
• Excessive resistance while operating could indicate a defect with the workpiece material or broken or damaged Manual Ironworker
components. To avoid injury, stop work immediately and inspect workpiece material for nicks, dents, welds, excessive scale or
remaining coatings. Clean or repair as necessary or discard and begin with a new piece. Also inspect Manual Ironworker components
for looseness or damage.
To order parts and supplies: 800.343.9353 >> eastwood.com 3
DANGER indicates a hazardous situation which, if not avoided, will result in death or serious injury.
WARNING indicates a hazardous situation which, if not avoided, could result in death or serious injury.
CAUTION used with the safety alert symbol, indicates a hazardous situation which, if not avoided, could result in minor or moderate injury.
NOTICE is used to address practices not related to personal injury.
SAFETY INFORMATION
The following explanations are displayed in this manual, on the labeling, and on all other information provided with this product:

4 Eastwood Technical Assistance: 800.343.9353 >> techelp@eastwood.com
SET-UP
• The Eastwood Manual Ironworker requires up to several hundred
pounds of handle force to operate and must be securely mounted
on a heavy, solid workbench, stand, floor etc., capable of holding
the static weight of the unit plus the ability to counter the high force
stresses from operation.
• Place the Manual Ironworker over the chosen location then mark
mounting hole locations by tracing holes in the feet.
• The use of 1/2” x 4” [m13 x 100mm] through bolts & nuts or longer
lag screws with substantial washers and attachment to a structural
member is absolutely necessary.
• The Eastwood Manual Ironworker is shipped with the Actuating
Arm in the downward position (FIG 1) requiring some partial disas-
sembly and reassembly as follows:
- Using a ¼” Drift or Punch, drive out the partially inserted Roll
Pins and set aside for reinstallation (FIG 2).
- Remove the Pivot Pin (FIG 3) then pull the Actuating Arm stub
all the way up and over center to relieve tension of the Handle
Return Springs (FIG 4).
- Pull off the two Handle Return Springs (FIG 5) and set aside for
reinstallation noting which one is Left and which is Right.
- Keep the Actuating Arm in the upward, over-center position
(FIG 6).
- Replace the Handle Return Springs making sure the hooked
fingers are positioned properly just ahead of the Drive Posts
with the open loops facing rearward (FIG 6).
- Replace the Roll Pins allowing them to contact the straight
fingers of the Handle Return Springs into a slight tension in the
nearest locating holes (FIG 6).
- Drive the Roll Pins into place with a Hammer (FIG 7).
- Replace the Pivot Pin (Fig 8) then allow the Actuating Arm stub
to move forward. At this point it should be under spring tension
(FIG 8).
ASSEMBLY
• Assemble the two Handle sections and bolt together with the
M8 x 20mm Bolt (FIG 9).
• Install assembled Handle to the Actuating Arm with the
M12 x 50mm Bolt, Washer, Lock washer and Nut (FIG 10).
• The Eastwood Manual Iron Worker is ready for use.
Check for the presence of electrical, air or other
utility lines under the mounting surface before
drilling mounting holes.
FIG. 1
✓
Actuating
Arm
FIG. 2
FIG. 3
FIG. 4
Rotate up

To order parts and supplies: 800.343.9353 >> eastwood.com 5
FIG. 5 FIG. 6
FIG. 7 FIG. 8
FIG. 9 FIG. 10

6 Eastwood Technical Assistance: 800.343.9353 >> techelp@eastwood.com
FIG. 11
FIG. 12
FIG. 13
FIG. 14
ADJUSTMENTS
• Pivot Pin
The Eastwood Manual Ironworker design incorporates a moveable Pivot
Pin which modifies the cutting pivot point.
The factory installed position (rearward hole location) offers the greatest
leverage with the lowest Handle force required while causing greater lever
travel (FIG 11). This is best when shearing thicker materials.
The alternate position (forward hole location) provides shorter lever travel
however it requires significantly greater lever force (FIG 12). This may be
used on shearing lighter, thinner materials.
TO SWITCH PIVOT PIN POSITION:
- Remove Pivot Pin by griping the head firmly and rotating side to side
while pulling firmly. Carefully withdraw Pivot Pin and immediately
place it through the alternate pivot position (FIG 12). Rotate Pivot
Pin side to side while pushing in.
• Right-Side, Round, Square and Angle Support Plate
The Right-Side Support Plate may be adjusted up or down to accommo-
date various sizes of material. To Do So:
- Loosen the 18mm Nuts (FIG 14).
- Insert material to be sheared into the appropriate left side opening.
- Slide the Support Plate up or down as required to provide support
for the protruding material.
- Tighten the 18mm Nuts.
Do Not allow any components to move when
withdrawing Pivot Pin or Blade Drive Plate
misalignment can occur (Fig 13). Should this
occur, use of a screwdriver or magnet is advisable
to move the Blade Drive Plate back into alignment.
DO NOT use fingers!
Drive Plate
✓
✓

To order parts and supplies: 800.343.9353 >> eastwood.com 7
OPERATION
The Eastwood Manual Ironworker features multiple metal shearing options
based on the shape, thickness and type of metal to be sheared (FIG 15).
- Main Shear (FIG 16) - The Main Shear is intended for most com-
mon shearing operations of flat stock and sheet metal up to
4” x 0.312” [100 x 8mm].
- Round Shear (FIG 17) - The Round Shear is for round bar stock up
to 0.625” [16mm] in diameter.
- Square Shear (FIG 17) - The Square Shear is for square bar stock
up to 0.787” [20mm].
- Angle & “T” Shear (FIG 18) – The Angle & “T” Shear is designed to
accept most angle and T profile stock up to 2.36” x 2.36” x 0.25”
[60 x 60 x 6mm].
FIG. 15
FIG. 16
FIG. 17
FIG. 18
Square
✓
✓
Round
Angle

8 Eastwood Technical Assistance: 800.343.9353 >> techelp@eastwood.com
SHEARING OPERATION – MAIN SHEAR
• Measure and mark a cut line on the material to be cut.
• Raise the Actuating Arm to the highest position, opening the blades.
• With the Clamping Foot in place, slip the material to be cut under
it and through the blades allowing it to hold the piece to be cut in
place (FIG 19).
• Rotate the Actuating Lever downward firmly in one smooth motion
to shear the metal.
• Raise Actuating Lever fully then retrieve cut piece from unit.
SHEARING OPERATION – ROUND, SQUARE AND ANGLE SHEARS
• Measure and mark a cut line on the material to be cut.
• Raise the Actuating Arm to the highest position, opening the blades.
• Insert the material to be cut into the left side of the unit at the
proper configured opening and through the blades allowing the
right-side Support Plate to support the material (FIG 20).
• Rotate the Actuating Lever downward firmly in one smooth motion
to shear the metal.
• Raise Actuating Lever fully then retrieve cut piece from unit.
Do Not Use Hands or Fingers to hold piece to be cut
in place while cutting.
Do Not Use Hands or Fingers to hold piece to be cut
in place while cutting.
FIG. 19
FIG. 20

To order parts and supplies: 800.343.9353 >> eastwood.com 9
BLADE REPLACEMENT
The Eastwood Manual Ironworker is designed with hardened steel blades
that should last the life of the Iron Worker. Should damage occur and
require Blade replacement, the following procedure describes the process.
NOTICE: The following steps require precise adjustments, alignment and
high attention to detail. This procedure should only be attempted by users
with advanced mechanical skills.
MAIN SHEAR BLADES
Removal
- Unbolt and remove the entire Handle Assembly.
- With (2) 18mm wrenches Remove the Outer Blade Retaining Plate
bolts (FIG 21).
- Using the same 18mm wrenches, remove the 2 bolts securing the
Main Moving Blade to the Blade Frame.
NOTE: The Main Moving Blade has 2 finished surfaces and may be
reversed if one side is worn or damaged (FIGS 22 & 23).
- With an 18mm wrench, remove the bolts on the left side attaching
the Main Fixed Blade to the Main Frame (FIGS 24 & 25).
Installation
NOTE: The Main Moving Blade Must be installed before the Main Fixed
Blade as there is a preload designed into the Main Moving Blade Frame.
- Hold Main Moving Blade in place, reinstall bolts and nuts then
secure with (2) 18mm wrenches.
- Insert the 2 bolts from the left side of the Main Frame, thread into
the Main Fixed Blade and tighten in place.
- Replace Handle.
FIG. 21
FIG. 22
FIG. 23
FIG. 25
FIG. 24

10 Eastwood Technical Assistance: 800.343.9353 >> techelp@eastwood.com
ROUND, SQUARE AND ANGLE SHEAR BLADES
Removal
- Unbolt and remove the entire Handle Assembly.
- Remove the Material Support Plate from the right side of the unit
with an 18mm wrench (FIGS 26 & 27).
- Remove the Pivot Pin then pull the Actuating Arm stub all the way
up and over center to relieve tension of the Handle Return Springs
(FIG 28).
The following steps involve components and assem-
blies that are heavy and will suddenly fall away! Use
extreme care and hold these components securely
when withdrawing fasteners!
FIG. 26
FIG. 27
FIG. 28

To order parts and supplies: 800.343.9353 >> eastwood.com 11
- Pull the Actuating Lever/Sector Gear from the assembly.
- Remove the left side Snap Ring securing the left Pivot Arm to the
Main Shaft (FIG 29). then move the Main Shaft back slightly then
Very Carefully lower the left Pivot Arm (FIG 30).
- Pull the Main Shaft from the right side of the Main Frame all to-
gether with the right Pivot Arm and the Actuating Lever/Sector Gear
still attached.
- Remove the Fixed Plate and Rack Assembly using an 18mm wrench
and 10mm hex key.
- Remove the Moving Shear Blade with an 18mm wrench (FIG 31).
- The V-Upper Blade can now be removed from the back side of the
Moving Shear Blade, using a 16mm wrench.
- The Fixed Blades are now fully exposed and may be removed with
a 16mm wrench (FIG 32).
Take note of the position of the Actuating Lever/Sec-
tor Gear position and relation to the teeth with those
of the Rack for re-assembly.
Blades have sharp edges. Use extreme caution and
wear heavy gloves when handling.
FIG. 29
FIG. 30
FIG. 31
FIG. 32
Left Pivot Arm
Moving
Shear Blade
Left Pivot Arm
✓
Main
Shaft
Drive
Plate
✓
✓
Fixed Blade
✓
✓
Adjustable
Down Blade
Shown with
Moving Shear Blade removed

12 Eastwood Technical Assistance: 800.343.9353 >> techelp@eastwood.com
FIG. 33
FIG. 34
FIG. 35
Installation
- Set replacement blades into the blade cradle of the Main Frame
and secure with fasteners. Tighten with a 16mm wrench
(FIGS 32 & 33).
- Set the Fixed Plate and Rack Assembly in place, thread in fasteners
and tighten with 18mm wrench and 10mm hex key.
- Replace the Main Moving Shear Blade and secure with two previ-
ously removed bolts.
- Raise the right-side Pivot Arm up into place and insert the Main
Shaft into the bore in the Main Frame.
- Engage the Actuating Lever/Sector Gear teeth with those of the
Rack and swing the left side Pivot Arm up placing the bore over the
Main Shaft.
- Replace the Snap Ring onto the Main Shaft.
- Reattach the Material Support Plate to the right side of the unit with
and secure with an 18mm wrench.
- Reinstall the Handle Assembly.
BLADE ADJUSTMENT
For proper shearing action, the blades are making contact under tension
and maintain an even relationship across their entire surface. As the East-
wood Manual Iron Worker is constructed to a high degree of precision and
accuracy, virtually no adjustment is required when replacing blades. Below
are several reference points for proper operation.
• Main Blade Alignment:
- The Main Blades should be overlapping at the inboard end by ap-
prox. 1” [25mm] when open (FIG 34).
- At the open end, there should be a gap of approx. 0.75” [19mm]
with 15° of separation when viewed from the side (FIG 34).
• Round, Square and Angle Blades Alignment:
- When properly installed and viewed from the left side; the triangular
shaped Round/Square Shearing Blade is nested within the aperture
of the Main Frame with the long sides tight against the front and
bottom edges of the opening (FIG 35).
- The smaller Angle Shearing Blade is positioned within the 45°
opening with the lower, squared edge solid against the angled edge
of the triangular Round/Square Shearing Blade. The upper beveled
edge is positioned in the angled end of the slot (FIG 35).
Fixed Shear Blade
✓
Main Moving Blade
Main Fixed Blade
3/4”
1”
✓
✓
✓
✓
Angle
Square
Round
No
Gap
No
Gap
No
Gap
Gap
Gap
✓
✓
✓
✓
✓
✓
✓
✓
✓

To order parts and supplies: 800.343.9353 >> eastwood.com 13
MAINTENANCE
• Provide several drops of a good quality motor oil to all pivot points and rotating parts periodically to prevent binding.
• Add a good quality automotive chassis grease to the three Zerk Fittings located at the top of the Moving Shear Blade.
• Apply a good quality automotive chassis grease to the mating gear teeth.
• Keep all areas of the tool clean particularly those surfaces that contact metal workpieces. Dirt and metal chips can cause uneven shearing
and blade damage.
• Store in a clean & dry environment when not in use. Coat all machined surfaces with a light lubricant film of oil or suitable protectant to prevent
rust formation.

NOTES
14 Eastwood Technical Assistance: 800.343.9353 >> techelp@eastwood.com

To order parts and supplies: 800.343.9353 >> eastwood.com 15
PROBLEM CAUSE CORRECTION
Upper Blade
Stops at Lower
Blade
Blades Out of Alignment
Stop all action to avoid serious damage and check Blade Alignment
in instructions.
Metal Workpiece Too Thick or Too Hard
Stop all action to avoid serious damage. Do not exceed material limitations
described in the “SPECIFICATIONS” section.
Metal Chips Particles in Blades Stop all action to avoid serious damage. Remove chips or particles from blades.
Upper Blade
Binding at
Release with
Lower Blade
Blades Out of Alignment
Stop all action to avoid serious damage and check Blade Alignment
in instructions.
Metal Workpiece Too Thick or Too Hard
Stop all action to avoid serious damage. Do not exceed Do not exceed material
limitations described in the “SPECIFICATIONS” section.
Metal Chips Particles in Blades Stop all action to avoid serious damage. Remove chips or particles from blades.
Blades will not
Shear Metal
Blades Worn or Damaged Follow Blade Replacement instructions.
Metal Workpiece Too Thick or Too Hard
Stop all action to avoid serious damage. Do not exceed material limitations
described in the “SPECIFICATIONS” section.
TROUBLESHOOTING

ADDITIONAL ITEMS
#21952 Ironworker Main Moving Blade
#21953 Ironworker Main Fixed Blade
#21954 Ironworker V-Upper Blade
#21955 Ironworker Adjustable Down Blade
#21956 Ironworker Fixed Blade
#28038 Sheet Metal Gauge
#13475 Electric Metal Cutting Shears
#32044 Bead Roller Kit
#21489 Shrinker/Stretcher Set
#21491 Shrinker/Stretcher Stand
© Copyright 2018 Easthill Group, Inc. 7/18 Instruction item #21566Q Rev 1
If you have any questions about the use of this product, please contact
The Eastwood Technical Assistance Service Department: 800.343.9353 >> email: techelp@eastwood.com
PDF version of this manual is available at eastwood.com
The Eastwood Company 263 Shoemaker Road, Pottstown, PA 19464, USA 800.343.9353 eastwood.com
-
 1
1
-
 2
2
-
 3
3
-
 4
4
-
 5
5
-
 6
6
-
 7
7
-
 8
8
-
 9
9
-
 10
10
-
 11
11
-
 12
12
-
 13
13
-
 14
14
-
 15
15
-
 16
16
Eastwood Iron Worker Replacement Fixed Blade Operating instructions
- Type
- Operating instructions
- This manual is also suitable for
Ask a question and I''ll find the answer in the document
Finding information in a document is now easier with AI
Related papers
-
 Eastwood MIG Welder 135 And Versa Cut Plasma Cutter 40 Operating instructions
-
Eastwood Radius Edge Die Set Operating instructions
-
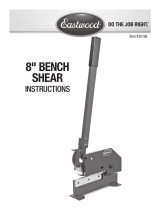 Eastwood 8 Inch Bench Shear Replacement Blades Operating instructions
-
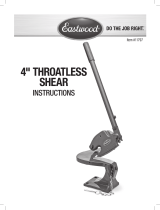 Eastwood Metal Cutting Throatless Shear Operating instructions
-
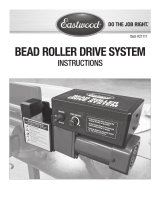 Eastwood Elite Bead Roller Drive System Operating instructions
-
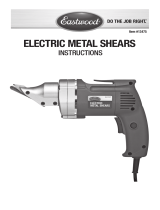 Eastwood Electric Metal Cutting Shears Operating instructions
-
 Eastwood 1/2" Drive Electric Impact Wrench Operating instructions
-
 Eastwood 27 Inch Bead Roller Fence Operating instructions
-
 Eastwood 3/8" Drive Impact Air Ratchet Operating instructions
-
 Eastwood Rod Forming Tool Operating instructions
Other documents
-
 Connector Products (CPI) New Bolt Replacement Installation guide
-
 Metal Pro MP4500FS Owner's manual
-
 Edwards Ironworkers Edwards JAWS 100-Ton Ironworker Owner's manual
-
Klutch 49698 Owner's manual
-
 Edwards Ironworkers Edwards JAWS 50-Ton Ironworker Owner's manual
-
 Edwards Ironworkers Edwards JAWS 55-Ton Ironworker Owner's manual
-
Grizzly T31648 Owner's manual
-
Grizzly T31688 Owner's manual
-
 Edwards Ironworkers IW25-1P230 Owner's manual
-
 Metal Pro MP4000FS Owner's manual


