Page is loading ...

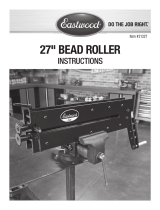
27" BEAD ROLLER FENCE
INSTRUCTIONS
Item #21328

2 Eastwood Technical Assistance: 800.343.9353 >> techelp@eastwood.com
The EASTWOOD ELITE BEAD ROLLER FENCE is specifically designed to fit the Eastwood Elite 27”
Bead Roller to create precise, perfectly straight line beads and offsets in metal panels up to 40”
wide. Quick and easy to install, adjust and remove.
CONTENTS
(1) Bead Roller Fence
(4) M10 x 1.5 x 25mm Bolts
DANGER indicates a hazardous situation which, if not avoided, will result in death or serious injury.
WARNING indicates a hazardous situation which, if not avoided, could result in death or serious injury.
CAUTION used with the safety alert symbol, indicates a hazardous situation which, if not avoided,
could result in minor or moderate injury.
NOTICE is used to address practices not related to personal injury.
SAFETY INFORMATION
The following explanations are displayed in this manual, on the labeling, and on all other information
provided with this product:

To order parts and supplies: 800.343.9353 >> eastwood.com 3
READ INSTRUCTIONS
• Thoroughly read and understand this manual before using.
• Save for future reference.
PINCH AND CRUSH HAZARD!
• The Eastwood Elite Bead Roller Fence consists of metal components which
can present a hand/finger pinch hazard. Avoid pinching hands while han-
dling and keep fingers and hands away from moving parts when operating.
CUT HAZARD!
• Handling sharp metal can cause serious cuts. Wear thick, well-fitting work
gloves to prevent cuts from handling sharp metal.
EYE INJURY HAZARD!
• Metal particles can be ejected from the metal surface when forming.
Sheet metal edges and corners are sharp and can injure eyes. Always
wear ANSI approved eye protection when operating this tool.
• Before beginning ANY work with this Fence, it is absolutely necessary that
the Bead Roller (not included) be pre-installed in a vice properly secured
to a sturdy workbench anchored to the floor or wall.
SAFETY INFORMATION

4 Eastwood Technical Assistance: 800.343.9353 >> techelp@eastwood.com
ASSEMBLY
• Thread the four M10 x 1.5 x 25mm
Bolts into the Mounting Wings on the
underside of the Bead Roller Fence
(Fig 1).
FIG. 1
Mounting
Wings
✓
✓
FIG. 2
SET UP
• Using an 18mm wrench (not included) remove one of the lower Bearing Block retaining bolts
(Fig 2). and set it aside for re-installation.
• Loosen the Adjustable Handle Bolt Lock Screw and the Roller Tensioning Adjustable Handle
Screw to raise the Upper Shaft fully then lock it in place.
Lock
Raise Up
Lower Bearing Block Bolt
Roller Tensioner
Lock Screw
✓
✓
✓
✓

To order parts and supplies: 800.343.9353 >> eastwood.com 5
FIG. 3
• Slide the Bead Roller Fence into the
gap between the Upper and Lower
Arms of the Bead Roller with the
Mounting Wings downward and the
point of the “Vee” inward (Fig 3).
• Re-install the Lower Bearing Block
Retaining Bolt and Washer.
NOTE: With the Bead Roller Fence
installed and moved inward to the
full depth of the Bead Roller frame,
the maximum working depth from
the face of the Fence to the forming
surfaces of the Roller Dies is
20-1/2” (Fig 4).
• Slide the Bead Roller Fence to the
desired depth and finger tighten
the four Clamping Bolts equal
amounts (Fig 5).
• Using an accurate square (not
included), check for squareness
between the face of the Fence and
the upper Arm of the Frame
(Fig 6) and adjust by turning the
Bolts in and out slightly as needed.
Tighten all bolts firmly with a 16mm
wrench after squareness is achieved.
Removed Lower Bearing Block Bolt
✓
FIG. 4
✓
✓
20-1/2” Max.
FIG. 5
FIG. 6
90°

6 Eastwood Technical Assistance: 800.343.9353 >> techelp@eastwood.com
FIG. 7
OPERATION
Use the Bead Roller normally while keeping the edge of the metal panel against the face of the Fence
with an even pressure (FIG 7) which will produce a consistently straight bead or offset parallel to the
edge of the metal panel.

To order parts and supplies: 800.343.9353 >> eastwood.com 7
NOTES

© Copyright 2017 Easthill Group, Inc. 6/17 Instruction item #21328Q Rev 1
If you have any questions about the use of this product, please contact
The Eastwood Technical Assistance Service Department: 800.343.9353 >> email: techelp@eastwood.com
PDF version of this manual is available online >> eastwood.com/21328manual
The Eastwood Company 263 Shoemaker Road, Pottstown, PA 19464, USA
US and Canada: 800.343.9353 Outside US: 610.718.8335
Fax: 610.323.6268 eastwood.com
ADDITIONAL ITEMS
#20622B Bead Roller Stand
#51088 Shrinker/Stretcher Set
#13475 Eastwood Electric Metal Shears
#11797 Throatless Shear
#14042 Versa Bend Sheet Metal Brake
#20254 Eastwood 24” Slip Roll
/