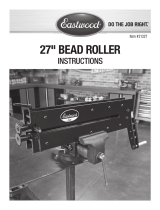
Eastwood Elite 8" Heavy Duty Bead Roller Operating instructions

Type
Operating instructions

This manual is also suitable for

Eastwood Elite 8" Heavy Duty Bead Roller is a professional metal fabrication tool designed for creating strengthening ribs in panels used in crafting replacement floor pans, firewalls, trunk floors, inner fenders. It excels in adding edge beading to any panel, and with offset flange dies, you can create channels and flanges. The 8” throat depth lets you reach the center of a 16” panel, while the gear-driven design delivers maximum forming power with minimal effort.

Eastwood Elite 8" Heavy Duty Bead Roller is a professional metal fabrication tool designed for creating strengthening ribs in panels used in crafting replacement floor pans, firewalls, trunk floors, inner fenders. It excels in adding edge beading to any panel, and with offset flange dies, you can create channels and flanges. The 8” throat depth lets you reach the center of a 16” panel, while the gear-driven design delivers maximum forming power with minimal effort.

8" HEAVY DUTY BEAD ROLLER
INS TRUCTIONS
Item #21487
2 Eastwood Technical Assistance: 800.343.9353 >> techelp@eastwood.com
The EASTWOOD ELITE 8” HEAVY DUTY BEAD ROLLER is a professional metal fabrication tool which proves excellent for producing strengthening ribs in panels
used in creating replacement floor pans, firewalls, trunk floors, inner fenders etc. or for adding edge beading to any panel. Also create channels and flanges with
the offset flange dies. The gear-driven design delivers maximum forming power while requiring minimal handle force for the greatest accuracy. A generous 8”
throat depth provides the ability to reach the center of a 16” panel.
CONTENTS
(1) 8” Bead Roller
(4) Handle Spokes
(1) Set of Offset Dies (Installed)
(1) Set of 3/8” Bead Roller Dies
SPECIFICATIONS
Maximum material working thickness: Steel = 18 Gauge; Aluminum = 16 Gauge
Maximum panel width (working from center): 16
Handle Spokes
✓
3/8”
Bead
Dies
Offset
Dies
Metal Hub
Roller Tension Screw
✓
✓
✓
✓
✓
To order parts and supplies: 800.343.9353 >> eastwood.com 3
DANGER indicates a hazardous situation which, if not avoided, will result in death or serious injury.
WARNING indicates a hazardous situation which, if not avoided, could result in death or serious injury.
CAUTION used with the safety alert symbol, indicates a hazardous situation which, if not avoided, could result in minor or moderate injury.
NOTICE is used to address practices not related to personal injury.
SAFETY INFORMATION
The following explanations are displayed in this manual, on the labeling, and on all other information provided with this product:
READ INSTRUCTIONS
Thoroughly read and understand this manual before using.
Save for future reference.
PINCH AND CRUSH HAZARD!
The Eastwood Elite 8” Heavy Duty Bead Roller consists of heavy metal components which can present a hand/nger pinch hazard and
cause potentially serious injuries if dropped. Avoid pinching hands while handling. The use of safety shoes is strongly recommended.
Keep fingers and hands away from moving parts when operating.
CUT HAZARD!
Handling sharp metal can cause serious cuts. Wear thick, well-fitting work gloves to prevent cuts from handling sharp metal.
EYE INJURY HAZARD!
Metal particles can be ejected from the metal surface when forming. Sheet metal edges and corners are sharp and can injure eyes.
Always wear ANSI approved eye protection when operating this tool.
Before beginning ANY work with this tool, it is absolutely necessary that it be installed in a vice properly secured to a sturdy,
workbench anchored to the floor or wall.
Strenuous physical force may need to be applied to the Eastwood 8” Heavy Duty Bead Roller during use. Failure to ensure
proper footing can quickly result in a fall which could inflict serious personal injury or property damage. Always work in a clean,
uncluttered environment.
Be sure there is sufficient working room around the tool to allow for safe handling of various sizes of metal.
Excessive resistance while operating could indicate a defect with the workpiece material or broken or damaged Eastwood 8”
Heavy Duty Bead Roller components. To avoid injury, stop work immediately and inspect workpiece material for nicks, dents, welds,
excessive scale or remaining coatings. Clean or repair as necessary or discard and begin with a new piece. Also inspect Eastwood
8” Heavy Duty Bead Roller components for looseness or damage.
4 Eastwood Technical Assistance: 800.343.9353 >> techelp@eastwood.com
ASSEMBLY
Thread the 4 Handle Spokes into the machined Hub located on
the Upper Shaft end adjacent to the Upper Spur Gear (Fig 1).
Check the tightness of the 2 set-screws securing the Hub to
the Upper Shaft with a 4mm Hex Key (not included) (Fig 2).
FIG. 1
FIG. 2
SET UP
Clamp the lower edge of the Bead Roller Frame in a minimum 4”
(6” & larger strongly recommended) vise (not included) with the
Roller Tensioning Screw toward the top and the Lock Screw to the
rear (FIG 3) and tighten vice securely. NOTE: It is helpful to use
a vise with a swiveling base, since you will be able to rotate it as
needed to maintain a comfortable position while working a panel.
FIG. 3
Lock Screw
✓
To order parts and supplies: 800.343.9353 >> eastwood.com 5
LAYOUT & PLANNING
Using a suitable marker or scribe, draw the pattern or shape you
want to form with beads right on the panel. We recommend using
a T-square and straightedge or long ruler for straight lines. For
curves, use a circle or radius template.
Work carefully and lay out your design lines as neatly as possible.
When forming beads, be sure to work from the inside of the piece
toward the outside. The bead roller stretches metal and if you work
from the outside toward the center, the bead you previously formed
will be distorted and the entire piece may warp.
Plan out how you will need to turn and move the panel while
creating the pattern to avoid having to start and stop in the
middle of a line.
Make a test pass through the Bead Roller over each design line to
be sure there is sufficient throat depth.
A little time taken at this stage will make the rest of the job go that
much more easily and help avoid mistakes.
OPERATION
GETTING STARTED
Loosen the Upper Bearing Block Bolt located at the rear of the Bead
Roller Frame with a 19mm wrench (not included) (FIG 4). Note that
the Left Upper Bearing Block mounting hole is slotted.
Loosen the Roller Tensioning Bolt with a 10mm wrench (not
included) and retract it several turns (FIG 4). At this point, the Left
side of the Upper Roller Shaft and Bearing Block should be free
to be raised up sufficiently to separate the Bead Roller Mandrels
enough to slide the workpiece metal between them.
Center the Upper Female Mandrel Die groove over the previously
drawn pattern line then slide the Upper Roller Shaft and Bearing
Block down in place against the metal workpiece panel (FIG 5).
Draw down the Roller Tensioning Bolt finger tight, check alignment
with your drawn line then tighten several additional turns with a
10mm wrench (not included) (FIG 5). For repeatability, count the
number of turns required when forming multiple beads of the
same depth.
Tighten the Upper Bearing Block bolt located at the rear of the Bead
Roller Frame with a 19mm wrench (not included) (FIG 6).
FIG. 4
FIG. 5
FIG. 6
Do Not Over tighten the Tensioning Bolt as this may
tear the metal workpiece, jam the Roller Dies or
deform the Frame.
Roller
Tensioning
Bolt
✓
Upper Bearing
Block Bolt
✓
6 Eastwood Technical Assistance: 800.343.9353 >> techelp@eastwood.com
CREATING STRAIGHT BEADS
Turn the crank slowly as you move the metal along following the marked guideline.
Keep the marked guideline aligned with the center of the Upper Die as you go. When you reach the end of the guideline, you may re-roll the bead by
having your helper turn the crank in the opposite direction. This produces a more sharply defined bead.
When done, loosen and retract the Roller Tensioning Bolt then loosen the Upper Bearing Block Bolt and raise the Upper Die.
Pull the workpiece panel from between the dies and admire your work.
FORMING CURVES
The trick to forming curves with the bead roller is careful coordination between turning the handle, and moving the metal workpiece slowly through
the dies while rotating it through the curve all at the same time.
It is critical to producing a good job that you keep the guideline aligned with the center of the Upper Die as you go. If your design forms an oval,
start the bead in the center of a straight or larger radiused section.
Do no attempt to start right at a corner or a joint of two lines, since it will be extremely difficult to line up the bead perfectly when you finish.
By using combinations of curves and straight lines, there is almost no limit to the designs you can create with the Eastwood Bead Roller.
CHANGING DIES
DIE REMOVAL
Loosen the Roller Tensioning Bolt located at the top of the Bead Roller Frame.
Loosen the Upper Bearing Block Bolt and retract it several turns.
Raise the left side of the Upper Roller Shaft and Bearing Block to separate the Bead Roller Dies then tighten the Upper Bearing Block Bolt to
hold the Upper Die in place.
Loosen the 4mm Die set screws with a 4mm hex key (NOT INCLUDED).
Pull the Dies from the shafts.
DIE INSTALLATION
With the Upper Shaft held in the up position, slide the Dies onto the shaft ends. Be sure to align the set screws with the flats of the shafts.
Use care to align the machined grooves or offsets of the Dies before tightening set screws.
Re-adjust the Roller Tensioning Bolt and tighten the Upper Bearing Block Bolt.
STORAGE
Remove 4 Spoke Handles.
Apply a thin film of light oil or rust-preventive to all bare steel areas.
Store in a clean, dust-free, dry, dampness free area preferably covered with plastic sheeting.
MAINTENANCE
Clean dirt and debris from Roller Dies.
Check tightness of all hardware.
Check operation for binding. Lubricate Bearing Blocks periodically with medium bodied chassis grease through the Zerk Fittings.
Add grease to the drive gears.
Maintenance should be performed before each use.
To order parts and supplies: 800.343.9353 >> eastwood.com 7
NOTES
© Copyright 2017 Easthill Group, Inc. 7/17 Instruction Item #21487Q Rev. 1
If you have any questions about the use of this product, please contact
The Eastwood Technical Assistance Service Department: 800.343.9353 >> email: techelp@eastwood.com
PDF version of this manual is available online >> eastwood.com/21487manual
The Eastwood Company 263 Shoemaker Road, Pottstown, PA 19464, USA
US and Canada: 800.343.9353 Outside US: 610.718.8335
Fax: 610.323.6268 eastwood.com
ADDITIONAL ITEMS
#51088 Shrinker/Stretcher Set
#13475 Eastwood Electric Metal Shears
#11797 Throatless Shear
#14042 Versa Bend Sheet Metal Brake
#20254 Eastwood 24” Slip Roll
#20267 Eastwood Bead Roller Metal Fabrication Forming Dies
#20552 Bead Roller Fence
#21328 Eastwood Elite 27” Bead Roller
  • Page 1 1
  • Page 2 2
  • Page 3 3
  • Page 4 4
  • Page 5 5
  • Page 6 6
  • Page 7 7
  • Page 8 8

Eastwood Elite 8" Heavy Duty Bead Roller Operating instructions

Type
Operating instructions
This manual is also suitable for

Eastwood Elite 8" Heavy Duty Bead Roller is a professional metal fabrication tool designed for creating strengthening ribs in panels used in crafting replacement floor pans, firewalls, trunk floors, inner fenders. It excels in adding edge beading to any panel, and with offset flange dies, you can create channels and flanges. The 8” throat depth lets you reach the center of a 16” panel, while the gear-driven design delivers maximum forming power with minimal effort.

Ask a question and I''ll find the answer in the document

Finding information in a document is now easier with AI