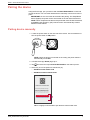
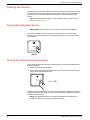
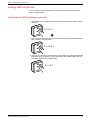
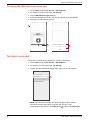
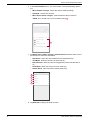
The Elko 230 V Smart Smoke Alarm uses a photoelectric sensor and a temperature sensor to detect smoke and heat caused by rapid temperature increases. It includes a backup battery that allows the device to work even if the power supply is disconnected. When connected to the ELKO Smart system, the device will send notifications via the ELKO Smart app, allowing you to monitor your home's safety remotely.
The Elko 230 V Smart Smoke Alarm uses a photoelectric sensor and a temperature sensor to detect smoke and heat caused by rapid temperature increases. It includes a backup battery that allows the device to work even if the power supply is disconnected. When connected to the ELKO Smart system, the device will send notifications via the ELKO Smart app, allowing you to monitor your home's safety remotely.


-
 1
1
-
 2
2
-
 3
3
-
 4
4
-
 5
5
-
 6
6
-
 7
7
-
 8
8
-
 9
9
-
 10
10
-
 11
11
-
 12
12
-
 13
13
-
 14
14
-
 15
15
-
 16
16
-
 17
17
-
 18
18
-
 19
19
-
 20
20
-
 21
21
-
 22
22
-
 23
23
-
 24
24
-
 25
25
-
 26
26
-
 27
27
-
 28
28
-
 29
29
-
 30
30
-
 31
31
-
 32
32


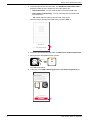
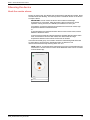
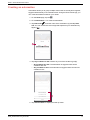
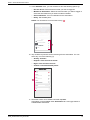
The Elko 230 V Smart Smoke Alarm uses a photoelectric sensor and a temperature sensor to detect smoke and heat caused by rapid temperature increases. It includes a backup battery that allows the device to work even if the power supply is disconnected. When connected to the ELKO Smart system, the device will send notifications via the ELKO Smart app, allowing you to monitor your home's safety remotely.
Ask a question and I''ll find the answer in the document
Finding information in a document is now easier with AI
Related papers
Other documents
-
Schneider Electric Smart Smoke Alarm 230 V Instruction Sheet
-
-
Sunricher SR-ZGP2801KS User manual
-
Schneider Electric Wiser User guide
-
 LINKOZE Smart WiFi Door Opening Detector User manual
-
LINKOZE Smart WiFI Humidity and Temperature Thermometer User manual
-
-
-
-
