Page is loading ...

THE ASTRO
-
HOG STORY
The Astro-Hog is one of modeling's classic designs. It's appearance on the scene in 1957 changed the course of radio control
aerobatics. Up till that time, R/C pattern flying consisted mainly of clumsy looking maneuvers performed by over-stable, high
wing, free
-flight style models that were primarily steered by rudder alone. The Astro-Hog was the first successful low-wing
aileron-controlled R/C model, designed by Fred Dunn of California. Its flight performance was revolutionary - smooth, graceful,
controlled maneuvers were now possible! The Berkeley Model Company quickly came out with a kit of the Astro-Hog, and it
became a common sight at flying fields everywhere. Astro-Hogs made a clean sweep of 1st, 2nd. 3rd, and 4th place at the 1958
National Championships.
Model Airplane News magazine, in its April 1958 issue, proclaimed: "An
airplane to top anything so far in multi R/C. Out of this world
maneuverability!" (A report of that MAN article is included in this kit.)
The Astro-Hog kit production came to a premature end in 1961 when the
Berkeley Company went out of business. Though it had only been on the
market for 3 years, the Astro-
Hog had established itself as a legend against
which new designs would be measured.
The flight characteristics that made the Astro-Hog so popular back then are still perfect for today's flier. A thick semi-
symmetrical
airfoil, large wing area, and light wing loading give it perfect stability plus great maneuverability. It will perform any maneuver in
the book, yet flies slow enough to let you enjoy it. The Astro-Hog makes an ideal first low-
wing trainer for learning pilots, or it can
be the ultimate fun machine for experienced fliers.

.
THE RETURN OF THE ASTRO
-
HOG
Sig Mfg. Co. now owns the old Berkeley kit line. This modern version of the Astro-Hog, is a faithful copy of the original with
these improvements.
1. Simplified construction - The inner structure of the model has been redesigned to make it quicker and easier to build.
2. The wing dihedral has been reduced from the original 8" under each wing panel to 6" per panel (12" total).
3. Strip ailerons are provided instead of the original "barndoor" style. Strip ailerons have dominated model design since the
days of the Astro-Hog because they are much easier to build and install; have no slop or play in their movement; and
they will roll a model just as well as the barndoor style. No materials are supplied in this kit for making barndoor ailerons.
4. Bolt-on wing mounting is provided instead of the original rubber band wing mounting. No materials are supplied for
making the old rubber band mounting.
5. The stabliizer is now permanently mounted on top of the fuselage sides, instead of the original rubber band mounting
onto the bottom. No materials are supplied for making the old style mounting.
6. Tricycle landing gear has been incorporated into the redesigned Astro-Hog as standard equipment, to provide trouble-
free ground handling by pilots of all skill levels. The materials and standard construction sequence in this kit are for
building the trike gear installation. (*see note below).
These changes from the original design make it easier than ever to build and fly an Astro-Hog. Nothing has changed that alters
the airplane's legendary flight characteristics. The materials supplied in this kit are for building this modern Sig version of the
Astro
-Hog as shown on the kit box label. The "Optional Taildragger Conversion" is the only modification of the kit we endorse.
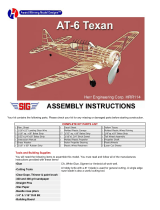
FRED DUNN with his original Astro
-
Hog
Optional Taildragger Conversion
There may be some of you, especially veteran fliers, who will want to convert your
Astro-Hog back to the original taildragger landing gear for aesthetic reasons. On
plate 2 of the full-size plans, you will find all the patterns necessary to convert back
to the taildragger version. Also in section 15 there are instructions on making the
installation. Decide now whether you want to make this modification and plan
accordingly.
COMPLETE KIT PARTS LIST
Die-Cut Balsa Sheets
2 Sheet No.1 W1, W4, FSD, S1 6 Sheet No.2 W2, W4 2 Sheet No.3 W3, W4, W5A 2 Sheet No.4 W5, W6, W1A,
W1B
2 Sheet No.5 TB-1, TB-2, TB-3, TB-4,
TB-5, TB-6
1 Sheet No.6 F5A, F1C, F3, F4
Printed Balsa Sheets
1 Sheet No.7 Right Fuselage Side 1 Sheet No.8 Left Fuselage Side 1 Sheet No.9 FN-1, FN-2, FN-3 1 Sheet No.10 S-2
1 Sheet No.11 Cowl Side Doublers,
Wing Filler Blocks, Tail Fairing Blocks
Sheet Balsa
6 3/32x4x36 Fuse Top Sheeting, Wing
L.E. Sheeting
5 3/32x3x36 Sheeting for Stab &
Wing Center-Sections, Fuse Bottom
4 3/32x1-1/4x30 Wing T.E.
Sheeting
Block Balsa
1 1/2x4-3/16x6 Nose Bottom Block 1 5/8x3-3/16x4-1/2 Cowl Bottom
Block
1 3/4x1x3-
3/16 Cowl Top Filler
Block
2 3/4x2-1/2x2 Wing Fairing
Stick Balsa
3 3/16x5/16x36 Stab Ribs 5 3/32x3/16x36 Capstrips 2 1/8x9/16x36 Leading Edges 2 3/16x3/4x36 Leading Edge
Cap
5 3/16x3/16x36 Top Stringers, Bottom
Middle Stringer
2 3/16x3/8x30 Stab Spars 6 1/4x1/4x36 Corner
Stringers, Uprights & Tip
Braces
6 1/4x1/2x30 Cross Braces,
Main Spars & Spar Doublers
2 1/4x5/8x30 Trailing Edges 3 5/16x5/16x30 Stab T.E. & Pushrods 1 1/2x1/2x18 Triangular Stock
for Fuselage
1 3/4x3/4x6 Triangular Stock
Wing Bolt Support
1 1x1x6 Triangular Stock for Cowl
Special Shaped Balsa
1 1/4x3x10-1/2 Tapered Stock for
Rubber
2 1/4x3x13-1/2 Tapered Stock for
Elevators
2 1/2x1-1/2x36 Shaped
Aileron Stock

.
Hardwoods
1 1/4 Dia. x6-1/2 Dowel Elevator
Joiner, Wing
2 3/4x3/4x1-1/2 Basswood
Wing Bolt Blocks
2 3/8x3/4x6-1/4 Basswood L.G.
Blocks
2 3/8x3/4x3/4 Maple L.G. Anchor
Blocks
1 5/16x5/16x36 Sprice L.E., Stab
L.E. Doubler
Music Wire
1 5/32 Dia. Coiled Nose Gear 2 5/32 Dia. Formed Main Gear 2 Formed Left & Right Aileron
Torque Rods
1 1/16 Dia.x12 Straight Wire for
Pushrod Ends
Plastic
1 .015 Clear for Windshield 1 ABS Molded Headrest
Hardware
20 Molded Poly Hinges 2 1/4x20 Nylon Wing Bolts 2 Nylon Control Horns; elevator,
rudder
12 #2x3/8 Sheet Metal Screws;
control horns (4) L.G. straps (8)
1 5/32 Nylon Nose Gear Bearing 1 5/32 Nylon Steering Arm 1 6-
32x1/4 Set Screw; for steering
arm
4 4-40x3/8 Mounting Bolts; for nose
gear bearing
4 4-40 Blind Nuts; for nose gear
bearing
2 Aluminum Engine Mounts 8 6-
32x3/4 Mounting Bolts; engine
mounts (4), engine (4)
4 6-32 Blind Nuts; engine mounts
4 Nylon L.G. Retaining Straps 2 Nylon Aileron Connectors 4 2-56x10 Threaded Rods;
ailerons (2), rudder (1), elevator
(1)
5 Nylon R/C Links; ailerons (2),
rudder (1), elevator (1), throttle
(1)
1 2-56 Threaded Coupler; for
throttle pushrod
1 Pushrod Connector Assembly
Miscellaneous
1 Plan Plate 1 1 Plan Plate 2 1 Instruction Book 1 2x24 Fiberglass Tap; for wing
center section
1 1/8 od x32 Nylon Tubing;
throttle and nose gear pushrods
1
1/16x32 Steel Cable; throttle
and nose gear pushrods
Die-Cut Plywood
RADIO EQUIPMENT REQUIREMENTS
For best results, we recommend that you install 4-channel radio equipment in your Astro-Hog to operate the ailerons, elevator,
rudder and engine throttle. The Astro-Hog's fuselage is spacious enough that any common brand of radio equipment with
standard size servos and battery pack can be used.

.
ENGINES AND MUFFLERS
The Astro-Hog can be flown with a wide range of glow engines, either the 2-stroke or
4-stroke type. Because of its light wing loading (about 20oz/sq.ft. - similar to a "Cub"
type trainer), a lot of high reving power is not needed. The Astro-Hog was designed to
fly at slower airspeeds than today's typical pattern models.
In a 2-stroke cycle glow engine, we recommend .45 - .60 cu. in. displacement. A
good .45 or .50 is adequate if the model is kept light, preferably 7 pounds or slightly
less. If you fly off a grass field, live at high altitude, or just prefer a little reserve power,
a .60 size engine would be a better choice. A non-schneurle .60 (like the venerable
Webra ,61 Blackhead, Veco or K&B .61 Enya .60 III etc.) makes and ideal powerplant
for the Astro-Hog in most cases.
A .60 size 4
-stroke cycle glow engine is also a very popular choice for the Astro-Hog. Typically, 4-stroke engines are quieter
and more economical on fuel than an equivalent size 2-stroke. They develop their power at a lower rpm. Their realistic sound
and performance blend perfectly with the Astro-Hog's flying style. Since 4-strokes don't produce quite as much power as the
same 2
-
stroke, we do not recommend .40
-
.50 size 4
-
strokes.
There is no one type of muffler that is best suited to the Astro-Hog. It all depends on
the particular engine that you've elected to use. You will have to figure out your own
muffler installation. However, since the Astro-Hog cowling is large and wide open, you
will find that almost any normal muffler will work.
GLUES
There are so many different glues available today for model construction that it can
be confusing for the newcomer. To simplify matters, most glues can be classified as
one of four basic types:
Easy to use water-base wood glues such as Sig Bond (yellow) and Sig Super-Weld (white).
Super strong two-part epoxy glues such as Sig Kwik-Set (5 minute cure) and Sig Epoxy (3 hour cure).
Traditional solvent-base model cements such as Sig-Ment.
Fast cyanoacrylate "super" glues such as Zap, Hot Stuff, Jet etc.
Each of these types has different characteristics and advantages. Often times, the choice of which type to use is strictly a matter
of personal preference based on your experience with a previous model. If you are new to the hoby and not sure what type to
use, we recommend that you try Sig-Bond glue for the majority of the general Astro-Hog framework construction. It is a great all-
purpose alphatic glue that is easy to use . You should also have on hand some epoxy glue, either slow dry or 5-minute, for
areas subject to unusual strain or involving metal pieces. Some of the steps in these instructions call out the type of glue to use
for that particular assembly. In other areas you can use your own judgement as to which type is best suited to the purpose and
to your building schedule.
CAUTION:
Some people have experienced allergic reactions when exposied to epoxy or cyanoacylate glues. This is
very rare. However, it is always important that such glues, and also paints, thinners, and solvents, be used
with adequate ventilation to carry fumes away.
There are also a couple of places ahead in these instructions where it calls for "model putty" or "wood filler". We recommend Sig
Epoxolite Putty, regular household spackling compound (DAP, Red Devil etc.) or automotive body putty (Bondo, etc.) for these
instances.
NOTES BEFORE BEGINNING CONSTRUCTION
Any reference to right or left refers to your right or left as if you were seated in the cockpit.
To build good flying models, you need a good straight building board. Crooked models don't fly well! The building board can be
a table, a workbench, a reject "door core" from the lumber yard, or whatever - as long as it is perfectly flat and untwisted. Cover
the top surface of the building board with a piece of celotex-type wall board or foam board, into which pins can be easily
pushed. Don't hesitate to use plenty of pins during assembly to hold drying parts in the correct position.
When pinning and gluing parts directly over the full-size plans, cover the plan with wax paper or plastic kitchen wrap to prevent
gluing the parts to the plans.

.
Don't use a ball point pen for making marks on the model during construction. If not sanded off, these ink marks will show
through the model's final finish. Use a pencil instead of a pen.
Balsa die-cut parts have identification numbers printed on them. The plywood die-cut parts do not. Use the diagrams in the
"COMPLETE KIT PARTS LIST" above to mark the i.d. numbers on the corresponding plywood parts.
Leave all the die-cut parts in the sheets until needed in construction. Remove pieces from the sheets carefully. If difficulty is
encountered, do not force the part from the sheet. Use a modeling knife to cut it free. A jig saw works best for cutting out the
printed balsa parts. If a jig saw is not available, a sharp modeling knife and a straightedge can be used. Cut just outside the
printed lines, leaving all of the line on the part. When fitting the piece into the structure, use a sanding block to bring the edges
to an exact fit.
All of the other kit parts can be identified by the "COMPLETE KIT PARTS LIST". Sort the different sizes of sticks and sheets into
individual piles to avoid confusion during building. Cut all long pieces of balsa first, followed by medium lengths, before cutting
up any full length strips into short pieces.
Any model parts mentioned in these instructions, but not furnished with the kit, are marked by and asterisk (*).
SANDING BLOCKS
An assortment of different size sanding blocks are indispensable tools for model
construction. A good general purpose block can be made by wrapping a full 9"x11"
sheet of sandpaper around a piece of hardwood or plywood. Use three screws
along one edge to hold the overlapping ends of the sadnpaper. Put 80 grit paper on
the block during general construction. Switch to 220 grit paper for final finish
sanding just before covering,
Another handy block can be made by gluing sandpaper onto a 24" or 36" long
piece of aluminum channel stock. Most hardwood stores carry a rack of aluminum
in various sizes and shapes. This long block is very useful for sanding leading and
trailing edges accurately.
Finally, glue sandpaper onto different sizes of scrap plywood sticks and round
hardwood dowels. These are handy for working in tight places and for careful shaping where a big block is too hard to control.
1. BASIC WING PANEL CONSTRUCTION
a.
Six pieces of 1/4"x1/2"x30" balsa are supplied for making all the top and bottom
wing spars. Cut two of the 30" pieces into four 11
-7/16" long spar doublers. Glue
one spar doubler onto the end of each remaining 30" main spar. Pin them down
straight and flat until dry.
b.
Glue the W2A ply doublers onto the W2 balsa wing ribs. Make three with the
doubler on the right side of the rib and three with the doubler on the left. Align
carefully and let dry!
CAUTION: Be sure to properly identify the front end of each W2A before gluing
them to the ribs.

.
c. Notice the notches for the grooved landing gear blocks have been pre-
cut into the W2A ply doublers but not in the W2 balsa
ribs. There are two sets of notches. Those in back of the main spar are for the standard trike gear installation, and those in
front of the spar are for the optional taildragger installation. Cut open the balsa ribs to match the notches in the ply doublers
for your choice of landing gear.
d.
Glue the die
-
cut balsa riblets W5A onto the ends of the W5 ribs. Make one right and one left. Let dry.
NOTE: The Astro-Hog wing consists of
two separate panels - a right wing panel
and a left wing panel. Each panel is first
constructed by itself, entirely separate
from the other, before they can be joined
together later. Beginning with the next
step e) the instructions are describing
the assembly of one wing panel at a
time.
e.
Pin one of the wing panel plans to the building board and cover it with wax paper. Pin the 1/4"x1/2"x30" bottom spar
assembly in place on the plan. Slant the pins rearward so that they can be easily removed later.
f.
Glue and pin balsa wing ribs W2, W3, W4, and W5 in place along the bottom spar. Use a small triangle or other 90 deg.
object to make sure the ribs are vertical.
g.
h.
Glue the 1/4"x1/2"x30" top spar assembly in place. The end of the
spar doubler should fit snug against W3.
A Dihedral Angle Guage is pictured right. Cut it out carefully and glue
it to a piece of cardboard or scrap balsa. Then glue the W1 center rib
in place, using the guage to tilt the rib towards the wing tip.
NOTE: This same Dihedral Angle Guage is to be used for tilting the
W1 rib in both wing panels. The angle of the guage is 6 deg., half of
the total dihedral amount (12 deg.) of the finished wing.
i.
Glue in the die-cut balsa pieces W1A
and W1B. When dry, use a sandpaper
file to make sure they are not sticking
above the tops of the ribs W1 and W2.
j.
Glue the 1/8"x9/16"x36" balsa leading
edge onto the fronts of the ribs. Notice
that the leading edge must extend on
past rib W5 into the wingtip area - don't
cut it off too short!

.
k. Glue in place the 3/32"x1-
1/4"x30" balsa trailing edge top sheeting. The rear edge
of the sheet should be flush with the ends of the ribs. If your sheet is bowed a
little, any slight overhang past the ends of the ribs will be sanded of later.
l.
Glue the die-cut balsa wingtip parts TB-1, TB-2, TB-3, TB-4, TB-5, and TB-6 on
top and bottom of the die
-
cut lite
-
ply wingtip bow. Pin flat until dry.
m.
Glue the laminated wingtip bow in place on the end of the wing panel. The outer
edge of the tip bow should be blocked up 1/2" off the building board. The inner
two ends of the bow should be centered directly over the datum line of rib W5
(datum line is from the leading edge to the trailing edge centers. See cross-
section.).
n.
Glue balsa rib W6 in place.
Let the entire wing panel dry thoroughly!
2. COMPLETING THE WING PANEL
a.
Unpin the wing panel from the board and cut off the jig tabs at the back of each rib. Cut from the front towards the die-cut
slit at the back. Then use a sanding block to lightly touch up the ribs until they are all even.
b.
Glue on the 3/32"x1
-
1/4"x30" balsa trailing edge bottom sheeting. When dry sand sheets flush with the end of the ribs.
c.
Glue on the 1/4"x5/8"x30" balsa trailing edge piece.
d.
Trim and sand the 1/8"x9/16" balsa leading edge flush with the top and bottom of the ribs.
e.
Cut the 1/2" balsa wing filler block from the printed balsa sheet No.11. Glue it in place between ribs W1 and W2, behind the
leading edge. When dry, carve and sand the top and bottom of the block flush with the ribs.
f.
Use the pattern to the right to cut the top
and bottom front wingtip braces from
1/4" sq. balsa stock. Soak both braces in
a bowl of water for 2-3 minutes to make
them bendable, and then glue both in
place at the same time. Glue and pin the
square ends first, flush against the wing
panel main spars. When those ends are secure, squeeze both angled ends together onto the tip bow and glue them
securely. Also glue at rub W6.

.
g. Bevel the top and bottom balsa edges of the wingtip where the 3/32" leading edge sheeting will attach. Blend the bevel into
the 1/4" sq. tip brace at the back and the shape of the leading edge at the front. Sand all the way down to the edge of the
light
-
ply center at the tip bow.
h.
Glue on the 3/32"x4"x36" balsa top and bottom leading edge sheeting. Attach both sheets to the main spars, leading edge,
and all the main wing ribs W1 through W5. Do not try to bend the ends of the sheets over W6 and the wingtip bow yet,
i.
Wet the ends of the top and bottom leading edge sheets with water to make them easier to bend over the wingtips. Let the
water dry in a couple of minutes, then glue and pin the sheets securely to the wing tip structure. When dry, trim the excess
sheeting off flush with the leading edge and the tip bow.
j.
Glue the 3/8"x3/4"x3/4" anchor block onto the grooved landing gear block. Note the anchor block should be offset 3/16"
from the end. Drill a 5/32" dia. hole straight through the grooved block and the anchor block - see wing plan for exact
location of the hole.
k.
Glue the grooved landing gear block
assembly into the rib notches. It should
stick out 3/32" so as to be flush with the
balsa sheeting when it is added.
l.
Plank the bottom of the wing panel, from
rib W1 out to rib W3, with 3/32" sheet
balsa. Cut pieces to fit from the
3/32"x3"x36" balsa stock provided, and
then glue the pieces in place.
m.
Plank the top of the wing panel, from rib
W1 out to the last W2 rib, with 3/32"x3"
sheet balsa in the same manner as you
just did the bottom.
n.
Cut to length and glue all of the
3/32"x3/16" balsa capstrips for the top
and bottom of the wing ribs. NOTE: Do
not cpastrip rib W6.
o.
Cut and install the 1/4" sq. top and bottom rear wingtip braces. Make these braces out of separate straight sections of
wood, with a break at rib W6. Do not try to make them in one piece and bow them in place as you did the front tip braces.
p.
q.
Glue the 3/16"x3/4"x36" leading edge cap. When dry, carve and sand
the leading edge cap to finished airfoil contour.
Carve and sand the 1/4"x5/8" balsa trailing edge piece (installed
earlier, step 2c) flush with the trailing edge sheeting.

.
r. Carve and sand the wingtip to final shape - except for the area near the end of rib W5 which must be blended into the
aileron after it is attached.
s.
Carefully block sand the entire wing panel until all joints are smooth and even. Use a large sanding block to avoid sanding
down any one area too much.
Now go back to step 1e and repeat the process up to this point to build the opposite wing panel.
3. JOINING THE WING PANELS
a.
Carefully block sand the center end of both wing panels until the sheeting, spars,
leading edge and trailing edge are all flush with the pre-angled center rib W1. Use
a large sanding block and sand slowly to keep the ends of the panels straight and
true.
b.
Check the fit of the wing panels to each other by blocking them up together as
shown below. When the center ribs are tightly together on the building board,
each wingtip should be approximately 3-1/8" above the board. The 3-1/8"
measurement is from the bottom of rib W5 to the board. The pre-
angled W1 center
ribs should automatically put the tips close to the correct measurement.
If your tips measure anywhere from 3" to 3-1/4" and the center ribs are fitting together nice and snug - that's close enough -
don't try to alter the angle of the center ribs to get the tips exactly 3-1/8".
Being 1/8" off at the tips only changes the actual total dihedral angle 1/4", and that won't harm the model's flying
characteristics at all.
It's more important to have the center ribs perfectly snug to each other, without any gaps, than it is to get the dihedral
exactly 3-1/8". If you do have gaps between the center ribs, resand with the large sanding block until the fit is good.
c.
Cut a 3/32" wide slot in the W1 center rib
of each wing panel to accept the die-cut
plywood dihedral brace. The slot should
be the full height of the rib, right at the
front of the main spars. Use a good
sharp modelling knife for making this cut
to avoid splintering the rib.
d.
Trial fit the wing panels together again
without glue, this time with the dihedral
brace in place to make sure it doesn't
interfere with the snug fit of the center
ribs. Alter the slots if necessary.

.
e. Glue the right and left wing panels together, including the dihedral brace, with slow drying epoxy glue. First work glue into
the slots with a dowel or wire to insure that the dihedral brace will get securely glued to the main wing spars inside. Then
smear a coat of glue on both center ribs so that the joint between the wing panels will be completely filled. Finally, coat the
dihedral brace with glue and slide the parts together. Carefully line up the leading and trailing edges so there is no twist
between the panels. Pin securely and wipe off any excess glue that has oozed out of the joint. Block up the wing assembly
as you did for checking the dihedral angle, double check the final alignment, and then let dry.
f.
A pocket has been built into the center of the wing where the aileron servo will be
mounted. The pocket is the space between pieces W1A, W1B, and the back of
the spars. Carefully remove the 3/32" top wing sheeting flush with the sides of
these pieces. Then use a small saw to remove the section of center ribs W1 that
runs through the middle of the pocket. Do not cut into or remove any of the 3/32"
bottom wing sheeting.
g.
Cut both pieces of shaped balsa aileron stock to the length shown on the plans
for the ailerons
-
26
-
5/16" long. Save the cutoff ends of aileron stock for later use.
h.
Draw a hinge center-line down the middle of the leading edge of both ailerons.
Draw a corresponding hinge center-line along the middle of the wing trailing
edge.
i.
At one end of each aileron, mark the
location for the aileron torque rod
installation. Slot and drill the aileron
leading edge to receive the torque rod
wire and then epoxy them in. Don't get
any glue on the brass bearings!
j.
With a sanding block, curve the trailing
edge of each aileron at the tip until it
matches the plan.
k.
Finish sanding the the ailerons to final
shape with 220 grit sandpaper. It's not
necessary to change the actual shape
of the aileron much, just round off the
corners of the leading and trailing edges
and make the entire aileron smooth.
Don't sand off the hinge center-line.
l.
Cut the molded plastic hinges loose from their connecting spruce and pre-
fix each one at the center by bending it back and
forth several times. Cut slots in the aileron leading edge and the wing trailing edge to receive the hinges. Use 5 hinges per
aileron as shown on the plan.
m.
Do Not Glue The Hinges In Yet!
Dry fit the ailerons onto the wing without
any glue on the hinges. Check the
movement of the aileron up and down.
If there is any binding or misalignment,
alter the hinge slots if necessary to
correct. Keep in mind that the gap
between the aileron and the wing
should be kept as narrow as possible
(about 1/32" to 1/16" maximum). The
aileron should be able to travel about
1/2" up and 1/2" down. If you need a
bigger gap than that to get much
movement, you may have to round the
leading edge of the aileron a little more.
An X-
Acto #11
knife
blade or a
Goldberg
or Du-Bro
hinge slotting "fork" are the
handiest tools to use for cutting
the initial hinge slots. Then clean
out the slots by working an X-
Acto #15 saw blade in and out of
the slot repeatedly until just
enough wood has been removed
to allow the hinge to slide easily.
NOTES ON MAKING HINGE SLOTS

.
n. Epoxy the hinges in permanently. Working with one aileron at a time, fill all 5 hinge slots in the aileron with slow drying
epoxy glue. Insert the hinges halfway into the slots. Wipe off any excess glue that oozes out of the slot. Set aside and
epoxy five hinges into the slots in the other aileron. Let both ailerons dry completely!
Repeat the process to glue the other end of the hinges into the slots in the wing trailing edge. Make sure to wipe off all
excess glue in the hinge gap. Let dry.
o.
Epoxy the torque rod bearings to the
trailing edge of the wing. The brass tube
bearings might not actually touch the
back of the wing depending upon how
wide your hinge gap is. Do not force the
bearing against the trailing edge when
gluing! Let it adopt whatever natural
position it takes from the lineup of the
aileron and surrounding it with glue,
allowing the glue to fill any gap. Be
careful not to get any glue on the wires.
COVERING NOTE:
If you are going to cover your
Astro-Hog with an iron-on pre-
colored covering material (like
Monokote, etc.), it is best to
cover the ailerons and wing
trailing edge at this time
before proceeding to the next
step.
p.
Glue the 1/16" die-cut plywood wing
bolt supports in place on the bottom of
the wing. They should extend
approximately 1-9/16" past the wing to
line up with the trailing edge of the
ailerons.
From the rear view, the ply bolt
supports should line up just under the
bottom surface of the ailerons when the
ailerons are held in neutral position.
q.
Cut two pieces of leftover aileron stock
to fill in the area between the ailerons.
Notch the front of the pieces to fit over
the torque rods. Glue in place, being
careful not to get any glue on the torque
rods where it could bind them up.
r.
Fill in the gaps between the aileron
stock and the wing trailing edge with
scrap balsa. When dry, sand the filled in
area to final wing contour.
s.
Pin the ailerons in neutral position and
finish shaping the wing tips at the back
of rib W5. Make the tips blend smoothly
into the ailerons.
t.
Cut strips of 2" fiberglass tape to
reinforce the wing center joint. Cut 3
pieces for the top of the wing and 1
piece for the bottom.
To Apply the Fiberglass Tape
1. Coat the wing center with slow drying epoxy glue.
2. Lay the tape on top of the glue.
3. Holding one end of the tape so it won't slip, "squeegee" the
glue through the tape with a small paddle of scrap balsa.
Scrape over the tape several times with the squeegee paddle
to smooth the tape and remove excess glue.
4. When dry, sand lightly to remove any rough spots. Try not to
sand into the fiberglass tape itself.

.
4. FUSELAGE SIDES
Cover the building board with wax paper. Pin printed balsa sheets No.7 and No.8 - the right and left fuselage sides - onto
the board.
a.
With a modelling knife, cut loose from the rest of the printed sheet the small parts
that are printed under the wing saddle area of each fuselage side. The part is
marked A and B for the right fuselage side, X and Y for the left fuselage side.
Save these parts to be used later.
b.
Cut to length and glue onto the fuselage sides all of the 1/4"sq. balsa corner
stringers and vertical pieces. Be sure to leave a 1/8" gap in the corner stringers
where formers F2 and F5 will go.
c.
Glue and pin balsa doublers FSD on the fuselage sides. Be very careful to
achieve good alignment of FSD with the printed lines on the fuselage sides, as
FSD will set the stabilizer at the correct incidence later.
d.
Glue lite-ply doublers LPD-1, LPD-2 and LPD-3 in place. Note the gaps between the doublers for formers F2 and F5. Use
epoxy glue, not Sig
-
Bond or any other water base glue (the water can cause these parts to curl).
e.
Cut to length and glue in place the 1/2" balsa triangles that go along the front and bottom edges of doubler LPD-1.
f.
Trim completely around the outside edge of each fuselage side with a shap modeling knife, cutting away the excess printed
sheet. Where structure has already been glued on, trim the excess away flush with the structure. At the front trim to the
printed outline.
g.
Cross-match the fuselage sides by pinning them together and using a sanding block to true-up any rough edges. If the
sides were built and cut accurately, not much sanding will be needed. Be careful when sanding in the wing saddle and
stabilizer mount areas not to change the incidence angles.
h.
Finish cutting out the two small A-B and X-Y parts that were set aside in step 4a. Then glue them in place on the fuselage
sides, pinning flat until dry. The corresponding letters on the sides will help align the parts correctly. Use a piece of waxed
paper or plastic wrap underneath the glue seam to keep it from sticking to the board.
5. FIREWALL ASSEMBLY
NOTE: You need to have the engine and muffler that you will be using on hand when working on the firewall.

.
a.
Epoxy the die
-
cut plywood firewall parts F1A and F1B together. Hold or clamp together until dry.
b.
Mark the vertical center-line and thrust
line on the front of the firewall, using the
F-1 cross-section drawing on the plan
as a guide. Check the width of the
engine that you intend to use and
determine the spacing that will be
required between the aluminum engine
mounts. Now locate the mounts on the
firewall accordingly. Mark the locations
of the four mounting holes and drill
them out with a 3/16" drill bit.
c.
Bolt the engine mounts loosely onto the firewall with the 5-
32" mounting bolts and blind nuts provided. Double check to see
that the mounts are lined up properly and then start tightening up the bolts. Keep tightening until the prongs of the blind
nuts are started into the wood and holding. Now carefully remove the mounts and bolts from the firewall and tap the blind
nuts the rest of the way into the wood with a hammer. Spread epoxy glue over the blind nuts to keep them firmly in place.
Be careful not to get any glue in the threads of the blind nuts.
d.
Draw a line across the back of the
firewall representing the bottom of die-
cut balsa former F1C. Use the F-1
cross-section drawing on the plan as a
guide. Now trim out the bottom of
former F1C where necessary to clear
the blind nuts. Then glue F1C in place.
e.
Hold (or tack glue) the firewall in
position on one of the fuselage sides.
Slide your engine back and forth on the
mounts until the engine's thrust washer
sticks out 1/4" to 1/2" ahead of the
fuselage side. Mark the engine
mounting holes on the aluminum
mounts. Drill the holes with a #36 drill
bit and tap for 6-32 mounting bolts.
(See below)
TAPPING ALUMINUM ENGINE MOUNTS
Clamp the engine mount securely
in a vise and center punch the
motor mounting holes. Drill the
holes with a sharp twist drill bit in a
variable speed electric drill. If
possible, use a drill press instead
of a hand held drill. Lubricate the
drill bit with machinist's cutting oil,
special aluminum tapping fluid, or
other light household oil such as
Marvel or 3-in-1.
Run the drill at a moderate speed with moderate pressure. Let the bit cut its way through the aluminum at its own rate.
Don't try to force it with excess pressure or high speed. Aluminum galls easily and may jam and break the bit if forced. If
resistance builds up, back it out of the hole frequently and clean off the metal fragments. Relubricate the bit and hole with
oil and continue drilling. Tapping the drilled holes is easy if the same precautions are taken. Lubricate the tap liberally
with cutting oil. Use moderate constant pressure when turning the tap into the hole. If resistance builds up, back the tap
back out frequently and clean the fragments out of the threads. Use plenty of oil and work slowly.

.
f. Position the nylon nose gear bearing on the front of the firewall and mark the mounting hole locations. Drill out the holes
with a 9/64" bit and install 4
-40 blind nuts and mounting bolts- in the same manner you did for the engine mounts in step 5c.
g.
Assemble the nylon steering arm and formed nose gear wire into the nose gear bearing on the firewall. Check it turns freely.
h.
A hole must be drilled through the firewall at this time for the flexible cabel pushrod that will operate the nose gear steering.
First check these instructions further on and familiarise yourself with pushrod installation. Then fasten the supplied pushrod
connector into the middle hole of the nylon steering arm. Turn the steering arm back against the firewall and mark the spot
for the pushrod to exit and hit the connector. Drill with a 3/16" drill bit.
i.
Locate the best spot on the firewall for the throttle pushrod to exit and line up with your engine's carburetor control arm. Drill
the hole with a 3/16" drill bit. Avoid placing the hole within 1/2" of the firewall edge. A 1/2" balsa cowl side doubler will
occupy that space later.
j.
Cut a 7/8" dia. hole in the firewall for the tubes from the fuel tank to stick through. See section 14 "Tips On Tanks" for some
recommendations for fuel tank selection. If you use a standard-style 12oz round or rectangular tank, as recommended,
place the center of the hole 1/2" above the thrust line. If you elect to use a slant-style tank or a tank smaller than 12oz., you
may want the hole a little higher. Plan your tank installation now!
A jig saw works best for cutting out the hole. Or, you can drill a series of smaller holes around the perimeter of the 7/8" hole,
and then cut between the small holes with a keyhole saw blade (such as X
-
Acto #27).
6. JOINING THE FUSELAGE SIDES
a.
b.
c.
With a sanding block, bevel the rear ends of the fuselage sides as
shown. Sand until the tail end of each fuselage side is 1/8" thick.
Glue the firewall in place on the left fuselage side. Use 5-minute
epoxy and hold it square against a 90 deg. triangle until dry.
IMPORTANT NOTE: The bottom lip of former F1C should seat
tightly against the top of the 1/4" sq. fuselage corner stringer.
Epoxy die-cut plywood formers F2 and F5 in place on the left
fuselage side. Glue them on one at a time with 5 minute epoxy and
use a 90 deg. triangle to hold them square until dry.
IMPORTANT NOTE: Both F2 and F5 have small die-cut slits on their sides which should line-up with the top of the 1/4" sq.
fuselage corner stringer.

.
d. Epoxy the right fuselage side onto the formers and firewall. Use slow drying gue and lots of pins so that you have plenty of
time for getting an accurate alignment of the fuselage sides to each other and to the formers before the glue dries. Make
sure that the tail ends of the sides line up properly. Let dry.
e.
Glue the die-
cut balsa formers F3, F4, and F5A in place. Space them out carefully between F2 and F5. The exact distances
between the formares are shown on the side view plan.
f.
Cut to length and glue in place the 3/16" sa. balsa top stringers that go between formers F1C and F5A.
g.
Sand down the edges of the die-cut lite-ply cockpit floor until it fits between the two stringers that bridge across the sides of
formers F3 and F4. Glue the floor in place.
h.
Align the fuselage on the top view plan, pinning the bottom of F2 and F5 to the building board. Pull the tail ends of the
fuselage sides together and glue. Make sure that the joint is directly over the centerline on the plan. Let dry.
i.
Glue in die-cut plywood formers F6, F7, F8A, and F9A. Check side view plan for exact positioning in relation to the 1/4" sa.
balsa uprights in the fuselage sides.
j.
Glue the die-cut plywood formers F8B and F9B. The bottom corners of these formers should be flush with the 1/4" sq.
corner stringers.
k.
Cut to length and glue in place the 3/16" sq. bottom middle stringer that runs from the back of former F5 to the tail end of
the fuselage.
l.
Cut four short pieces of 1/4"x1/2" balsa stick to use as cross braces behind former F5. Sand them to fit between the corner
and middle stringers and then glue in place.
m.
Using a long straightedge and a
modeling knife, cut a 3/32"x3"x36" balsa
sheet diagonally from corner to corner.
Glue and pin the two tapered pieces onto the bottom of the fuselage. When dry,
trim off the excess flush with the fuselage sides.
n.
Cut to length and glue in place the three 3/16" sq. balsa top stringers that run from
former F5 back to former F9A.

.
7. FINISHING THE FUSELAGE
a.
Trial fit your fuel tank in the fuselage.
Slip a 3/16"sq.x2-1/8" balsa stick (cut
from scrap) between the top of the tank
and the bottom of the fuselage top
stringers. Slide the stick backward or
forward until the tank sits level in
relation to the top fuselage sides. Glue
the stick to the stringers after you find
the right spot.
b.
Glue die
-
cut plywood former F2A in place.
c.
Use a sanding block to bevel the ends of the 1/2"x4-
3/16"x6" nose bottom block until it fits in place. Recess a small area on
the front of the block to clear the nose gear blind nuts. Then glue the block in place. Don't get any glue in the threads of the
blind nuts.
d.
Two pieces of 3/32"x4"x36" balsa are supplied for sheeting over the top of the fuselage formers. Use the paper patterns
provided to cut the sheeting stock into 4 separate pieces - 2 for covering the front formers (F2 through F5A), and 2 for
covering the rear formers (F5 through F9A). You'll find that the paper patterns are approximate only and slightly oversize to
allow for minor variations between models. Slight trimming of the balsa sheets may be necessary to make them fit your
airplane perfectly.
e.
Glue both the front sheeting pieces, along their bottom edges only, to the
fuselage sides. Once these joints are dry, wet the outside surface of the sheets to
make them easier to bend. Trial bend the left sheet down onto the formers to
check the fit. Carefully retrim where necessary. Note that the top seam should
overlap halfway onto the 3/16" sq. top stringer. When satisfied with the fit, apply
Sig-Bond glue to the formers and stringers, and start pinning the left sheet
securely in place. Finish trimming any rough edges after the sheet is pinned
down.
Repeat the bending, gluing, and pinning process for the right side sheet, joining it
to the left sheet at the top stringer.
f.
Attach the two rear 3/32" balsa sheeting pieces in the same manner you just did the front piece.
g.
Cut out the 1/2" balsa cowl side doublers from printed balsa sheet No.11. Glue the doublers in place.
h.
Sand the sides of the 5/8"x3-3/16"x4-
1/2" balsa cowl bottom block until it fits
between the cowl side doublers. Bevel
the back end of the block to fit flush
against the firewall. Shape the side view
of the block to match the contour of the
fuselage sides.
i.
Make an oval cutout at the back end of the block to clear the nose gear
assembly. Hollow out the inside of the block enough to allow adequate movement
of the steering arm. Glue the block in place.
j.
A 6" long piece of balsa triangle stock is supplied. Cut it in half and glue the two pieces in the front corners of the cowl. Cut
and sand the excess off flush with the fuselage sides.
k.
Add the 3/4"x1"x3
-1/4" balsa filler block that goes along the top of the firewall, between the cowl side doublers. Cut the
block to the shape shown on the top view plan before gluing it in.
l.
Carve and sand all the wood in the top cowl area down flush with the fuse top sheeting
m.
Carve and sand the 1/2" balsa bottom block down flush with the bottom of formers F1 and F2.

.
n.
Carve and sand the remaining front corners of the nose to blend smoothly into the top and bottom contours.
o.
Shape the 1" balsa triangles and the inside of the top filler block to a pleasing contour. 80 grit sandpaper wrapped around a
large diameter dowel is handy for this job.
p.
Carefully sand the remainder of the fuselage to final form. Round the bottom corners of the rear fuselage as shown in the
cross
-
section drawings on the plan.
8. COCKPIT AND PLASTIC HEADREST
Trim the cockpit opening to finished size using the full size pattern provided with
the plan as a template. Trim with a sharp knife and finish the edge with fine
sandpaper.
Sand the outside of the headrest with 360 grit or finer sandpaper to remove the
surface gloss of the plastic. Do not use courser sandpaper which will put deep
scratches in the plastic. Deep scratches will often open up wider during painting
and become prominent. Shape the bottom edges of the headrest with an 80 grit
sanding block until it fits evenly onto the top of the fuselage.
If you are planning to paint your entire model, glue the headrest in place now and paint it later when you do the rest of the
model. Glue it with Sig
-
Ment, Sig Epoxy, or cyanacrylate "super" glue.
If you are planning to use an iron-on pre-colored covering, paint the headrest separately and glue it in place after the
fuselage has been covered. Peel off the iron-on covering where the headrest will sit so that it can be glued directly to the
balsa.
CAUTION: Do not try to cover the ABS plastic headrest with Monokote or other
iron-on types of covering material. The heat may melt and distort the plastic.
We recommend that the headrest be painted with Sig Supercoat Dope or Sig
Skybrite paint for best results. Hobbypoxy, K&B Superpoxy, and Dulux
(automotive) enamel have also been proven compatible with ABS plastic and can
be used if desired. Do not use other paints, dopes, or finishes without testing to
make certain it is compatible with the plastic.

.
Color paint can be put directly on the sanded headrest. Primer type coats are not needed if a good sanding job was done
with fine sandpaper. The color paint can be brushed or sprayed onto the headrest. Try not to apply heavy, wet coats which
may cause an "orange peel" effect. Put on light coats with adequate drying time between coats. Follow the paint
manufacturer's instructions carefully.
9. MATING THE FUSELAGE TO THE WING
a.
Set the fuselage on the wing to check the fit. If necessary, lightly sand the wing saddle area of the fuselage to achieve a
good fit with no large gaps.
b.
Carefully drill two 1/4" dia. holes through former F2 for the wing dowels. The exact locations for the holes are premarked on
F2 by two small dimples.
c.
Cut the 1/4" dia.x6-1/2" long hardwood dowel supplied into three pieces - one 4" long elevator joiner, and two 1-1/4" long
wing dowels.
d.
Grind or sand one end of both 1/4"x1-1/4" wing dowels to a sharp point -
keep the point symmetrical and centered. Push the
dowels into the holes in F2, leaving just the sharp points sticking out. (It may seem that the dowels go into the holes awfully
hard at first, but they will loosen up after they've been pushed in and out a few times.)
e.
Carefully slide the wing into position, pushing the sharp dowel points into the wing leading edge.
f.
Remove the wing and drill two 1/4" dia. holes through the wing leading edge where indicated by the dowel punch marks.
g.
Remove the wing dowels from former F2. Put a piece of wax paper over the face
of F2 and then reinsert the dowels through the paper back into F2. Push the
dowels only 5/16" into F2 this time - leave most of the dowel length sticking out.
h.
Trial fit the wing in position, sliding it into the dowels. Check to see that the wing
still fits the fuselage. If not, slowly enlarge the holes in the wing leading edge until
it fits properly. When staisfied with the fit, coat the inside of the holes in the wing
with epoxy glue. Put the wing back in place and hold securely in position until the
glue dries. When dry, carefully remove the wing, pulling the dowels out of F2. Fill
any small gaps around the dowels at the wing leading edge with another
application of glue.
i.
The 3/4"x3/4"x1-
1/2" hardwood wing bolt
blocks must be shaped to fit properly in
the fuselage. Bevel one end of each
block by drawing a line on it matching
this pattern, and then sanding to the line.
This beveled end fits snugly against
former F5 when the side of the block is
lined up with the wing saddle.
Bevel the side of each block next. Draw a line on the block matching this pattern and sand to the line. This beveled side
should fit snugly against the fuselage side when the end of the block matches the dihedral angle (indicated by the bottom
seam of former F5). Be sure to make a right and left block.

.
After shaping epoxy the blocks in place
j.
Reinforce the wing bolt blocks with pieces of 3/4" balsa triangular stock, cut from
the 6" long piece provided.
k.
Tape or pin the wing in correct alignment on the fuselage. Determine the correct
spots on the bottom of the wing and drill through and hit the hardwood wing bolt
blocks in the desired locations for the nylon bolts. Drill through the wing and the
hardwood blocks at the same time with a No.7 drill. (Remember to keep the drill
perpendicular to the bottom surface of the wing so the heads of the nylon bolts will
seat flush against the wing.
l.
Take the wing off and tap the hardwood blocks with a 1/4
-
20 tap. Redrill the holes to 1/4" dia. to pass the nylon bolts.
m.
Two pieces of 3/4"x2-1/2"x2" balsa are provided for making a fairing behind former F2 on the bottom of the wing. Bolt the
wing in place on the fuselage and shape each block to fit down into half of the cavity.
n.
Carve the blocks roughly to shape so that the contour of the fuselage is carried onto the wing.
o.
Glue the blocks onto the wing, not to F2. When dry, finish sanding them to shape. Fill any remaining gaps with model putty
or wood filler(*) to complete the fairing.
10. STABILIZER AND ELEVATORS
Pin the stabilizer/elevator plan to the building board and cover it with wax paper.
a.
Cut to length and pin on the plan the 5/16" sq. balsa stabilizer trailing edge.
b.
Glue the die-cut 1/8" lite-ply doubler against the front of the trailing edge.
c.
Cut the S-2 parts from the printed balsa sheet No.10. Glue and pin them in place
against the trailing edge.
d.
Cut to length and pin in place the 5/16" sq. spruce leading edges. Add a short
doubler, also cut from the 5/16" sq. spruce stock, behind the leading edge center
joint.
e.
Cut to length and glue in all the 3/16"x5/16" balsa strip ribs.

.
f. Cut two pieces of 3/16"x3/8" balsa for the top spars. Glue in place on top of the strip ribs and S-2 pieces. Let the entire stab
assembly dry completely before proceeding!
g.
When dry, unpin the stabilizer from the board and glue in the two die-cut balsa S1 ribs. Make sure the ribs are centered on
the leading and trailing edges so that the 3/32" balsa sheeting to be added later will be flush.
h.
Cut to length and glue two 3/16"x3/8" balsa spars onto the bottom of the stabilizer.
i.
Add the 3/32" sheet balsa fill
-in to the top and bottom of the stabilizer center-sections. Notice that at the front, the fill-in
sheets butt up against the back of the 5/16" leading edge doubler, they don't overlap it.
j.
When dry, sand the point off the front of the stabilizer. Make the flat spot as wide as shown on the plan.
k.
Taper the tip ends of the top and bottom spars down to the edge of the S
-
2 pieces.
l.
Mark a center-line all the way around the outside of the stabilizer. Using the line as a guide, carve and sand the stabilizer
leading edge, trailing edge, and tips round.
m.
Sand the 3/32" center-section sheeting smooth. You will note a slight mismatch where the sheeting meets the leading and
trailing edges. Fill in these small voids with wood filler or model putty(*). DO NOT try to sand the voids completely out
instead of filling them in, or you may sand down the leading and trailing edges too much and weaken them.
n.
Two 13-1/2" long pieces of 1/4"x3" balsa tapered stock are provided for making the elevators. Cut one of the elevator
patterns from the plan and trace the outline onto both pieces of tapered stock. Cut the elevators to shape. IMPORTANT:
Notice that one side of the tapered stock feels slightly rough while the other side is presanded smooth - plan your cutting of
the left and right elevators so that the smooth side is used as the bottom for both.
o.
Join the elevators together by gluing them to the 1/4"x4" hardwood dowel joiner. Pin straight and flat on the building board
until dry.
p.
Block sand the rough side of the elevators flat and smooth. Sand carefully so that
the 1/4" leading adge thickness is maintained.
OPTIONAL: When block sanding (to the right), steepen the taper a little bit near
the tip of the elevator to make the trailing edge a constant thickness along the
back. This sounds tricky, but actually won't take more than a few passes of the 80
grit sanding block.
q.
Sand all the edges of the elevator assembly round. Hold the elevators up to the
stabilizer trailing edge to blend the shape of the tips together.
/