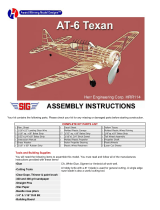
Page is loading ...


.
This model of the famous Piper Cub is a natural for radio control, but can also be flown free flight - an increase in dihedral is
recommended for this application - or converted to control line by the addition of leadout guides to the wing tip and a bellcrank
in the cabin. The stable flight characteristics make it a good RC scale trainer for inexperienced fliers, but it can be stunted by
expert expert pilots. Built-up construction is strong and light, will not be difficult if you study the plans and the instructions in this
manual carefully. Read all of the manual before beginning construction.
Die-cut parts are marked with letters indicating the particular component - "F" for fuselage, "W" for wing and "S" for stabilizer.
Leave the parts in the sheet until needed for construction so that they will not be lost or broken. Remove the pieces from the
sheets carefully. If difficulty is encounted, do not force the part from the sheet. Use a modeling knife to cut it free.
Wax paper may be used to protect the plan during building when the glue used is an aliphatic resin such as Sig Bond, a white
variety such as Sig Superweld or Sig Epoxy. If a model cement like Sig-
Ment is selected, use plastic wrap to protect the drawing
because this type of glue will dissolve the wax out of the wax paper and not set up properly.
1. WING PANELS
A.
Laminate two 1/8" thick W-6 pieces together to make a single 1/4" thick. Do the
same with W-7 and W-8. Assemble W-6, W-7 and W-8 into a complete wing tip by
gluing together flat on the plan. Remove when dry.
B.
Pin the 1/16"x3/4" trailing edge sheeting over the plans and glue the 1/8"x3/8"
shaped trailing edge on top of the 1/16"x3/4" sheeting in the position indicated on
the plans.
C. Look at the Aileron Construction View and the Aileron Rib Cross-section. Note the
1/8"x1/4" piece of balsa - indicated by gray tone on the isometric drawing - on the
back of the 1/4"x1/2" piece that forms the leading edge of the aileron. This is
cemented on 1/16" up from the bottom. Pin the 1/4"x1/2" aileron leading edge
piece and the 1/4"x1/2" piece just ahead of it that forms the back of the wing in
place on the plan.
D. Taper the main and rear spars from full height at Rib W-
4 to 1/4" tall at the tip ends
of the spars. Take all of the taper off on the top of the spars.

.
E. Thread the wing ribs over the spars. If any of the spar holes are too tight, do not
try to force the rib onto the spar but enlarge the hole slightly so that it will slip
over the spar easily. For spars which may have a natural bow, the height of the
spar holes should be increased so that the spar can be accomodated in the rib
with the rib sitting flat on the building surface.
F.
Use 1/16" scrap balsa scabs under each rib, front and rear, on the flat bottom
before the upward curve starts. This will bring the rib-spar assembly on a level
with the trailing edge planking.
G.
Place the rib
-
spar assembly over the plans, align the ribs and pin down.
H.
Glue ribs with Sig Super Weld to the 1/8"x3/8" shaped trailing edge and to the 1/4"x1/2" piece that forms the front of the
aileron cavity in the wing.
I.
Glue the "A" ribs in place in the ailerons between the 1/4"x1/2" aileron leading
edge piece and the 1/8"x3/8" shaped trailing edge. Use temporary scabs of 1/16"
scrap balsa under the front of the A ribs to bring them level with the trailing edge
plankin. (See Aileron Rib Cross-section).
J.
Add the 5/16" square leading edge.
K.
Glue in the 1/8"x1/4" top front spar with Super Weld.
L. Install all W-3 half ribs by inserting sideways under the top front spar and twisting into place on the leading edge and the
top front spar. The last W-3 rib at the wing tip must be modified slightly to fit over W-8 and is not installed until W-8 is in
place.
M.
Bevel the edge of the 1/16" sheet trailing edge top planking so that it will fit
snugly against the trailing edge bottom planking and glue in place.
N.
Glue the preassembled wing tip assembly (Paragraph A in this section) in place.
Block up with scrap balsa to the level of the 1/4" ends of the main and rear spar
and cement tip to them as well as the leading and trailing edge.
O.
Insert the top front spar into W-8 and taper W-
8 so that the 1/16" top planking will
join smoothly when installed, a matter of cut and try.

.
P.
Add the 1/16" sheet front planking.
Q.
Put the 1/16"x1/8" capstrips on top of all ribs, including the aileron, except for the
two end W-2s and W-5.
R.
Remove wing panel from the plan. The 1/8"x1/4" bottom front spar should be inset
into W-8 as was the top front spar. Install gussets made from die cut sheet scrap. In
addition to the gussets in the wing shown on the plan, it is recommended that scrap
gussets also be added to the corners of the ailerons. This will prevent covering
shrinkage from distorting the aileron end ribs. Note the proper direction of the grain
for the gussets as shown on the plan.
S.
Use scrap plywood for the anchor blocks in the wing that provides places to fasten
the strut ends and holes in which to plug the strut braces. Block them out from the
spars with scrap balsa so that the plywood is flush with the surface wing.
T. The plywood mounting plate for the aileron control horn is installed flush with the
bottom surface. Install the aileron control horn before the wing is covered, epoxying
the nylon screw retainer securely to the inside of the plywood plate so that the
control horn may be removed to get it out of the way for the covering operation and
later re-installed.
U. The plywood mounting for the aileron bellcrank should be re-inforced with 1/4"
square scrap balsa at each end where it contacts the wing rib. You may wish to build
an opening from scrap balsa around the point where the R/C clevis link rod exits
from the wing surface between the bellcrank and control horn. This will make a
neater job and provide a place to fasten the covering.

.
2. WING CENTER SECTION
A.
Prepare the center section trailing edge
in the same maner as the wing.
B.
Assemble the plywood wing joiners.
Then add 1/4" square balsa pieces as
shown in the accompanying sketch.
C.
Lay the four center ribs over the plan with 1/16" scrap scabs under the fronts to level them with the trailing edge planking.
Glue the two middle ribs of the center section to the trailing edge and the plywood wing joiners. Leave the outer ribs
unglued for the moment and hold them in position with pins.
D.
Slide the spars of the completed wing panels into the holes of the center section ribs and the plywood wing joiner ends into
the holes of the W-2 ribs of the wing panel. Block up each tip 7/16", measured at rib W-4. This procedure will necessitate
enlarging the bottoms of the plywood wing joiner holes in the W-2 ribs and the bottoms of the spar holes in the center
section ribs to permit the swiveling action needed to incorporate the dihedral. If you are planning to fly the Cub by rudder
only control it is recommended that you increase the amount of dihedral under each tip to one inch. For free flight Cub, put
2" of dihedral under each tip.
E.
Epoxy the spars together and re-inforce the joints with scrap plywood. Use epoxy also on the trailing edge joints to the
center section. Glue the outer center ribs up against the ends of the wing panels and to the plywood wing joiners. Sheet
the center section with 1/16" balsa.
F.
Fill all dents and cracks with Sig Epoxolite putty. Sand entire wing carefully with a sanding block and finish with hand-held
fine sandpaper.
G.
Control surfaces are attached with molded nylon hinges provided in the hardware pack.
3. WING STRUTS
(See Plan)
The front strut for the Cub is approximately 21" long.The rear strut is approximately 21-1/2" long. Individual construction
differences between models can cause variations in the lengths required, so measure for exact size directly on your model
with the wing permanently installed. Sand strut to airfoil shape.
Drill two holes in the aluminum shim stock where it will be inside the spruce wing strut. These holes will enable the epoxy
glue to get a good grip on the aluminum. Cut a slot in the end of the strut with a razor saw, and epoxy the aluminum strip
into the slot. Wrap a piece of fine cloth (silk or fiberglass), coated with epoxy, around the end of the strut to reinforce the
installation of the aluminum.
Screws are provided to fasten the upper wing strut ends to the plywood strut attachment plates that are built into the wing.
Bolt and nuts are provided for connecting the lower wing strut ends to the shim aluminum fittings that are built into the
fuselage above the landing gear.
Glue piece of 1/16"x1/8" balsa to the "U" shaped 1/16" wire strut braces. Cover with paper or silk to firmly attach to the
wire.
An alternate popular method for the construction of the strut ends is shown on the plan. The materials for these
modifications are not furnished in the kit. Molded nylon pinned hinges are shown for the upper strut ends to enable them to
fold flat against the bottom surface of the wing when it is removed for transportation or storage. For the fuselage end of
each strut an adjustable RC clevis can be used to provide quick detachability.

.
4. ELEVATOR AND STABILIZER
A.
Laminate two S-1 pieces to make a
single piece 1/4" thick. Do the same with
pieces S-2 through S-6.
B.
Protect the plan with wax paper. Pin
down and glue together with Sig Bond,
pieces S-1 through S-6.
C.
Note that the two halves of the elevator
are joined by a piece of 1/4" dowel
which is built into the structure at this
time.
D.
Add the 1/4" square balsa trailing edge
of the stabilixer, leading edge of the
elevator and the end pieces.
E.
Ribs are 2/32" x 1/4" balsa.
F.
The stabilizer is not covered until after installation on to the two fuselage dowels. There is a gap between the fuselage and
the satbilizer frame to simulate the same effect in the real airplane.
G.
Sand all edges round. Do not airfoil the tail surfaces as the original was made of tubing and was flat.
5. FIN AND RUDDER
A.
The fin and rudder are constructed similar to the stabilizer and elevator, except that the outline is formed of 1/4" x 1/2"
balsa sticks rather than laminated die cut shapes.
B.
The plan duplicates the scale structure of the fin on the full size Cub and thus has no rib at the bottom of the fin. The
covering is stretched from the lower 3/32" x 1/4" rib to the 3/16" square fuselage stringers on each side to provide a fillet
effect. If you are not experienced at handling silk in this type of application or are using some other covering material, it is
recommended that another piece of 1/4" square be added to the structure as shown in the accompanying detail so that the
fin may be covered independently of the fuselage.
C.
The fin is incorporated into the structure of the fuselage during its assembly, so take this into account during construction.
Note particularly that the fin post extends down to the bottom of the fuselage and is notched into the rear of the fuselage
frame.
D.
The fin leading edge extends into the fuselage. The fin must be mounted on the fuselage before the top stringers and the
1/4" stabilizer mounting dowels and associated blocks are installed.
6. FUSELAGE
A.
Protect the plans with wax paper. Pin down 1/4" square pieces to form a fuselage side frame, gluing with Sig Bond. Each
side is composed of two separate sections, with the split occuring at the double 1/4" square located at Former 2. This is to
permit incorporation of the taper toward the nose when the sides are joined together. Note that the right side of the
fuselage is different from the left side. If you wish to install an operating cabin door. If you do not intend to use this feature,
both sides may be made like the left side, without the door opening, and may be assembled on top of each other.

.
B. Set the fuselage side frames over the top view on the plans and join, using 1/4" square cross pieces and the plywood
former F-3.
C.
At the split line of the front section of the side frames, sand a bevel in the back edge so that it fits up against the other
section snugly when the taper toward the nose is incorporated. Join the front sections with 1/4" square balsa.
D.
Epoxy the hardwood landing gear blocks between the fuselage side frames.

.
E. Cut out 1/8" of the 1/4" sq. bottom longerons and glue on the 1/8" plywood tail wheel bracket mount. Bend the tail wheel
wire, insert through the nylon tail wheel bracket. Bend the steering arm in the top. Screw the bracket to the plywood
mount. Hook the steering arm to the rudder by epoxying a metal strap into the rudder. Do not fit the strap tightly against
the arm but allow some clearance for free movement.
F.
Plank the fuselage sides, up to the split line at the front of the landing gear block where the nose taper begins, with 3/32"
balsa sheet. Don't plank the front fuselage until after the wing hold
-
down wires are installed.
G.
Build two 1/8" spruce cabin frames on the plan in the same manner as the balsa fuselage sides were constructed. Note
that the top of the cabin is made from lamination of 1/8" square spruce. Epoxy glue is suggested for the assembly of the
spruce cabin frame. Tack a temporary cross-piece between the two sides at the front to facilitate assembly of the frames
on the fuselage. If you do not wish to install an operating cabin door on the right side, the spruce pieces that represent the
door may be cemented together rather than made as separate pieces.
H.
Add the hardwood triangular blocks in the corners of the top rear of the cabin.
I.
Place the completed wing in the proper position on the top of the cabin and tape in position.
J.
Protect the front of the wing with wax paper and epoxy the 1/8" plywood cross-plate to the spruce of the cabin top, resting
flush against the wing center section.
K.
Notch a 1/8" groove in the fuselage frame for the 1/8" diameter wing hold down
wires.
L.
Drill two side-by-side holes in the center of the cabin plywood cross-plate on
through the plywood wing joiners. Cut out the wood between the two holes so that
it becomes a single oblong hole.
M.
Plug the two 1/8" diameter wing hold down wires into this hole. The 1/8" wing hold
down wires may have to be rebent slightly to fit perfectly into the notches in the
side of the main frame and plug straight into the hole in the plywood cross-plate
and into the wing. When satisfied with the fit, epoxy them to the fuselage frame,
remove wing and solder the two wires together where they join at the top.
Wrapping some fine copper wire around them in front of the plywood cross-plate
will help make a good joint.

.
N.
Add the balsa blocks on each side of the plywood cross
-plate and sand to match the shape of the wing.
O.
By pushing a pin through the wing, locate the exact spot for the wing hold down bolts in the centers of the hardwood
triangles at the back corners of the cabin. Drill through the wing and on through the hardwood blocks with a number 7 drill.
Remove the wing. Drill out the hole in the wing to 1/4" diameter to pass the 1/4
-
20 nylon wing hold
-
down screws.
P.
Prepare the firewall for installation by installing the blind nuts that retain the motor mounts and epoxying in place. Select and
position the fuel tank while easy access is available to the inside of the fuselage nose.
(NOTE: The tank level depends on the motor installation. The center line of the tank should be about 3/8" below the needle
valve. An inverted engine will therefore require a lower tank than when the engine is side mounted. The plan shows use of
an inverted engine with low tank position to provide full space on both sides of the cowl for installation of a super-detailed
dummy engine. For sport flying or stand-off scale events, a side mounted engine is more practical however, since the idle
adjustment is less critical and the engine is easier to work on and start. Since the engine cylinders on the actual airplane are
exposed, the model engine in the side-
mounted position doesn't look unrealistic. The tank location for a side mounted engine
requires that the top fuselage cross pieces in the nose be removed and a cut out made into the front fuselage formers F-1
and F-2 to get the tank in a high enough position. Plank the top of the fuselage nose with 3/32" balsa sheeting before
removing the cross pieces and cutting into the formers to accomodate the tank. A super-detailed model with an instrument
panel will need a specially selected tank shape because most standard plastic bottle clunk tanks are too long to fit in front of
it.)
Q.
Drill holes through the firewall to pass the tank tubes.
R.
Plank the sides of the front fuselage forward of the split line with 3/32" sheet balsa. If the top of the front fuselage has not
already been planked as described previously during installation of a side-mounted engine tank, it may be covered now.
Wetting the balsa sheet will enable it to be bent around the curvature of the fuselage top.
S.
Add the balsa block bottom to the nose section.
T.
Inset 3/32" sheet balsa cabin floor between the bottom 1/4" square longerons.
U.
Epoxy the 1/8" plywood firewall to the front of the fuselage.
V.
Glue on F
-
1, F
-
2 and F
-
4 through F
-
7.
W.
Install the fin
-
elevator mounting blocks. Epoxy 1/4" dowels into holes. Measure from plans for accuracy.
X.
Glue the side and top stringers in place. The top stringers may have to be soaked in water or steamed near the cabin so that
they may be curved into place. Note that the center top stringer is actually two 1/8" square pieces, the first glued into the
notches in the formers and the second glued on top.
7. LANDING GEAR
The landing gear is most easily assembled by first fastening the front and rear 1/8" and 3/32" formed wires into the
grooved landing gear blocks with the nylon strap and screws provided. Bind the 1/16" formed wires in place with fine
copper wire (not furnished) such as Sig Copper Wire SH330. Some slight rebending of individual wires may be necessary
to get an exact fit When the gear is lined up properly, solder all of the copper wired connections together.
Three-inch balloon type wheels are recommended for best scale appearance. To use Banner Streamlite wheels which
have a scale-like hub, solder a piece of 1/8" I.D., 5/32"O.D brass tubing over the axle. Use this type of bushing for any
type of wheel which has a predrilled 5/32" hole. P.B. Aeroscale wheels and Tatone "Flight Line" wheels also have a scale-
like hub.
8. COWLING
A.
Match the two cowling halves by gently rubbing over a sheet of sandpaper on a flat surface.
B.
Trial fit the halves and sand the edges as above with a sanding block. Hold the plastic joiner strips supplied in place on the
inside of one half. Leave half of the strip extended over the edge so as to lap onto the other part half when it is attached.
C.
Using a small, pointed brush, flow a few drops of thinner under the edge. It will spread along the seam by capillary action.
(Don't let thinner get under your finger, it will leave a finger print.

.
D. Join the halves with several strips of masking tape. Flow butyrate thinner or acetone into the seam from the inside. Scrape
and sand the seam. A putty may be made from shavings of the waste plastic dissolved in acetone to fill any parts of the
seam that have completely closed.
E.
Carefully cut out the opening for the motor. The cowling for the side-mounted engine must be split through the back edge
on the engine side to permit it to be fitted over the engine. Or the engine can be removed from the mounts and the split
won't be necessary.
F.
Recess a small piece of 3/32" scrap plywood into the 3/32" fuselage sheeting under the cowl (see plan). Do this on both
sides of the nose. Tape the cowl in place and drill pilot holes through the cowl and into the blocks. Attach the cowl with
screws.
G.
The cowling may be painted with Sig Supercoat Dope. Fine sand before doping. Don't apply heavy coats. Allow one coat
to thoroughly dry before applying the next. If other lacquers or enamels are used, check compatability with the plastic on
scraps before painting.
9. OPTIONAL COWL REINFORCEMENT METHOD (Materials not supplied)
The strength of the cowling may be increased by lining the inside with fiberglass cloth and resin. This leaves the outside
surface smooth and easy to paint. The photos show a Sig Kommander cowl, but the same method applies to any Sig
plastic cowl. If the cowl is not a one piece cowl, completely assemble it (directions are given in the booklet or on the
plan) before lining the inside with glass cloth.
1.
Sand the entire inner surface of the cowl with 80 grit garnet sandpaper or similar
coarse grained paper. (Photo 1.) Remove all of the glass from the plastic with the
sandpaper or the resin will not adhere properly. Don't worry about scratches from
the paper, a rough surface will help the cloth and resin stick down.
IMPORTANT: Do not sand the outside of the cowl with this coarse paper. Use
only 220 and 360 Tri-M-Lite paper or equivalant on the outside and avoid
scratching.
2.
Cut a piece of Sig Regular Weight Glass Cloth that will fit into the cowl and cover the entire surface. The cloth is stretchy
and can be formed to the contours. If you have had no experience in handling glass cloth, it may be easier to use two
pieces of cloth, covering half of the inside at a time.
3.
Mix only about 1 to 1 1/2oz. of Sig Glass Resin at a time. Add 4 or 5 extra drops
of hardener over the amount called for in the directions on the can. The cowl area
to be coated is small and will not take much time so the extra hardener will speed
up the set up time. Paint the cloth onto the inside surface of the cowl with the
resin mix. (Photo 2.) Pat out any wrinkles in the cloth while painting. A few cuts
into the cloth around the trim area helps to make the cloth easier to handle. Apply
resin to about 1/8" of the waste cloth sticking out from the cowl all around the
edges. This resined area makes it easier to trim off the excess without the cloth
threads unraveling and makes for a smoother edge.
4.
Do not flex or handle the cowl excessively while the resin is setting up. This may
damage adhesion of the resin to the cowl. When the resin has set up hard, the
waste glass cloth can be trimmed from the edges with a single edge razor blade
or a modelling knife. (See photo 3.)
5.
If there are any uneven spots or ridges in the first 1/4" of cloth inside the back
edge of the cowl, sand them down smooth. Plastic screw hole reinforcement
strips (supplied with some kits) will not be necessary if this glass cloth reinforcing
method is used.

.
IMPORTANT: Since this procedure will make the inside dimensions of the cowl slightly smaller, it will probably be
necessary to sand down the firewall/or nose of the model for best fit. Look ahead to this probability during the building of
the model. You may want to begin to take down the firewall before it is assembled into the fuselage. And, of course, do not
cover or paint the fuselage until the cowl is fitted on to it so that any sanding down of the nose required can be easily
done.
Whether or not you want to use this reinforcement method, be sure and follow this caution about screw mounting.
The most common cause of plastic cowls cracking is distortion of the plastic from
improper installation of the plywood mounting inserts and retaining screws. If the
plastic is fully supported by the plywood underneath, no strain will occur when the
screws are tightened down.
10. DOPING AND DECORATION
CAUTION! READ THIS WARNING
Don't try to cover any of the plastic parts with monokote or other iron-on types of covering material. The heat will
damage the plastic parts.
If this kit has a sheeted foam wing, follow instructions
A
otherwise follow instructions
B
Instructions A:
Match the foam wing cores to each other before sheeting the cores with balsa wood. Sand them as required so they fit
evenly together. This will make it easy to join them together with a good match after they are sheeted without having to
sand down the skin.
Follow directions carefully when applying the balsa wing skins to the foam core. The contact glues will dissolve the
foam if they are too wet when the skins are put on the cores. These dissolved spots in the foam weaken the strength of
the wing and can cause it to fail under load in the air. Have a good "wet" joint in the center of the wing, using plenty of
epoxy glue. The main strength of the wing joint depends on the balsa skin on one half being firmly attached to the balsa
skin on the other half. A "dry" joint with little or no glue in this seam will not be strong enough.
Be careful when covering the wing with iron-on plastic material, since excessive application of heat can melt the foam
core and weaken the wing.
Instructions B:
The model should be covered with silk, rather than Silkspan, due to the large unplanked areas. After final sanding of
the finished framework give it two coats of dope wherever you want the silk to adhere to the framework. Give these
surfaces another final, light sanding. Remember that covering and paint won't cover up poor workmanship. Be sure all
surfaces are smooth. Apply the silk wet but do not stretch too tightly, as it will only encourage warping later on. Pull the
silk up just enough to get out all the slack and wrinkles. Paint dope around the edges. This will soak through and
adhere to the pre doped framework. Let dry before trimming with a sharp double-edged (for thinness) razor blade.
Check for any spots that are not stuck down and apply more dope.
Next give the entire airplane three coats of Supercoat Clear Dope. We recommend spraying if you have a spray gun. If
you spray, reduce the dope at least fifty-fifty with Supercoat Thinner. If you brush, reduce the clear until it brushes
easily and flows out nicely. The clear dope should fill the pores of the silk well. Next apply a fairly heavy coat of Sig
Sanding Sealer. When dry, sand with No. 220 3M Tri-M-Ite paper. Be very careful over the ribs and the edges of the
fuselage that you do not cut through the silk. Use care around stringers and any other projections, as these areas will
sand through much faster than any open area.
Repeat the Sanding Sealer until you have a very smooth surface. It may be necessary to use a third coat. Low spots
and rough areas can readily be seen by holding the model up to the light. If you have done a good job in perparing the
surface, one or two coats of color will be sufficient. After the main color coat has been applied, mask off the pattern for
the trim. After the masking tape has been applied, brush a thinned coat of cleardope along the edge of the masking
tape.

.
This will prevent the trim color from creeping under the edge of the tape. After the trim color has dried, spray a very light
mist coat to clear over the entire airplane. When this has dried it can be followed by two or three fairly heavy coats of clear.
The mist coat of clear forms a barrier between the wet, heavy coat of clear and the trim colors, so that the heavy coat of
clear will not soften the trim colors and cause them to bleed and run. When the final coat of color has dried it can be wet
sanded with No.400 Wet-Or-Dry paper, being very careful not to sand through the clear coat. After sanding buff with Sig
Rubbing Compound, using a soft, damp pad and generous amounts of rubbing compound. Use a brisk rubbing motion,
rather than heavy pressure. When the surface has a smooth, glossy finish, wipe with a clean, dry cloth. Apply decals and a
final coat of wax to seal the decals and protect the surface from dirt and grime.
If the wing develops warps during covering and painting, it should be straightened. One good method is to spray on a thin
coat of clear dope on the warped half and allow to dry until it can be handled - but wait no longer than this. Block the wing
up on a flat surface in a twist that has approximately the same amount of warp in the opposite direction from the original
warp. For example, if the trailing edge is warped 1/4" down at the tip, block it up so that it is twisted into a position with 1/4"
up warp at the same spot. The covering will be somewhat stretchy at this point, with the dope not completely dried out.
The twisting can be done without much trouble and is started in the hands to begin the distortion required before fastening
down on a flat surface. Weights will be necessary to hold the wing in this position for about 24 hours. Don't put the wing on
wax paper or use it between the weights and the wing if you think the dope might be soft enough yet to stick. Use plastic
wrap for this purpose. Wax paper will hinder the dope drying process and may leave a residue that will make it
permanently sticky. When you first remove the wing from the twist it will remain for a while with the new oposite warp.
However, the dope is still not completely cured and the internal stresses of the first warp still remain in the structure. In
about a day, part of the first warp will twist back in the original direction. Hopefully. it will end up zero-zero when the dope
has completely cured, which will take at least a week. If not, a futher adjustment may be required, using the results of the
first attempt as a guide. It is a matter of guess work but the rule of thumb about twisting equally in the opposite direction
seems to work out well in practice.
11. PREPARING CABLE PUSHRODS
To keep ends of the cable from unravelling during handling, tin the end with soldier. Use a non-corrosive paste flux and
resin core solder. Have a hot iron and flow the solder completely through the cable.
Grind or file the end smooth. Bring it to a point so that it will easily insert into the pushrod fittings.
After the proper length is arrived at, sweat solder the area to be cut so that it will not fray and unravel while being cut. It
can be cut with a good pair of side-cutting pliers, filed in two, ground through on the edge of a grinding tool, or cut with a
silicon cutting wheel on a motor tool.
If the RC link fits too tightly in the nylon horn holes, drill the holes out with a No.51 size drill bit.
12. PRE
-
FLIGHT
Set the model up on a table in a level attitude. With a straight edge held along the bottom of the stabilizer, use ruler
measurements to insure that the wing incidence is the proper amount. The bottom of the wing at the cabin brace wire
plywood piece should be 1/8" higher than the bottom of the wing trailing edge.
(Note: For the benefit of experienced multi channel fliers it should be noted that the 1/4" incidence was chosen with the
needs of rudder only and beginning fliers in mind. It provides for sfe hands-off flight. for increased acrobatic ability or
maneuvering qualities you may want to consider reducing the wing incidence to 1/8". This is only recommended for those
whose background includes a sufficient amount of flying and building experience to cope with this change.)
If the wing incidence is not correct, adjust by adding shims under the leading or trailing edge as required. These
corrections should be done before the model is covered.
Be certain to carefully range check your radio equipment and see how it operates with the engine running before
attempting test flights. A lot of problems can be avoided if the engine has been well broken-in and idle adjustment
perfected on a test block or in another airplane before installation in the model.
A properly balanced and aligned model with a reliable engine and radio is assured of successful test flights.
13. BALANCING
The Center of Gravity position shown on the plan is the rearward limit. Do not balance any farther back than this point
even if lead must be added to the nose. Trying to fly with the C.G. too far back is much more dangerous than the slight
increase in wing loading caused by adding nose weight. Balance with an empty fuel tank. For test flights it is
recommended that the C.G. be positioned 1/2" to 3/4" ahead of the plan location. When slightly nose heavy the model is
much more stable and less likely to stall or snap roll.

.
The reaction to control movements is also less sensitive with a forward C.G. so it is not easy to overcontrol. Some
aerobatic ability may be sacrificed with a forward C.G. so you may wish, after test and familiarization flights, to move, it
rearward. Do this gradually and check results and control response in the air at a good altitude.
WARNING - DANGER! -Important: Read These Warnings:
Do Not fly control line or towline models within 300 feet of electric power lines. Instant death from electrocution
can result from coming near them. Direct contact is not necessary.
A model airplane motor gets very hot and can cause serious burns. Do not touch the motor during or after
operation.
Keep clear of the propeller. It can cut off a finger or put out an eye. Make sure the propeller is securely
fastened in place and is not cracked.
Model airplane fuel is flammable and poisonous. Take the same precautions while transporting and using it
that you would with a can of gasoline or a bottle of poison.
Remember that it is possible to lose control of a model airplane. Do not fly in locations where the model may
hit people or damage property if loss of control occurs.
Check your model and equipment regularly to insure it is in safe operating condition.

.

.
© Copyright SIG Mfg. Co., Inc.
SIG MFG. CO., INC............Montezuma, Iowa 50171
-
0520
LIMIT OF LIABILITY:
In use of our products, Sig Mfg. Co.'s only obligation shall be to replace such quantity of the product proven to be defective.
User shall determine the suitability of the product for his or her intended use and shall assume all risk and liability in
connection therewith.
/