Page is loading ...

! INSTALLATION!INSTRUCTIONS!
FLTW-7692 instructions 10-14-16.doc Page 1 of 2 GS
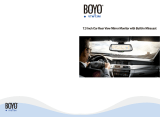
7.3” Display mirror w/3 video inputs and D-tab mount
(FLTW-7692)
Please read thoroughly before starting installation and check that kit contents are complete.
Items Included in the Kit:
Tools & Supplies Needed:
7.3” Display Mirror
Power/Video harness
Remote control
Zip ties
These instructions
Wire strippers
Wire cutters
Electrical tape
Zip ties
Plastic panel removal tools
Digital Volt Meter / BCM safe test light
Screwdriver
Socket set
Wrench
Safety Precautions:
• Work in well ventilated area that is clear of obstructions.
• Secure vehicle with tire chucks in both front and rear of tires.
• Turn vehicle accessories OFF and ensure ignition key is in OFF position.
• Wear safety goggles and snug fitting clothes.
• Use tools only for their intended purpose and which are in good repair.
• Only perform this task if confidence, skill, and physical ability permit.
NOTE: We strive to provide accurate and up-to-date installation instructions. For the latest full color
instructions, as well as an installation video, please visit www.brandmotion.com

! INSTALLATION!INSTRUCTIONS!
FLTW-7692 instructions 10-14-16.doc Page 2 of 2 GS
1. Remove old mirror from mount on
windshield as per manufacturer’s directions.
2. Install new mirror on to D-tab and tighten
with a Phillips screwdriver.
3. Connect the power harness to the plug on
the mirror. Route the harness down the A-
pillar to the under dash to make the power
connections.
4. Connect the RED wire from the mirror
harness to 12-volt accessory power.
5. Connect the BLACK wire to a solid ground.
6. Connect the green wire from the mirror
harness to the positive 12-volt reverse wire
in the vehicle.
7. Connect the rear camera to the video input
on the mirror labeled Camera.
8. If you are using the other video input on
the mirror, you can connect them as well.
Video 1 and 2 use the manual trigger wires
to trigger a full screen view of the image.
Or you can use the CH touch button on the
left side of the mirror glass to turn on the
cameras images.
9. To turn off the cameras that are showing on
the mirror, press the power button to turn
them off until they are triggered again.
10. The start up screen can be turned off from
the remote. Press the menu until you see
the function and then press up or down.
11. The parking scale can be turned off or
adjusted from the remote. Press the menu
button and until you see scale and the press
up or down. To adjust the lines press the
center button in the circle and use the
button below and to the left to move the
parking line. Press the button in the center
again to move to the other side. (Camera
must be triggered from the green wire to
adjust the scale lines.)
12. Test the mirror by placing the vehicle in
reverse and see if the camera image shows
on the display of the mirror.
13. Reassemble the vehicle in reverse order.
/