Page is loading ...

1
Privacy Gate Assembly Instructions
TOOLS REQUIRED
Post Hole Digger or Power Auger (min. 12” diameter auger required)
String Line, Stakes and String Level
Level (36” or longer)
Shovel and Hoe
Power Drill and Drill Bits
Wheelbarrow (to mix and transport concrete)
Tape Measure
Safety Glasses and Work Gloves
No. 2 Phillips Head Screwdriver
4 Pieces of 6 ft long #4 rebar
PVC Adhesive
The following instructions will guide you through the assembly and installation of
your new privacy gate.
Installation Steps
Step 1. Layout Fence and Position posts
•Remember – Consider soil conditions, slopes, utility locations and property lines when
positioning posts.
• Run a string line to locate the fence line, using the line to establish the outside faces of
your posts (Fig 1).
• Stake out the fence posts, locating line, corner, end and gate posts. Mark the centers of
the post locations for your fence and gate using dimensions from the Post Location Chart
below.
Post Location Chart
The following chart summarizes the size and measurements for posts, fence style and gate
width.
.
Fence Style Post Gate Po st On Center
Size Opening Distance*
Privacy 5 x 5 44” 49”
* On-Center means from center of one post to the center of the next post.
Step 2. Set Fence and Gate Posts
•
Remember – Call before you dig. Contact your local utility providers to locate underground
utilities in the area.
•
Dig or auger post holes based on the dimensions in chart below. Ensure that the bottom of the Fig. 3 Make-up of a post hole
post is set at exactly 32" below grade for the Privacy Gate plus a 6" gravel base in each hole
(Fig. 3).
•
Mix concrete according to manufacturer’s specifications. Place and hold the post while pouring concrete 6" at a time and tamping to eliminate air
pockets. Leave enough space at the top of the concrete to allow sod to grow around post. Set the correct post height, plumb and level each post.
•
Before concrete sets, site down the fence line and adjust posts, if necessary. If posts are too high, place a wooden block across the top of the post
and tap down with a rubber mallet. Allow post concrete to set 24 – 48 hours before
hanging gate
in place.
Post Hole Post Hole
Fence Style Post Size Post Depth (A) Depth* (B) Diameter (C)
Privacy 5 x 5 32” 38” 12”
•
*Remember – In frost regions, determine how deep you need to dig the post holes to ensure
concrete extends below the frost line.
.
.

2
Step 3. Assemble Gate
Having set your posts, you are now ready to assemble the gate. Remember – Protect the finish of your gate during assembly by assembling on a dry,
clean and flat surface.
a.) Measure Gate Opening: Ensure that the gate opening is between 43” and 44”.
b.) Install U-channels to Uprights: Center the U-Channel on the 2 x 3-1/2 uprights between the routed holes and secure it with the three 3/4” self-
tapping screws provided using the No. 2 Phillips Head Screwdriver. Repeat with the second U channel on the other upright. Note: The top and
bottom screws should be about 2” from inside of the top and bottom rails.
c.) Insert Rails. Insert rails into one of the 2 x 3-1/2 uprights.
d.) Install Panels: Slide panels into place in the rails. Ensure tongue and groove of each panel lock together.
e.) Install Second
Upright: Insert rails into the second upright and push uprights together as far as they can go.
g.) Square Gate and Secure rails in two 2 x 3-1/2 uprights: Square the gate using the carpenters square and secure the top and bottom rails in the
2 x 3-1/2 uprights using two 3/4” self-tapping screws provided at top and bottom of stiles on both sides of the gate.
h.) Install 2 x 3 1/2 Caps: Glue caps onto the 2 x 3 ½ stiles with a UV rated PVC adhesive.
Step 4. Determine and Install Hinge and Latch Locations
•
Install hinges and latch on gate according to the instructions provided with the hinge and latch box kit.
Step 5. Reinforce Gate Posts with Concrete and Rebar Reinforcement
•
Make sure to install hinges and latch prior to reinforcing the inside of the gate posts.
•
Reinforce the inside of the hinge and latch posts with two 6’ pieces of #4 rebar.
•
Pour concrete into posts, tamping occasionally to remove air pockets.
•
Allow post concrete to set 24 to 48 hours before
hanging gate
in place.
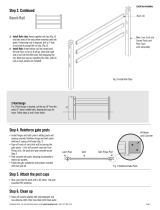
Step 6. Hang Gate
Care & Cleaning
Occasionally, you may want to clean your fence. To do so, simply hose it off with your garden hose, using the spray nozzle. For tougher dirt, use
warm water and mild, non-abrasive detergent (e.g. dish washing liquid) and non-abrasive cloth or soft scrub brush. DO NOT use abrasive
cleaners, pads or hard scrub brushes – these may scratch the surface and affect the finish. For stubborn stains, use a soft cloth with PVC cleaner
available from your local hardware store.
/

