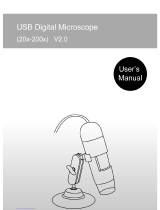
VMS-006-DX1

Veho VMS-006-DX1 User manual

  • Hello! I am an AI chatbot trained to assist you with the Veho VMS-006-DX1 User manual. I’ve already reviewed the document and can help you find the information you need or explain it in simple terms. Just ask your questions, and providing more details will help me assist you more effectively!
VMS-006-DX1
User Manual
2 3
n Veho DX-1 Microscope
n Adjustable cradle stand
n SowareCD
n Quick start guide
n Calibraonruler
n Cleaningcloth
What’s in the box?Introduction
TheVehoDX-1microscopeallowsyoutoexplorethemicroscopicworld.Highlyusefulfor
students,teachers,laboratoryresearch,medicalanalysis,repairservicesorhobbyists.
Pleasetakeamomenttoreadthroughthismanualtoensureyougetthemostoutofthe
microscope.Keepthismanualsafeforfuturereference.
Beforeusingthemicroscope,pleasereadthesafetyprecauonsbelow.Alwaysensure
thattheunitisoperatedcorrectly:
n TheDX-1microscopeisnotwaterproof
n Useandstorewithinacool,dryenvironment(-5°C–50°C),avoidusingindamp
condions
n Donotpointthelenstowardsthesunorastronglightsource,thismaydamage
the microscope
n Avoidtouchingthelens,unlesswiththesuppliedcleaningcloth
n DonotstaredirectlyintotheLEDs;theymaydamageyoureyes
If you require assistance or have any quesons about the DX-1 Microscope,
please contact us through our Live Chat on our website at:
veho-world.com
4 5
Assembling the DX-1 Microscope
1 2 3 4
‘Click’
Posionthecradle
standuprightwiththe
lockingnutghtened.
Alignxingpointson
microscopewithxings
oncradle.
Gentlypush
microscopeunlclicks
intoplace.
Theangleofthecradle
canbeadjustedbyundoing
thelockingnut.
Focus WheelAdjuststhefocusofthe
microscope on the object
Brightness Wheel Adjust the brightness
ofthe8LED’s
Cradle StandFullyadjustablealloystand
Locking NutLoosentoadjusttheangleof
thestand,onceinposionghtenthenut
Guide to the DX-1 Microscope
2
4
3
1
1
2
3
4
6 7
ToinstalltheMicroCapturePlussoware,usethesupplied
sowareCDorvisitourwebsitedownloadareaat:
veho-world.com/downloads
Oncedownloadedontoyourdesktop,double-clicktheinstall
buonfor‘MicroCapturePlus’andaccepttoinstallthe
sowareontoyourPC;theinstallaonwillbegin.
Installing microscope software
Operang system requirements
n Windows-7/8/10
MacOS-10.12andlater
n P41.8orabove
n RAM 1GB
n VideoMemory126M
n USBport2.0
PluginthemicroscopebeforeopeningMicroCapture
soware.Onceconnected,openMicroCapture
sowaretostartusingthemicroscope.
Ifthemicroscopeisnotrecognisedorhasbeen
disconnectedanocaonwillbedisplayed.
Connecting the DX-1 Microscope
8
Focusing the microscope
9
Tofocusthemicroscoperotatethefocuswheelon
thefrontofthemicroscope;clockwisetozoom-in
oran-clockwisetozoomout.Usingthesoware,
youwillbeabletoseeonscreenwhethertheDX-1
isfocused.
Captureasllphotoorvideofootageat
anypointwhenusingthemicroscope,use
theiconsordropdownmenuwithinthe
MicroCapturePlussoware.
Sengandpreferencescanalsobe
adjustedwithinthesoware,these
include:
n Resoluon
n Dateandme
n Interfacelanguage
n Full-screen mode
n Timerforphoto/videocapture
Using the software
10 11
Calibraon
Ensure‘DisplayCrossing’isturnon,goto
‘Opons>XYGuide>On/O.
Themicroscopewilldefaulttocrossing
‘On’,werecommendthatthisisleon.
Step 1 Focus the microscope on the
suppliedcalibraonruler,adjustthe
magnicaonwheelunlthepictureis
clear.Takeapictureoftheselectedarea
whentherulerlinesareparalleltothe
blueXYguides,asshownintheimage.
Step 2 Double-click on the image
captured to enter the measurement
interface.
Step 3 Once the image is open, click on
thecalibraonicon.Usingthemouse,
clickonthebeginningandendingpoints;
youmustknowthedistancebetweenthe
points(usingtheruler).Adialoguebox
willpopup,entertheexactvalueofthe
measurementinto‘Actualdimension’.
Thesowarewillautomacallycalibrate
themagnicaonrate.Click‘OK’andthe
adjustedmagnicaonratewillshowin
theupperrightcorner.
Step 4Nowusing‘AnyAngleLine’,
under the measurement icon, measure
thesamedistanceagain.Ifthevalue
measuredisapproximatelythesameas
theactualvalue,thencalibraonhas
beensuccessful.
Calibration & Measurements
12 13
Measurements
Double-click on the image to enter the
measurementinterface.Underthe
‘Measurement’icon,chooseanyofthe
followingoponstomeasure.
Any Angle Line Measurement Clickandhold
fromonepointanddragtothenextpoint,
thenrelease.
Connuous Line MeasurementAllowsyou
tomeasureanyconnuouslength.Click,
holdanddragfromonepointtoother
points,thenrelease.
Radius Circle MeasurementClick,holdand
extendouttothechosenradius.Theradius,
circumferenceandareaofthecirclewillbe
calculated.
Diameter Circle MeasurementClick,
holdandextendouttothechosen
diameter.Thediameter,circumference
andareaofthecirclewillbecalculated.
Three Points Angle Measurement Select
anythreepoints,theanglevalueswillbe
calculatedanddisplayed.
14 15
Changing Calibraon
Usethefollowingstepstochangecalibraonsengs.
1. Double-clicktoopentheimage,clickthe
‘Calibraon’icon,andselect‘ResetMagnicaon’
andthen‘ResetPictureMagnicaon’.Thenstart
calibraonagain.
2. Changethemagnicaonrateandcaptureseveral
images, click on the image to enter measurement
interface.Select‘SetMagnicaon’then‘Set
PictureMagnicaon’,adialogueboxwillappear;
enteryourchosenmagnicaonrateandclick‘OK’.
3. Ifyouwanttousethesamemagnicaonrateto
capturepictures,click‘SetMagnicaon’then‘Set
CaptureMagnicaon’tosavesengs.Allpictures
willusethesamemagnicaonrate.
Youcanannotatecapturedimagesusing
thedraworaddtextfeatures;thisis
usefulwhenusingforlateranalysis.
1. Clickthepencilicontobringupthe
drawingdropdownlist.Selectyour
preferredtool,andstartdrawingon
theimage.
2. Clickthetexticontoaddwring
toyourcapturedimage.Fromthe
dropdownselectyourpreferredfont,
sizeandtextcolour.
Adding drawing and text
16 17
Specifications
Image sensor 2MegaPixels
Photo resoluon 1920x1080,1280x720,640x480
Video resoluon 1920x1080,1280x720,640x480
Focus range Manualfocusfrom0mmto150mm
Magnicaon rao 10xor200x
Video format AVI
Photo format JPEG
Light source 8LEDs(brightnessadjustable)
PC interface USB2.0
Power source 5VDCfromUSBport
System requirements Windows7/8/10,Mac10.12andlater
Languages English,German,Spanish,Russian,Italian,French,Portuguese,Dutch,Polish,
Japanese,Korean,Chinese
Bundle soware MicroCapturePlus(withmeasurementforWin/Mac)
Dimensions Microscope:110mmx33mm
Troubleshooting
Problem Soluon
Photocaptureorvideoisblurredorshaky Theimageisnotinfocus,correctthisbyturningtheFocusWheel.
Usethemicroscopestandwhencapturingimagestoavoidshake.
Microscopedoesnotturnon TryadierentUSBport.
DownloadtheMicroCapturePlussoware.
Screenisblank Ensurethatthesowareisopenandthescopeispluggedin.
Checktheitemyouwanttoviewisposionedcorrectlyunderthe
lens.Ensurethescopeisfocused.
Imagelookssmudgedorblurred Cleanthescreenandlenscarefullywithsuppliedcloth.
If these do not solve your problem please contact us via our Live Chat on our website at:
veho-world.com
IntheeventyouneedtocontactVehoforsupportortroubleshootingfor
yourVehoDX-1Microscope,pleasecontactusviaourLiveChatonourwebsiteat:
veho-world.com
Support
/