Page is loading ...

www.rexton.com
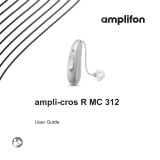
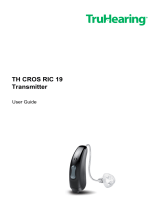
CROS inoX 8C
Transmitter
User Guide

2
Content
Welcome 4
Your CROS transmitter 5
Components and names 7
Signal tones 8
Batteries 9
Battery size and handling tips 9
Replacing batteries 10
Daily use 11
Turning on and o 11
Inserting and removing the transmitter 11
Maintenance and care 15
Device 15
Ear pieces 16
Professional maintenance 19
Further information 20
Explanation of symbols 20
Operating, transport and orage conditions 21
Troubleshooting 22
Disposal information 22
Conformance information 23
Country-specic information 25


4
Welcome
Thank you for choosing one of our hearing inrument
accessories.
This guide, along with support from your Hearing Care
Professional, will help you underand the advantages
and greater quality of life this accessory oers.
CAUTION
It is important to read this user guide thoroughly
and completely. Follow the safety information to
avoid damage or injury.

5
Your CROS transmitter
CROS solutions are designed for people with profound
hearing loss in one ear which can not be aided with a
hearing inrument. A CROS transmitter worn on this
ear captures sound from this side and transmits it to
the hearing inrument on the other ear. This allows the
wearer of the hearing inrument to hear sounds from
both sides.
CROS transmitter hearing inrument

6
Two solutions are available:
■ CROS solution:
For people with normal hearing in one ear and
profound hearing loss in the other. Sounds from the
side with hearing loss are captured and transmitted
wirelessly to the good‑hearing side.
■ BiCROS solution:
For people with profound hearing loss in one ear
and less severe hearing loss in the other. Sounds
from the more severe hearing loss side are captured
and transmitted wirelessly to the better‑hearing side.
The hearing inrument processes and amplies the
sounds from both sides.
The CROS transmitter works with our specic wireless
hearing inruments. Your Hearing Care Professional will
advise you on the compatible models.
NOTICE
This user guide only applies to the CROS
transmitter. Your hearing inrument has a
separate user guide.

7
Components and names
➋
➋
➋
➊ Ear piece (Click Sleeve)
➋ Microphone
➌ Battery compartment
(on/o switch)
➍ Removal cord
You can use the following andard ear pieces:
Standard ear pieces Size
Click Sleeve
(vented or closed)
Click Dome™ single
(open or closed)
Click Dome semi‑open
Click Dome double
You can easily exchange the andard ear pieces.
Read more in section "Maintenance and care".

8
Signal tones
Signal tones of the CROS transmitter ‑ like a low battery
beep - are sent to the hearing inrument.
Ask your Hearing Care Professional to congure the
signal tones.

9
Batteries
When the battery is low the sound becomes weaker
or you will hear an alert signal. The battery type will
determine how long you have to replace the battery.
Battery size and handling tips
Ask your Hearing Care Professional for recommended
batteries.
Battery size: 10
■ The "battery low" signal of the CROS transmitter and
the "battery low" signal of the hearing inrument have
dierent melodies.
■ Always use the correct battery size for your device.
■ Remove the batteries if you intend not to use the
device for several days.
■ Always carry spare batteries.
■ Remove empty batteries immediately and follow your
local recycling rules for battery disposal.

10
Replacing batteries
Removing the battery:
XOpen the battery
compartment.
XRemove the battery by
hand.
Inserting the battery:
XIf the battery has a protective lm, remove it
only when you are ready to use the battery.
XInsert the battery with the
"+" symbol facing upwards.
XCarefully close the battery compartment. If you feel
resiance, the battery is not inserted correctly.
Do not attempt to close the battery compartment by
force. It can be damaged.

11
Daily use
Turning on and o
XTurning on: Close the battery compartment.
The transmitter turns on after a delay of several
seconds (power-on delay).
XTurning o: Open the battery compartment.
Inserting and removing the transmitter
CAUTION
Risk of injury!
XAlways wear the device with an ear piece.
XMake sure that the ear piece is completely
attached.
Inserting:
XIdentify right and left device so that you insert it in the
correct ear. The labeling or the color of the device
indicates the side:
red color, imprinted "R" = right ear
blue color, imprinted "L" = left ear

12
XTake care that the flap of the Click Sleeve matches the
line printed on the device.
correct incorrect
XHold the device correctly before inserting it: Pay
special attention to the removal cord indicating the
bottom. The arrow which is printed on the device has
to point upwards.
L R

13
XCarefully push the device
into the ear canal.
XTwi it slightly until it sits
well.
Open and close
your mouth to avoid
accumulation of air in the
ear canal.
CAUTION
Risk of injury!
XInsert the device carefully and not too deeply
into the ear.
■ It may be helpful to insert the right device with
the right hand and the left device with the left
hand.
■ If you have problems inserting the device,
use the other hand to gently pull your earlobe
downwards. This opens the ear canal and eases
insertion of the device.

14
Removing:
NOTICE
Never pull on the battery compartment door to
remove the device. This could damage the device.
XPush lightly on the back of your ear to loosen the
device.
XRemove the device by pulling the removal cord
towards the back of your head.
CAUTION
Risk of injury!
XIn very rare cases the ear piece could remain
in your ear when removing the device. If this
happens, have the ear piece removed by a
medical professional.
Clean and dry your device after usage. Read more in
section "Maintenance and care".

15
Maintenance and care
To prevent damage it is important that you take care of
your device and follow a few basic rules, which will soon
become a part of your daily routine.
Device
Drying and orage
XDry your device overnight.
XFor longer periods of non-use, ore your device in a
dry environment with an open battery compartment
and the batteries removed.
XAsk your Hearing Care Professional for more
information.
Cleaning
Your device has a protective coating. However, if not
cleaned regularly you may damage the device or cause
personal injury.
XClean your device daily with a soft, dry tissue.
XNever use running water or immerse the
device in water.
XNever apply pressure while cleaning.
XAsk your Hearing Care Professional for recommended
cleaning products, special care sets, or more
information on how to keep your device in good
condition.

16
Ear pieces
Cleaning
Cerumen (ear wax) may accumulate on the ear pieces.
This may aect sound quality. Clean the ear pieces daily.
XClean the
ear piece right
after removal
with a soft and
dry tissue.
This prevents
that cerumen
becomes dry
and hard.
XSqueeze the tip of the ear piece.
Exchanging
Exchange andard ear pieces approximately every
three months. Replace them sooner if you notice
cracks or other changes. The procedure for exchanging
andard ear pieces depends on the type of ear piece.
In section "Components and names", your Hearing Care
Professional has marked your type of ear piece.

17
Exchanging Click Sleeves
XGrip the Click Sleeve with your ngers and pull it o. If
you cannot grip it, turn it inside out and then pull it o.
XTake particular care that
the new Click Sleeve
clicks noticeably in place.
click

18
XWhen inalling the new Click Sleeve, take care that
the flap of the Click Sleeve matches the line printed on
the device.
correct incorrect

19
Exchanging Click Domes
If you have problems removing the old Click Dome,
use the removal tool or follow the inructions on the
packaging of the Click Domes:
The removal tool is available as an accessory.
XTake particular care that
the new Click Dome clicks
noticeable in place.
Professional maintenance
Your Hearing Care Professional can perform a thorough
professional cleaning and maintenance.
Ask you Hearing Care Professional for your individual
recommendation of maintenance intervals and for
support.

20
Further information
Explanation of symbols
Symbols used in this document
Points out a situation that could lead to serious,
moderate, or minor injuries.
Indicates possible property damage.
Advice and tips on how to handle your device better.
Symbols on the device or packaging
CE compliance label, conrms compliance with
certain European Directives, refer to section
"Conformance information".
EMC and radio communications
compliance label Auralia, refer to section
"Conformance information".
Indicates the legal manufacturer of the device.
Do not dispose of the device with general
domeic wae. Read more in section
"Disposal information".
Read and follow the inructions in the user
guide.
/