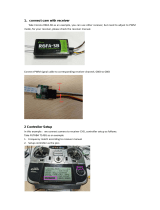
Page is loading ...

TBS POWERCUBE - Multirotor Stack patented!
All-in-one racing flight control, speed control and power distribution
Revision 2017-03-09
The next generation plug&play RACE system. Design optimized for ultimate performance and reliability.
Compatible with any multi-rotor frame.
Key features
• Ultra-lightweight and high-performance multi-rotor stack
• Designed to be bundled and sold with any 120 to 330mm size frame
• Stacked boards for extreme durability
• Based on fast STM32F3 flight controller
• Innovative patent-pending wire-free power distribution through stand-offs
• True plug & play, no soldering required
• Cost-efficient and field-repairable
• Tested, developed and flown by the world’s leading pilots
• Highest quality aluminum screws, brass standoffs and electronic components
• Standard 36x36mm dimension, 70g incl. PDB, wires & connectors
• Upgradable from compact to extreme configurations
1

Specifications
TBS COLIBRI - Flight control layer
Hardware:
• STM32F303RCT6 72MHz 256kB MCU/FPU
• MPU6000 3-axis Gyro NEW!
• Separate ultra-low noise LDO for IMU NEW!
• Auto resettable polyfuse to protect the FC against short circuits NEW!
• ESC connection pads for 4 ESC NEW!
• Motor PWM auto-connecting PWM/OneShot/Multishot signals
• Bootloader tactile switch for easy firmware update
• 5V for receiver and FC over internal BUS System
Software:
Cleanflight or Betaflight with BST and pass-through ESC support, firmware:
http://ww.team-blacksheep.com/powercube/colibri-latest.zip
Compatibility:
Tri-, quad- and hexacopters
In/outputs:
• 1x Receiver port - PPM, SBUS or SPEKTRUM (PPM, UART2, 5V, 3.3V)
• 1x RGB LED driver port with regulated 5V
• 1x GPS/compass/altitude port (UART3, I2C, 5V)
• 1x UART serial port (UART1)
• 1x Piezo buzzer port for active driven buzzers
• 1x Internal BUS system (6x PWM, 1x BST, 5V, 12V)
• 4x ESC solder pads NEW!
• 1x Servo Output for tricopters or any Servo function
• 2x VBatt (North-East & South-West corner)
• 2x GND Batt (North-West & South-East corner)
• 1x USB port (STM VCP)
• 1x Push button - DFU boot mode
Connectors:
JST-SH 1.00mm with 2.54mm pin header
TBS BULLETPROOF 20A - Speed control layer(s)
Firmware:
TBS 20A, BLHeli 14.6 , SimonK customized available
Supports:
OneShot, active/regenerative braking, safety cut-off (simonk)
Hardware:
• 1x ATmega8A MCU
• Electrolytic capacitors - crash resistance!
• Efficient high-performance FET drivers
Maximums:
Current draw
20A constant - with 5mph airflow
30A constant - with good airflow
45A burst, 10 seconds
Supply voltage
2S, 3S, 4S, 5S, 6S compatible
In/outputs:
• 2x VBatt (North-East & South-West corner)
• 2x GND batt (North-West & South-East corner)
• 1x Internal BUS-system (6x PWM, BST, 5V, 12V)
• 1x PWM-pads for custom installations
• 3-phase brushless motor output
2

TBS PDB V2 with integrated DCDC - Power distribution and power supply layer (NEW!)
Power distribution:
100A max. continuous current, 150A burst
Current sensor:
100A, 0.1A resolution, 2% accuracy, BST-compatible (e.g for TBS CORE PRO)
Inputs:
• 1x Battery V+ and GND, 150A max
• 1x Internal BUS system (6x PWM, BST, 5V, 12V)
Ports:
• CAM - FPV camera port, 5V/12V selectable on PCB (factory set to 12V)
• VTX - FPV video transmitter port, 5V/12V/VBat selectable on PCB (factory
set to 5V)
• BST - BlackSheep Telemetry port, connects to TBS CORE PRO OSD
Power supply:
5V @ 4A NEW!, 12V @ 0.2A, combined max. draw
Connectors:
Molex Picoblade 1.25mm, 4-pin for VTX and CAM, 5-pin for BST
TBS POWERCUBE - Stack details
Working temperature:
0°C to 85°C
Dimensions:
36 x 36 x 30mm (with 4 ESCs)
Weight:
70g - brass standoff version
62g - aluminum-gold standoff version (available in PRO tuning kit)
Basic kit contents:
• 1x TBS COLIBRI V2.0 flight control NEW!
• 4x TBS BULLETPROOF speed control w/2mm female bullet connector
• 1x TBS PDB V2 w/ XT60 connector NEW!
• 1x Plastic isolation layer
• 1x PPM/SBUS cable
• 1x Spektrum cable
• 1x Piezo buzzer
• 1x LED pigtail
TBS FPVision OSD/VTX - CORE PRO OSD, Video Transmitter, Power Distribution and Power Supply
Power distribution:
100A max. continuous current, 150A burst
Current sensor:
100A, 0.1A resolution, 2% accuracy
Inputs:
• 1x Battery V+ and GND, 150A max.
• 1x Internal BUS system (6x PWM, BST, 5V, 12V)
• 1x VTX menu button
Ports:
• 2x CAM - FPV cam port, 5V/12V selectable via TBS Agent (5V default)
• 1x BST - BlackSheep Telemetry port, connects to TBS ecosystem
• 1x U.FL SMD VTX antenna connector
Power supply:
5V @ 4A, 12V @ 0.2A, combined max. draw
Connectors:
Molex Picoblade 1.25mm, 4-pin for CAM inputs, 5-pin for BST
3

Attention
The TBS POWERCUBE, when installed, can easily damage property or extremities if not used properly. Always
ensure that no propellers are installed when configuring, installing or tuning your multirotor. We also
recommend to use the options “Spin motor when armed” and use stick commands to arm your multirotor,
rather than switches.
NEVER leave the platform powered on and unattended. Always check proper failsafe (power down)
functionality, and try not to break too many laws while flying FPV (TBS can not be held responsible is what we
are saying.)
Only disassemble/reassemble with proper tools! Take extra care to components that are situated around the
standoffs. Check the maintenance section before attempting to open up the PowerCube!
4

Table of content
Attention
TBS POWERCUBE Overview
Installation
Mounting on your frame
Carbon fiber frames
Finalizing your installation
The first flight
TBS POWERCUBE on the TBS VENDETTA quadcopter
TBS FPVision - CORE PRO OSD, UNIFY PRO VTX, VID SWITCH, BEEPER, DCDC
RC Calibration - Push button
Camera port switch
FPV Camera OSD control
Camera 5V/12V software selector
Board connection diagram
TBS COLIBRI V2 - Flight control
Overview and connections
North
East
South
West
Configuration and tuning
Default Values
Driver installation
Updating firmware using TBS Agent (recommended)
Updating firmware using CleanFlight
Upgrade via CleanFlight
CleanFlight Configurator issues
Upgrade via DFU (developer use)
TBS BULLETPROOF 25A ESC - Speed control
Configuration
Firmware upgrades
ESC / Interface table
TBS POWERCUBE PDB V2 - Power distribution
Selecting VTX and CAM voltage
Connecting FPV camera and transmitter
Making older TBS PDB V1 compatible with newer TBS COLIBRI FC
Troubleshooting FPV Transmitter / Camera
5

TBS Elite Bundle / External ESC PDB layer
TBS POWERCUBE Drag Race Shield
Connecting TBS equipment
Connectivity with TBS CORE PRO OSD
TBS CORE PRO Connection
Entering OSD configuration menu
RC Calibration (mandatory)
Calibrate new setup
Read RC data from existing setup
Maintenance
Replacing components
Tuning
Troubleshooting
Good practices
6


Installation
Mounting on your frame
The TBS POWERCUBE should be placed in the same
spot where the flight controller is normally installed.
The TBS POWERCUBE carries power (VBatt, GND) over
the four standoffs in the corners, alternating between
VBatt and GND. For this reason, the two screws
carrying power (VBatt) are hidden underneath the
double sided sticky tape on the bottom of the TBS
POWERCUBE. The tape isolates them from the carbon
fiber frame. The ground-carrying standoffs should be
used to bolt the TBS POWERCUBE onto the frame. In
combination with the tape, this creates a very solid
mount.
The corners on the top layer indicates the polarity of the power, i.e. “+” for VBatt and “-” for GND, as shown in
the image below.
8

Installed from the factory are super-lightweight M3 aluminum screws. They are anodized to protect against
short circuits. The provided mounting screws are made for frames up to 2mm thickness. If your frame is
thicker, please use below table to find the correct screw length:
Frame thickness:
Recommended mounting screw length:
1.6mm
M3x6 (included in kit)
2mm
M3x6 (included in kit)
2.5mm
M3x7
3mm
M3x7
4mm
M3x8
5mm
M3x9
Carbon fiber frames
Carbon fiber frames can conduct electricity, therefore the lower plastic isolator bed must be used. If you are
mounting the stack onto power distribution boards or G10 frames, you can use smaller nylon washers or
stand-offs (3mm shorter) instead of the plastic isolation bed.
Frame type:
Mounting options:
G10, other glass fiber materials
No plastic bed, mounting screws on all four corners
Carbon Fiber, FR4 with copper
Plastic bed required, mounting screws only on GND “-” corners
When using carbon fiber plates, make sure that you only screw the mounting (GND) screws through the
frame, the power-carrying screws (VBatt) remain isolated inside the plastic bed.
Make sure that no power carrying elements can get in touch with the carbon frame except ground
(Powercube GND, VTX antenna socket etc.).
Pay special attention to motor phases, also make sure the screws are not too long to push up into the motor
windings.
9

Finalizing your installation
If you have a multimeter handy, make a quick test if Vbatt and GND do not short. You do this with the “sound”
or “Ohm” setting on your multimeter, and then probing on the 2 pins inside the XT60 connector. If there is no
short (no beep and not reading 0.00 Ohm), connect a battery and a receiver. If you have a CORE PRO, you can
now simply turn on your FPV display or goggles and run the calibration wizard. After this, all your channels
are mapped correctly. If you are not using the CORE PRO, you will need to ensure that the channels are
correctly mapped using the CleanFlight Configurator software and your R/C.
Then, start your motors and ensure they are spinning in the right direction. The arm
command is yaw-right, throttle at zero. The motors will spin in idle. Verify that the
motor directions matches the right diagram. If they do not match, you may need to
flip two of the three connector cables. Also, now is a good time to double-and-triple
check that motor 1, 2, 3 and 4 are wired up to the correct layer in the TBS
POWERCUBE stack.
The first flight
When preparing for the first flight, there are a couple of things to consider.
1) Do not move the model while plugging in the battery and during the first 4 to 5 seconds after
powering up. During initialization the gyro must remain idle, otherwise the self-calibration will be
wrong. If you have installed LEDs or a Buzzer, they will indicate when the model is ready to take off by
3 distinct beeps and solid LED color on all LEDs using the “Warnings” LED setting.
2) If the model immediately flips or rolls during take-off, verify that the TBS POWERCUBE flight
controller is oriented in the correct way and that all motors are plugged into the correct position of
the TBS PowerCube stack. The arrow on the board must face flight forward. Also, verify that the
motor spin directions are correct.
10

TBS POWERCUBE on the TBS VENDETTA quadcopter
The TBS VENDETTA has a full POWERCUBE installed at its core. It powers the R/C receiver, flight control,
motors, buzzer, LED backplate and DCDC power system. The OSD is powered by a separate TBS CORE PRO.
The instructions for the TBS VENDETTA can be found at:
http://www.team-blacksheep.com/tbs-vendetta-manual.pdf
11

TBS FPVision - CORE PRO
OSD, UNIFY PRO VTX, VID
SWITCH, BEEPER, DCDC
The TBS FPVision is a new layer for the
POWERCUBE and it is our latest innovation
(released October 2016). It packs a powerful
punch in a small package, it combines the CORE
PRO OSD, DCDC, UNIFY PRO 5G8 VTX, dual
camera/switch and TBS 100A Current Sensor in
one layer and replaces the normal DCDC layer. The current sensor can estimate your battery capacity and
display accurate capacity remaining. The OSD engine was improved to support a variety of advanced display
features, but still builds upon the CORE PRO stack. The TBS FPVision directly replaces the bottom layer (PDB
V1 or V2) in the normal POWERCUBE stack, the Unify Pro VTx and the CORE PRO OSD in your build. The
stacking height or other functionality is not affected.
For instructions on how to use the OSD, please consult the TBS CORE PRO manual as this is what is at the
heart of the FPVision board. While for the VTX, check the TBS UNIFY PRO VTX manual in more detail.
There are some additional features built into the camera ports of the FPVision that the regular TBS CORE PRO
does not support, which we will explain in the following sections.
RC Calibration - Push button
The TBS FPVision only has a single push button available as an external input. Push it for 5 seconds to enter
the OSD / RC Calibration mode, which you need to perform to provide further control to the TBS FPVision
OSD.
Camera port switch
There are two camera ports on the FPVision. In the OSD configuration menu, you can select which R/C
channel that controls the camera switch. You can also reverse the direction of the channel.
FPV Camera OSD control
Accessing the camera’s OSD menu used to be a big hassle. Now, simply select “FPV CAMERA” menu from the
CORE PRO OSD and you will get to access the camera’s OSD (compatible with TBS ZeroZero V2, HS1177,
Runcam Owl Plus / Swift, etc).
12

If the OSD times out, or you select EXIT, move your ROLL stick to left for 3 seconds to re-enter the CORE PRO
OSD.
Camera 5V/12V software selector
The camera port is set to 5V from the factory. To change the output voltage to 12V, connect the TBS FPVision
to the TBS Agent (Windows software), and look for the CAM VOLTAGE property. You can toggle it between 5V
and 12V. Be sure that your camera can support this voltage!
Board connection diagram
13

TBS COLIBRI V2 - Flight control
The TBS COLIBRI RACE edition is a barebone version of the TBS COLIBRI (debuted in the TBS GEMINI), built
specifically for the TBS POWERCUBE. Flashed by default with Cleanflight to allow maximum tuning capabilities
for racers, with multiple innovative features such as built-in IR port, MPU6500 with serial support (insanely
low looptimes!!), USB VCP, JST-SH plug&play ports, as well as solder sockets for the most critical input and
outputs for seasoned builders.
Note: TBS COLIBRI V2 is only compatible with TBS PDB V2, only use V2 FC on V2 PDB.
• STM32F303 based chipset for ultimate performance
• PPM, SBUS, DSM, DSMX input (5V and 3.3V provided over internal BUS)
• 6 PWM ESC output channels (autoconnect, internal BUS)
• Choose between plug&play sockets or solder pads for R/C and buzzer
• 36x36mm standard size (30.5mm grid)
• RGB LED strip support incl. power management
• Extension port for GPS/external compass/pressure sensor
• UART serial port for peripherals (Crossfire CRSF, Blackbox, FrSky telemetry etc.)
• 5V buzzer output
• MPU6000 (NEW!) accelerometer/gyro sensors
• Runs Cleanflight/ Betaflight software
• 3x status LED (DC-DC Pwr/3.3V Pwr/Status)
• Weight only 4.4g
14

Overview and connections
An overview of all the ports provided by the COLIBRI RACE flight controller is shown in the illustration below.
Connect your peripherals according to your requirements. Pin-out is also printed on the underside of the PCB.
North
V1:
V2:
•Buzzer - Accepts any active driven buzzer on 5V, alarms can be set in CleanFlight/BetaFlight GUI
Pin-out from left: GND / 5V Buzzer Signal
Additional soldering pads for direct soldering (first batch has reverse signed + and - pads!)
•ESC Outputs (V2) - Control signal output connector for 4 ESCs
Pin-out from left: ESC4&GND / ESC3&GND / ESC2&GND / ESC1&GND
These are not used when part of the TBS POWERCUBE, then there are pads on the PDB V2
•UART1 - Serial communication port
Pin-out from left: UART1 RX / UART1 TX / GND / 5V
•IR_LED (V1) - IR LED use for lap timing
Pin-out from left: Signal / GND
•Boot button (V1) - Boot button for flashing new firmware
Button must be pressed to get into the DFU firmware loader mode
15


South
V1&V2:
•LED_Strip - For directly connecting WS2812B, WS2812, and WS2811 based RGB LED strips
Regulated 5V PWR provided to connector over internal BUS, no additional voltage regulator
required!
Any WS2812B LED boards with up to 32 LEDs should work
Pin-out from left: Data Out / 5V / GND
Signal-pin connects to DIN on WS28xx pads
•GPS/Mag/Alt (UART3) - Connector for external GPS, magnetometer and altitude sensors - or other
uses, can be configured in Cleanflight/BetaFlight.
Pin-out from left: 5V / GND / UART3 TX / UART3 RX / SDA / SCL
•RC_RX - Two receiver signal connectors, supports: PPM, S.BUS, SPEKT, DSM, DSMX
Pin-out from left: PPM, UART2 RX / 3.3V / GND / 5V
Additional 2.54mm pitch soldering pads available for direct soldering receiver signal
17

West
V1&V2:
Stacking header pin-out:
•Stacking header - Connecting the different layers in the stack
Top row: PWM2, PWM4, PWM6, BST SCL, UART2_RX, +5V
Bottom row: PWM1, PWM3, PWM5, BST SDA, UART2_TX, +5V PDB V2 and FPVision (NEW!) /
+12V PDB V1
•LEDs - Status indicator
DCDC LED, lights up once 12V is available over internal BUS
PWR control LED, controlled via CleanFlight/BetaFlight
STAT LED, controlled via CleanFlight/BetaFlight
•Servo - One Servo output (for tricopters) with 3-pins for PWM / 5V / GND
5V is provided from internal BUS
18

Configuration and tuning
The COLIBRI RACE runs Cleanflight by default. Cleanflight comes with a great and easy to use Chrome
Application that you can download here:
•CleanFlight Configurator
There are several very detailed CleanFlight guides available, which teaches you how to tune, configure and
calibrate your model (see FliteTest and Oscar Liang’s guides below). It would be impractical for this manual to
regurgitate all of this. However, please do ensure that the parameter values specified in the following section
are set in the configurator for proper control of the ESCs and aircraft.
•FliteTest: Naze32 Tutorial
•PID Tuning Explained
Default Values
The ideal parameter values for COLIBRI with the BULLETPROOF 20A ESCs are shown in the following screen
capture. Open CleanFlight and make sure all the fields are set to the corresponding values. The ESCs come
pre-calibrated out of the box, there is no need to calibrate the servo range or do any other setup on the ESCs.
Additionally, if you are planning to install LEDs on your frame, you can enable “LED Strip” support in
CleanFlight. It allows you to directly connecting WS2812B, WS2812, and WS2811 based RGB LEDs to the
COLIBRI RACE flight control and configure their color.
19

Driver installation
The COLIBRI RACE is one of the first flight controllers that natively supports USB. In newer operating systems
(Windows 10, Mac OS X 10.10) there are no drivers required to enable configuration. However, for the most
users a new driver has to be installed manually. Download and install the following driver.
•STM32 VCP Driver Download (Windows only)
Some computers may not immediately recognize the new STM32 VCP device after installing the driver. You
may need to go into your Device Manager and updating the driver directly. Find a yellow icon next to the USB
device, right-click it and select “Update Driver”. Navigate to the following folder to locate the correct driver:
C:\Program Files (x86)\STMicroelectronics\Software\Virtual comport driver\
Updating firmware using TBS Agent (recommended)
Getting the latest firmware flashed via TBS Agent is a fast and easy process. This is the recommended method
of updating the COLIBRI RACE.
1. Install the latest STM32 VCP drivers, as shown in the previous section, from
http://www.st.com/web/en/catalog/tools/PF257938
2. Open TBS Agent and click on the “UPDATE COLIBRI RACE”-tab
3. (Pressing boot button for update the FC is not necessary anymore with latest Agent revision, unless
the firmware has been completely erased) (NEW!)
Press and hold the “BOOT”-button on the COLIBRI board while connecting the micro-USB cable to the
side of the main assembly to enter DFU programming-mode.
V1: V2:
20
/