Welcome and thank you for choosing the GolfBuddy. The
GolfBuddy is ready to use right out of the box, without having to
deal with complicated interfaces to your computer. Please read
the quick start guide prior to using the GolfBuddy. If you ever have
any questions, please visit us online at www.gpsgolfbuddy.com to
access an online Q&A
Thanks,
GolfBuddy USA
Part 1. Preparing the Unit
Step 1. Charging
Connect the charger into the slot on the bottom of your
GolfBuddy.
Charging time: 3-4 hours
Standard usage time*: 13 Hours
AAA battery back up
*Estimated battery life is based on use of the GolfBuddy unit with the
backlight turned off.
Step 2. Checking Your Course
Turn on your GolfBuddy and check if your course is pre-
loaded in your GolfBuddy.
If you don’t find your course, visit us online at www.
gpsgolfbuddy.com and update your course library or
request your course data.
Part 2. At the Course
Step 1. Acquiring Satellite Signal
Power on your GolfBuddy while facing it up towards the sky.
Keep your GolfBuddy steady for 1-2 minutes to establish a satellite signal*.
*Initial satellite connection takes 3-5 minutes or longer
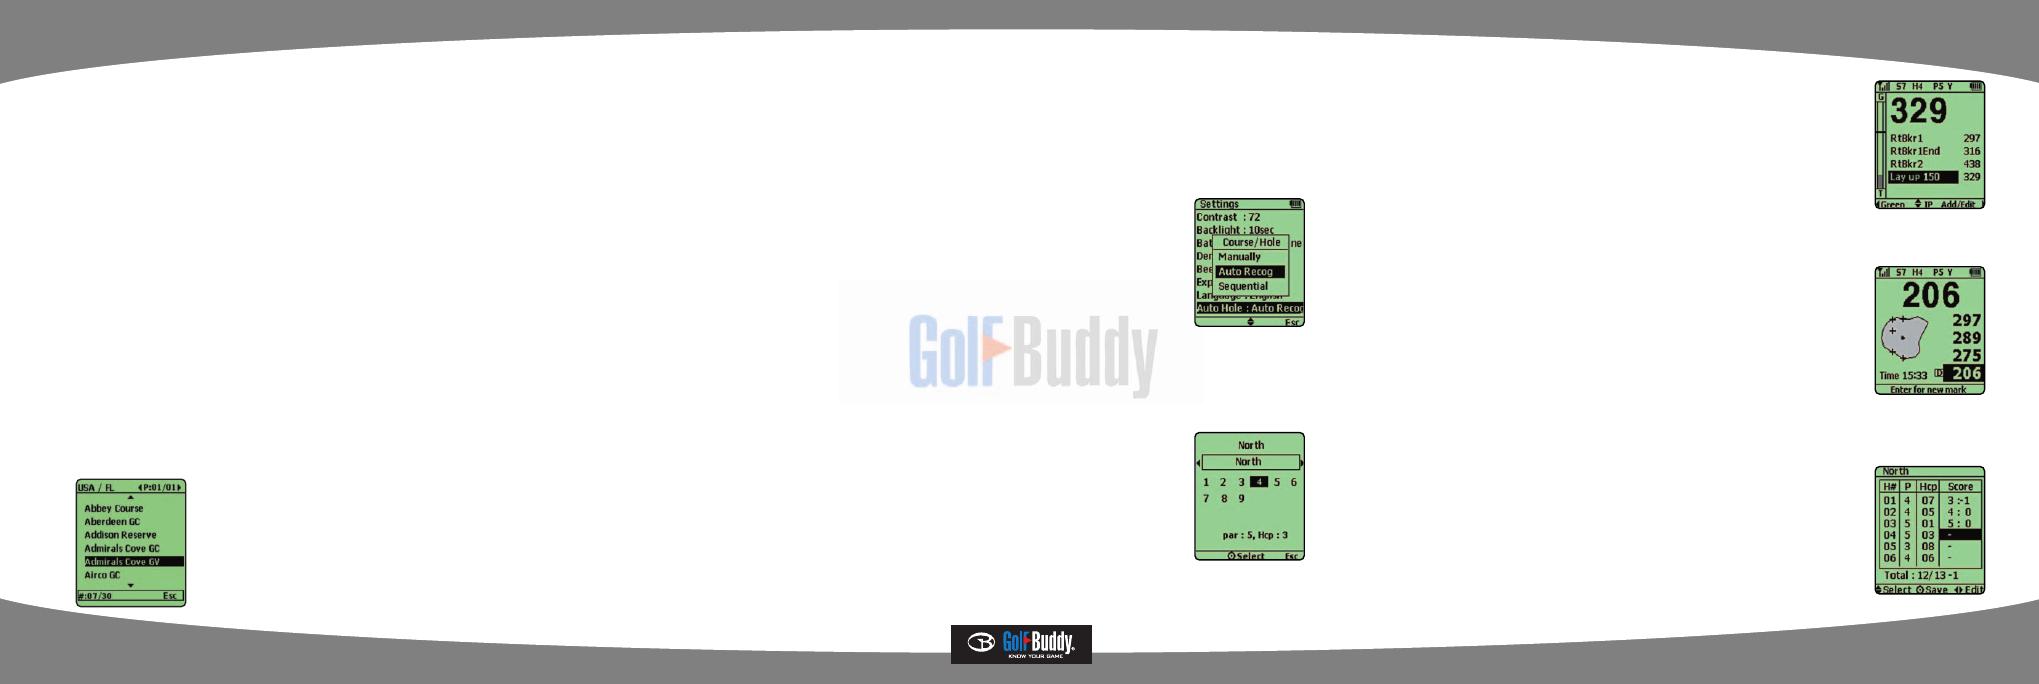
Step 2. Automatic course/hole recognition
Your GolfBuddy will automatically choose the course you are in.
All you have to do is step in to the course with your GolfBuddy.
You don’t have to push any buttons!
*Setting to Automatic will allow your GolfBuddy to automatically select the
course and hole for you.
Your GolfBuddy will also automatically update the hole number
as you make your way around the course
Part 3. Basic Instructions
Step 1. Changing the Course/Hole
Once a satellite signal has initially been established, you will be
able to manually select the course and hole if you wish to.
At the play screen, push your toggle button to the left twice.
This will take you to hole selection screen.
At the hole selection screen, push left/right on your toggle
button to select the hole you want.
Then push in the toggle button to select.
Setp 2. View Target Information
This function will display your remaining distance to bunkers,
hazards, targets, Layup, Etc.
At the play screen, go to the target information page by pushing
the toggle button once to the right.
On the target bar, the solid black line indicates the selected
target and the shaded gray area along the bottom indicates
your current position.
Step 3. Measuring Shot Distance
Before your shot, press the mark button located along the right
side of the GolfBuddy.
The screen will then display [Mark New Position?] and push in
the toggle button once to select.
Take your shot and walk to the position that your ball has landed.
The number will continually change as you move, showing the
offset distance from the marked position as you walk towards
the ball.
Press cancel button to go back to the play screen.
Step 4. Score Tracking
On the play screen, navigate to score tracking screen by
pushing the toggle button to the left, once.
When the hole information screen appears, push in the toggle
button to select.
Push up or down on the toggle button to select holes, and push
left or right on the toggle button to select the score.
Push in the toggle button to store your score.


