EPSON PowerLite 8300i Projector
16 - EPSON PowerLite 8300i Projector 5/03
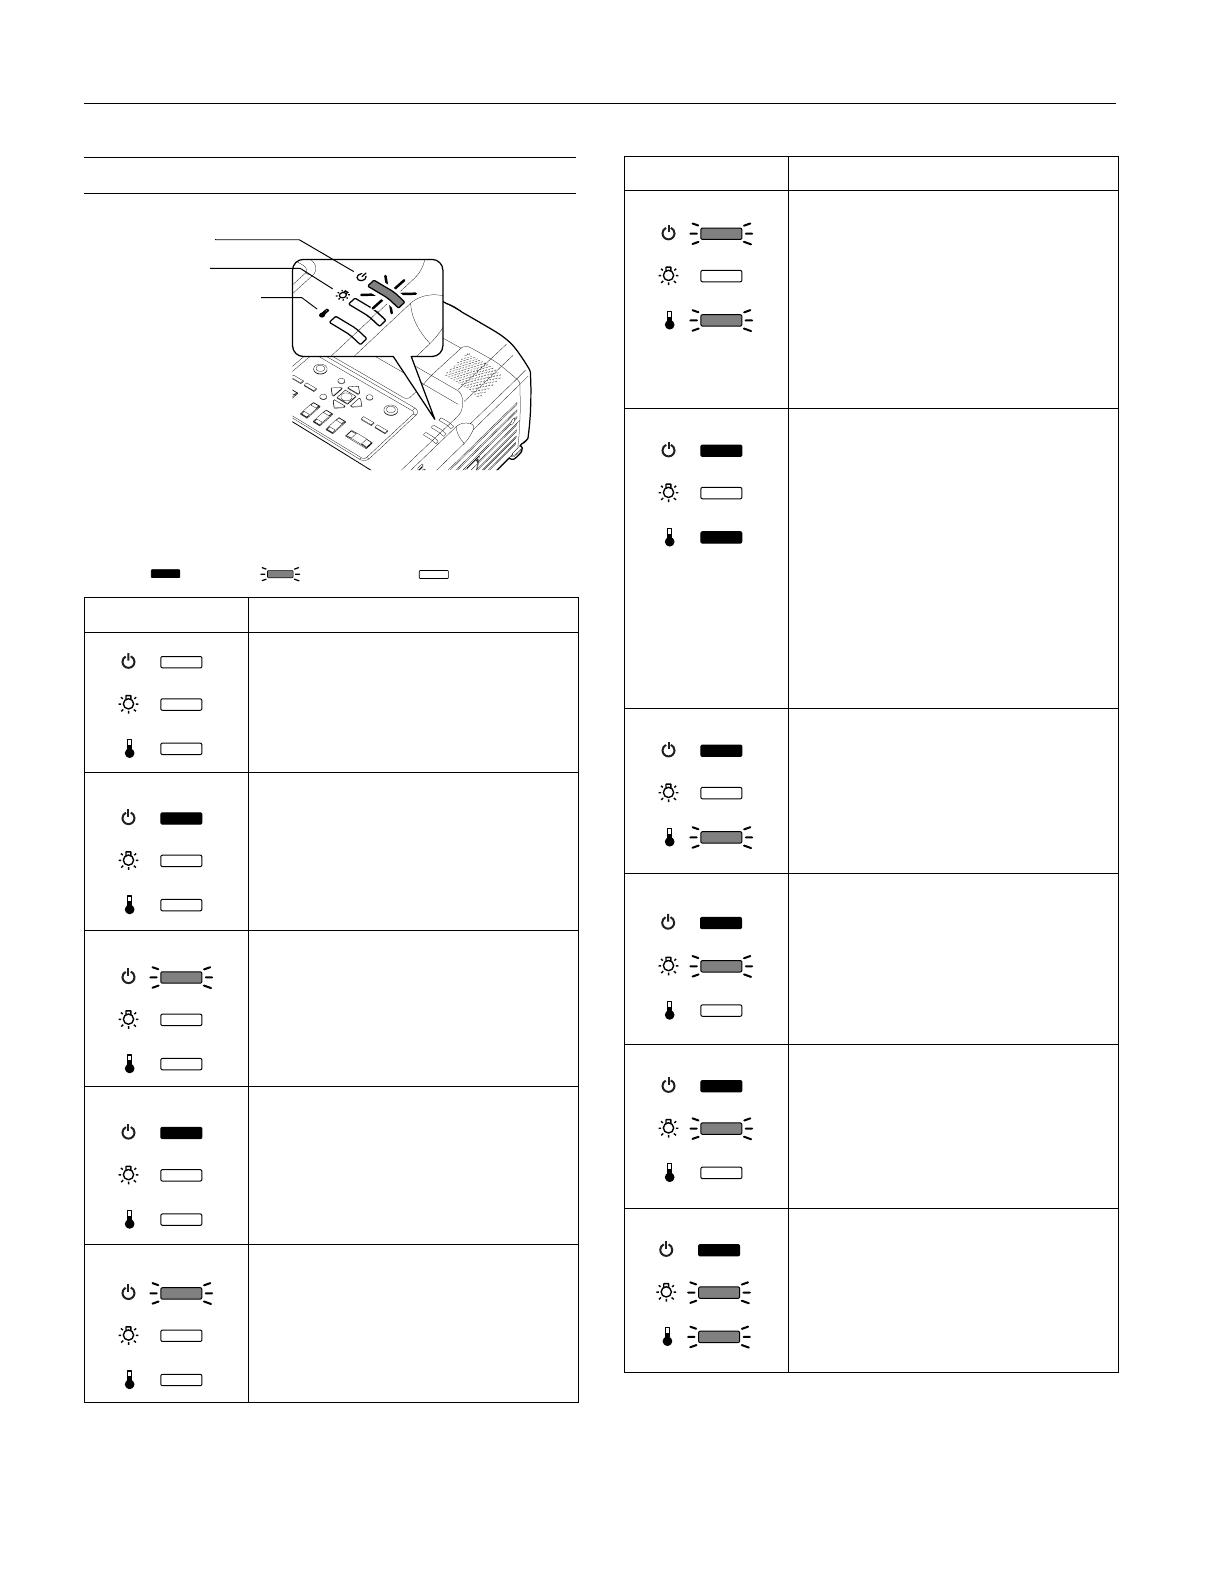
Projector Status Lights
s
The lights on top of the projector indicate the projector’s
status and let you know when a problem occurs.
Key: = on = flashing = off
Light Description and solution
If no lights are on, make sure the power
cord is connected securely both at the
power outlet and the projector. If you have
just replaced the lamp, make sure the cover
is securely fastened.
When the power light is orange, the
projector is in standby mode. Press the
Power button to turn it on.
When the power light is flashing green, the
projector is warming up. Wait for the
image to appear.
When the power light is green, the
projector is operating normally.
When the power light is flashing orange,
the projector is cooling down. Do not
unplug it until the light stops flashing and
remains orange. If you want to turn it back
on, wait until the light stops flashing.
Power light
Temperature light
Lamp light
Orange
Green
Green
Orange
When the power and temperature lights
are flashing, the projector is getting too
hot, but you can continue running it in this
condition.
Verify that the air filter is not clogged.
Clean or replace it as described on page 17.
Make sure the room temperature is not
above 95 °F (35 °C) and there is plenty of
space around and under the projector for
ventilation.
When the power and temperature lights
are red, the projector has overheated,
which turns off the lamp automatically.
Wait about 5 minutes for the projector to
cool, then unplug the power cord.
Verify that the air filter is not clogged.
Clean or replace it as described on page 17.
Make sure the room temperature is not
above 95 °F (35 °C) and there is plenty of
space around and under the projector for
ventilation. Then plug the power cord back
in and press the Power button.
If the projector continues to overheat,
contact EPSON for help.
When the power light is red and the
temperature light is flashing red, there is a
problem with the fan or temperature
sensor. Unplug the power cord and contact
EPSON for help.
When the power light is green and the
lamp light is flashing orange, the lamp is
reaching the end of its life. To ensure
continued operation, you should replace it
as soon as possible (see page 18).
When the power light is red and the lamp
light is flashing red, the lamp has burned
out. Replace it as described on page 18.
If these lights come on after replacing the
lamp, make sure the lamp is fully inserted
and the lamp cover is attached.
If all three lights are red, the projector has
an internal problem. Unplug the power
cord and contact EPSON for help.
Light Description and solution
Red
Orange
Red
Red
Red
Red
Orange
Green
Red
Red
Red
Red
Red


