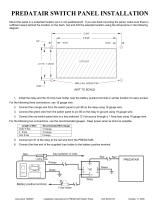
Page is loading ...

69889
HARNESS KIT
3-PORT ISOLATION MODULE
LIGHT SYSTEM
Parts List and Installation Instructions
A DIVISION OF DOUGLAS DYNAMICS, LLC
September 15, 2015
Lit. No. 92936, Rev. 01
CAUTION
Read this document before installing the
snowplow.
CAUTION
See your sales outlet/Web site for specifi c
vehicle application recommendations before
installation. The online selection tool has
specifi c vehicle and snowplow requirements.

Lit. No. 92936, Rev. 01 2 September 15, 2015
69889
69889 Plug-In Harness Kit
Part Description
Qty
69889
29047
69792 Vehicle Lighting Harness – 11-Pin w/Relays 1
69888 Plug-In Harness 1
29047 Adapter, 3-Port to 26345/26346 Vehicle Control Harness 1
76272 Adapter, 10-Pin Harness w/Soft-Start Module 1
– Reclosable Fasteners 4
PARTS LIST

Lit. No. 92936, Rev. 01 3 September 15, 2015
69889
SAFETY DEFINITIONS
NOTE: Indicates a situation or action that can
lead to damage to your snowplow and vehicle or
other property. Other useful information can also
be described.
FUSES
The snowplow electrical and hydraulic systems
contain several blade-style automotive fuses. If
a problem should occur and fuse replacement is
necessary, the replacement fuse must be of the same
type and amperage rating as the original. Installing a
fuse with a higher rating can damage the system and
could start a fi re. Fuse Replacement, including fuse
ratings and locations, is located in the Maintenance
section of the Owner's Manual.
BATTERY SAFETY
CAUTION
Indicates a potentially hazardous situation
that, if not avoided, may result in minor or
moderate injury. It may also be used to alert
against unsafe practices.
TORQUE CHART
1/4-20 109 154
1/4-28 121 171
5/16-18 150 212
5/16-24 170 240
3/8-16 269 376
3/8-24 297 420
7/16-14 429 606
7/16-20
9/16-12
9/16-18
5/8-11
5/8-18
3/4-10
3/4-16
7/8-9
7/8-14 474 669
644 9091-8
1-12 704 995
1/2-13
1/2-20
11.9
13.7
24.6
27.3
43.6
26.9
53.3
93
148
49.4
69.8
77.9
106.4
120.0
8.4
9.7
17.4
19.2
30.8
35.0
49.4
55.2
75.3
85.0
M6 x 1.00
M12 x 1.75
M8 x 1.25
M14 x 2.00
M10 x 1.50
M27 x 3.00
M22 x 2.50
M30 x 3.50
M24 x 3.00
M20 x 2.5011.1
19.5
38.5
67
107
7.7
613
778
1139
1545
450
428
562
796
1117
M33 x 3.50
M36 x 4.00
2101
2701
1468
1952
325
M16 x 2.00 231
167
M18 x 2.50 318222
Recommended Fastener Torque Chart
Size Size
Torque (ft- lb)
Grade
5
Grade
8
Metric Fasteners Class 8.8 and 10.9
These torque values apply to fasteners
except those noted in the instructions.
Torque (ft- lb)
Grade
5
Grade
8
Size Size
Torque (ft- lb)
Class
8.8
Class
10.9
Torque (ft- lb)
Class
8.8
Class
10.9
Inch Fasteners Grade 5 and Grade 8
CAUTION
Read instructions before assembling.
Fasteners should be fi nger tight until
instructed to tighten according to the torque
chart. Use standard methods and practices
when attaching snowplow, including proper
personal protective safety equipment.
WARNING
Indicates a potentially hazardous situation
that, if not avoided, could result in death or
serious personal injury.
CAUTION
Batteries normally produce explosive gases,
which can cause personal injury. Therefore,
do not allow fl ames, sparks or lit tobacco
to come near the battery. When charging or
working near a battery, always cover your
face and protect your eyes, and also provide
ventilation.
• Batteries contain sulfuric acid, which burns
skin, eyes and clothing.
• Disconnect the battery before removing or
replacing any electrical components.

Lit. No. 92936, Rev. 01 4 September 15, 2015
69889
TYPICAL 2-PLUG, 3-PORT MODULE SYSTEM DIAGRAM
CAUTION
On 2-plug electrical systems, plug
covers shall be used whenever
snowplow is disconnected. Vehicle
Battery Cable is 12-volt unfused source.
Factory Vehicle Harness
Factory Vehicle Harness
BAT
BLK
RED
Battery
10.0-Amp Fuses
(Snowplow Park/Turn &
Snowplow Control)
Turn Signal
Configuration Plug
Typical Plug-In Harness
Vehicle Lighting
Harness (11-Pin)
Vehicle Control Harness
Vehicle
Headlamps
Park/Turn
Lamps
Vehicle
Headlamps
Park/Turn
Lamps
Vehicle Battery Cable
To Snowplow
Control
To Switched Accessory
Fire Wall
3-Port Module
RED
10-Pin Harness Adapter
w/Soft-Start Module
Vehicle Chassis
Grounding Post*
*See the note on page 17 for more information.

Lit. No. 92936, Rev. 01 5 September 15, 2015
69889
TYPICAL 3-PLUG, 3-PORT MODULE SYSTEM DIAGRAM
Factory Vehicle Harness
Factory Vehicle Harness
RED
BLK
RED/GRN
RED/BRN
RED
BLK/ORN
BLK/ORN
RED
BLK/ORN
10-Pin Harness Adapter
w/Soft-Start Module
Adapter
15-Amp Fuse (Park/Turn)
Battery
Turn Signal
Configuration Plug
(not used)
Typical Plug-In Harness
Vehicle Lighting
Harness (11-Pin)
Vehicle Control Harness (3-Pin)
Vehicle
Headlamps
Vehicle
Headlamps
Park/Turn
Lamps
Park/Turn
Lamps
Vehicle Battery Cable
Motor
Relay
Battery
Cable
To Snowplow Control To Switched Accessory
Fire Wall
3-Port Module
7.5 - Amp Fuse (Straight Blade Control)
10.0-Amp Fuses
(Snowplow Park/Turn &
Snowplow Control)
Vehicle Chassis
Grounding Post*
*See the note on page 17 for more information.

Lit. No. 92936, Rev. 01 6 September 15, 2015
69889
TWO-PLUG SYSTEM
Vehicle Battery Cable Installation
1. Turn OFF the vehicle ignition.
2. Disconnect both the NEGATIVE (–) and the
POSITIVE (+) battery cables.
3. Route the supplied vehicle battery cable from
the grille or bumper to the battery, avoiding any
sharp edges and hot or moving parts. Cable tie
only the end section closest to the grille. The
vehicle battery cable may need to be lengthened
on vehicles with batteries located under or behind
the cab.
4. Route the red wire from the vehicle battery cable
to the POSITIVE (+) battery terminal. Do not
connect at this time.
NOTE: Use dielectric grease on all electrical
connections to prevent corrosion. Fill receptacles
and lightly coat ring terminals and blades before
assembly.
CAUTION
Batteries normally produce explosive gases,
which can cause personal injury. Therefore,
do not allow fl ames, sparks or lit tobacco
to come near the battery. When charging or
working near a battery, always cover your
face and protect your eyes, and also provide
ventilation.
• Batteries contain sulfuric acid, which burns
skin, eyes and clothing.
• Disconnect the battery before removing or
replacing any electrical components.
5. Route the black wire from the vehicle battery
cable to the vehicle chassis NEGATIVE (–) ground
connection shown. Do not connect at this time.
Prior to attaching, clean away any paint or dirt to
ensure a good ground connection. The 4-position
connector from the vehicle battery cable will
connect to the mating connector (labeled "BAT")
on the end of the vehicle control harness.
NOTE: Do NOT route the black vehicle battery
cable wire to the negative battery post. See the
note on page 17 for more information.
Vehicle Chassis
NEGATIVE (–) Ground Connection

Lit. No. 92936, Rev. 01 7 September 15, 2015
69889
Vehicle Lighting and Vehicle Control
Harness Installation
1. Route both harnesses around or through the
radiator bulkhead to the Isolation Module.
2. Connect the 4-position connector from the vehicle
lighting harness to the matching 4-position
connector from the vehicle control harness.
3. Connect the vehicle lighting harness to position A
on the 3-port Isolation Module.*
4. Route the end of the vehicle control harness with
the white, 4-pin connector to the fi re wall.
5. Connect the black 4-position connector (labeled
"BAT") from the end of the vehicle control harness
to the 4-position connector from the vehicle
battery cable. Do not cable tie the harness at
this time.
6. On the driver's side, locate an existing hole
through the fi re wall for the vehicle control
harness. If access through the fi re wall does not
exist, drill a 5/8" hole through the fi re wall of the
vehicle in a convenient location away from sharp
edges, and hot or moving parts.
7. Push the braided harness breakout with the cab
control connector through the fi re wall hole into the
cab. Use a grommet, existing plug cover, or proper
chafi ng material to protect the harness where it
passes through the fi re wall. Route the harness to
the selected control mounting location.
To mount the control, follow the instructions
supplied with the control.
*For installations requiring an adapter, follow the instructions included with the adapter.
8. Locate the supplied yellow and orange snowplow
control feed wire behind the left side of the
driver-side dash panel. It is taped to the headlamp
switch harness. Activating the snowplow mode
switch on the dash will provide 12V power to the
snowplow control feed.
9. Route the red "ACC" wire from the vehicle control
harness to this location and trim away excess
length.
10. Following the instructions in the Recommended
Splicing Procedure section, splice the red
"ACC" wire into the yellow and orange snowplow
control feed wire using the supplied parallel
splices and heatshrink tubing.
CAUTION
Before installing self-drilling screws or
drilling mounting holes, check the selected
mounting area for any wires, hoses or other
obstructions.
Snowplow
Control Feed
Wire
Back of
Driver-Side
Dash

Lit. No. 92936, Rev. 01 8 September 15, 2015
69889
THREE-PLUG SYSTEM
Motor relay and Vehicle Battery Cable
Installation
1. Turn OFF the vehicle ignition.
2. Disconnect both the NEGATIVE (–) and the
POSITIVE (+) battery cables.
3. Choose a location on the vehicle where the
motor relay will be protected from road splash
and debris. Motor relay must be within 18" of the
vehicle battery. (The motor relay can be farther
from the battery if the battery cable provided with
either the plug-in harness or adapter kit is longer
than 22".)
NOTE: Position motor relay terminals up,
horizontal or in between.
CAUTION
Batteries normally produce explosive gases,
which can cause personal injury. Therefore,
do not allow fl ames, sparks or lit tobacco
to come near the battery. When charging or
working near a battery, always cover your
face and protect your eyes, and also provide
ventilation.
• Batteries contain sulfuric acid, which burns
skin, eyes and clothing.
• Disconnect the battery before removing or
replacing any electrical components.
4. Drill two 9/32" mounting holes using the motor
relay mounting plate as a template. Mount the
motor relay using 1/4" x 3/4" cap screws, washers
and locknuts.
5. Route the supplied vehicle battery cable from
the grille or bumper to the location chosen for
mounting the motor relay, avoiding any sharp
edges and hot or moving parts. Cable tie only
the end section closest to the grille. The vehicle
battery cable may need to be lengthened on
vehicles with batteries located under or behind
the cab. If lengthening is necessary, use the same
gauge wire as the vehicle battery cable, and cover
all connections with dual-wall heatshrink tubing to
prevent shorting.
6. Attach the red wire from the vehicle battery cable
to the one of the large terminals on the motor
relay. Secure with a lock washer and 5/16" nut,
and tighten to a maximum of 35 in-lb.
NOTE: Use dielectric grease on all electrical
connections to prevent corrosion. Fill receptacles
and lightly coat ring terminals before assembly.
CAUTION
Overtightening terminal attaching nuts may
cause seal failure, resulting in premature
failure of motor relay.
Red Vehicle Battery Cable
(Tighten nut to max. 35 in-lb)
CAUTION
Before installing self-drilling screws or
drilling mounting holes, check the selected
mounting area for any wires, hoses or other
obstructions.

Lit. No. 92936, Rev. 01 9 September 15, 2015
69889
Vehicle Lighting and Vehicle Control
Harness Installation
The vehicle lighting and vehicle control harnesses
are designed to plug into one another when the
snowplow is not attached. To ensure adequate
length, plug the harnesses together before cable tying
them.
1. Route both harnesses around or through the
radiator bulkhead to the Isolation Module.
2. Make the following connections:
• 10-position connector from vehicle control
harness to 10-position connector from the
3-port adapter (PN 29047).
• Single-wire connector from vehicle control
harness to single-wire connector from the
3-port adapter.
• 4-position connector from adapter included with
hydraulic kit to 4-position connector from vehicle
lighting harness.
• Vehicle lighting harness to position "A" on the
3-port Isolation Module.*
NOTE: The 3-position connector on the vehicle
control harness (4-port module confi guration
plug) will not be used. Cover the terminals with
dielectric grease and cap off with electrical tape.
3. Route the end of the vehicle control harness with
the white 6-pin connector to the fi re wall. Route the
vehicle control harness breakout with four wires to
the motor relay.
Motor relay small terminal connections:
Straight blades — brown/red and black/orange
V-plows — brown/red and brown/green
*For installations requiring an adapter, follow the instructions included with the adapter.
7. Route the black wire from the vehicle battery
cable to the vehicle chassis NEGATIVE (–) ground
connection. Do not connect at this time. Prior to
attaching, clean away any paint or dirt to ensure
a good ground connection. The black/orange wire
from the vehicle battery cable will connect to the
mating connector on the vehicle control harness.
NOTE: Do NOT route the black vehicle battery
cable wire to the negative battery post. See the
note on page 17 for more information.
Vehicle Chassis
NEGATIVE (–) Ground Connection

Lit. No. 92936, Rev. 01 10 September 15, 2015
69889
7. On the driver's side, locate an existing hole
through the fi re wall for the vehicle control
harness. If access through the fi re wall does not
exist, drill a 5/8" hole through the fi re wall of the
vehicle in a convenient location away from sharp
edges and hot or moving parts.
8. Carefully push the end of the harness through fi re
wall hole into the cab. Use a grommet, existing
plug cover, or proper chafi ng material to protect
the harness where it passes through the fi re
wall. Route the harness to the selected control
mounting location.
9. To mount the control, follow the instructions
supplied with the control.
Red Battery Cable
Tighten to max. 35 in-lb.
Brown/Red
Wire
Vehicle Control Harness
Wire from Vehicle Control Harness
Straight Blade: Black/Orange
V-Plow: Brown/Green
Tighten to max. 15 in-lb.
Red/Green Wire
4. Secure the wires to the small terminals of the
motor relay with #10 lock washers and 10-32 nuts,
and tighten to a maximum 15 in-lb.
5. Connect the single-wire connector (black/orange
wire) from the vehicle control harness breakout
to the single-wire connector (black/orange wire)
from the vehicle battery cable. Do not cable tie the
harness at this time.
6. Attach the supplied red battery cable and the
red/green wire from the vehicle control harness
to a large terminal on the motor relay with a lock
washer and 5/16" nut, and tighten to a maximum
35 in-lb. Route the supplied red battery cable
between motor relay terminal and POSITIVE (+)
battery terminal, avoiding sharp edges and hot or
moving parts. Do not make battery connection at
this time.
CAUTION
Overtightening terminal attaching nuts may
cause seal failure, resulting in premature
failure of motor relay.
CAUTION
Before installing self-drilling screws or
drilling mounting holes, check the selected
mounting area for any wires, hoses or other
obstructions.

Lit. No. 92936, Rev. 01 11 September 15, 2015
69889
PLUG COVER INSTALLATION
1. Stretch the rectangular opening of the plug cover
strap over the end of the vehicle battery cable.
Place the plug cover over the molded plug when
snowplow is not in use.
Molded Plug
Plug Cover
10. Locate the supplied yellow and orange snowplow
control feed behind the left side of the driver-side
dash panel. It is taped to the headlamp switch
harness. Activating the snowplow mode switch on
the dash will provide 12V power to the snowplow
control feed.
11. Route the red wire from the vehicle control
harness to this location and trim away excess
length.
12. Following the instructions in the Recommended
Splicing Procedure section, splice the red wire into
the yellow and orange snowplow control feed wire
using the supplied parallel splices and heatshrink
tubing.
Snowplow
Control Feed
Wire
Back of
Driver-Side
Dash

Lit. No. 92936, Rev. 01 12 September 15, 2015
69889
TURN SIGNAL CONFIGURATION PLUG
1. Mate the turn signal confi guration plug located
on the plug-in harness. If the Isolation Module is
installed on the driver's side, mate the plug so that
the wire colors match (green to green and blue to
blue). If the module is installed on the passenger's
side, mate the plug so that the wire colors are
opposite (green to blue).
2. Connect the single-wire connector from the
vehicle lighting harness to the single-wire
connector from the plug-in harness.
WARNING
If the turn signal confi guration plug is mated
incorrectly, the turn signals will be reversed
between the vehicle and the snowplow.
Turn Signal Configuration Plug
Driver-Side Module Passenger-Side Module
GRN GRN
BLU BLU
BLU GRN
GRN BLU
B – Green & Red Wires C – Blue & Red Wires
ISOLATION MODULE MOUNTING
Isolation Modules are sold separately. Check the Kit
Selection Guide/Selection List for the correct module
for your vehicle.
Locate a fl at surface within the engine compartment
of the vehicle for mounting the Isolation Module (on
the driver's side if possible). For example, the
fi re wall, fender well or radiator shroud are possible
mounting locations. If a fl at surface cannot be located,
cable tie the Isolation Module to existing brackets or
harnessing.
Reclosable fastener strips and cable ties are supplied
for mounting the Isolation Module, but self-drilling
screws can also be used. When using the reclosable
fastener strips, the mounting surface must be free of
dirt and grease.
Cable
Ties (4)
Reclosable
Fastener
Strips
Isolation Module (bottom view)
Screws (2)
(not supplied)
CAUTION
Before installing self-drilling screws or
drilling mounting holes, check the selected
mounting area for any wires, hoses or other
obstructions.

Lit. No. 92936, Rev. 01 13 September 15, 2015
69889
9. Check the circuits for continuity.
10. Cover the splice with heatshrink tubing. The tubing
should extend beyond the splice on both sides.
11. Using a hot-air source, starting in the center and
working out to either side, apply heat until the
tubing recovers and glue can be seen around the
edges. Allow the tubing to cool before handling.
NOTE: The splices supplied will accommodate
18-gauge wires as shown. For larger gauge wires,
cut the wire, strip the ends 3/8" to 1/2" and twist
together. Apply solder to the splice and cover with
heatshrink tubing.
Crimp and solder each splice.
From OEM
vehicle harness
From control
harness
Splicing Procedure
Butt Splice
5/16"
Insert wires into splice.
Vehicle switched
accessory wire
Cover the splice with heatshrink tubing.
Using a hot-air source, apply heat until tubing
recovers and glue can be seen around the
edges. Allow tubing to cool before handling.
Heatshrink tubing
Glue
RECOMMENDED SPLICING PROCEDURE
1. Locate wire to be spliced into.
2. Cut wire at least 1-1/2" from any other splice,
connector, or terminal. If wires are covered by
tubing or braid, remove enough of it to achieve the
minimum clearance required.
3. Strip away 5/16" of insulation from the ends of the
wires to be spliced.
4. Slide two wires into one end of the supplied
parallel splice.
5. Place a piece of heatshrink tubing
(3/16" x 1-1/4" long) over the remaining wire to be
spliced. Cut tubing into 1-1/4" lengths if required.
6. Insert the wire into the open end of the splice and
crimp using an appropriate crimp tool. One or
two crimps may be necessary to ensure a good
connection. No wire strands should be visible
outside of the splice.
7. Preheat a soldering tool for at least one minute to
help promote even solder fl ow.
8. Apply heat to the splice. Avoid heating too close to
the insulation. Apply solder to the wires. Use just
enough solder to produce an even fl ow through
the splice. Use rosin core solder ONLY. Do not
use acid core solder.
NOTE: Avoid using an excessive amount of solder,
as it can result in wicking. Wicking occurs when
solder travels up the wire core. This may cause
the wire to become stiff or brittle, which could
lead to a broken or open circuit.

Lit. No. 92936, Rev. 01 14 September 15, 2015
69889
PLUG-IN HARNESS INSTALLATION
Headlamp Removal Instructions
Vehicles With Fender Moulding
1. Remove the two fender moulding fasteners
shown.
2. Release the three fender moulding locks and
partially remove the fender moulding.
All Vehicles
3. Remove the fasteners. Move the fender liner to
the side.
4. To remove the headlamp assembly trim panel,
start by removing the fasteners shown.
Fender Fasteners
Moulding
Locks
Fender
Liner
Fasteners
Headlamp
Trim Panel
Fasteners
Clips

Lit. No. 92936, Rev. 01 15 September 15, 2015
69889
5. From the inner edge, release the headlmap
assembly trim panel clips. Start at the outer
edge of the assembly to release the headlamp
assembly trim panel.
6. Use a fl at-blade screwdriver to release the four
locking tabs along the bottom to completely
remove the headlamp assembly trim panel.
7. Remove the three fasteners on the headlamp trim
panel bracket.
Headlamp Assembly Trim Panel
Locking Tabs
Underneath
8. Release the two tabs to remove the air channel.
9. Remove the three headlamp assembly trim panel
bracket fasteners.
10. Squeeze the tabs to remove the headlamp
assembly trim panel bracket.
Fastener
Locations
Headlamp
Trim Panel
Bracket
Fasteners
Tab
Bracket

Lit. No. 92936, Rev. 01 16 September 15, 2015
69889
11. Disconnect the marker lamp electrical connector.
12. Remove the two fasteners on the top of the
headlamp assembly.
13. Remove the fastener on the side of the headlamp.
Electrical
Connector
Headlamp
Fastener
Locations
14. Position the headlamp assembly forward and
disconnect the remaining electrical connectors.
15. Remove the headlamp assembly.
Fastener Location
Headlamp
Assembly
Electrical
Connector

Lit. No. 92936, Rev. 01 17 September 15, 2015
69889
Harness Installation
1. Connect the plug-in harness to the mating
connectors removed from the headlamps or
headlamp housings.* Connect the plug-in harness
to the mating connections at the headlamps or
headlamp housings. Route the plug-in harness to
the 3-port Isolation Module. Connect the plug-in
harness to the adapter by matching harness
connector B with adapter port B and harness
connector C with adapter port C. Connect the
adapter to the module by matching adapter
connector B with module port B and adapter
connector C with module port C.
For vehicles with headlamp bulb or turn signal
DRLs: The DRL wire from the plug-in harness will
not be used. Coil and cable tie the DRL wire.
2. Connect the black 4-position connector from
the middle of the vehicle control harness to the
4-position connector from the plug-in harness.
3. Locate the turn signal wire on each side of
the vehicle. Splice the "TURN" wire from the
plug-in harness into the signal wire on the
corresponding side following the instructions in the
Recommended Splicing Procedure section.
4. Splice the "PARK" wire from the plug-in harness
into the parking light wire following the instructions
in the Recommended Splicing Procedure section.
5. Cable tie the vehicle control harness, vehicle
lighting harness, and plug-in harness away from
any sharp, hot or moving parts.
3-Port Module
Plug-In Harness
10-Pin Harness Adapter
w/Soft-Start Module
6. Mount the soft-start module in an area that
receives good airfl ow, such as the cavity between
the grille and the radiator.
BATTERY CONNECTIONS
NOTE: Cable tie the control harness and
accessory tap away from the brake, clutch, gas or
parking brake pedals, and any moving parts.
NOTE: Do NOT connect ground wires directly to
the negative battery post. Direct connections to
the negative battery post will cause the charging
system to malfunction and shorten battery life.
The NEGATIVE (–) cables should be connected to
the vehicle chassis grounding point shown. See
Ford Special Vehicle Engineering Bulletin Q-231
for more information.
1. Attach the POSITIVE (+) OEM cable to the
battery. Attach the RED vehicle battery cable to
the POSITIVE (+) battery terminal following OEM
battery cable connection recommendations.
2. Attach the NEGATIVE (–) OEM cable to the
vehicle chassis NEGATIVE (–) ground connection
shown. Attach the BLACK vehicle battery
cable to the vehicle chassis NEGATIVE (–)
ground connection following OEM battery cable
connection recommendations.
Mount soft-start
module between
the grille and the
radiator.
*For installations requiring an adapter, follow the instructions included with the adapter.
Vehicle Chassis
NEGATIVE (–) Ground Connection

Lit. No. 92936, Rev. 01 18 September 15, 2015
69889
The company reserves the right under its product improvement policy to change construction or design details and furnish equipment when
so altered without reference to illustrations or specifi cations used. This equipment manufacturer or the vehicle manufacturer may require or
recommend optional equipment for snow removal. Do not exceed vehicle ratings with a snowplow. The company offers a limited warranty for
all snowplows and accessories. See separately printed page for this important information.
Printed in U.S.A.
/