Page is loading ...

LED Wall Washer
WARNING: This product may represent a possible shock or fire hazard if improperly installed or attached in any way.
Products should be installed by a qualified electrician in accordance with these instructions, current electrical codes
and/or the current National Electric Code (NEC).
WARNING: To avoid electrical shock, disconnect or disable power at the source prior to installation or maintenance!
IMPORTANT SAFETY INSTRUCTIONS - Do not begin installation until you read and understand
the installation and safety instructions.
1. All units must be unplugged before installing or servicing in any way.
2. Do not route cords or units through walls, doors, windows or any similar part of a building structure.
3. When using outdoors,
controller (if applicable) must be secured in a weatherproof enclosure.
4. Do not use if there is any damage to the unit, its lens and/or power cord’s insulation. Inspect periodically.
5. Do not submerge in water or liquids.
6. Secure units using mounting hardware appropriate for the mounting surface. Do not secure unit or its
power cord with staples, nails or the like that may damage insulation.
7. As dictated by engineer’s drawings or local code, install safety cables on fixtures.
8. Do not attempt to open or service the fixture. None of its parts are serviceable by the user.
9. Do not exceed the specified voltage and current input.
10. If using in conjunction with the LW36-CON controller, do not exceed the maximum run of thirty units.
11. This product has a polarized grounded plug as a safety feature to reduce the risk of electric shock.
Do not cut the plug off or alter it in any way.
WARNING: When using outdoors, basic safety precautions should always be followed to reduce the risk of
fire, electric shock and personal injury, including the following:
1. Ground Fault Circuit Interrupter (GFCI) protection should be provided on the circuit(s) or outlet(s) to b
e
used for outdoor use. Receptacles are available having built-in GFCI protection for this measure of safety.
2. Use only outdoor extension cords, such as type SW, SOW, STW, STOW, SJW, SJOW, SJTW, or SJTO. This
designation is marked in the wire of the extension cord. Never use with an extension cord unless plug
can be fully inserted. AC 120V, 60Hz max.
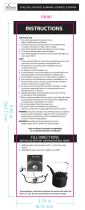
INSTALLATION PLANNING
Plan ahead for quick, successful installation.
1. Review all wiring plans in advance, in consult with an
electrical inspector if possible. Refer to local and state
codes for installation compliance.
2. Make a fixture layout plan that shows locations of each
fixture and the controller. Leave room or create a legend
to record the fixture “ID’s” (identifying number for fixture
addressing purposes).
3. As you unpack each fixture, attach a weatherproof label
on the fixture to reference its location in the lighting
installation plan. This will help speed the installation and
identify units for addressing purposes.
See Figure 1.
Safety instructions for LW36-RGB
www.americanlighting.com
RV-0810KB
Figure 1
R
Tilt angle
adjustment handle
Lighted screen
(indicates ID)
Data/signal input
Power input
using included power cord or
power from previous xture
Data/signal output
Power out
to next xture (only used
when daisy-chaining units)
indoors
Label back of xture with its ID

s unit).
LED Wall Washer
Installation instructions for LW36-RGB
INSTALLATION CONSIDERATIONS
The maximum number of fixtures that can be controlled by the LW36-CON controller is thirty.
For any project that requires more than thirty fixtures, please consult factory.
1. Calculate the number of fixtures to be used. Consider the locations of all fixtures and of the controller.
2. Create a lighting plan that uses either a series configuration (where each unit is powered by the previous
one) or provide a receptacle for each unit. See Figure 3 and “Fixture Installation”. Locate the controller within
175 feet of the last fixture in a series. Note: The controller is usually installed after the fixtures are in place
and will require its own 120V AC outlet within 7’ of its location.
2. Be sure to provide a 120V AC, grounded outlet within 5 feet of the first fixture’s location and purchase 15’
linking power cables (indoor use only) as necessary; or locate an outlet for each. If using outdoors, outlet(s)
must also be GFCI and weatherproof.
3. Consider what mounting hardware will be used. The mounting surface will
dictate the type of fastener. The base has through-holes for mounting.
FIXTURE INSTALLATION
1. Be sure to record the fixtures’ IDs on the lighting plan. Label the fixtures with
their assigned locations by attaching a weatherproof label to each unit.
2. Set the fixtures’ IDs. Note: If you want all the fixtures to be synchronized,
give them all the same ID*. To change the fixture’s ID, simply press the
contact buttons on the back next to the LED screen (one will advance
IDs, the other will lower ID numbers). The fixture’s ID will be held in
memory even when unplugged or otherwise powered off.
2. Rotate and hold the light in the desired position with the LED array
facing the surface to be lighted. Note: The LED Wall Washer doesn’t
have a rotational adjustment, only a tilt adjustment. See Figure 2.
3. Use the through-mounting holes in the base of each unit and suitable
fasteners to mount the Wall Washer to the mounting surface.
4. Attach the cord and plug set to the fixture and plug in; or power the
fixture directly from a previous fixture using the 15’ power cable (part
number LW36-EX15, indoor use only, sold separately). See Figure 3.
5. Loosen the handle that holds the tilt angle for the array and tilt fixture
to the desired angle. Re-tighten this handle to hold the tilt angle.
CONTROLLER INSTALLATION
Note: Simple effects (such as fixed color, color sequence and color wash) do not require a controller. Each
fixture is factory-set to ID = 1 as indicated on the lighted screen on the back of the array (see Figure 1.)
If the ID is left as 1, the unit will begin to advance through a factory-set color sequence. A controller is required
to produce syncronous color changing mixes and for use as a DMX interface. For advanced lighting “scenes”,
use DMX software*, such as “Sunlite”, to write to LW36-CON (controller) using LW36-XLR3 (XLR3 adapter
cable); each sold separately.
1. Determine the location of the controller and plug in the controller. (If your installation uses more than one
controller, please consult factory.) Refer to the controller instructions for user programming instructions.
2. Connect the controller‘s data output cable (mini 3-pin female) directly to the data input cable of the fixture
(mini 3-pin male) or interconnect using 15’ signal cable, (part number LW36-EC15, sold
separately), if needed. See Figure 3.
3. Daisy-chain the remaining fixtures directly or with 15‘ signal cables, as needed.
*Specialized DMX software will allow multiple IDs for advanced effect lighting. All fixtures
connected to the LW36-CON controller will automatically syncronize. When using DMX 512
software, refer to that company’s instructions.
www.americanlighting.com
Figure 3
Figure 2
18
120
The LED Wall Washer has an adjustable
angle but the base doesn’t rotate.
R
#1 #2 #3 #30 LW36-CON
#1 #2 #3 #30 LW36-CON
7’ grounded
power cord
DMX input lead, XLR3 adapter required (LW36-XLR3)
Data
output
Daisy-chain power to units (indoors) or
provide a receptacle for each xture.
/