Page is loading ...

Quick Start Guide
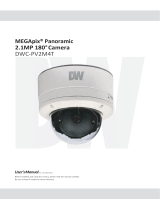
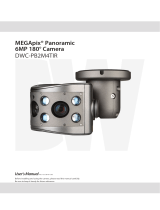
DWC-PV2M4T
WHAT’S IN THE BOX
QSG Manual 1 Set
Screw & Plastic
Anchor – 4pcs
1 Set
Manual CD 1 Set T-Wrench 1 Set
Template Sheet 1 Set Tor x Wrench 1 Set
Test Monitor Cable 1 Set Six angles Wrench 1 Set
Username: admin Password: admin
Attention: This document is intended to serve as a quick reference page for initial set-up.
It is recommended that the user read the entire instruction manual for complete and proper camera usage.
Tel: 866-446-3595 / 813-888-9555
Technical Support Hours: 9:00AM – 8:00PM EST, Monday thru Friday
digital-watchdog.com
Quick Start Guide
Step 1 – PREPARING TO MOUNT THE CAMERA
Step 3 – INSTALLING THE CAMERA MODULE
Step 2 – CABLING THE CAMERA TO EXTERNAL DEVICES
1. Using the mounting template sheet or the camera itself, mark and drill the necessary holes in the wall
or ceiling.
2. Install the camera’s junction box on the mounting surface using the provided screws.
3. Secure the main body to the junction box using the safety wire.
A. Using the template sheet, make and drill
the cabling holes on the wall/ceiling.
B. Install the mount bracket on the wall/ceiling
using the provided screws.
C. Secure the main body to the mount bracket
using the safety wire.
D. Pass the wires through the mount bracket
and make all necessary connections.
E. Attach the main body to the mount bracket
by tightening the lock screw using the six-
angle wrench.
1. Attach the main body to the junction box by tightening the lock screw using the six-angle wrench.
2. Tighten the lock set screw to x the camera.
3. Adjust the angle of the camera by rotating the Control screw on the main body using the T-wrench.
See ‘Step 4’ for more information.
1. Pass the wires through the mount bracket and make all necessary connections.
a. NETWORK CONNECTIONS – If you are using a PoE Switch, connect the camera using an Ethernet
cable for both data and power.
b. NETWORK CONNECTIONS – If you are using a non-PoE switch, connect the camera to the switch
using an Ethernet cable for data transmission and use a power adapter to power the camera.
c. AUDIO CONNECTIONS – Connect the ‘Audio Out’ cable to a device such as a speaker. Connect the
‘Audio In’ cable to a device such as a microphone.
d. ALARM INPUT / SENSOR – Connect the white and yellow cables to an alarm / sensor input device
such as a motion detector.
e. ALARM OUTPUT – Connect the red and black cables to an alarm output device such as alarm lights.
Power Requirements Power Consumption
DC 12V
PoE IEEE 802.3atPoE+ / PoE Class 3
DC 12V: 6.3W, 525mA / TDN ON: 8.8W, 733mA
PoE: 7W, 583mA / TDN ON: 9.3W, 775mA
A
B
C
E
D
NETWORK CONNECTION
POWER
ALARM
INPUT
ALARM
OUTPUT
AUDIO INPUT
AUDIO OUTPUT
NETWORK CONNECTION
POWER
ALARM
INPUT
ALARM
OUTPUT
AUDIO INPUT
AUDIO OUTPUT

Step 6 – DW DESKTOP TOOL
™
Use the DW Desktop Tool
™
included in the camera’s accessory CD to scan the network and detect all
MEGApix
®
cameras. Use the DW Desktop Tool
™
to set the camera’s network settings, perform rmware
upgrade or access the camera’s web client.
Quick Start Guide
Rev Date: 5/15 © 2015 Digital Watchdog. All rights reserved.
Step 7 – WEB VIEWER
Once the camera’s network settings have been
setup properly, you can access the camera’s web
viewer using the DW Desktop Tool. To open the
camera’s web viewer:
1. Find the camera using the DW Desktop
Tool.
2. Double-click on the camera’s view in the
results table.
3. Press the ‘View Camera Website.’ The
camera’s web viewer will open up in your
default web browser.
4. Enter the camera’s username and password (default are admin / admin).
5. If you are accessing the camera for the rst time, install the ActiveX les in order to view video from
the camera.
Network Setup
1. Run the CD included with the camera and click on the DW Desktop Tool
™
le.
2. The software will scan your network for all supported cameras and display the results in the table. Allow up
to 5 seconds for the IP Installer to nd the camera on the network.
3. You can press the ‘Refresh List’ to search the network again, or lter the search results by entering a value
in the lter box at the bottom of the page.
4. Check the box next to ‘Display Camera Thumbnail’ to view a JPEG image of the camera’s view next to the
camera name on supported models.
5. Select a camera from the list by double-clicking on it. The camera’s network information will appear.
If necessary, you can adjust the camera’s network type.
6. The camera’s default network information is:
7. To view the camera’s web viewer, click on ‘View Camera Website.’
8. To save the changes made to the camera’s settings, input the ID
and PW of the camera for authentication and click ‘Save’.
9. If the camera needs to be rebooted after the settings were changed, press the ‘Reboot’ button.
The camera will cycle power and will appear back in the search results once the reboot is complete.
10 . To update the camera’s rmware from the DW Desktop Tool
™
, click on the rmware tab, upload the
rmware le and select the cameras to update. You can update multiple cameras at the same time.
Step 4 – ADJUSTING THE CAMERA’S PAN AND TILT
Step 5 – MANAGING THE SD CARD
The camera’s EasyAdjust
™
IP66-rated Dome Enclosure allows you to adjust the lens’ pan and tilt externally,
reducing installation time and simplifying the conguration process. To adjust the camera’s pan and tilt:
1. Both the pan and tilt of the camera are adjusted from the tilt and rotation control screws on the camera’s
dome.
2. Using the included T-Wrench, rotate the screw marked ‘T’ to adjust the camera’s tilt.
3. Using the included T-Wrench, rotate the screw marked ‘R’ to adjust the camera’s pan/rotation.
To install the memory card:
1. Open the OSD Cap by using the L-Wrench.
2. The SD Card slot is located under the reset button.
3. Insert a Micro SD/SDHC Class 10 card according
to the diagram.
4. To remove the SD card, press the card gently into
the card slot to release it. The card will pop out
automatically.
Select DHCP if the internet service is dynamic IP. This will allow the camera to receive its IP address
from the DHCP server.
Select STATIC to manually enter the camera’s IP address, subnet mask, Gateway and DNS information.
Contact your network administrator for more information.
Default TCP/IP information
• IP: 192.168.1.80 • Gateway: 192.168.1.1
• Subnet Mask: 255.255.255.0 • DNS: 168.126.63.1
‘Port Forwarding’ has to be set in your network’s router for
external access to the camera.
NOTE: The camera has an endless 360° pan rotation. Turning the camera constantly at the same
direction can cause damage to the pan’s wiring module.
Default ID / PW : admin / admin
/