Shingle
Screwdriver
For more information on the Lock-In Gutter Guard and other innovative products
from Amerimax visit amerimax.com
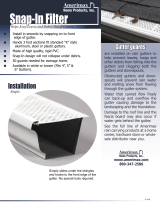
The Lock-In Gutter Guard comes with a pre-notched
end that allows the guards to overlap, eliminating any
gaps that would allow debris through the seams and
into the gutter. As you install each section simply overlap
the end with the previous section.
At the end of the gutter, cut the last gutter guard an extra 2 inches longer than the end
of the gutter. Cut a notch on the back edge of the gutter guard (A) and on the front edge
(B). Bend the end section down to create the end cap.
5
Starting at one end of the gutter, install the gutter guard by
slightly lifting the shingles and sliding the gutter guard under
the shingle (A). If the starter row of shingles are fastened to the
roof deck slide the guard between the layers. (Note: Check your
local building codes for any special installation requirements).
Pull the front edge forward to engage with the lip of the gutter.
If necessary a athead screwdriver can be used to help pull
the guard forward (B).
(A)
(B)
Bend down
End Cap
6
For outside corners (A) or inside corners (B),
mitre cut both adjoining sections. Notch the
front edge of one section to create an overlap.
Outside
Corner
Inside
Corner
(A)
(B)
6” Gutter
6 Inch Gutter: Depending on how low the gutter is hung (C)
and how much pitch the gutter has from one end to the other
it may be necessary to install the gutter guard inside the gutter
rather than under the shingles (D).
6” Gutter
(A)
(B)
(C)
(D)


