Page is loading ...

Model 90 Quantifier Sound Level Meter
Page 1
User Manual for the
Pulsar Model 90 Quantifier
Sound Level Meters
This manual, the software to which it relates, the
program code and drawings are all:
© Copyright Pulsar Instruments Plc 1989-2009

Model 90 Quantifier Sound Level Meter
Page 2
The content of this manual, any illustrations, technical information and descriptions within this
document were correct at the time of going to print. Pulsar Instruments Plc reserves the right to
make any changes necessary, without notice, in line with the policy of continuing product
development and improvement.
No part of this publication may be duplicated, reprinted, stored in a data processing system or
transmitted by electronic, mechanical, photographic or other means, or recorded, translated,
edited, abridged or expanded without the prior written consent of Pulsar Instruments Plc.
No liability is accepted for any inaccuracies or omissions in this manual, although due care has
been taken to ensure that is it complete and accurate as possible.
Accessories supplied by Pulsar Instruments Plc have been designed for use with the
instrumentation manufactured by Pulsar Instruments Plc. No responsibility is accepted for
damage caused by the use of any other parts or accessories.
In order to take account of a policy of continual development, Pulsar Instruments Plc reserves
the right to change any of the information contained in this publication without prior notice.
Produced by Pulsar Instruments Plc, The Evron Centre, John Street, Filey, North Yorkshire, YO14
9DQ. © Copyright Pulsar Instruments Plc 2009
Reference Number 05/09/MODEL 90/01

Model 90 Quantifier Sound Level Meter
Page 3
0HPreface.........................................................................................................................113H5
1HMessages and Symbols ............................................................................................... 114H5
2HSection 1 Introduction .................................................................................................115H6
3HMain Features ........................................................................................................... 116H6
4HMeasurement Functions .............................................................................................. 117H6
5HBroadband Measurement Mode .................................................................................... 118H6
6H1:1 & 1:3 Octave Band Measurement Mode ................................................................... 119H7
7HOptions & Accessories ................................................................................................ 120H7
8HSection 2 Getting Started .............................................................................................121H8
9HHow to... .................................................................................................................. 122H8
10HMake a 15 minute Broadband Measurement ..............................................................................123H8
11HMake a 1:1 Octave Band Measurement over 1 minute.................................................................124H8
12HMake a 1:3 Octave Band Measurement over 5 minutes ...............................................................125H8
13HMake a set of twenty four 1 hour measurements........................................................................126H8
14HQuick Start ............................................................................................................... 127H9
15HSwitch on.............................................................................................................................128H9
16HCalibrate the Sound Level Meter ..............................................................................................129H9
17HSet the measurement duration .............................................................................................. 130H10
18HCheck the measurement range.............................................................................................. 131H10
19HChange the measurement function......................................................................................... 132H11
20HStart & Stop the measurement .............................................................................................. 133H11
21HReview the measurement ..................................................................................................... 134H12
22HUnpacking and checking the Sound Level Meter ............................................................135H13
23HInstruments Layout...................................................................................................136H14
24HInstalling the software...............................................................................................137H15
25HAssembly ................................................................................................................138H15
26HPreamplifier........................................................................................................................ 139H15
27HUsing Microphone Extension Cables........................................................................................ 140H16
28HBatteries............................................................................................................................ 141H16
29HUsing an external power supply............................................................................................. 142H17
30HWindshield ......................................................................................................................... 143H17
31HNK:70 Random Incidence Adaptor ......................................................................................... 144H17
32HSwitching On ...........................................................................................................145H18
33HChecking the Configuration of the Instrument ...............................................................146H19
34HTime and Date .................................................................................................................... 147H19
35HMeasurement Range............................................................................................................148H19
36HMeasurement Mode ............................................................................................................. 149H20
37HMeasurement Duration......................................................................................................... 150H20
38HMeasurement Auto Repeat.................................................................................................... 151H21
39HMeasurement Auto Synchronise............................................................................................. 152H21
40HConfiguring the instrument from the Analyser software ............................................................. 153H21
41HCalibration...............................................................................................................154H22
42HStarting a measurement ............................................................................................155H23
43HBroadband Mode ................................................................................................................. 156H23
44H1:1 Octave Band Mode ......................................................................................................... 157H23
45H1:3 Octave Band Mode ......................................................................................................... 158H24
46HDisplaying the data during a measurement...................................................................159H25
47HBroadband Mode ................................................................................................................. 160H25
48HPausing and Resetting a measurement ........................................................................161H26
49HStopping the measurement ........................................................................................162H26
50HViewing the stored measurements...............................................................................163H27
51HAfter a measurement has been stopped.................................................................................. 164H27
52HRecalling stored measurements ............................................................................................. 165H27
53HSection 3 Configuring the Sound Level Meter.............................................................166H28
54HKeypad ...................................................................................................................167H28
55HMenu System ...........................................................................................................168H28
56HMeasurement Mode...................................................................................................169H29
57HBroadband Mode ................................................................................................................. 170H29
58H1:1 Octave Band Mode ......................................................................................................... 171H30

Model 90 Quantifier Sound Level Meter
Page 4
59H1:3 Octave Band Mode ......................................................................................................... 172H30
60HMeasurement Duration ..............................................................................................173H31
61HMeasurement Auto Repeat .........................................................................................174H33
62HMeasurement Auto Synchronise ..................................................................................175H34
63HMeasurement Range .................................................................................................176H35
64HInstrument Setup .....................................................................................................177H37
65HDisplay Contrast.................................................................................................................. 178H37
66HTime & Date ....................................................................................................................... 179H38
67HCalibration Level ................................................................................................................. 180H38
68HDisplay Resolution ............................................................................................................... 181H39
69HTime Weighting................................................................................................................... 182H40
70HFrequency Weighting ........................................................................................................... 183H40
71HLn values ........................................................................................................................... 184H41
72HUser Metric......................................................................................................................... 185H42
73HConfiguring the instrument from the Analyser software ............................................................. 186H43
74HSection 4 Viewing and Downloading the measurements ............................................187H44
75HRecalling Stored Measurements ..................................................................................188H44
76HBroadband Measurement...................................................................................................... 189H45
77H1:1 Octave Band Measurements ............................................................................................ 190H45
78H1:3 Octave Band Measurements ............................................................................................ 191H46
79HChecking & Clearing the memory ................................................................................192H48
80HDownloading Measurements to the Software.................................................................193H50
81HSoftware Installation .................................................................................................194H50
82HConnecting the instrument to the PC ...........................................................................195H50
83HUnderstanding how the measurements are stored .........................................................196H51
84HSection 5 Maintenance & Care....................................................................................197H53
85HSection 6 Troubleshooting .........................................................................................198H54
86HBasics .....................................................................................................................199H54
87HCalibration...............................................................................................................200H54
88HMeasurements & Settings ..........................................................................................201H54
89HDownloading Measurements.......................................................................................202H55
90HAppendix 1 Specifications ..........................................................................................203H56
91HModel 105 & 106 Acoustic Calibrators........................................................................ 204H61
92HOperation. ...............................................................................................................205H61
93HSwitching on the Calibrator................................................................................................... 206H61
94HPermanent-on Mode ............................................................................................................ 207H61
95HCalibrating a Sound Level Meter. ........................................................................................... 208H62
96HBackground Noise ............................................................................................................... 209H62
97HStabilisation ....................................................................................................................... 210H62
98HChanging the Battery ................................................................................................211H63
99HBattery type. ...................................................................................................................... 212H63
100HSpecification. .............................................................................................................213H64
101HTechnical Information................................................................................................214H65
102HFree Field Correction .................................................................................................215H66
103HMicrophone Correction Values ............................................................................................... 216H66
104HExample ............................................................................................................................ 217H66
105HAppendix 3 Software Installation ..............................................................................218H67
106HSystem Requirements ...............................................................................................219H67
107HInstallation Requirements ..........................................................................................220H67
108HAppendix 4 Configuring the instrument from the software ........................................221H68
109HAppendix 5 CE Certificate of Conformity .................................................................... 222H69
110HEquipment Description ..............................................................................................223H69
111HGuarantee .................................................................................................................. 224H70
112HPulsar Instruments Offices .........................................................................................225H70

Model 90 Quantifier Sound Level Meter
Page 5
0BPreface
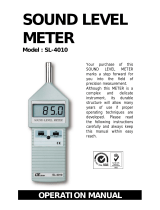
Thank you for purchasing this MODEL 90 Series Sound Level Meter from Cirrus
Research plc. This powerful instrument provides excellent expansion capability, and has
been designed to provide reliable, accurate measurements over a long period of time.
This manual describes the procedure that should be followed to set up and operate the
MODEL 90 Sound Level Meter, as well as comprehensive technical information, using
optional accessories as well as troubleshooting.
This manual also contains the information regarding the MODEL 106 and MODEL 105
Acoustic Calibrators.
If you are a new user of Sound Level Meters or new to the MODEL 90 Sound Level
Meter, first read Section 1 Introduction to familiarise yourself with the features,
components and accessories supplied. Then read Section 2 Getting Started for step-by-
step instructions on how to use the instrument.
The different versions of the MODEL 90 are:
MODEL 91 Class 1 Broadband Only
MODEL 92 Class 2 Broadband Only
MODEL 93 Class 1 Broadband with 1:1 Octave Band Filters
MODEL 94 Class 2 Broadband with 1:1 Octave Band Filters
MODEL 95 Class 1 Broadband with 1:1 & 1:3 Octave Band Filters
MODEL 96 Class 2 Broadband with 1:1 & 1:3 Octave Band Filters
The MODEL 90 Sound Level Meters meet the requirements for Class 1 and Class 2 of
IEC 61672-1:2002 standard for Class 1 Group X or Class 2 Group X Sound Level Meters
as appropriate.
They also meet the requirements for Class 1 and Class 2 according to IEC 60651 and
60804 depending upon the version of the instrument. Please refer to page
226H56 for full
technical details of the MODEL 90 Sound Level Meters.
To meet the requirements of ANSI S1.4 for Random Incidence microphone response, an
NK:70 Random Incidence Adaptor should be used when making measurements. Please
refer to page
227H17 for details of the use of the NK:70 Random Incidence Adaptor.
14BMessages and Symbols
Messages are used in this manual to bring important information to your attention. The
different message types are indicated as shown below.
Pay attention! A caution informs you that improper use of the equipment or
failure to follow instructions may cause data loss or may damage the
equipment.
Please read. A note is a hint or advice that helps you make best use of the
equipment and accessories.
i

Model 90 Quantifier Sound Level Meter
Page 6
1BSection 1 Introduction
15BMain Features
16BMeasurement Functions
The measurement functions that can be provided by the MODEL 90 depend upon the
options that have been fitted. If the instrument has been fitted with the 1:1 Octave
Band or the 1:3 Octave Band filters, these measurements will be available.
Listed below is a summary of the measurements that can be provided by the basic
Broadband instrument, and by the addition of the 1:1 Octave Band or the 1:3 Octave
Band filters.
If the Auto Repeat function is used, the MODEL 90 can be made to repeat the
broadband measurement up to 999 times. See page
228H21 for details of setting the auto
repeat function. The instrument can also be configured to synchronise the
measurement start time with the instrument clock. See page
229H21 for details of the Auto
Synchronise function.
17BBroadband Measurement Mode
In Broadband Mode, the instrument stored the overall values such as L
Aeq
, L
AFmax
and
Ln’s as well as storing a noise profile, or Time History, during each measurement.
The MODEL 90 instruments can store up to 1,300 Broadband Measurements which can
be of any length, up to a maximum of 99 hours per measurement. With each
measurement is stored a noise profile which consists of 1 second Leq samples, with up
to a maximum of 11 days of Noise Profile being available.
Function
Frequency
Weighting
Displayed as
Maximum
value
Minimum
value
A
L
AF
L
AFmax
L
AFmin
C
L
CF
L
CFmax
L
CFmin
Sound Level with Fast Time
Weighting
Z
L
ZF
L
ZFmax
L
Zfmin
A
L
AS
L
ASmax
L
ASmin
C
L
CS
L
CSmax
L
CSmin
Sound Level with Slow Time
Weighting
Z
L
ZS
L
ZSmax
L
Zsmin
A
L
AI
L
AImax
L
AImin
C
L
CI
L
CImax
L
CImin
Sound Level with Impulse
Time Weighting
Z
L
ZI
L
ZImax
L
ZImin
A L
Aeqt
- -
C L
Ceqt
- -
Equivalent Continuous Sound
Pressure Level with
integration time t
Z L
Zeqt
- -
A L
AE
- -
C L
CE
- -
Sound Exposure Level (SEL)
Z L
ZE
- -
Peak Sound Pressure C LCpeak - -
Takt Maximum Sound Level
DIN 45641 (L
AFTeq
)
A LAFTeq - -
A LAIeqt - -
C LCIeqt - -
Impulse Weighted Equivalent
Sounds Press Level with
integration time t (L
Ieqt
)
Z LZIeqt - -
Please note that only one Frequency Weighting can be selected at any time.

Model 90 Quantifier Sound Level Meter
Page 7
18B1:1 & 1:3 Octave Band Measurement Mode
In the 1:1 or 1:3 Octave Band Filter Mode, the MODEL 90 instrument provide a
sequential sweep through the filter bands over the measurement duration. In addition
to the frequency bands, the instruments also provide a measurement of the overall L
Aeq
,
L
Ceq
and L
Zeq
functions.
Function Frequency
Weighting
Displayed as
Stored
Measurement
Applies to
Sound Level with Fast Time
Weighting
Z LZF No
116B1:1 & 1:3
Octave Bands
Z LZeqt Yes
1:1 & 1:3
Octave Bands
A LAeqt Yes Broadband
C LCeqt Yes Broadband
Equivalent Continuous Sound
Pressure Level with
integration time t
Z LZeqt Yes Broadband
The 1:1 Octave Band Filters cover the following frequency bands: 31.5Hz to 16kHz
The 1:3 Octave Band Filters cover the following frequency bands: 25Hz to 16kHz
When the MO:800/6 Options is fitted, the 1:3 Octave Band Filters include the additional
20Hz and 20kHz 1:3 Octave Band Filters.
19BOptions & Accessories
The MODEL 90 Series are also available with a range of options and accessories that
can enhance the performance and applications of the instrument. For full details, please
contact Pulsar Instruments Plcor your local representative.
The most commonly used accessories are listed below.
Model 105 Class 1 Acoustic Calibrator
Model 106 Class 2 Acoustic Calibrator
K2 Hard Attache Case
WS90 Windshield
CP1 Carry Pouch
TR1 Tripod
DC80 USB Download Cable
MEC2 2 m Microphone Extension Cable for Instruments with removable preamp
MEC 5 5 m Microphone Extension Cable for Instruments with removable preamp
MEC10 10 m Microphone Extension Cable for Instruments with removable preamp
TM1 Preamplifier Tripod Mount
Outdoor Kits
WK1 Outdoor Weatherproof Kit with Lightweight Outdoor Microphone System
WK2 Outdoor Weatherproof Kit with Heavy Duty Outdoor Microphone System
Replacement Microphone Capsules
MK:226 Class 1 Microphone Capsule for Models 91, 93 & 95
MK:216 Class 2 Microphone Capsule for Models 92,94 & 96

Model 90 Quantifier Sound Level Meter
Page 8
2BSection 2 Getting Started
20BHow to...
These example settings are designed to demonstrate the different configurations that
are available from the MODEL 90 Sound Level Meters. Please check the configuration of
the instrument to match the measurement requirements of your application before
making a measurement.
60BMake a 15 minute Broadband Measurement
1. Switch on
2. Calibrate
3. Set Measurement Mode to Broadband
4. Set measurement duration to 15 minutes
5. Switch off Auto Repeat & Auto Synchronise
6. Set Measurement Range
7. Start Measurement
a. Run for 15 minutes
8. Stop Measurement
9. Review Measurement Data
61BMake a 1:1 Octave Band Measurement over 1 minute
1. Switch on
2. Calibrate
3. Set Measurement Mode to 1:1 Octave Band
4. Set Measurement Duration to 1 minute
5. Set Measurement Range
6. Start Measurement
a. Run for 1 minute
7. Stop Measurement
8. Review Measurement Data
62BMake a 1:3 Octave Band Measurement over 5 minutes
1. Switch on
2. Calibrate
3. Set Measurement Mode to 1:3 Octave Band
4. Set Measurement Duration to 5 minutes
5. Set Measurement Range
6. Start Measurement
a. Run for 5 minutes
7. Stop Measurement
8. Review Measurement Data
63BMake a set of twenty four 1 hour measurements
1. Switch on
2. Calibrate
3. Set Measurement Mode to Broadband
4. Set Measurement Duration to 1 hour
5. Set Auto Repeat to On
6. Set Number to 25
7. Set Auto Synchronise to On
a. Start Measurement
8. After 24 1 hour measurements the instrument will stop
9. Review Measurement Data

Model 90 Quantifier Sound Level Meter
Page 9
21BQuick Start
64BSwitch on
Key Press Display
When the instrument has switched on, the start-up screen will change to the standard
noise level display.
65BCalibrate the Sound Level Meter
If a microphone extension cable is to be used during a measurement, the
instrument must be calibrated with the cable attached.
Connect the Acoustic Calibrator to the Sound Level Meter and select the 94dB setting
on the Acoustic Calibrator. Press the Menu key to select the Calibrate option and press
OK to start the calibration procedure.
Key Press Display
Comments
If the calibration is successful , press the exit key to return to the main screen.

Model 90 Quantifier Sound Level Meter
Page 10
66BSet the measurement duration
Press the menu key to view the current measurement duration and the status of the
auto repeat and auto synchronise function. At the bottom of the screen is the current
configuration.
Key Press Display
Comments
In this example, the measurement
duration is set to 30 minutes.
The Auto-Repeat function is
switched on.
The Auto-Synchronise function is
switched on.
If the measurement duration is not as required, use the Measurement Duration menu
option to set the required measurement duration. Refer to page
230H31 for details of setting
the measurement duration.
67BCheck the measurement range
Press the Range key to check the current measurement range.
Key Press Display
Comments
In this example, the measurement
range is set to 70dB to 140dB.

Model 90 Quantifier Sound Level Meter
Page 11
To change the measurement range, use the Up and Down Arrow keys to select the
required measurement range and press OK. Refer to page
231H35 for details of setting the
measurement range and the use of the bar graph display in choosing the correct
measurement range.
68BChange the measurement function
To check the current measurement function and to change the measurement function,
press the menu key. Use the Up and Down arrows keys to select the required
measurement mode and OK to Select the mode required.
Key Press Display
Comments
In this example, the instrument is
set to Broadband Measurement
Mode
69BStart & Stop the measurement
To start the measurement, press the Start Key
Key Press Display
Comments
Press the Up and Down arrow keys to view the measurement functions during the
measurement.

Model 90 Quantifier Sound Level Meter
Page 12
To stop the measurement, press the Stop Key.
Key Press Display
Comments
The instrument stores the
measurement in memory and
enters the measurement review
mode.
70BReview the measurement
When the measurement has been stopped, the instrument automatically stores the
measurement in memory and enters the measurement review mode. Use the Up and
Down arrow keys to view the different measurement values and press the exit key to
return to the main display.
Refer to page
232H44 for details of the measurement review mode.

Model 90 Quantifier Sound Level Meter
Page 13
22BUnpacking and checking the Sound Level Meter
Carefully remove the instrument from its shipping container and inspect it for possible
damage or missing items. If the meter appears to be damaged or something is missing,
contact Pulsar Instruments Plcor your local representative immediately.
The basic MODEL 90 instrument is supplied with the following standard accessories:
Analyser for Windows Software on CD-ROM
MODEL 90 User Manual
Certificates of Calibration
ZL:100 USB Data Cable
Batteries 2 x AA
In addition, the Class 1 versions of the instrument are supplied with an MV:200D
Preamplifier and a microphone box.
If you have ordered the instrument as a complete measurement kit, you will have also
received some further items such as an Acoustic Calibrator, Carrying Case and
Windshield.

Model 90 Quantifier Sound Level Meter
Page 14
23BInstruments Layout

Model 90 Quantifier Sound Level Meter
Page 15
24BInstalling the software
Before measurements can be downloaded from the MODEL 90 instrument, the Analyser
software must be installed from the supplied CD.
Please refer to page
233H50 for further details of the installation of the Analyser software.
25BAssembly
The MODEL 90 instruments are supplied fully assembled apart from the MV:200
Preamplifier for Class 1 instruments and the batteries.
71BPreamplifier
The Class 1 versions of the MODEL 90 (MODEL 91, MODEL 93 and MODEL 95) are
supplied with a removable preamplifier, the MV:200D. Also, a removable preamplifier
may be fitted as an option to the Class 2 instruments.
This preamplifier must be connected to the Sound Level Meter before the unit is
switched on. This unit is connected to the top of the MODEL 90 using a locking ring. To
connect the MV:200D Preamplifier, follow the diagram below:
(1) Place the preamplifier into the socket on the Sound Level Meter
(2) Ensure the connector has located into the socket
(3) Tighten the Locking Ring.
Do not cross thread the locking ring. Damage caused by misuse is not covered by the
warranty for the instrument.
Removing the Preamplifier
Do not twist the preamplifier body. Unscrew the locking ring and pull the

Model 90 Quantifier Sound Level Meter
Page 16
preamplifier from the Sound Level Meter.
72BUsing Microphone Extension Cables
The MODEL 90 instruments can be used with a microphone extension cable if the
instrument is fitted with the removable preamplifier. If a microphone extension cable is
to be used during a measurement, the instrument must be calibrated with the cable
attached.
Connect the microphone extension cable in the same manner as the MV:200C
Preamplifier.
73BBatteries
The batteries of the MODEL 90 are located behind the cover on the bottom of the
instrument. Slide the cover to the right hand side to remove and to access the battery
holder.
Ensure the instrument is switched off. Remove the battery holder from the instrument
and insert the batteries. The MODEL 90 instruments uses two AA type batteries, also
known as LR6.
Ensure that the batteries are inserted correctly. DO NOT reverse the polarity
of the batteries as this may cause damage to the instrument.

Model 90 Quantifier Sound Level Meter
Page 17
74BUsing an external power supply
The MODEL 90 can be used with an
external power supply. When the
external supply is connected, the MODEL
90 switches automatically from the
internal battery power.
When the external power is either
removed or switched off, the instrument
will automatically switch back to the
internal battery supply.
When an external supply is connected, the display of the instrument will show a symbol
in the top right corner as shown below.
75BWindshield
The MODEL 90 Series can be used with a 90mm Foam Windshield which will reduce the
noise levels generated by air turbulence over the microphone capsule.
The windshield can also be used to protect the microphone capsule of the Sound Level
Meter from dust and fluids which may affect the performance of the instrument. To use
the Windshield, push the hole in the windshield over the microphone of the Sound Level
Meter. The Windshield must be removed before the Sound Level Meter can be
calibrated.
76BNK:70 Random Incidence Adaptor
The NK:70 Random Incidence Adaptor is designed to modify the
response of the microphone capsule from Free Field to Random
Incidence in order to comply with the requirements of ANSI
S1.4.
For instruments supplied for use outside of the USA, this
adaptor may not be supplied. For further details, please contact
your local representative.
To fit the NK:70 Random Incidence Adaptor, push the adaptor
over the microphone grill. Do not attempt to remove the
microphone grill as this may cause damage to the capsule.
To calibrate the instrument fitted with the microphone capsule,
remove the NK:70 Adaptor and follow the instructions supplied
with the instrument. Do Not attempt to calibrate the instrument
with the NK:70 fitted.

Model 90 Quantifier Sound Level Meter
Page 18
26BSwitching On
120B119BKey Press Display
When the instrument is first switched on, a Welcome screen is shown with the
instrument type and version number. After 3 seconds, the display will change and the
current Sound Level will be shown with the current configuration shown as above.
In this example, the instrument is showing the Fast A-Weighted Sound Level with the
current Date and Time shown at the bottom of the screen. The battery level is shown in
the top right hand corner of the display.
Across the top of the display, above the numbers, is shown the sound level as a bar
graph. This graph is scaled with the current measurement range. Please refer to page
234H35 for details of changing the measurement range.
The display will also show the battery level and when the instrument is in Overload or
Under Range. The Glossary on page Error! Bookmark not defined. also describes the
indication of Overload and Under Range.
Low Battery Level Overload Under Range

Model 90 Quantifier Sound Level Meter
Page 19
27BChecking the Configuration of the Instrument
The Setup of the instrument should be checked before making a measurement.
77BTime and Date
Key Press Display
Comments
The current time and date are
shown at the bottom of the
screen.
78BMeasurement Range
Key Press Display
Comments
The current measurement range is
shown highlighted. Use the Up
and Down Arrows to change the
range.
Press the OK key to change the
range or Exit to discard.
The bar at the top of the screen
shows the noise level in proportion
to the measurement range.

Model 90 Quantifier Sound Level Meter
Page 20
79BMeasurement Mode
Key Press Display
Comments
The current measurement mode is
shown on the screen.
In this example, the measurement
mode is Broadband.
80BMeasurement Duration
Key Press Display
Comments
The measurement duration is
shown at the bottom of the
screen.
In this example, the measurement
time is 30 minutes.
When the instrument is set to either 1:1 or 1:3 Octave Band Mode, the Run Duration is
divided between the frequency bands. For example, if the measurement duration is set
to 30 minutes, the MODEL 90 instrument will take a total of 30 minutes to complete
the sweep through the frequency bands.
To meet the accuracy required by the standards to which the instrument is designed to
meet, there is a minimum time required to measure each frequency band. Therefore,
the MODEL 90 enforces a minimum measurement duration of 1 minute for the 1:1
Octave Band Mode and 3 minutes for the 1:3 Octave Band Mode.
/