Spin Master 45136 User manual
- Category
- Toy vehicles
- Type
- User manual
This manual is also suitable for
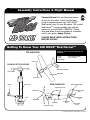
Spin Master 45136 is designed to provide a fun and exciting flying experience. With its powerful pump and aerodynamic design, it can reach impressive speeds of up to 240KMH (150MPH)1 and fly over 90 meters (100 yards)! Assembly is quick and easy, and the plane comes with a set of stickers to customize its look. The included pump allows for multiple flights without the need for batteries or additional power sources. Whether you're a beginner or an experienced flyer, Spin Master 45136 offers an enjoyable and challenging experience.
Spin Master 45136 is designed to provide a fun and exciting flying experience. With its powerful pump and aerodynamic design, it can reach impressive speeds of up to 240KMH (150MPH)1 and fly over 90 meters (100 yards)! Assembly is quick and easy, and the plane comes with a set of stickers to customize its look. The included pump allows for multiple flights without the need for batteries or additional power sources. Whether you're a beginner or an experienced flyer, Spin Master 45136 offers an enjoyable and challenging experience.


-
 1
1
-
 2
2
-
 3
3
-
 4
4


Spin Master 45136 User manual
- Category
- Toy vehicles
- Type
- User manual
- This manual is also suitable for
Spin Master 45136 is designed to provide a fun and exciting flying experience. With its powerful pump and aerodynamic design, it can reach impressive speeds of up to 240KMH (150MPH)1 and fly over 90 meters (100 yards)! Assembly is quick and easy, and the plane comes with a set of stickers to customize its look. The included pump allows for multiple flights without the need for batteries or additional power sources. Whether you're a beginner or an experienced flyer, Spin Master 45136 offers an enjoyable and challenging experience.
Ask a question and I''ll find the answer in the document
Finding information in a document is now easier with AI
Related papers
-
Spin Master AIR HOGS The Amazing Spider-Man Striker 3 Assembly Instructions & Flight Manual
-
-
-
-
-
-
-
-
-
Other documents
-
bq BQ-1085L Hornet Max Pro Hard reset manual
-
Air Hogs RC Fire Wing Operating instructions
-
 Hobbico Nexstar select User manual
-
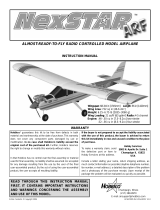 Hobbico NexStar ARF User manual
-
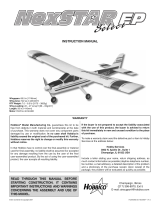 Hobbico NexSTAR EP User manual
-
Carl Goldberg Products Eagle 2 ARF Owner's manual
-
-
Tower Hobbies Trainer 40 ARF User manual
-
Carl Goldberg GBGA1077 Owner's manual
-
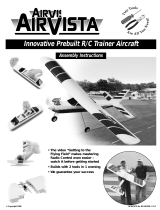 Hobbico AirVista Assembly Instructions Manual


