Page is loading ...

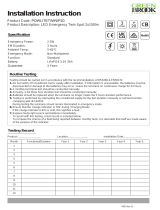
Installation Instruction
Product Code: ELLEDEXIT
Product Description: Metal Exit Box
Specification
Emergency Power: <3W
Viewing Distance: 30m
EM Duration: 3 hours
Charging Time: 24 hours
Ambient Temp: 0-40 C
Emergency Mode: Maintained
Function: Standard
Battery: LiFePO4 3.2V 1.5Ah
Warranty: 3 years
Routine Testing
Testing should be carried out in accordance with the recommendations of BS5266 & EN50172.
1,Do not switch off unswitched mains supply after installation. If Interruption is unavoidable, the batteries must be
disconnected or damage to the batteries may occur. Leave the luminaire on continuous charge for 24 hours.
2, A monthly functional test should be conducted manually.
3, Annually, a full three hour duration test should be conducted manually.
4.Batteries should be replaced when the luminaire no longer meets the 3 hours duration performance.
5.Testing is performed by interrupting the unswitched supply for the test duration manually or self-test function
complying with IEC62034.
During testing the luminaire should remain illuminated in emergency mode.
6.Ensure that the 'charge indiscator' is 'ON' during 'Charging Mode'.
If the charge indicator (LED) is unlit, this signifies a fault.
7.Replace faulty light source and batteries immediately.
To assist with this testing, a test record is included below.
To increase the chance of a fault being reported between monthly tests, it is desirable that staff are made aware
of the purpose of the indicator.
Testing Record
Product: Location: Installation Date:
Month Functional/Duration Year 1 Year 2 Year 3 Year 4 Year 5
1
2
3
4
5
6
7
8
9
10
11
12
3

Installation Instruction
Pictogram Replacement
Iss 1:08.12.23
/


