TracPhone V7 Installation Guide
TracPhone V7
24" (60 cm) Configuration

TracPhone V7 Installation Guide
1
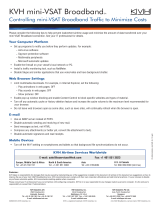
KVH’s Complete mini-VSAT Broadband
sm
System
KVH, TracPhone, and the unique light-colored dome with contrasting baseplate are registered trademarks of KVH Industries, Inc.
All other trademarks are property of their respective companies. The information in this document is subject to change without notice.
No company shall be liable for errors contained herein. © 2007 KVH Industries, Inc., All rights reserved. 54-0464 Rev. C
These instructions explain how to install the TracPhone V7 mini-VSAT Broadband satellite
communications system. Instructions on how to use the system are provided in the User’s Guide.
Installation Steps
CAUTION - RF Radiation Hazard
Who Should Install the System?
To ensure a safe and effective installation, only a KVH-certified technician should install the
TracPhone system. KVH-certified technicians have the tools and electronics expertise necessary
to install the system. To find a technician near you, visit www.kvh.com/wheretogetservice.
Technical Support
1. Inspect Parts and Get Tools... 3
2. Plan the Antenna Installation... 4
3. Plan the Belowdecks Installation... 5
4. Prepare the Belowdecks Units... 6
5. Prepare the Antenna Site... 9
6. Remove the Restraints... 10
7. Wire the Antenna... 11
8. Mount the Antenna... 12
9. Wire the Belowdecks Units... 13
10. Connect Power... 15
11. Configure the Computer(s)... 16
12. Turn On the System... 19
13. Set Up RF Hazard Zones (Optional)... 20
14. Test the System... 21
15. Educate the Customer... 23
The antenna transmits radio frequency (RF)
energy that is potentially harmful.
Whenever the system is powered on, make
sure everyone stays more than 36 feet
(11 m) away from the antenna within its
5-80° elevation range. No hazard exists
directly above the antenna and anywhere
below the antenna’s mounting plane.
North/South America, Australia:
Phone: +1 401 847-3327
E-mail: [email protected]
Europe, Middle East, Asia:
Phone: +45 45 160 180
E-mail: [email protected]
Radiation
Hazard
Radiation
Hazard
3
6
f
t
(1
1
m)
3
6
f
t (
1
1
m)
80
5
80
5
Antenna

3
Before you begin, follow these steps to make sure
you have everything you need to complete the
installation.
a. Unpack the box and ensure it contains
everything shown in Figure 1 and on the
Kitpack Content Lists. Save the packaging for
future use.
b. Carefully examine all of the supplied parts to
ensure nothing was damaged in shipment.
c. Gather all of the tools and materials listed
below. You will need these items to complete
the installation.
• Flat-head and Phillips-head screwdrivers
• Electric drill and 1/2" (13 mm) bit
• 3" (80 mm) hole saw
•Wire cutters
• Socket wrenches and extension
• 7/16" open-end wrench
• Light hammer and center punch
•Adhesive tape, scriber or pencil
• Wire strippers and terminal lug crimper
• Two RF coax cables (see Figure 20 on
page 11 for type required)
•Connector installation tools
• Laptop computer with Windows
®
Vista
or XP installed
NOTE: KVH offers an optional Service Selector kit for
connecting both a TracPhone V7 and a Fleet antenna
system to the onboard local area network (LAN).
Supplemental instructions are provided in the Service
Selector kit (KVH P/N 01-0299).
Radome
Baseplate
Figure 1: TracPhone V7 System Components
Antenna
Control Unit
Modem
Router
Remote Service
& Support Module
Multimedia Terminal
Adapter (MTA)
Always lift the antenna by the baseplate and
never by the radome or any portion of the
internal antenna assembly (see Figure 1).
IMPORTANT!
Inspect Parts and Get Tools
1

4
Before you begin, consider the following antenna
installation guidelines:
• Minimize blockage. The antenna requires a
clear view of the sky to transmit and receive
satellite signals (see Figure 2). The fewer
obstructions, the better the system will
perform.
• Make sure the mounting surface is wide
enough to accommodate the antenna’s base
(see Figure 3). Also make sure it is flat, level
(within ±1°), strong enough to support the
antenna’s weight (60 lbs, 27.2 kg), and rigid
enough to withstand heavy vibration.
• Select a location that is as close as possible to
the intersection of the vessel’s fore-and-aft
centerline and midships.
• Select a location that is well above any areas
accessible to passengers and crew to reduce
the risk of RF radiation exposure.
• Do not mount the antenna at the same level
as the radar because the radar’s energy might
overload the antenna. Ideally, you should
mount the antenna 4 ft (1.2 m) above the
radar, outside the beam path of the radar.
Blocked!
Antenna
Mast
Look Angle
Vessel Platform
5 to 80
Figure 2: Blockage from Obstruction
27.36"
(69.5 cm)
26.2"
(66.5 cm)
12"
(30.5 cm)
12"
(30.5 cm)
6"
(15.2 cm)
6"
(15.2 cm)
4 x 1/2"
( 13 mm)
26.2"
(66.5 cm)
FWD
Figure 3: Antenna Dimensions
Side View
Bottom View
Plan the Antenna Installation
2

5
Before you begin, consider the following
installation guidelines for the belowdecks units.
Control Unit and Modem
• Select a mounting location in a dry, well-
ventilated area belowdecks away from any
heat sources or salt spray.
• Be sure the front panels will be easily
accessible to the user.
• Leave enough room at the rear panel for
connecting the cables.
• You have several options for mounting the
control unit and modem:
Option 1 - Inside the optional case
Option 2 - To a horizontal surface together
using two L-brackets
Option 3 - To a horizontal surface
separately using four L-brackets
NOTE: The control unit and modem are sized to
fit a standard 19" (482.6 mm) equipment rack.
• To use the supplied data and power cables,
the control unit must be located within 100 ft
(30 m) of the antenna. However, you can
order 150 ft (45 m) cables if a longer cable run
is necessary (see Figure 20 on page 11).
Router and MTA
• To use the supplied Ethernet cables, select a
mounting location within 25 ft (7.5 m) of the
modem (maximum length = 200 ft (60 m)).
• Be sure the location provides adequate WiFi
reception. Do not install the router in an area
surrounded by metal or near any electrical
devices that generate RF noise.
Remote Service & Support Module
• To use the supplied serial data cable, select a
mounting location within 25 ft (7.5 m) of the
control unit (maximum length = 50 ft (15 m)).
• Be sure the location provides adequate GPRS
cellular reception.
11.31"
(28.7 cm)
2.61"
(6.6 cm)
16.75"
(42.5 cm)
Figure 4: Control Unit or Modem Dimensions (Identical)
20.5"
(52.1 cm)
11.3"
(28.7 cm)
20.5"
(52.1 cm)
Figure 5: Case Dimensions
Plan the Belowdecks Installation
3

6
If you plan to mount the control unit and modem
inside the optional 19" (482.6 mm) case, follow
these steps to assemble the case.
a. Remove the four M4 screws securing the rear
cover to the case. Discard the rear cover.
b. Attach the top cover to the case using four
M4 x 12 mm screws (see Figure 6). Attach the
bottom cover and the two mounting brackets
using four M4 x 16 mm screws.
c. Attach the four plastic feet to the bottom
cover (see Figure 6).
d. At the front of the case, insert eight cage nuts
into the following locations on the frame
(four on each side) (see Figure 6): #2, #5, #8,
and #11.
e. At the back of the case, insert four cage nuts
into the following locations on the frame (two
on each side): #1 and #3
f. Remove the four #6-32 screws and washers
securing the two retaining straps to the rear
panel of the control unit. Do not remove the
bottom screws securing the straps to the modem.
g. Attach the strain-relief bracket to the
retaining straps and control unit using the
screws and washers you removed in Step f
(see Figure 7).
h. At the top 3U section of the case, insert the
control unit/modem assembly and secure the
front mounting brackets to the case using
four M6 screws and washers (see Figure 8).
i. At the bottom 3U section of the case, attach
the supplied blank panel using four M6
screws and washers (see Figure 8).
j. Secure the back of the control unit to the back
of the case using the two supplied “Z”
brackets. Attach the brackets to the case
frame using four M6 screws and washers.
Attach the brackets to the rear panel of the
control unit using four #6-32 screws and
washers (see Figure 8).
k. Once you have completed all system wiring,
mount the case to the vessel using fasteners
appropriate for the mounting surface.
M4 x 16mm Screw (x4)
Mounting Bracket (x2)
Top Cover
Bottom Cover
M4 x 12mm Screw (x4)
Plastic Foot (x4)
1
2
3
4
5
6
7
8
9
10
11
12
Figure 6: Assembling the Case
#6 Washer (x4)
#6-32 Screw (x4)
Strain-Relief
Bracket
Tie-Wrap
Holes (x12)
Retaining
Strap (x2)
Control Unit
Modem
Figure 7: Attaching the Strain-Relief Bracket
M6 Screw (x4)
Plastic Washer (x4)
#6 Washer (x4)
#6-32 Screw (x4)
“Z” Bracket (x2)
Cage Nut (x4)
Attach to Case
Attach to Control Uni
t
M6 Screw
(
x8
)
Plastic Washer (x8)
Cage Nut (x8)
Blank Panel
Control Unit
and Modem
Case
Figure 8: Securing the Control Unit/Modem in the Case
Prepare the Belowdecks Units
4
Option 1 - Mounting in the Case

7
If you plan to mount the control unit and modem
together as an assembly, without using the
optional case, follow these steps to detach the
rack-mount brackets, attach the strain-relief
bracket, and attach the “L” mounting brackets.
a. Remove the 12 #6-32 screws and washers
securing the two rack-mount brackets to the
front of the control unit and modem (see
Figure 9). Remove the brackets.
b. Remove the four #6-32 screws and washers
securing the two retaining straps to the rear
panel of the control unit. Do not remove the
bottom screws securing the straps to the modem.
c. Attach the strain-relief bracket to the
retaining straps and control unit using the
screws and washers you removed in Step b
(see Figure 10).
d. Attach two of the supplied “L” mounting
brackets to the sides of the control unit or
modem using four #6-32 screws and washers
(see Figure 11). You can attach the brackets to
either the top of the control unit or the bottom
of the modem, depending on your desired
mounting location.
e. Once you have completed all system wiring,
mount the modem/control unit assembly to
the vessel using fasteners appropriate for the
mounting surface.
#6-32 Screw (x12)
#6 Washer (x12)
Rack-Mount Bracket (x2)
Control Unit
Modem
Figure 9: Detaching the Rack-Mount Brackets
#6 Washer (x4)
#6-32 Screw (x4)
Strain-Relief
Bracket
Tie-Wrap
Holes (x12)
Retaining
Stra
p
(x2)
Control Unit
Modem
Figure 10: Attaching the Strain-Relief Bracket
#6 Washer (x4)
#6-32 Screw (x4)
“L” Mounting
Bracket (x2)
.156" ( 3.96 mm)
Mounting Hole (x4)
Figure 11: Attaching the “L” Mounting Brackets (Modem Not Shown)
Prepare the Belowdecks Units
4
Option 2 - Mounting Units Together

8
If you plan to mount the control unit and modem
separately, follow these steps to detach the
control unit from the modem, attach the strain-
relief brackets, and attach the “L” mounting
brackets.
a. Remove the 12 #6-32 screws and washers
securing the rack-mount brackets to the front
of the control unit and modem (see Figure 9
on page 7). Remove the brackets.
b. Remove the 16 #6-32 screws and washers
securing the four metal retaining straps to the
control unit and modem (see Figure 12).
Remove the straps.
c. Attach a strain-relief bracket to the back of
the control unit using four of the screws and
washers you removed in Step b (see
Figure 13).
d. Attach a second strain-relief bracket to the
back of the modem using four of the screws
and washers you removed in Step b (see
Figure 14).
e. Attach two of the supplied “L” brackets to
the sides of the control unit using four #6-32
screws and washers (see Figure 11 on page 7).
You can attach the brackets at either the top
or bottom of the control unit, depending on
your desired mounting location.
f. Attach the two other supplied “L” brackets to
the sides of the modem using four #6-32
screws and washers (see Figure 11 on page 7).
You can attach the brackets at either the top
or bottom of the modem, depending on your
desired mounting location.
g. Once you have completed all system wiring,
mount the control unit and modem to the
vessel using fasteners appropriate for the
mounting surface.
#6-32 Screw (x16)
#6 Washer (x16)
Strap (x4)
Modem
Control Unit
Figure 12: Detaching the Retaining Straps
#6 Washer (x4)
#6-32 Screw (x4)
Strain-Relief
Bracket
Tie-wrap
Holes (x12)
Control Unit
Figure 13: Attaching the Bracket to the Control Unit
#6 Washer (x4)
#6-32 Screw (x4)
Strain-Relief
Bracket
Tie-wrap
Holes (x12)
Modem
Figure 14: Attaching the Bracket to the Modem
Prepare the Belowdecks Units
4
Option 3 - Mounting Units Separately

9
Once you have identified a suitable antenna
mounting site, according to the guidelines
provided in Step 2, follow these steps to drill the
mounting holes and cable access hole to prepare
the site for installation.
a. Unfold the antenna mounting template
(supplied in the Customer Welcome Kit) and
place it onto the mounting surface. Make sure
the “FWD” (forward) arrow points toward
the bow and is parallel to the vessel’s
centerline (see Figure 15).
NOTE: You don’t need to mount the antenna
exactly on the vessel’s centerline, but the
antenna’s forward arrow must be parallel to it.
b. Using a light hammer and center punch,
mark the locations for the four mounting
holes and cable access hole on the mounting
surface in the locations indicated on the
template.
c. Drill a 1/2" (13 mm) hole at the four
mounting hole locations you marked in
Step b. Later, you will insert four 3/8"-16
bolts through these holes to secure the
antenna to the mounting surface.
d. Cut out the 3" (80 mm) cable access hole in
the location you marked in Step b. Smooth
the edges of the hole to protect the cables.
Later, you will route the data, power, and RF
cables through this hole and into the vessel.
e. Clean and dry the antenna mounting surface.
f. Peel off the paper backing from the supplied
foam seal to expose the adhesive. Then press
the foam seal down firmly onto the mounting
surface, ensuring the hole in the foam seal
aligns with the cable access hole in the
mounting surface (see Figure 16).
NOTE: Apply the foam seal to the vessel
mounting surface, not to the antenna’s baseplate.
You will have difficulty connecting the cables to
the antenna if the foam seal is attached to the
baseplate.
12"
(305 mm)
FWD
1/2" ( 13 mm)
Mounting Hole (x4)
12"
(305 mm)
3" ( 80 mm)
Cable Access Hole
Figure 15: Antenna Mounting Holes Layout
Figure 16: Foam Seal
Align with
Cable Access
Hole
Prepare the Antenna Site
5

10
Inside the antenna, four shipping restraints
prevent the antenna assembly from moving
during shipment. Follow these steps to remove
these shipping restraints.
a. Remove the six #10-32 Phillips screws
securing the radome to the baseplate.
Carefully lift the radome straight up until
clear of the antenna assembly and set it aside
in a safe place.
TIP: If you keep the radome topside, secure it with
a lanyard to prevent it from falling overboard.
b. Using wire cutters, cut and remove the
elevation shipping restraint securing the
reflector to the antenna frame (see Figure 17).
c. Cut and remove the tie-wrap securing the
antenna’s LNB to the reflector (see Figure 18).
d. Using a 9/16" socket with 6" extension,
remove the two 3/8" bolts securing the
azimuth shipping restraints to the antenna
baseplate (see Figure 19). Remove the
restraints.
Figure 17: Elevation Shipping Restraint
Wire
Figure 18: LNB Shipping Restraint
Tie-wrap
Figure 19: Azimuth Shipping Restraints
3/8" Bolts
Once you have removed the restraints,
handle the antenna very carefully. With the
restraints removed, the internal antenna
assembly rotates freely and, if not handled
properly, can damage the limit switch.
IMPORTANT!
Remove the Restraints
6

11
Follow these steps to connect the data, power,
and RF cables to the antenna.
a. In addition to the data and power cables, you
will need to connect two 75-ohm RF coax
cables from the antenna to the belowdecks
equipment. Use the guidelines in Figure 20 to
determine the type of RF cables required.
b. Label both ends of the two RF cables. Label
one cable “TX,” and label the other “RX.”
c. Route the data, power, and RF cables
belowdecks through the 3" (80 mm) cable
access hole. Leave an adequate service loop,
approximately 8" (20 cm) of slack, in the
cables for easy serviceability. Later, you will
connect the data and power cables to the
control unit and the RF cables to the modem.
d. Connect the data cable to the “Data” jack on
the bottom of the antenna (see Figure 21).
Hand-tighten until the connector locks in
place; do not use excessive force.
e. Connect the power cable to the “Power” jack
on the bottom of the antenna. Hand-tighten
until the connector locks in place; do not use
excessive force.
f. Connect the RF cable labeled “TX” to the
“MTx” jack on the bottom of the antenna.
Hand-tighten, then tighten with a 7/16"
wrench for 1/4 turn to ensure an electrical
and weather-proof connection.
g. Connect the RF cable labeled “RX” to the
“MRx” jack on the bottom of the antenna.
Hand-tighten, then tighten with a 7/16"
wrench for 1/4 turn.
Figure 20: RF Cable Requirements
15-50 ft (5-15 m) Cable Run
Cable: RG-11 (KVH P/N 32-0566-0050)
Connector: SNS11AS
Installation Tools: CST596711 and L3011B
50-100 ft (15-30 m) Cable Run
Cable: LMR-400-75
Connector: EZ-400-FMH-75
Installation Tools: TK-400EZ-75
100-150 ft (30-45 m) Cable Run
Cable: LMR-600-75
Connector: EZ-600-FMH-75
Installation Tools: TK-600EZ
NOTE: Optional 150 ft (45 m) data and power cables:
Data cable KVH P/N 32-0921-0150
Power cable KVH P/N 32-0924-0150
NOTE: RG-11 connectors/tools are manufactured by
Thomas & Betts. LMR-400-75 and LMR-600-75 cables/
connectors/tools are manufactured by Times Microwave.
Terminate RF cables with the proper type “F”
connectors (see Figure 20). Connectors are
included with RG-11 cables purchased from KVH.
Instructions for terminating LMR-400-75
cable are provided in Appendix B on page 28.
IMPORTANT!
Do not use bulkhead connectors. It is critical
that you maintain the integrity of the cables.
IMPORTANT!
Figure 21: Connectors on Bottom of Antenna
MRx
MTx
Data
Power
Wire the Antenna
7

12
Follow these steps to mount the antenna to the
mounting surface.
a. Place the antenna baseplate over the holes
drilled in the mounting surface.
b. Make sure the forward arrow inside the
baseplate points toward the bow and is
parallel to the vessel’s centerline (see
Figure 22).
c. Make sure the four holes in the baseplate line
up with the four holes in the mounting
surface.
d. At each of the four baseplate mounting holes,
place a 3/8" flat washer on a 3/8"-16 bolt and
insert the bolt into the hole from above (see
Figure 23).
e. Secure each mounting bolt to the mounting
surface using a 3/8" shoulder washer, a
3/8" flat washer, a 3/8" lock washer, and a
3/8"-16 hex nut from below. Tighten all four
bolts until the four rubber feet on the
baseplate are bottomed against the mounting
surface and the foam seal is fully compressed.
f. Reinstall the radome onto the antenna. Secure
in place with the six #10-32 screws you
removed in Step 6a (see Figure 24).
g. Install a protective plastic screw cap
(supplied in the kitpack) over each radome
screw.
Figure 22: Forward Arrow in Antenna Baseplate
You will need to rotate the antenna assembly
by hand to see all four mounting holes. Rotate
the antenna assembly slowly. If it hits a
mechanical stop with excessive force, the
limit switch might become damaged.
IMPORTANT!
3/8"-16 Bolt (x4)
3/8" Flat Washer (x4)
Foam Seal
Mounting Surface
3/8" Flat Washer (x4)
3/8"-16 Hex Nut (x4)
Antenna Baseplate
3/8" Shoulder Washer (x4)
3/8" Lock Washer (x4)
Figure 23: Mounting the Antenna (Side View)
#10-32 Screw (x6)
Figure 24: Reinstalling the Radome
Mount the Antenna
8

13
Wire the Antenna Cables
Follow these steps to connect the antenna to the
control unit and the modem.
NOTE: A system wiring diagram is provided in
Appendix A on page 27.
a. First dress the data and power cables from
the antenna. Strip back the insulation of each
wire approximately 1/4" (6 mm) and gently
twist each wire to ensure a good electrical
connection.
b. Find the terminal strip connector in the
kitpack. Connect the antenna data cable to
the terminal strip connector as shown in
Figure 25.
c. Connect the power cable from the antenna to
the terminal strip connector as shown in
Figure 25.
d. Plug the terminal strip connector into the rear
panel of the control unit (see Figure 26).
e. Connect the RF coax cable labeled “RX”
(connected to the antenna’s MRx jack) to the
“Rx RF” jack on the back of the modem (see
Figure 27).
f. Connect the RF coax cable labeled “TX”
(connected to the antenna’s MTx jack) to the
“Tx RF” jack on the back of the modem.
12 1110987612543
Data
Power
Antenna
Blue/White
White/Blue
Brown/White
White/Gray
Gray/White
White/Orange
Orange/White
White/Brown
Red
Black
Terminal Strip Connector
Figure 25: Antenna Power and Data Wiring
The diagram refers to wires by body color/
stripe color. For example, “Brown/White”
means the brown wire with the white stripe.
IMPORTANT!
19
8
7
6
5
4
3
2
1
211
1
0
Control Unit
Terminal Strip
Connector
Antenna
Figure 26: Antenna Power and Data Wiring
Antenna
MRx
J1
AC PWR
J3
Rx RF
J2
Tx RF
J4
ACU
J5
CONSOLE
J6
BUC PWR
J8
USER
ENET
J7
ACU
ENET
MODEL: VMBR-1510 ArcLight
PART: 1234567 REV XXX
SERIAL: XX-XXXXXX
CAGE CODE: 12345
Modem
MTx
TxRFRxRF
Figure 27: Antenna RF Transmit and Receive Wiring
Be sure to terminate RF cables properly with
type “F” connectors.
IMPORTANT!
Wire the Belowdecks Units
9

14
Wire the Control Unit to the Modem
Follow these steps to connect the control unit to
the modem.
a. Connect a serial data cable from the
“Modem” jack on the control unit to the
“ACU” jack on the modem (see Figure 28).
b. Connect the BUC power cable from the “BUC
Power” jack on the control unit to the “BUC
Pwr” jack on the modem.
Wire the Remote Service Module
Follow these steps to connect the remote service
& support module to the control unit.
a. Connect a serial data cable from the
“Maintenance Port” jack on the control unit
to the “Serial” jack on the remote service &
support module. (see Figure 29).
b. Connect the cellular antenna to the
“Antenna” jack on the remote service &
support module.
Wire the MTA and Router
Follow these steps to connect all LAN devices.
a. Connect the supplied straight-through
Ethernet cable from the “User ENet” jack on
the modem to the “WAN” jack on the MTA
(see Figure 30).
b. Connect a second straight-through Ethernet
cable from the “LAN” jack on the MTA to the
“Internet” jack on the router.
c. Connect the customer’s analog phone(s), fax
machine, and/or PABX to the RJ-11 “Phone”
jack(s) on the MTA.
d. For a wired Ethernet network, connect the
customer’s computer(s) to the numbered
RJ-45 Ethernet jack(s) on the router.
MODEM
RS422
BUC POWER
20V 2.5A
J1
AC PWR
J3
Rx RF
J2
Tx RF
J4
ACU
J5
CONSOLE
J6
BUC PWR
J8
USER
ENET
J7
ACU
ENET
NO OPERATOR
SERVICEABLE
PARTS INSIDE,
DO NOT OPEN
CAUTION
MODEL: VMBR-1510 ArcLight
PART: 1234567 REV XXX
SERIAL: XX-XXXXXX
CAGE CODE: 12345
Wire Colors:
Body/Stripe
Control Unit
Modem
Modem
ACU
BUC Power
BUC Pwr
Figure 28: Modem Data and BUC Power Wiring
SerialGP10
Antenna On/Off Audio
SIM
Power
Control Unit
Remote Service
& Support Module
Cellular
Antenna
Maintenance Port
Serial
Antenna
Figure 29: Remote Service & Support Module Wiring
J4
ACU
J5
CONSOLE
J6
BUC PWR
J8
USER
ENET
J7
ACU
ENET
NO OPERATOR
SERVICEABLE
PARTS INSIDE,
DO NOT OPEN
CAUTION
Modem
12V DC RSTR WAN LAN PHONE 2 PHONE 1
Power
Reset
Internet 1 2 3 4
Router
Analog
Phone
MTA
Laptop
PC
Phone1
User ENet
LAN
Internet
WAN
1
Figure 30: MTA and Router Wiring
The RJ11 jacks on the MTA are rated for
analog signals only. Do not connect a digital
device directly to it.
IMPORTANT!
Continued Wire the Belowdecks Units
9
NOTE: The routing and VoIP equipment supplied with the
system might differ from those shown in this diagram.

15
Follow these steps to connect power to the
TracPhone V7 system.
a. Before you begin, disconnect vessel power.
b. Be sure the vessel is properly grounded in
accordance with marine standards.
c. Connect the control unit and modem to the
supplied AC power strip (see Figure 31 and
Figure 32). Use the special adapter cables
provided in the kitpack.
d. Connect the appropriate power cord (US or
European) to the power strip.
e. Connect the supplied AC/DC adapters to the
MTA, router, and remote service & support
module. Then plug the adapter cables into
the vessel’s AC power supply.
f. Strain-relieve all wires at the back of the
control unit and modem by securing them to
the attached strain-relief bracket(s). Use the
tie-wraps supplied in the kitpack. Be sure to
leave enough slack in the cables for easy
serviceability.
g. Plug the power strip into the vessel’s 115 or
230 VAC power supply.
CAUTION
For your own safety, disconnect vessel power
and make sure the circuit is dead before you
connect any power cables.
Vessel AC Power
(115 or 230 VAC)
J1
AC PWR
J3
Rx RF
J2
Tx RF
J4
ACU
J5
CONSOLE
J6
BUC PWR
J8
USER
ENET
J7
ACU
ENET
NO OPERATOR
SERVICEABLE
PARTS INSIDE,
DO NOT OPEN
CAUTION
MODEL: VMBR-1510 ArcLight
PART: 1234567 REV XXX
SERIAL: XX-XXXXXX
CAGE CODE: 12345
Antenna On/Off Audio
SIM
Power
Power
Strip
AC/DC
Adapter
12V DC RSTR WAN LAN PHONE 2 PHONE 1
Control Unit
Modem
Remote Service Module
MTA
AC/DC
Adapter
Power
Reset
Internet 1 2 3 4
Router
AC/DC
Adapter
AC Input
12 VDC
Power
AC Pwr
Power
Figure 31: Power Wiring
Figure 32: Power Strip for Control Unit and Modem
Do not cut off the ground pin from the control
unit and modem power cable plugs, and do
not use a 3-prong to 2-prong adapter.
IMPORTANT!
Double-check all of your wiring before
continuing. If wiring is incomplete or
incorrect, electronics may become damaged
when you apply power.
IMPORTANT!
Connect Power
10

16
Follow these steps to configure the user’s
computer(s) for a wired Ethernet connection to
the TracPhone V7. Once you have set up and
tested a wired connection, you can configure the
computer(s) for a wireless connection.
NOTE: The computer must have a network interface
card installed and all cabling must be 100 Mbps fast
Ethernet UTP CAT-5 with RJ45 connectors.
Windows Vista
™
a. Turn on the networked computer.
b. At the Windows Control Panel, double-click
Network and Sharing Center. You can find
the control panel either through the Start menu or
“My Computer.”
c. At the Network and Sharing Center window,
double-click the View Status link for the
Ethernet connection you are using for
TracPhone V7.
d. At the Local Area Connection Status window,
click Properties. This screen only displays if the
computer is currently connected to a network.
e. At the Local Area Connection Properties
window, select the Networking tab. Then
select Internet Protocol Version 4 and click
Properties (see Figure 33).
f. At the Internet Protocol Properties window,
select Obtain an IP address automatically
and Obtain DNS server address
automatically (see Figure 34). Then click OK.
g. At the Local Area Connection Properties
window, click OK.
When setting up a wireless network, apply
security settings, such as encryption, to
protect the network from outside intrusion. If
the user does not require a wireless network,
disable the wireless functionality. Refer to the
router owner’s manual for setup details.
IMPORTANT!
Figure 33: Windows Vista - Local Area Connection Properties
Figure 34: Windows Vista - Internet Protocol Properties
Configure the Computer(s)
11

17
Windows XP
a. Turn on the networked computer.
b. At the Windows Contol Panel, double-click
Network Connections. You can find the control
panel either through the Start menu or “My
Computer.”
c. At the Network Connections window,
double-click the Local Area Connection icon
for the Ethernet connection you are using for
TracPhone V7.
d. At the Local Area Connection Status window,
select the General tab. Then click Properties.
This screen only displays if the computer is
currently connected to a network.
e. At the Local Area Connection Properties
window, select the General tab. Then select
Internet Protocol (TCP/IP) and click
Properties (see Figure 35).
f. At the Internet Protocol (TCP/IP) Properties
window, select the General tab. Then select
Obtain an IP address automatically and
Obtain DNS server address automatically
(see Figure 36). Then click OK.
g. At the Local Area Connection Properties
window, click OK.
h. Restart the computer.
Figure 35: Windows XP - Local Area Connection Properties
Figure 36: Windows XP - Internet Protocol (TCP/IP) Properties
Continued Configure the Computer(s)
11

18
Macintosh OS X
a. Turn on the networked computer.
b. At System Preferences, click the Network
icon.
c. At the Network window, select the following:
•Show: Built-in Ethernet
•Configure: Using DHCP
• Leave all text boxes blank
d. Network: Click Apply Now.
e. Restart the computer.
Figure 37: Macintosh OS X - Network Preferences
Continued Configure the Computer(s)
11

19
Follow these steps to turn on the TracPhone V7
system and check the system for proper
operation.
a. Ensure the antenna has a clear, unobstructed
view of the sky.
b. Apply vessel power to the TracPhone system,
including the router, MTA, and remote
service & support module.
c. Turn on the power switch on the front of the
the modem (see Figure 38). The button’s light
should illuminate green.
d. Turn on the power switch on the front of the
control unit (see Figure 38). The button’s light
should illuminate green.
e. Wait 5 minutes for system startup.
f. Verify that the antenna finds and starts
tracking the service satellite and the modem
connects to the mini-VSAT Broadband
service, as indicated by the control unit LCD
screen shown in Figure 39. If an error
message appears, refer to the
Troubleshooting section of the User’s Guide.
g. Verify that the three status lights on the
control unit and the status light on the
modem are all lit green (see Figure 40). If any
of these lights is not lit green, refer to the
Troubleshooting section of the User’s Guide.
h. Verify that the status lights on the MTA and
router indicate a normal condition. Refer to
the MTA and router manuals for details.
STATUS
Power Switch
Figure 38: Power Switches
Power Switch
Modem
Control Unit
ONLINE
TRACKING 22W
Figure 39: Good Service Connection Indicated on Control Unit LCD
Figure 40: Status Lights
STAT US
Modem
Control Unit
Turn On the System
12
NOTE: Satellites will vary depending on your location.

20
To prevent exposure to RF energy, which may be
harmful to people who stand within 36 feet
(11 meters) of the antenna, you can configure up
to two RF radiation hazard zones for areas where
crew and/or passengers frequent (see Figure 41).
The system will disable the transmitter whenever
the antenna is pointing within one of these zones.
Follow these steps to set up an RF hazard zone.
a. Determine the necessary azimuth range for
the RF hazard zone(s). You will need to enter,
in clockwise order, beginning and ending
azimuths (>4° apart) relative to the antenna’s
forward arrow, which should be pointing
toward the bow (see Figure 42).
b. At the control unit, press MENUS until the
display shows “CONFIGURATION.” Then
press ACCEPT.
c. Press MENUS until the display shows “SET
HAZARD ZONE.”
d. Press CHANGE until the display shows “SET
HAZARD ZONE = YES.” Then press
ACCEPT.
e. At “ZONE 1,” press CHANGE. A cursor
appears under the first number in the
azimuth range for RF hazard zone #1.
f. Press CHANGE until the number is set to the
first digit of the beginning azimuth for the
first hazard zone.
g. Press ACCEPT. The cursor moves to the next
number.
h. Repeat steps f and g to set the remaining
digits of the desired RF radiation hazard
zone. Then press ACCEPT.
i. At “Zone 2,” repeat steps e-h to set the range
for the second RF hazard zone, if desired.
j. At “XMT IN ZONES,” verify that the display
shows “XMT IN ZONES = NO.” Then press
MENUS.
k. Press EXIT to exit the menu.
NOTE: For more details, refer to the Configuration
section of the User’s Guide.
335
025
Antenna
RF Radiation
Hazard Zone
Figure 41: Example of an RF Radiation Hazard Zone
Antenna
000
180
090270
045
135
225
315
Forward
335 025
RF Radiation
Hazard Zone
(Example)
Beginning
Azimuth
Ending
Azimuth
Figure 42: Azimuths Relative to Antenna’s Forward Arrow
ZONE 1= 335-025
CHANGE ACCEPT
Step 1:
Set Zone 1
Azimuth Range
ZONE 2= 000-000
NEXT ITEM CHANGE
Step 2:
Set Zone 2
Azimuth Range
XMT IN ZONES= NO
NEXT ITEM CHANGE
Step 3:
Set to “NO”
Figure 43: Setup Process for RF Hazard Zones
Set Up RF Hazard Zones (Optional)
13
Page is loading ...
Page is loading ...
Page is loading ...
Page is loading ...
Page is loading ...
Page is loading ...
Page is loading ...
Page is loading ...
Page is loading ...
Page is loading ...
/